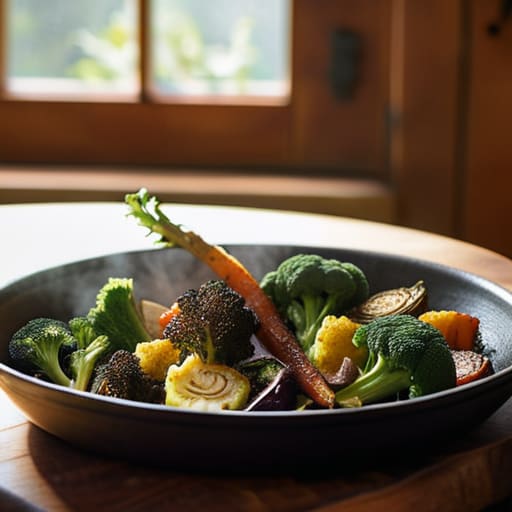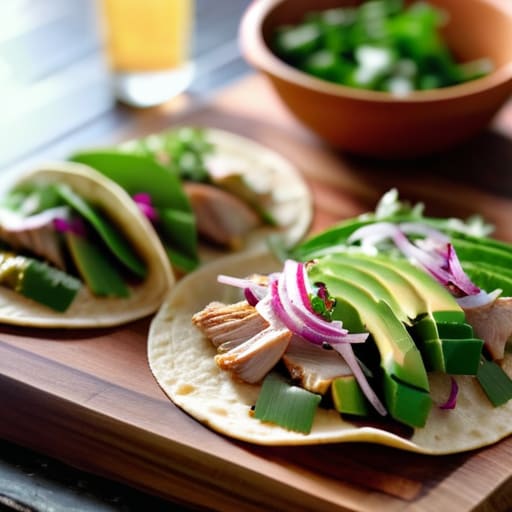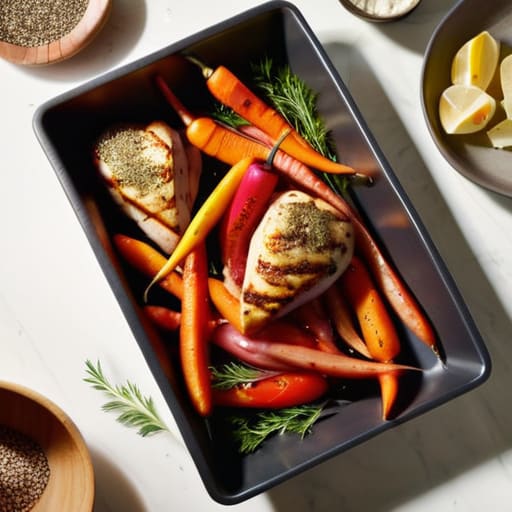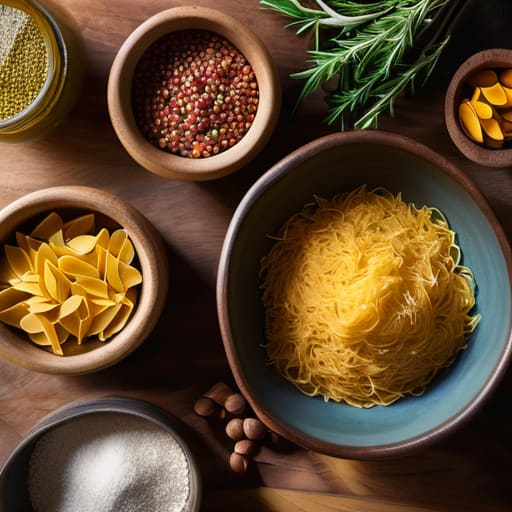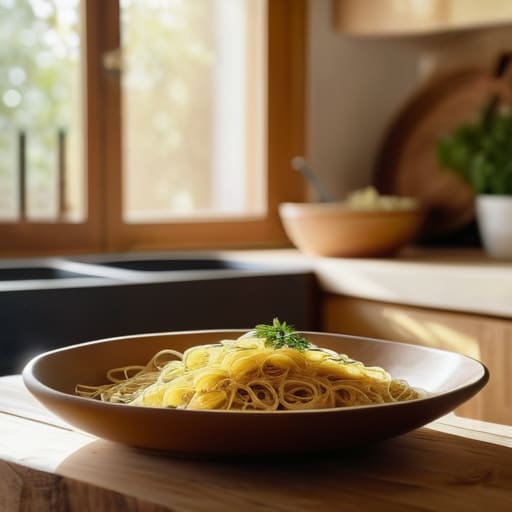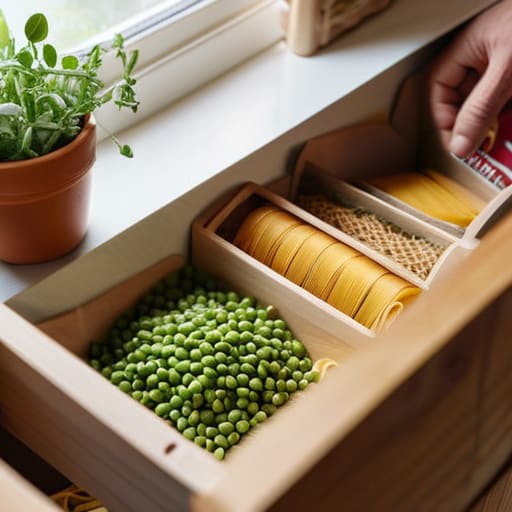
Learn how to cook pasta perfectly.

How to Cook Pasta Like an Italian

I still remember my first apartment in my early twenties, staring at a box of spaghetti like it was some kind of high-stakes engineering project. I’d spent twenty bucks on fancy, artisanal noodles that promised the world, only to end up with a gummy, overcooked mess that tasted more like wet cardboard than a real meal. It turns out, you don’t need a culinary degree or a kitchen full of expensive gadgets to master the basics; you just need to stop overthinking it. I spent way too many nights failing at how to cook pasta perfectly because I was following those ridiculous, complicated recipes that make a simple weeknight dinner feel like a chore.

Look, I’m not here to sell you on some gourmet lifestyle or tell you that you need imported olive oil to get this right. I’m going to give you the straightforward, no-nonsense truth based on years of trial, error, and a whole lot of salty water. I’ll break down the actual mechanics of the process so you can walk into your kitchen with total confidence. We’re going to strip away the fluff and focus on the simple, repeatable steps that ensure you nail that perfect al dente bite every single time.

Table of Contents

Mastering Boiling Water for Pasta and Salting It Right

Mastering Boiling Water for Pasta and Salting It Right

First things first: don’t go trying to boil pasta in a tiny saucepan. You need a big pot with enough room for the noodles to swim freely. If they’re crowded, they’ll stick together into one giant, gummy mess. Once you get that boiling water for pasta going at a steady, rolling boil, it’s time for the most important part: the salt. I know it sounds like a lot, but you want that water to taste like the sea. This is your only chance to season the actual noodle, not just the sauce sitting on top of it.

Don’t be shy with the shaker, either. Salting pasta water heavily is the secret to achieving al dente texture that actually tastes good. While you’re at it, keep an eye on those bubbles. If the heat is too low, the temperature drops when you dump the pasta in, and you’ll end up with a mushy disaster. Just keep it hot, keep it salty, and you’re already halfway to a meal you can be proud of.

Choosing Types of Pasta Shapes and Cooking Times

Choosing Types of Pasta Shapes and Cooking Times.

Now, let’s talk about the actual pasta you’re pulling off the shelf. I used to think a box of penne was just a box of penne, but I quickly learned that types of pasta shapes and cooking times actually matter a lot depending on what you’re making. If you’re tossing something with a heavy, chunky meat sauce, go for the big stuff like rigatoni—the ridges and hollow centers act like little scoops for the goodness. If you’re doing a light, oil-based sauce, stick to something thin like spaghetti or angel hair so you don’t end up with a heavy, clumpy mess in your bowl.

The biggest mistake I see people make is ignoring the clock. Every shape has its own sweet spot, and that window is smaller than you think. You’re aiming for achieving al dente texture, which is just a fancy way of saying the pasta should have a slight, satisfying bite in the middle rather than being mushy. Always start tasting a piece about two minutes before the box says it’ll be done. Trust your taste buds over the label every single time.

Five Pro Moves to Level Up Your Pasta Game

  • Save a mug of that liquid gold. Before you drain the pot, scoop out a cup of the starchy pasta water. I use this as my secret weapon to loosen up sauces and help them cling to the noodles instead of just sliding off to the bottom of the bowl.
  • Stop rinsing your pasta like it’s a dirty dish. I know it feels intuitive to wash away the starch, but that’s exactly what you need for a silky sauce. Unless you’re making a cold pasta salad, keep that starch right where it belongs—on the noodles.
  • Don’t let the sauce wait for the pasta. Most people boil the noodles, drain them, and then start heating the sauce. By the time the sauce is ready, your pasta is a gummy mess. Get your sauce simmering and ready to go before the pasta even hits the water.
  • The “finish in the pan” trick is a game changer. Instead of just dumping sauce on top of plain noodles, toss the pasta directly into the skillet with your sauce for the last minute of cooking. It lets the pasta soak up the flavor from the inside out.
  • Trust your taste buds, not just the box. Package instructions are a decent starting point, but they aren’t law. Start testing your pasta a minute or two before the timer goes off. You want that slight “bite” in the middle—that’s the al dente magic that makes a meal feel professional.

Quick Wins for Your Next Pasta Night

Don’t trust the box blindly—start tasting your pasta a minute or two before the timer goes off so you can catch that perfect al dente bite.

Keep a little bit of that starchy pasta water in a mug before you drain the pot; it’s liquid gold for making your sauce stick to the noodles.

Give your pasta plenty of room to swim in a big pot of salted water so it doesn’t turn into a gummy, clumpy mess.

## The Golden Rule of the Pot

“Look, you don’t need a culinary degree to nail this; you just need to stop treating the pot like a science experiment and start treating it like a tool. Salt that water until it tastes like the ocean, keep your eyes on the clock, and trust your teeth more than the box instructions.”

Nathan Cole

You've Got This

Cooking perfect al dente pasta: You've Got This.

At the end of the day, nailing perfect pasta really comes down to a few simple habits. Remember to salt that water like the sea, pick a shape that actually holds onto your sauce, and—most importantly—keep a close eye on the clock. Don’t just rely on the box instructions; start tasting that pasta a minute or two early to find that sweet spot. Once you get the hang of checking for that perfect al dente bite, you’ll realize you don’t need a fancy culinary degree to make a killer meal. It’s all about those small, intentional tweaks that turn a basic box of noodles into something worth savoring.

Look, I know that sometimes standing over a steaming pot feels like just another chore on a long list, but there is something seriously rewarding about making something great with your own two hands. Cooking shouldn’t feel like a high-stakes exam; it should be a chance to unwind and create something delicious. So, don’t be afraid to make a few mistakes along the way—even I still overcook a batch of penne every once in a while. Just keep practicing, keep tasting, and remember that everything is figure-out-able. Now, grab a fork and go enjoy that meal!

Frequently Asked Questions

Is it actually worth saving a cup of that starchy pasta water, or is it just a kitchen myth?

Trust me, it’s definitely not a myth. I used to toss it down the drain without a second thought, but once I realized what it actually does, I never went back. That starchy water is basically liquid gold. When you swirl a splash into your sauce, it acts like a bridge, helping the sauce actually cling to the noodles instead of just sliding off to the bottom of the bowl. It’s a total game-changer.

Should I be tossing the pasta in sauce immediately, or is there a better way to make sure the flavors actually stick?

Don’t just dump that pasta into a bowl of sauce and call it a day. If you want that restaurant-quality cling, you’ve gotta marry them in the pan. Before you drain the noodles, scoop out a mug of that starchy pasta water. Toss your pasta directly into your sauce with a splash of that liquid gold and a knob of butter or a drizzle of oil. Give it a good toss over the heat; that starch acts like glue, making sure every single bite is coated perfectly.

What’s the best way to handle leftover pasta so it doesn't turn into a mushy mess the next day?

Don’t let your leftovers turn into a bowl of glue! The secret is to rinse that pasta under cold water immediately after draining to stop the cooking process and wash away excess starch. Once it’s cool, toss it with a tiny bit of olive oil so the pieces don’t stick together. When you’re ready to reheat, skip the microwave if you can—a quick sauté in a pan with a splash of water or sauce works wonders.

Delicious quick lunch ideas for work.

Quick Lunch Ideas That Beat a Sad Desk Salad

We’ve all been there: it’s 12:15 PM, your stomach is growling like a chainsaw, and you’re staring blankly at a fridge that looks more like a graveyard for half-empty condiment bottles than a meal source. Between work deadlines and life’s general chaos, finding time to actually eat something decent feels like a chore, so we usually end up settling for expensive takeout or a sad, crushed bag of chips. I used to do the same thing until I realized that finding quick lunch ideas doesn’t require a culinary degree or an hour of prep work; it just takes a little bit of strategic tinkering.

I’ve spent way too many years trial-and-erroring my way through midday meals, and I’ve finally narrowed down a system that actually works for a busy schedule. In this post, I’m sharing five of my absolute favorite go-to meals that are fast, filling, and won’t leave you feeling like a zombie by 3:00 PM. These aren’t fancy, five-star recipes, but they are total game-changers for anyone who wants to eat better without the headache. Let’s dive in and get you fed.

Table of Contents

The "Everything But the Kitchen Sink" Quesadilla

The "Everything But the Kitchen Sink" Quesadilla.

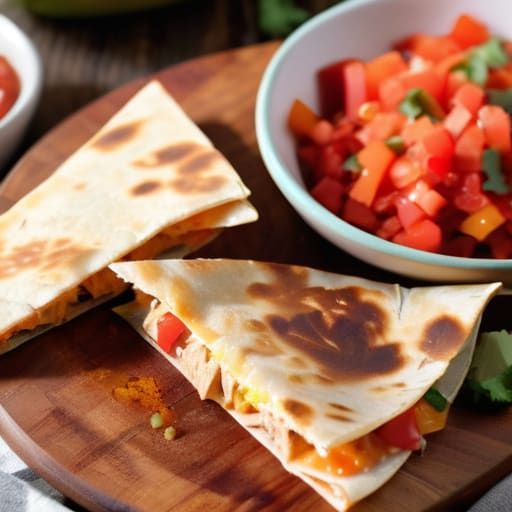
Look, I’m not a gourmet chef, and some days I really don’t have the energy to chop a dozen different vegetables. This is my go-to when I look in the fridge and see a bunch of random leftovers. Grab a tortilla, throw some cheese on there, and then just toss in whatever is left over from last night’s dinner—maybe some shredded chicken, a few black beans, or even those roasted peppers sitting in the crisper drawer.

Upgraded Tuna Salad Wraps

Fresh Upgraded Tuna Salad Wraps with cucumber.

Most people think tuna salad is just something sad you eat out of a can at your desk, but you can actually make it feel like a real meal with about thirty seconds of extra effort. Instead of just mixing tuna with heavy mayo, I like to add a squeeze of lemon juice and a dash of hot sauce to brighten things up. If you have a stray stalk of celery or some sliced cucumber in the fridge, chop it up and throw it in for some much-needed crunch.

The Five-Minute Mediterranean Bowl

The Five-Minute Mediterranean Bowl with chickpeas.

When I’m feeling like I need something a bit more “adult” but I still only have five minutes to spare, I go for a Mediterranean-style bowl. You don’t even need to turn on the stove for this one. I usually start with a base of pre-cooked quinoa or even just a big pile of arugula, then I pile on some canned chickpeas, halved cherry tomatoes, and some feta cheese.

Loaded Avocado Toast with a Twist

I know, I know—avocado toast is everywhere, and it can get a little cliché. But when you’re stuck in a mid-day slump and need something that feels substantial, it’s a total lifesaver. I like to use a thick slice of sourdough because it holds up better under the weight of the toppings. While the bread is toasting, mash up half an avocado in a small bowl with a bit of salt, pepper, and maybe some red pepper flakes if you like a little kick to your midday.

The Pantry Staple Pesto Pasta

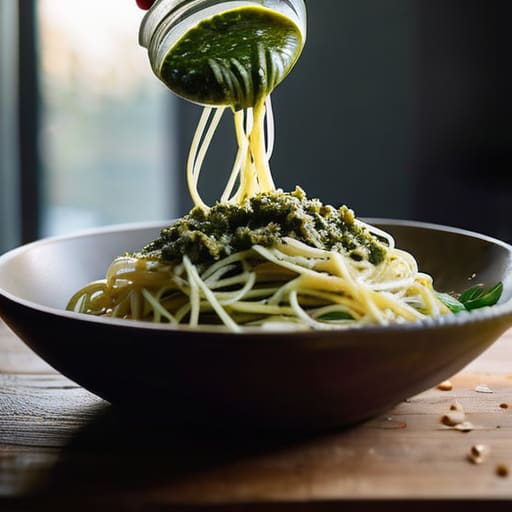
This is my ultimate “I forgot to go grocery shopping” meal. If you have a box of pasta and a jar of pesto sitting in your pantry, you are basically halfway to a delicious lunch. I usually boil up a single serving of rotini or penne—something with ridges that helps the sauce really stick to the noodles. While that’s cooking, I’ll grab a handful of frozen peas or some canned white beans to toss in at the last minute.

The Bottom Line on Quick Lunches

Don’t aim for perfection; a quick lunch is about fueling your body without spending an hour in the kitchen or a fortune at a deli.

Keep a few “emergency” staples in your pantry—like canned beans or quick-cook grains—so you’re never stuck eating a bag of chips for lunch.

The best meal is the one you actually make yourself, so pick the easiest option on this list and start there.

My Philosophy on Midday Fuel

Look, you don’t need a gourmet kitchen or a mountain of prep work to eat well. A good lunch is just about having a few reliable, “figure-out-able” staples on hand so you can fuel up and get back to your day without the stress or the massive grocery bill.

Nathan Cole

Don't Overthink the Midday Meal

At the end of the day, whether you’re throwing together a quick wrap, raiding the pantry for a loaded tuna salad, or assembling a simple grain bowl, the goal is the same: fuel your body without losing your mind. You don’t need a culinary degree or a massive grocery budget to eat well during your break. It really just comes down to having a few reliable staples on hand and being willing to experiment with what’s already in your fridge. If you can master these five basic ideas, you’ve already won half the battle against the midday slump.

I know it can feel overwhelming when your schedule is packed and your stomach is growling, but I promise you that lunch is totally figure-out-able. You don’t need to prep elaborate five-course meals on a Sunday just to survive a Tuesday. Start small, keep it simple, and don’t be afraid to make a mess in the kitchen. Once you realize that a decent meal is only a few minutes of effort away, you’ll stop viewing lunchtime as a chore and start seeing it as a chance to reset. You’ve got this!

Frequently Asked Questions

Can I prep these meals ahead of time on a Sunday so I don't have to cook at all during the week?

You absolutely can, and honestly, that’s the secret to actually sticking to a plan. I usually spend about an hour on Sunday afternoon prepping my grains, chopping veggies, or even cooking a big batch of protein. Just make sure you let everything cool down before you pop the lids on your containers so things don’t get mushy. It’s a little extra work upfront, but trust me, your weekday self will thank you.

What are some cheap protein swaps if I'm trying to stick to a tight grocery budget?

Look, I get it—meat prices are getting ridiculous, and it feels like you have to choose between your wallet and your protein goals. I’ve had to do some serious pivoting myself. Instead of reaching for that expensive steak or chicken breast, try leaning on dried lentils, canned tuna, or eggs. They’re absolute lifesavers. Even frozen edamame or a big bag of black beans can carry you through the week without draining your bank account.

Do I need to invest in any specific containers or gear to keep these lunches fresh in the fridge?

Honestly? You don’t need to go overboard with fancy gadgets. I used to think I needed a whole set of matching glass containers, but a few decent, airtight Tupperware-style bins will do the trick. If you want to spend a little, grab some glass ones—they don’t hold onto smells like old garlic or onions do. Just make sure they seal tight. Keeping the air out is the real secret to freshness.

Learn how to make a stir fry.

How to Make a Stir-fry With Whatever You Have

I used to think you needed a professional-grade carbon steel wok and a literal flame coming out of your stove to do this right. I’d see those fancy cooking shows where chefs toss vegetables ten feet into the air, and I’d think, there’s no way I can do that in my cramped apartment kitchen. It felt like one of those things that was destined to be expensive and stressful, but I’m here to tell you that most of that hype is just noise. Learning how to make a stir fry shouldn’t require a culinary degree or a kitchen remodel; it just takes a little bit of prep and the right mindset.

I’m not going to give you a list of twenty obscure ingredients you can only find at a specialty import shop. Instead, I’m going to show you how to use what you’ve already got in your pantry to get a meal on the table in under twenty minutes. My goal is to give you a straightforward, repeatable system that works every single time, whether you’re using a cast iron skillet or a standard pan. We’re going to strip away the intimidation and focus on the actual mechanics of heat and timing so you can cook with confidence.

Table of Contents

Mastering High Heat Cooking Methods Without the Stress

Mastering High Heat Cooking Methods Without the Stress

Now, let’s talk about the part that makes most people sweat: the heat. When I first started, I’d turn the burner on, throw everything in at once, and end up with a soggy, sad mess of steamed vegetables instead of that crispy, charred goodness we’re after. The secret to mastering high heat cooking methods isn’t just about cranking the dial to ten; it’s about managing your space and your timing. You want that pan screaming hot before anything hits the oil, but you also need to be ready to move fast.

This is exactly why I’m such a stickler for vegetable prep for stir fry. If you’re standing there frantically chopping a carrot while your garlic is already burning in the pan, you’ve already lost the battle. Get all your veggies sliced, your proteins cubed, and your stir fry sauce ingredients measured out in little bowls next to the stove. Once that heat is up, it’s a sprint, not a marathon. If you stay organized, you can focus on the sizzle instead of the panic.

Smart Vegetable Prep for Stir Fry That Saves Time

Smart Vegetable Prep for Stir Fry That Saves Time

Here’s the thing about stir fry: if you start chopping once the pan is already smoking, you’ve already lost the battle. I’ve burned more garlic cloves than I care to admit because I was scrambling to find my cutting board while the oil was dancing in the pan. To keep things moving, you want to nail your vegetable prep for stir fry before you even touch the stove. I like to group my veggies by how long they take to cook. Hard stuff like carrots or broccoli goes in one pile, while the quick-hitters like bell peppers or snap peas go in another.

I also swear by the “mise en place” approach—it sounds fancy, but it just means getting your bowls ready. While you’re slicing, go ahead and whisk your stir fry sauce ingredients in a small jar or bowl. Having your liquid seasonings, your sliced protein, and your prepped veggies sitting right there in front of you turns a chaotic kitchen into a smooth, assembly-line operation. Trust me, once you get into this rhythm, these become the easiest quick weeknight stir fry meals you’ll ever make.

Five Pro Moves to Level Up Your Stir Fry Game

  • Don’t crowd the pan. I know it’s tempting to throw everything in at once to save time, but if your pan is packed tight, the temperature drops and your veggies end up steaming in a sad, soggy pile instead of getting that nice sear. Cook in batches if you have to.
  • Get your sauce ready before the heat is on. Once that oil starts smoking, you won’t have time to hunt through the pantry for soy sauce or cornstarch. Mix your liquid ingredients in a small bowl beforehand so you can just pour and go.
  • Cut everything to a uniform size. Since stir frying happens fast, you want every piece of broccoli or chicken to cook at roughly the same rate. Aim for bite-sized chunks so you don’t end up with some pieces that are perfect and others that are still raw in the middle.
  • Use a high-smoke point oil. Skip the extra virgin olive oil for this one—it’ll burn and taste bitter before your food is even halfway done. Reach for canola, peanut, or avocado oil; they can handle the heat without breaking a sweat.
  • Don’t forget the “aromatics” punch. Garlic, ginger, and maybe a little chili flakes are the soul of a good stir fry. Toss them in during the last 30 seconds of your initial oil heating so they scent the dish without turning bitter from overcooking.

Quick Wins for Your Next Stir Fry

Prep everything before you turn on the stove; once that pan gets hot, you won’t have time to go looking for the garlic.

Don’t be afraid of high heat, but keep your ingredients bite-sized so they cook fast and evenly.

Focus on the order of operations—toss in your harder veggies first and save the leafy greens for the very end so nothing turns to mush.

The Secret to a Perfect Pan

“Stir fry isn’t about following a rigid recipe like you’re in a chemistry lab; it’s about getting your prep done early so you can actually enjoy the sizzle instead of panicking while your garlic burns.”

Nathan Cole

You've Got This: From Prep to Plate

You've Got This: From Prep to Plate.

At the end of the day, a great stir fry isn’t about having a professional chef’s kitchen or fancy equipment; it’s about the preparation. Once you’ve mastered that smart vegetable prep to save yourself from mid-cook panic and you’ve gotten comfortable managing that high heat, you’re already ahead of most people. Remember, the goal is to get everything into the pan in a logical order so nothing burns while you’re rushing to grab the next ingredient. Keep your sauce ready, your veggies chopped, and your heat high, and you’ll find that the whole process becomes much more rhythmic and way less chaotic.

I know it can feel a little intimidating when you first hear that loud sizzle hitting a hot pan, but trust me, that sound is just the recipe working. Don’t sweat it if your first attempt isn’t a masterpiece—maybe you overcooked the broccoli or forgot a splash of soy sauce—just tweak it next time and keep going. Cooking is a skill, just like fixing a leaky sink or troubleshooting a router, and it only gets easier with practice. You’ve got all the tools and the knowledge you need right in front of you, so get in that kitchen and start tossing.

Frequently Asked Questions

I don't have a wok, so can I just use a regular non-stick skillet?

You can absolutely use a non-stick skillet, so don’t sweat it if you don’t own a wok. Just keep one thing in mind: a skillet has more surface area and less “wall” than a wok, so your veggies might steam instead of sear if you crowd the pan. To fix that, just cook in smaller batches. It might take a few extra minutes, but you’ll still get that great texture without the specialized gear.

How do I stop my vegetables from turning into mushy, overcooked piles?

The secret is all about timing and “staggering” your veggies. I used to throw everything in at once, and yeah, it turned into a sad, soggy mess. Instead, treat your vegetables like a lineup. Toss in the hard stuff first—think carrots or broccoli—and let them get a head start. A minute or two later, add the softer stuff like bell peppers or snap peas. This way, everything hits your plate perfectly crisp.

What's the best way to thicken the sauce so it actually sticks to the food instead of pooling at the bottom of the pan?

The secret is a “slurry,” and honestly, it’s a total game-changer. Mix about a teaspoon of cornstarch with a splash of cold water in a small cup until it’s smooth—no lumps allowed! Once your stir fry is cooked, pour your liquid sauce into the pan, then drizzle that slurry in while stirring. It’ll go from watery to glossy and thick in seconds, hugging every piece of veggie and meat instead of just puddling at the bottom.

Healthy meal prep ideas for the week.

Healthy Meal Prep Ideas to Eat Well All Week

I’ll be the first to admit it: I used to be the king of the “sad desk salad” or, worse, grabbing a greasy takeout bag because I was too wiped out to even think about cooking. We’ve all been there, staring into a fridge full of random ingredients and feeling like we’ve already lost the battle against a busy week. The problem isn’t that you don’t want to eat well; it’s that the sheer mental load of deciding what to eat every single night is exhausting. That’s why I started obsessing over healthy meal prep ideas that actually work for real life, rather than those complicated, three-hour kitchen marathons that leave you too tired to enjoy your food.

In this guide, I’m stripping away the fluff and giving you five straightforward, foolproof ways to get your nutrition back on track. I’m not talking about spending your entire Sunday over a hot stove; I’m talking about smart, scalable systems that save you time and money. By the time you finish reading these five tips, you’ll have a clear roadmap to reclaim your evenings and finally stop the cycle of expensive, last-minute decision fatigue. Let’s get to it!

Table of Contents

The Sheet Pan Savior

The Sheet Pan Savior meal prep recipe.

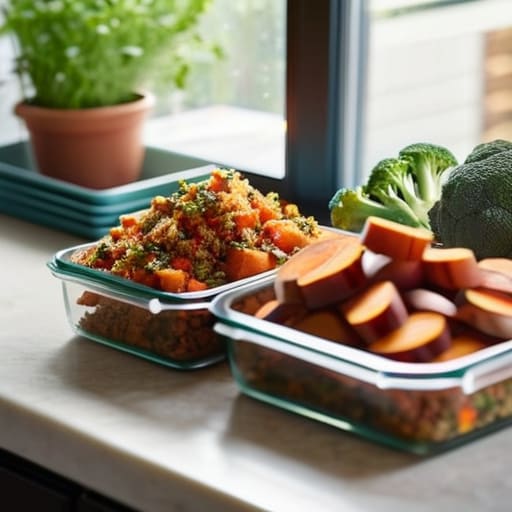
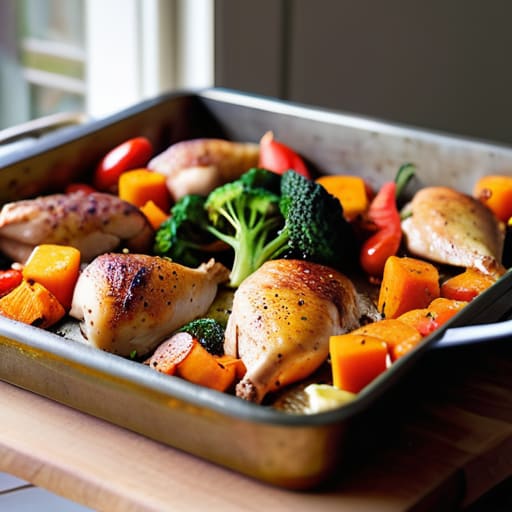
If you’re like me, you probably hate doing a mountain of dishes after cooking. That’s why I swear by the sheet pan method for meal prepping. You just chop up some chicken thighs, broccoli, and sweet potatoes, toss them in olive oil and whatever spices you have in the pantry, and spread them out on a single baking sheet. It’s the ultimate low-effort, high-reward way to get your protein and veggies ready for the week without turning your kitchen into a disaster zone.

Build-Your-Own Grain Bowls

Assembling Build-Your-Own Grain Bowls.

I used to think meal prepping meant eating the exact same Tupperware meal five days in a row, which honestly sounds like a nightmare. Instead, I started prepping “components” for grain bowls. I’ll cook up a big batch of quinoa or brown rice and roast a tray of chickpeas or hard-boiled eggs. This way, you aren’t stuck with one flavor profile; you’re just assembling a meal in about two minutes.

The Big Batch Chili Strategy

The Big Batch Chili Strategy meal prep.

There is something deeply satisfying about a heavy pot of chili simmering on the stove on a Sunday afternoon. Chili is basically the king of meal prep because it actually tastes better the next day after the spices have had time to settle. I like to load mine up with lean ground turkey, black beans, kidney beans, and plenty of diced bell peppers to sneak in some extra nutrients without even thinking about it.

Adult Lunchables (Protein Boxes)

Some days, the idea of reheating food in a communal office microwave sounds absolutely miserable. On those days, I go with what I call “adult lunchables.” It’s really just a glorified snack box, but it’s a lifesaver for staying on track with your health goals. Think sliced deli turkey or ham, some hard-boiled eggs, a handful of almonds, and some sturdy veggies like cucumber slices or baby carrots.

Mason Jar Salad Logic

We’ve all been there: you prep a salad on Sunday, and by Tuesday, it’s a soggy, sad mess at the bottom of the container. I learned the hard way that the secret to a fresh salad is all about the layering technique. You use a wide-mouth mason jar and put your dressing at the very bottom, then add your “hard” veggies like carrots or chickpeas, and save the leafy greens for the very top.

The Bottom Line

Don’t try to go from zero to sixty; start with just one or two recipes a week until it feels like second nature.

Focus on versatile ingredients—if you prep a big batch of roasted veggies or a protein, you can turn them into a dozen different meals.

Keep it simple and keep it real; if a meal is too complicated to cook on a Tuesday night, it’s not going to work for your lifestyle.

My Take on the Prep Game

Look, meal prep isn’t about spending your entire Sunday in a kitchen apron staring at rows of identical plastic containers. It’s just about making sure “Future You” isn’t starving and reaching for a bag of chips at 6:00 PM because you’re too tired to think. Keep it simple, keep it real, and just get the basics ready.

Nathan Cole

You've Got This

Look, I know that staring at a pile of raw chicken, a bag of spinach, and a stack of Tupperware can feel a bit daunting when you first start out. But if you take what we talked about today—focusing on versatile proteins, keeping your grains simple, and not overcomplicating your seasoning—you’re already ahead of the game. The goal isn’t to turn your kitchen into a professional restaurant line; it’s just about making sure that when you’re tired on a Tuesday night, you have something actually good waiting for you in the fridge. Once you nail these five basic ideas, you’ll realize that meal prepping isn’t a chore, it’s just a way to buy yourself some time and sanity.

My biggest piece of advice? Don’t try to be perfect right out of the gate. If you only prep two lunches this week instead of five, that is still a win in my book. You’re building a habit, and habits take a little bit of tinkering to get just right, much like fixing up an old piece of furniture. Just pick one idea from this list, grab your containers, and get moving. I promise you, that feeling of crushing your goals while eating something that doesn’t come out of a crinkly plastic bag is worth every bit of effort. Now, get in there and start cooking!

Frequently Asked Questions

I don't have a ton of extra fridge space; how can I meal prep without my kitchen feeling like a crowded warehouse?

I totally get it. I’ve been there, staring at a fridge so packed I can’t even find the mustard. If space is tight, stop trying to prep full meals in massive Tupperware. Instead, try “component prepping.” Roast a big batch of veggies, cook some grains, and prep a protein separately. Store them in smaller, stackable containers or even reusable silicone bags. It keeps things organized and much easier to squeeze into those narrow shelves.

How do I keep things from getting soggy or tasting "old" by Thursday?

The biggest mistake I see is tossing everything into one big container. That’s a recipe for mush. To keep things fresh, keep your “wet” ingredients—like dressings, salsas, or juicy tomatoes—in separate small containers. Also, let your cooked grains or proteins cool down completely before you lid the container; if you trap that steam, you’re basically steaming your veggies into oblivion. Keep it dry, keep it separate, and it’ll still taste great by Thursday.

What's the best way to prep if I'm working with a really tight budget and can't afford fancy organic ingredients?

Look, I get it. I’ve been there, staring at a grocery receipt and wondering where all my money went. You don’t need fancy organic kale to eat well. Focus on the heavy lifters: dried beans, lentils, oats, and seasonal veggies. Buy in bulk when you can, and don’t sleep on the frozen aisle—those veggies are just as nutritious and way cheaper. Stick to the basics, shop your pantry first, and you’ll be fine.

Healthy dinner ideas for the whole family.

Healthy Dinner Ideas the Whole Family Will Eat

Look, I get it. By the time 6:00 PM rolls around and you’ve spent the whole day grinding through work, the last thing you want to do is wrestle with a complicated recipe or spend an hour hovering over a stove. Most of us default to takeout or something frozen just because it’s easy, but that constant cycle of junk food starts to leave you feeling sluggish and, frankly, pretty crappy. I used to be the same way until I realized that finding actual healthy dinner ideas doesn’t mean you have to live on plain steamed broccoli and sadness.

I’ve spent a lot of my time in the kitchen figuring out how to balance nutrition with the reality of a busy life, and I’ve narrowed it down to the stuff that actually works. In this post, I’m sharing five of my go-to meals that are easy on the wallet and even easier on your schedule. I promise you’ll walk away with simple, reliable wins that prove you can eat well without turning your kitchen into a high-stress laboratory. Let’s get to it.

Table of Contents

The One-Pan Roasted Veggie and Sausage Toss

The One-Pan Roasted Veggie and Sausage Toss.

If you’re anything like me, the worst part of cooking isn’t the actual prep—it’s the mountain of dishes waiting in the sink afterward. That’s why I swear by the one-pan roast. You just grab a sheet pan, toss on some sliced smoked sausage, bell peppers, onions, and maybe some broccoli, and hit it with a drizzle of olive oil and a heavy hand of dried oregano. It’s a total lifesaver on those Tuesday nights when you feel like you have zero energy left to give.

Sheet Pan Lemon-Herb Salmon

Sheet Pan Lemon-Herb Salmon with asparagus.

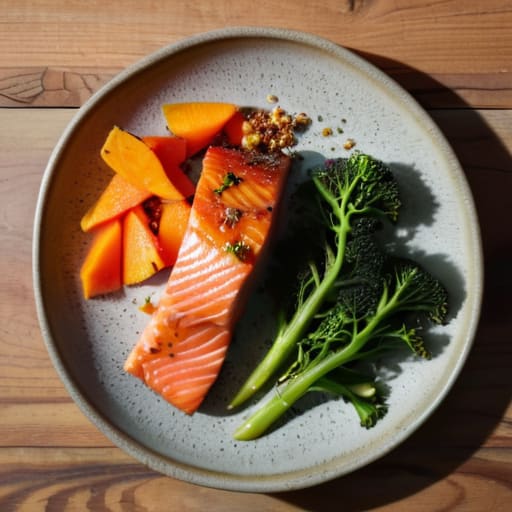
I used to think salmon was one of those “fancy” foods you only eat when you’re trying to impress someone, but honestly, it’s one of the easiest things to whip up. You just lay your fillets on a piece of parchment paper, squeeze some fresh lemon over them, and scatter some asparagus or green beans right alongside. It’s a nutritious powerhouse that doesn’t require you to stand over a hot stove for half an hour.

The "Everything in the Pantry" Grain Bowl

The "Everything in the Pantry" Grain Bowl.

We’ve all been there—you open the fridge, and it looks like a wasteland. Instead of giving up and ordering expensive takeout, I’ve learned to lean on the grain bowl method. Start with a base of whatever you have in the cupboard, whether it’s quinoa, brown rice, or even that farro you bought months ago and forgot about. It’s all about building layers of texture and flavor so it doesn’t feel like you’re just eating a bowl of mush.

Quick Chicken and Veggie Stir-Fry

When I’m in a real rush, I go straight for the stir-fry. It’s basically the ultimate way to use up those random vegetables sitting in the crisper drawer that are starting to look a little sad. Just slice up some chicken breast into small, even pieces so they cook fast, and toss them into a hot pan with a bit of oil. Once the meat is mostly done, throw in your peppers, snap peas, or carrots and keep things moving.

Loaded Sweet Potato Boats

If you haven’t tried stuffing a sweet potato yet, you are seriously missing out. I find these to be the perfect “set it and forget it” meal. You just poke a few holes in the potato, pop it in the oven (or the microwave if you’re really short on time), and let it get soft. Once it’s ready, slice it open and use a fork to fluff up the inside a bit, creating a little natural bowl right in the skin.

The Bottom Line

Keep it simple—you don’t need a culinary degree or a massive grocery budget to eat well; just focus on basic ingredients and one-pan methods that save you time on cleanup.

Don’t aim for perfection every night; the goal is just to make something better than takeout, and even a quick, healthy meal is a win for your wallet and your health.

Prep a little bit ahead of time when you have the energy so that when the week gets chaotic, you’re not staring at an empty fridge wondering what to do.

My Philosophy on the Kitchen Table

“At the end of the day, a healthy dinner isn’t about following some impossible, expensive diet plan; it’s just about making smart, simple choices with what you’ve got in the pantry so you can fuel up and actually enjoy your evening.”

Nathan Cole

Making It Work for You

Look, I know that after a long day of work, the last thing you want to do is tackle a recipe that requires twenty different ingredients and a PhD in culinary arts. But as we’ve seen, keeping things healthy doesn’t have to be a massive project. Whether you’re leaning on a quick sheet-pan salmon, throwing together a hearty grain bowl, or keeping it simple with a massive salad, the goal is just to get something good in your system without breaking the bank. You don’t need a gourmet kitchen or a huge grocery budget to win here; you just need a few reliable staples and a willingness to try something new. Once you get these basic patterns down, you’ll realize that healthy eating is actually pretty figure-out-able.

At the end of the day, don’t sweat the small stuff. If you end up ordering pizza one Tuesday night, don’t let it derail your whole week. Cooking is a skill, just like fixing a leaky sink or troubleshooting a slow computer—it takes a little practice, and you’re bound to make a mess along the way. My advice? Just pick one of these ideas and start small. The more you do it, the more it becomes second nature. You’ve got this, and I promise you’ll feel a whole lot better once you realize you don’t need a professional chef to take control of your kitchen.

Frequently Asked Questions

I’m on a tight budget—can I swap out some of these ingredients for cheaper pantry staples without ruining the meal?

Absolutely. I’ve been there—staring at a grocery list and realizing my bank account isn’t vibing with my cravings. You can definitely swap things out. If a recipe calls for expensive protein, try lentils or canned beans; they’re pantry legends for a reason. Swapping fresh spinach for frozen works too, and don’t sweat the fancy spices if you’ve got the basics. As long as you keep the core flavors, you’re golden. It’s all about being resourceful.

How can I prep these recipes ahead of time so I'm not spending an hour in the kitchen every single night?

Look, I get it. The “cooking” part is easy; it’s the constant cleaning and chopping every single night that kills the vibe. My trick? Spend one hour on Sunday doing the “heavy lifting.” Chop all your veggies, portion out your proteins, and get your sauces ready in little containers. If you’ve already done the prep work, assembly takes ten minutes instead of forty. It’s all about working smarter, not harder.
What are some good ways to scale these recipes down if I'm just cooking for one?

Look, I’ve been there—standing in front of a mountain of leftovers wondering if I’ve accidentally meal-prepped for a small army. When you’re flying solo, the trick is to scale the proteins and grains first, but don’t go crazy with the spices. I usually just halve the seasonings and use a smaller pan to keep things from drying out. Also, keep those extra veggies in the freezer; they’re a lifesaver for quick, single-serve portions.

Easy healthy recipes for real life.

Easy Healthy Recipes for Real Life

Look, I get it. After a long day of work, the last thing anyone wants to do is wrestle with a complex cookbook or spend two hours hovering over a stove. Most of us fall into that trap where we think eating well means buying expensive organic superfoods or spending your entire Sunday meal prepping. But honestly? That’s how you end up ordering takeout for the third time this week. I’ve spent years figuring out that finding easy healthy recipes isn’t about being a gourmet chef; it’s about working smarter, not harder, with the ingredients you actually have in your pantry.

In this guide, I’m stripping away the fluff and sharing five of my personal go-to meals that won’t break your budget or your schedule. I’m talking about real food that tastes great and, more importantly, gets you back to your life in under thirty minutes. By the time you finish reading these five tips, you’ll have a solid game plan for weeknight dinners that actually fuel your body without making you feel like you’re doing a chore. Let’s get to it.

Table of Contents

One-Pan Lemon Chicken and Veggies

One-Pan Lemon Chicken and Veggies sheet pan.

If you’re anything like me, the worst part of cooking isn’t the actual prep—it’s the mountain of dishes waiting for you in the sink afterward. That’s why I’m a huge fan of the sheet pan method. You just toss some chicken thighs, chopped bell peppers, broccoli, and red onion onto a tray, drizzle them with olive oil, and squeeze some fresh lemon over the top. It’s a total game-changer for those nights when you’re wiped out from work but still want something that doesn’t taste like a frozen burrito.

The "Everything" Grain Bowl

The "Everything" Grain Bowl with quinoa.

I used to think “healthy eating” meant eating nothing but plain steamed spinach, but man, was I wrong. Once I figured out the grain bowl formula, my lunches actually became something I looked forward to. Start with a base of something hearty like quinoa or brown rice—you can even use the pre-cooked pouches from the grocery store to save a ton of time. Then, just layer on whatever you have in the fridge: some canned chickpeas, sliced cucumbers, feta cheese, and maybe a handful of cherry tomatoes.

Quick Black Bean Tacos

Quick Black Bean Tacos in a pan.

There are days when I barely have the energy to boil water, and that’s when these tacos come in handy. You don’t need a fancy butcher or a culinary degree to make these work; a can of black beans is your new best friend. Just rinse them off, toss them in a pan with a little cumin and garlic powder until they’re warm, and you’ve got a protein-packed filling that’s ready in under five minutes.

Pesto Pasta with a Green Boost

We’ve all been there—you want comfort food, but you don’t want to feel like a lead weight after dinner. My go-to fix is a simple pesto pasta, but with a little “DIY upgrade” to pack in some nutrients. While your pasta is boiling, throw a couple of handfuls of frozen peas or some chopped baby spinach right into the same pot during the last two minutes of cooking. It’s a sneaky way to eat more greens without even trying.

Overnight Oats for Busy Mornings

I am definitely not a “morning person,” so any breakfast that requires me to stand up and cook at 7:00 AM is a non-starter. Overnight oats are the ultimate hack for anyone who struggles with a morning routine. You just grab a jar, throw in some rolled oats, a splash of milk (dairy or plant-based, whatever you prefer), and a spoonful of chia seeds. Give it a quick stir, pop it in the fridge, and you’re completely done before you even go to sleep.

The Bottom Line

Don’t let “healthy” intimidate you; if you can chop a vegetable and turn on a stove, you’ve already done the hard part.

Keep your pantry stocked with a few versatile staples so you aren’t scrambling or spending a fortune at the grocery store every single night.

Aim for progress, not perfection—even if it’s just one extra veggie or one less takeout order this week, it’s a win in my book.

## My Philosophy on the Plate

“Look, you don’t need a culinary degree or a massive grocery budget to eat well. Real healthy cooking isn’t about fancy ingredients or spending three hours over a stove; it’s just about picking simple, honest food and figuring out a way to get it on your plate without the headache.”

Nathan Cole

Getting Started in Your Own Kitchen

Look, I know that when you’re staring at a fridge full of random ingredients after a long workday, the last thing you want to do is follow a recipe that requires twenty different spices and an hour of prep. But as we just went through, eating well doesn’t have to be some high-maintenance project. Whether you’re leaning on the simplicity of a sheet-pan roast or the speed of a hearty grain bowl, the goal is to keep things manageable. You don’t need a chef’s degree or a massive grocery budget to make food that actually fuels you. Just focus on using whole ingredients and don’t be afraid to swap things out based on what’s actually on sale that week.

At the end of the day, cooking is just another skill, much like fixing a leaky sink or troubleshooting a glitchy router. You’re going to burn something occasionally, and some meals will turn out a bit bland, but that’s just part of the process. Don’t let the fear of a messy kitchen or a failed recipe keep you from trying. The most important part is that you’re taking control of what goes into your body. Once you get into a rhythm, you’ll realize that being healthy isn’t about perfection; it’s about showing up for yourself one simple meal at a time. You’ve got this.

Frequently Asked Questions

I'm on a tight budget—can I still make these recipes healthy without buying expensive superfoods?

Look, I get it. I’ve been there, staring at a shelf of $12 bags of chia seeds wondering if I’m doing life wrong. You don’t need fancy “superfoods” to eat well. Real nutrition is found in the basics: frozen veggies, canned beans, oats, and eggs. They’re cheap, they last forever, and they pack a massive punch. Focus on whole ingredients you can find in the bottom aisles, not the overpriced specialty section.

What are some good ways to meal prep these so I'm not cooking from scratch every single night?

Look, I get it—the idea of spending your entire Sunday in the kitchen sounds exhausting. My trick? Don’t prep full meals; prep components. Roast a big tray of veggies, cook a giant pot of grains, and grill some protein all at once. Then, during the week, you’re just playing assembly line. Grab a bowl, toss in your prepped stuff, add a quick sauce, and you’re eating in five minutes. It’s much more manageable.

If I don't have all the specialized kitchen gadgets mentioned, can I still make these work with just basic pans?

Look, I’ll let you in on a secret: most of those fancy kitchen gadgets are just expensive ways to do things you can already do by hand. If you don’t have a specialized pan, don’t sweat it. A standard heavy-bottomed skillet or even a decent cast iron will do the job just fine. Just keep an eye on your heat—basic pans can sometimes run a little hotter or cooler than the “pro” stuff. You’ve got this!

Quick and easy dessert recipes for cravings.

Easy Dessert Recipes for When a Craving Hits

Look, I get it. You’ve just finished a long day, the kitchen is a mess, and the last thing you want to do is spend three hours hovering over a stove or wrestling with a temperamental stand mixer. We’ve all been there—staring at a cookbook filled with ingredients you can’t pronounce and techniques that feel more like rocket science than cooking. Most people think that making something sweet from scratch requires a culinary degree, but honestly? That’s just not true. You don’t need a pastry chef’s toolkit to satisfy a sweet tooth; you just need a few easy dessert recipes that actually work without making your life complicated.

In this guide, I’m stripping away the fluff and giving you five of my absolute favorite go-to treats. I’ve tested these myself on lazy weeknights when I wanted something impressive but only had the energy for minimal effort. I’m going to show you exactly how to whip up delicious, crowd-pleasing desserts using basic pantry staples and simple methods. By the time we’re done, you’ll have a handful of foolproof options that will make you feel like a total pro in your own kitchen.

Table of Contents

The "No-Fail" Chocolate Mug Cake

The "No-Fail" Chocolate Mug Cake in mug.

Look, I’ve had plenty of nights where I just wanted something sweet without cleaning a dozen bowls and waiting forty minutes for the oven to preheat. That’s where the mug cake comes in. It’s basically the ultimate kitchen hack for when a sugar craving hits you hard and you don’t want to make a whole production out of it. All you need is a standard coffee mug, some flour, cocoa powder, sugar, and a splash of milk.

Five-Minute Berry Parfait

Layered Five-Minute Berry Parfait with Greek yogurt.

If you’re feeling like you need something a little lighter—or if you’re trying to keep things a bit healthier after a heavy dinner—this is my go-to. You don’t even need to turn on a stove for this one. I just grab some Greek yogurt, a handful of whatever berries are on sale, and a bit of granola. It’s all about the layering technique here to make it look like something you’d pay ten bucks for at a cafe.

Sheet Pan Cinnamon Apples

Baked Sheet Pan Cinnamon Apples.

Whenever the house is feeling a little cold or I’ve got some extra apples sitting in the crisper drawer, I throw these on a sheet pan. This is one of those recipes where the minimal effort really pays off. You just slice up your apples, toss them with a little bit of melted butter, cinnamon, and a sprinkle of sugar, and let the oven do the heavy lifting.

Classic Peanut Butter No-Bake Cookies

These are a staple in my house, especially on those days when I’m too tired to even think about an oven. They remind me of the stuff my dad used to whip up when we were kids. You basically just melt some butter, cocoa, and sugar in a saucepan, stir in your peanut butter and oats, and let it cool just enough to scoop onto wax paper. It’s a one-pot wonder that stays in my rotation because it’s so reliable.

The Lazy Person's Affogato

Sometimes, you don’t want to “cook” at all—you just want a sophisticated way to end a meal. That’s when I reach for the espresso machine (or even just some strong brewed coffee) and a pint of high-quality vanilla bean ice cream. An affogato is essentially just pouring hot coffee over cold ice cream, but it feels like a total luxury when you’re sitting on the couch at the end of a long day.

The bottom line on easy desserts

You don’t need a professional pastry kit to make something great; most of these recipes rely on stuff you probably already have in your pantry.

Don’t sweat the small stuff—if a cookie comes out a little wonky or a cake isn’t perfectly level, it’ll still taste awesome.

The best part about these simple treats is that they take the stress out of hosting, so you can actually enjoy the party instead of being stuck in the kitchen.

## My Philosophy on Sweets

“Look, you don’t need a degree in pastry arts or a kitchen full of expensive gadgets to make something that tastes amazing. Most of the time, a little bit of patience and a simple recipe are all you really need to turn a bad day around with something sweet.”

Nathan Cole

Sweet Success

Look, I know that when you see a recipe calling for a dozen different tools or a mountain of specialty ingredients, your first instinct might be to just grab a tub of store-bought ice cream and call it a day. But as we just saw, you don’t need a culinary degree to make something impressive. Whether you’re whipping up a quick fruit crumble or leaning on the simplicity of a classic chocolate mug cake, the secret is that minimal effort can still yield massive flavor. You don’t need to master French pastry techniques to satisfy a sweet tooth; you just need to follow the steps, keep your workspace clean, and not overthink the process.

At the end of the day, cooking—and especially baking—should be about enjoying the process, not stressing over perfection. If your crumble looks a little messy or your cake isn’t shaped like a professional’s, guess what? It’s still going to taste great, and more importantly, you made it yourself. That’s a win in my book. So, go ahead and grab those ingredients, get a little flour on your hands, and give it a shot. I promise that once you take that first bite of something you built from scratch, you’ll realize that most things are totally figure-out-able.

Frequently Asked Questions

Can I swap out the heavy cream for something lighter, like coconut milk, if I'm trying to keep things a bit healthier?

You absolutely can, but here’s the deal: coconut milk is a great swap, but it’s going to change the vibe of your dessert. It adds a subtle tropical flavor, so if you’re making something like chocolate mousse, it’ll taste a bit more “exotic.” For the best results, use the canned, full-fat stuff rather than the carton kind you pour over cereal. It’ll give you that creamy texture you’re after without the heavy dairy.

I'm running low on some of the specific ingredients—are there any easy substitutions I can use without ruining the whole thing?

Look, I’ve been there. I once tried to make brownies with expired cocoa and ended up using instant coffee instead—it actually worked! Generally, if you’re out of butter, softened cream cheese or even coconut oil can save the day. Running low on milk? A splash of heavy cream or even some almond milk usually does the trick. Just don’t go swapping salt for sugar unless you’re looking for a disaster. You’ve got this!

What's the best way to store these if I make them ahead of time so they don't get soggy or lose their texture?

Look, I’ve learned the hard way that a great dessert can turn into a soggy mess if you just toss it in a Tupperware and call it a day. If you’re making these ahead, my rule of thumb is to let them cool completely first—never trap steam in a container! For anything crunchy, stick to an airtight glass jar. If it’s something creamy, keep it in the fridge, but keep it tucked away from strong smells.

Easy slow cooker recipes for dinner.

Easy Slow Cooker Recipes for Hands-off Dinners

Look, I get it. By the time Tuesday rolls around, the last thing anyone wants to do is stand over a hot stove for an hour, scrubbing pans and playing chef. I’ve spent plenty of nights staring at a half-empty fridge, feeling like dinner was just another chore on an endless to-do list. That’s exactly why I’ve become a huge believer in the “set it and forget it” lifestyle. Finding reliable, easy slow cooker recipes isn’t just about saving time; it’s about reclaiming your evening so you can actually relax without feeling guilty about the mess in the kitchen.

In this guide, I’m breaking down five of my absolute favorite go-to meals that are basically foolproof. I’m talking about hearty, flavorful dishes that require minimal prep work and won’t break your grocery budget. Whether you’re a complete beginner or just someone looking to simplify your weeknight routine, these five recipes will prove that you don’t need a culinary degree to make a meal that actually tastes homemade. Let’s get into it and get those crockpots heating up.

Table of Contents

The "Dump and Go" Pot Roast

The "Dump and Go" Pot Roast meal.

Look, I know what you’re thinking—pot roast sounds like something that requires a culinary degree and a massive time commitment. But honestly? It’s one of the most foolproof meals you can make. You just grab a decent chuck roast, toss it in with some halved potatoes, carrots, and an onion, and pour in a bit of beef broth and some Worcestershire sauce. That’s it. No fancy searing or hovering over a stove required.

Salsa Chicken Tacos

Slow cooker Salsa Chicken Tacos.

If you’ve had one of those days where your brain is totally fried, this is your new best friend. You only need two things: chicken breasts and a jar of your favorite salsa. I usually just dump them both in the slow cooker and let them hang out on low for about six hours. It’s almost too easy, which is exactly why I love it when I’m running low on mental energy.

Hearty Sausage and Bean Stew

Hearty Sausage and Bean Stew in bowl.

There is something incredibly satisfying about a thick, warming stew, especially when the weather starts to turn a bit chilly. For this one, I grab a pack of smoked sausage (the pre-cooked kind saves even more time), a couple of cans of cannellini beans, and a jar of marinara sauce. Throw it all in with a splash of chicken broth, and you’ve got a meal that is surprisingly deep in flavor for how little effort it takes.

Creamy Garlic Parmesan Chicken

Sometimes you want something that feels a little more “fancy” without actually having to do the fancy work. This recipe is my go-to when I want a bit of comfort food. You just layer chicken thighs in the pot, cover them with a mix of heavy cream, garlic, and plenty of parmesan cheese, and let it do its thing. It sounds indulgent, but it’s a complete game-changer for your midweek dinner rotation.

Classic BBQ Pulled Pork

If you’re planning on hosting a few friends or just want to meal prep for the week, pulled pork is the ultimate way to go. Grab a pork shoulder—don’t be intimidated by the name, it’s just a cut of meat—and rub it down with some basic spices before adding a bottle of your favorite BBQ sauce. Set it on low, and just forget about it for the next eight hours.

The Quick Version: What I’ve Learned

Don’t overthink the prep; the whole point of a slow cooker is to save your sanity, so just chop, toss, and get on with your day.

Watch your liquids—since the steam doesn’t escape like it does in a regular pot, you usually need less broth or water than you’d think to avoid a watery mess.

Use the right timing to your advantage; if you’re heading out for the day, a low and slow setting is your best friend for making sure dinner is ready right when you walk through the door.

The Magic of the Slow Cooker

“Look, I don’t care if you’re a gourmet chef or someone who barely knows how to boil water; the slow cooker is the ultimate equalizer. It takes the guesswork out of a long workday and turns a pile of cheap ingredients into something that actually tastes like you put in way more effort than you actually did.”

Nathan Cole

Get Cooking and Get Your Time Back

At the end of the day, these recipes aren’t just about filling your stomach; they’re about taking the pressure off your evening routine. Whether you’re leaning into a hearty beef stew or keeping things light with a slow-cooked chicken dish, the goal is the same: minimal prep, maximum flavor, and zero stress. You don’t need a culinary degree or a kitchen full of expensive gadgets to make something that tastes like it took all afternoon. Just grab your ingredients, toss them in the pot, and let the machine do the heavy lifting while you tackle the rest of your life.

If you’re feeling a bit intimidated by a new recipe, just remember what I always say: most things are totally figure-out-able. If you forget a spice or swap one vegetable for another, don’t sweat it. Cooking is a skill you build one meal at a time, and the slow cooker is hands-down the best tool in your arsenal to help you practice without the chaos. So, pick one of these recipes for your next busy weeknight, get that lid snapped on, and enjoy the feeling of a problem solved. You’ve got this!

Frequently Asked Questions

Do I really need to sear the meat in a pan before tossing it in the slow cooker, or can I just skip that step to save time?

Look, I get it—when you’re staring at a pile of dishes and a long to-do list, that extra pan feels like a chore. If you’re in a massive rush, you can skip it and the meat will still cook through. But honestly? You’re missing out. Searing locks in those juices and creates a deep, savory base that a slow cooker just can’t replicate on its own. Do the extra five minutes; your taste buds will thank you.

How do I keep my slow cooker meals from turning out watery or mushy by the time dinner is ready?

Look, I’ve been there. You open the lid expecting a hearty stew and instead find a lukewarm soup. Usually, it’s because of “liquid overload.” Most people dump in way too much broth, forgetting that veggies and meat release their own juices as they cook. My rule of thumb? Use about half the liquid you think you need. Also, if you’re using watery veggies like zucchini, toss them in during the last hour so they don’t turn to mush.

Can I use frozen meat in these recipes, or am I going to run into a food safety issue?

That’s a great question, and honestly, one I’ve messed up on before. The short answer? Please, please don’t toss frozen meat straight into the slow cooker. It takes way too long to reach a safe temperature, which leaves your dinner sitting in that “danger zone” where bacteria love to party. Always thaw your meat in the fridge overnight first. It takes a little planning, but it’s the only way to keep things safe and delicious.

Guide on how to meal prep weekly.

How to Meal Prep for the Whole Week

I used to think that learning how to meal prep meant I had to turn my kitchen into a professional test kitchen, surrounded by twenty identical Tupperware containers and enough organic kale to feed a small village. Honestly, the way some “wellness influencers” talk about it makes it sound like a full-time job that requires a culinary degree and a massive budget. I’ve spent way too many Tuesday nights staring into a nearly empty fridge, halfway between ordering expensive takeout and eating a bowl of plain cereal, just because the idea of massive, multi-hour cooking sessions felt impossible.

But here’s the truth: most of that stuff is just noise. I’m not here to sell you on a lifestyle of aesthetic glass jars and complicated recipes that take all Sunday to finish. Instead, I’m going to show you how to approach how to meal prep using the same logic I use when fixing a leaky faucet—just break it down into manageable, logical steps. We’re going to focus on practical, high-impact wins that save you time and money without turning your life upside down. We’ll keep it simple, keep it cheap, and most importantly, keep it doable.

Table of Contents

Smart Weekly Meal Planning Tips to Save Your Sanity

Smart Weekly Meal Planning Tips to Save Your Sanity

Before you even touch a knife or turn on the stove, you’ve got to get your head in the game. The biggest mistake I see people make is trying to wing it on a Sunday night without a roadmap. To keep things from turning into a chaotic kitchen disaster, I rely on a few solid weekly meal planning tips that keep me from staring blankly at the pantry. Start by checking what you already have in the back of the cupboard—there’s no sense in buying a new bag of rice if you’ve already got three hiding behind the pasta. I like to pick two or three main proteins and just build everything around those to keep things simple.

Once you have a rough idea of what you’re eating, it’s time to think about the logistics. I’m a huge fan of batch cooking techniques, like roasting three trays of veggies or simmering a massive pot of chili all at once. It’s much more efficient than cooking five separate meals. Also, don’t skimp on your gear; investing in a decent set of meal prep containers for storage is a total game-changer. If your containers leak or don’t stack right, you’re going to hate opening your fridge on Wednesday. Get the good stuff, and you’ll actually want to grab your lunch on the go.

Batch Cooking Techniques That Make Sunday Feel Like a Breeze

Batch Cooking Techniques That Make Sunday Feel Like a Breeze

Now, let’s talk about the actual heavy lifting: the cooking part. When I first started, I thought I had to cook five different recipes every Sunday, which was a total recipe for burnout. Instead, I learned that the secret to efficient batch cooking techniques is to focus on “component cooking.” Rather than making a finished lasagna, I’ll roast three trays of mixed veggies, boil a big pot of quinoa, and grill a mountain of chicken breasts all at once. By prepping individual building blocks, you aren’t stuck eating the exact same leftovers every single night; you can pivot from a Mediterranean bowl on Tuesday to a hearty grain salad on Wednesday.

Once your food is ready, don’t just shove it into random Tupperware you found in the back of the pantry. If you want to stay consistent, invest in some decent meal prep containers for storage that actually seal tight. There is nothing worse than opening your lunch at work only to find a soggy mess because the lid wasn’t airtight. I like using glass containers because they go straight from the fridge to the microwave without that weird plastic smell, making your weekly routine feel a lot more professional and a lot less chaotic.

Five Pro Moves to Keep Your Prep from Feeling Like a Chore

  • Don’t try to be a gourmet chef on Sunday. Pick two or three “base” ingredients—like a big batch of roasted chicken, a pot of quinoa, or some seasoned black beans—and focus on making those versatile enough to switch up flavors throughout the week.
  • Invest in a decent set of matching glass containers. I know, it sounds like a minor thing, but having containers that actually stack well and don’t leak in your bag makes a massive difference in how much you actually want to grab your lunch on Monday morning.
  • Master the “component prep” method instead of full-on assembly. Instead of making five identical Tupperware boxes of the same pasta, just prep the components—chop the veggies, cook the protein, and make the sauce separately. It keeps the food from getting soggy and gives you more freedom to mix and match.
  • Use your freezer as your secret weapon. If you realize you’ve cooked way more chili or soup than you can eat in four days, don’t let it go to waste. Portion it into individual bags immediately and freeze them; those are your “emergency meals” for the next time you’re too tired to cook.
  • Clean as you go, seriously. There is nothing that kills my motivation faster than finishing a great cooking session only to find a mountain of crusty pans and vegetable scraps in the sink. If you wash your cutting board while the onions are sautéing, you’ll actually enjoy the process.

The Bottom Line: Making It Work for You

Don’t try to be a gourmet chef on your first go; start by prepping just two or three versatile ingredients that can work in multiple meals.

Focus on the “why” behind the prep—whether it’s saving money or just avoiding that 6:00 PM “what’s for dinner” panic—to keep yourself motivated.

Keep your tools organized and your kitchen workflow simple, because if the prep feels like a chore, you won’t stick with it next week.

The Real Secret to Staying on Track

“Look, meal prep isn’t about spending six hours in a flour-covered kitchen every Sunday; it’s just about making your future self a little less stressed when Tuesday night rolls around and you’re too tired to think.”

Nathan Cole

You’ve Got This

Meal prepping success: You’ve Got This.

Look, I know that staring at a pile of Tupperware and a mountain of raw chicken can feel a bit overwhelming at first. But if you take what we talked about today—starting with a solid plan, leaning into those batch cooking techniques, and not trying to cook five different gourmet meals at once—you’re already ahead of the game. The goal isn’t to turn your kitchen into a professional restaurant line; it’s about making your future self’s life easier. When you focus on simple, repeatable wins like roasting a big tray of veggies or simmering a massive pot of grains, you’re building a foundation that actually sticks.

If your first attempt at meal prepping goes a little sideways—maybe you overcooked the rice or ended up with three containers of the same salad—don’t sweat it. I’ve definitely been there, and honestly, it’s all part of the learning curve. Just tweak the recipe next week and keep moving. At the end of the day, meal prepping is just another tool in your belt to help you reclaim your time and your budget. You don’t need to be perfect; you just need to start where you are. Grab a container, get in the kitchen, and give it a shot. You’ll be surprised at how good it feels.

Frequently Asked Questions

How do I keep my food from getting soggy or tasting like "fridge air" by Thursday?

The “fridge air” taste is the worst—it’s like your leftovers are absorbing the scent of that half-used onion from Tuesday. First, let your food cool completely before sealing it; trapping steam is what makes everything soggy. Second, ditch the cheap plastic containers and grab some glass ones with airtight lids. They don’t hold onto smells like plastic does. Finally, keep sauces on the side and toss them on right before you eat.

Do I really need to spend my entire Sunday in the kitchen, or is there a faster way to do this?

Look, I get it. The idea of spending six hours straight hovering over a stove on a Sunday sounds like a nightmare, not a “hack.” You don’t need to do that. I personally swear by “component prepping”—instead of making full recipes, just roast two trays of veggies, boil a big pot of grains, and cook some protein. It takes way less time, and you can mix and match them all week so you don’t get bored.

What are the best containers to invest in so I'm not just throwing everything into cheap plastic tubs that leak everywhere?

Look, I’ve been there—staring at a puddle of leftover chili in my fridge because a cheap plastic tub decided to give up the ghost. It’s frustrating and a total waste of food. If you’re serious about this, invest in glass containers with snap-locking lids. They don’t stain, they’re microwave-safe, and they actually seal tight. If you’re on a tighter budget, grab a decent set of BPA-free silicone bags. They’re versatile and won’t leak in your bag.

Guide on how to make a smoothie.

How to Make a Smoothie That’s Actually Good for You

Look, I’m going to be real with you: you don’t need a $500 high-speed blender or a cabinet full of expensive, designer superfood powders to get a decent breakfast. I used to think learning how to make a smoothie meant following those ridiculous, thirty-ingredient recipes that look more like a chemistry experiment than actual food. It’s honestly a bit ridiculous how much the wellness industry tries to gatekeep a simple drink by making it seem complicated and pricey.

I’m not here to sell you on any magic powders or fancy gadgets. My goal is to show you that making a killer smoothie is a skill you can master with whatever you’ve already got in your fridge. I’m going to break this down into straightforward, repeatable steps that focus on balance, texture, and—most importantly—flavor. By the time we’re done, you’ll have a reliable system that works for your budget and your busy schedule, making your morning routine actually feel easy.

Table of Contents

Picking the Best Blender for Smoothies Without Breaking the Bank

Picking the Best Blender for Smoothies Without Breaking the Bank

Look, I’ve spent way too much money on gadgets that ended up gathering dust in a kitchen cabinet, so I get the hesitation. When you’re hunting for the best blender for smoothies, you don’t need a professional-grade, thousand-dollar machine that sounds like a jet engine taking off. For most of us, a solid mid-range model with enough horsepower to crush ice is plenty. You want something that can handle the heavy lifting without making your wallet cry.

The real trick is focusing on what actually matters for your daily routine. If you’re a fan of using frozen fruit vs fresh fruit, you’ll want blades that can actually pulverize those icy chunks rather than just spinning them around in a whirlpool. I always tell people to check if the motor is powerful enough to create a smooth consistency; there’s nothing worse than getting a mouthful of unblended kale bits. Aim for a blender with a sturdy jar and easy-to-clean parts. If it’s a pain to wash, you won’t use it, and that’s just money down the drain.

Mastering Your Smoothie Base Ingredients for Instant Success

Once you’ve got your gear ready, it’s time to talk about the foundation. I always tell people that the secret to a drink that doesn’t taste like flavored chalk is getting your smoothie base ingredients right from the jump. You want a mix of something creamy, something liquid, and something for flavor. If you’re looking for that perfect consistency, my biggest smoothie texture tips involve the ratio of solids to liquids. I usually start with a liquid base—like almond milk, coconut water, or even just plain old water—and then build upward.

Now, here is where most people trip up: the great frozen fruit vs fresh fruit debate. If you want a thick, milkshake-like texture without adding a ton of ice (which can water everything down), go with frozen fruit. It acts like a built-in coolant and thickener. To keep things healthy, I try to focus on smoothie nutritional balance by tossing in a handful of spinach or some chia seeds before I even touch the fruit. If you’re using it as a meal replacement, don’t forget about adding protein to smoothies with a scoop of powder or some Greek yogurt to keep you full until lunch.

5 Pro Moves to Stop Making Chunky, Boring Smoothies

5 Pro Moves to Stop Making Chunky, Boring Smoothies
  • Layer your ingredients like you’re building a house—liquids first, then powders, then solids, and save the frozen stuff for the very top. This helps your blender blades catch the liquid immediately so you don’t end up with a dry, stuck motor.
  • Don’t be afraid to freeze your leftovers. If you have half a banana or a handful of spinach that’s about to turn, toss it in a freezer bag. Frozen fruit makes your smoothie thick and frosty without needing to add extra ice, which can water down the flavor.
  • Watch the sugar trap. It’s easy to go overboard with honey or fruit juice, but if you want to avoid a mid-morning energy crash, lean more on creamy fats like Greek yogurt or a bit of nut butter to keep you full.
  • Give it a quick “pulse” before you go full speed. Instead of just hitting the highest setting and hoping for the best, hit the pulse button a few times to break up the big chunks. It saves your blender’s life and ensures a much smoother texture.
  • Clean your gear immediately. I learned this the hard way: if you let smoothie residue dry on the blades, it’s a nightmare to scrub later. Just rinse your blender jar with warm soapy water right after you pour your drink, and you’re good to go.

Quick Wins for Your Next Smoothie

Don’t overthink the gear; you don’t need a professional-grade blender to make a great drink, just something that gets the job done without draining your wallet.

Get your base right from the start by choosing a solid liquid and frozen fruit combo—it’s the secret to a creamy texture that isn’t watery.

Keep it simple and build in layers, starting with your liquids so you don’t end up fighting a stuck motor or a chunky mess.

## The Secret to a Perfect Blend

“Look, you don’t need a thousand-dollar machine or some fancy superfood powder to get a good smoothie. It’s really just about getting the order of operations right and not being afraid to experiment with what’s already in your fridge.”

Nathan Cole

Getting Your Smoothie Groove

Getting Your Smoothie Groove with simple ingredients.

At the end of the day, making a killer smoothie isn’t about having a professional-grade kitchen or a massive grocery budget. It really just comes down to the basics we talked about: picking a blender that actually gets the job done, nailing your liquid base, and layering your ingredients so you don’t end up with a chunky mess. Once you’ve got those fundamentals down, you’re basically just playing with food. You can swap out frozen berries for mango, or trade almond milk for coconut water, and you’ll find your own rhythm. Just remember to start simple and don’t be afraid to experiment with different textures until you find that perfect consistency.

I know that sometimes the idea of “starting a healthy habit” feels like another giant chore on an already overflowing to-do list. But honestly? A smoothie is one of the easiest wins you can grab in the morning. It’s fast, it’s rewarding, and there’s something uniquely satisfying about seeing a pile of random ingredients transform into something delicious right before your eyes. Don’t worry about making it “picture-perfect” for social media; just focus on making something that tastes good and makes you feel fueled. You’ve got this, so go grab your blender and give it a shot!

Frequently Asked Questions

How do I keep my smoothies from turning into a watery mess?

Nothing kills a good morning vibe faster than a smoothie that has the consistency of lukewarm dishwater. To fix this, stop leaning so hard on ice and juice. Instead, use frozen fruit—especially frozen bananas—to get that creamy, milkshake-like texture. I also like adding a spoonful of chia seeds or Greek yogurt; they soak up extra liquid and act like a natural thickener. Keep your liquid low, and you’ll nail that perfect pour every time.

Can I use frozen fruit instead of ice, or will that mess up the texture?

Honestly, using frozen fruit is my go-to move. It’s actually a total pro tip because it makes your smoothie thick and creamy without watering it down like ice does. If you use ice, you often end up with that weird, slushy, separated texture. Just toss in some frozen berries or mango chunks instead, and you’ll get a much smoother, more consistent result every single time. It’s a total game-changer.

Is there a trick to cleaning the blender quickly so I'm not stuck scrubbing it every single morning?

Look, I get it. Nobody wants to spend ten minutes scrubbing a pitcher when they just want to get on with their day. Here’s my go-to trick: as soon as you pour your smoothie, don’t let that gunk dry. Fill the blender halfway with warm water, add a single drop of dish soap, and let it run on high for thirty seconds. Rinse it out, and you’re done. It’s a total game-changer.