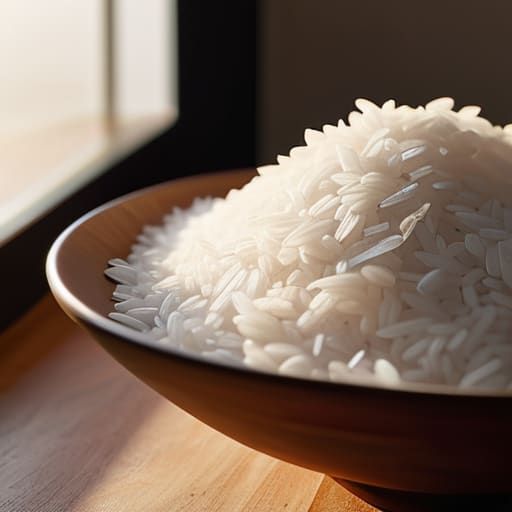
How to cook rice perfectly guide.

How to Cook Perfect Rice Every Single Time

I still remember the first time I tried to make a decent meal in my tiny, cramped apartment back in my early twenties. I was trying to impress a girl, but instead of a fluffy side dish, I ended up with a pot of gummy, semi-translucent sludge that looked more like wallpaper paste than food. It was embarrassing, and honestly, it felt like a total failure. I spent way too many nights staring at a steaming pot, wondering why the instructions on the bag never seemed to match what was actually happening in my kitchen. Learning how to cook rice perfectly shouldn’t feel like a high-stakes chemistry experiment or some mysterious ritual you can only master with a $500 smart cooker.

Look, I’m not here to sell you on some fancy, over-engineered gadget or a complicated set of rules that require a kitchen scale. I’ve spent years tinkering with everything from old power tools to stovetop burners, and I’ve learned that the best results usually come from the simplest methods. In this guide, I’m going to strip away the fluff and give you my straightforward, battle-tested approach. I’ll show you exactly how to get that light, airy texture every single time, so you can stop stressing the stove and just enjoy your dinner.

Table of Contents

Mastering the Rice to Water Ratio Without the Stress
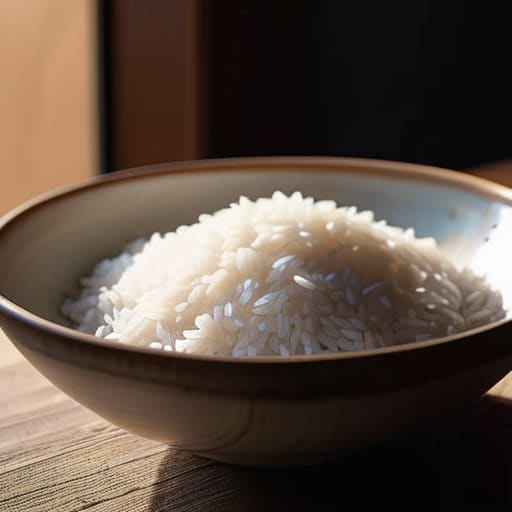
Mastering the Rice to Water Ratio Without the Stress

Look, I’ve been there—staring at a pot of gummy, overcooked mush wondering where it all went wrong. Most of the time, the culprit isn’t your skill; it’s just a bad rice to water ratio. If you’re using a standard stovetop rice method, the golden rule for most long-grain white varieties is 1 part rice to 2 parts water. But here’s the thing: I’ve learned that “standard” is a loose term. If you’re using a rice cooker, those machines are pretty smart, but you still want to trust your eyes over the manual sometimes.

One trick I swear by to avoid mushy rice is getting serious about your prep. Don’t just dump the grains in the pot and walk away. Rinsing white rice under cold water until it runs clear is a total game-changer; it washes off that excess surface starch that turns your dinner into a sticky mess. Once you’ve got that starch under control, you’re already halfway to a perfect bowl. It’s a small habit, but it makes a massive difference in the final texture.

Why Rinsing White Rice Changes Everything
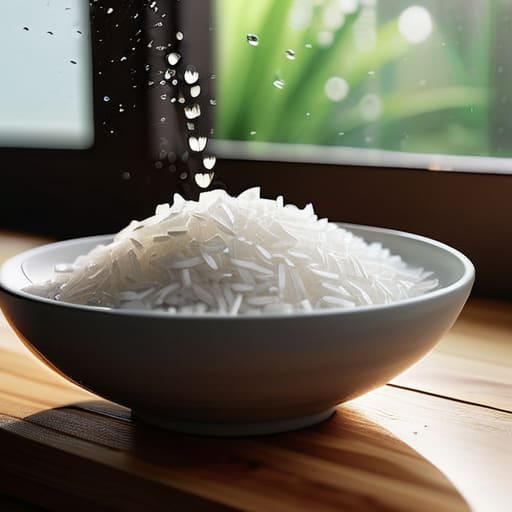
Why Rinsing White Rice Changes Everything.

If you’ve ever pulled a pot off the burner only to find a gummy, clumped-up mess, I’ve been there. It’s frustrating, especially when you’ve followed the recipe to a T. Most of the time, the culprit isn’t your heat control or your pot; it’s the surface starch. When you buy a bag of white rice, it’s coated in a fine, powdery starch. If you don’t get rid of that extra layer, it turns into a kind of “glue” during the cooking process, which is the fastest way to end up avoiding mushy rice becomes your new full-time job.

Think of rinsing white rice like washing the dust off a piece of lumber before you start building. You wouldn’t try to glue two pieces of wood together if they were covered in sawdust, right? It’s the same logic here. By running your rice under cold water in a fine-mesh strainer until the water runs clear, you’re stripping away that excess starch. This simple step ensures that each grain stays distinct, light, and fluffy once it hits the plate. It’s a small bit of extra work, but I promise it’s the secret weapon for better texture.

Five Little Tricks to Level Up Your Rice Game

  • Stop the stir. Once you’ve got your rice and water in the pot and it’s reached a simmer, put a lid on it and leave it alone. If you keep lifting the lid to peek, you’re letting all that precious steam escape, and that’s how you end up with unevenly cooked grains.
  • Let it rest before you touch it. This is the hardest part for me, but once the timer goes off, pull the pot off the heat and let it sit, covered, for about 10 minutes. It lets the moisture redistribute so the bottom layer isn’t a swamp while the top is dry.
  • Use the right gear. If you’ve got a heavy-bottomed pot, use it. Thin, cheap pots tend to have hot spots that scorch the rice at the bottom before the rest is even soft. A little extra weight goes a long way in keeping things even.
  • Fluff, don’t mash. When you finally go in with a fork or a rice paddle, be gentle. You want to lift and aerate those grains, not smash them into a paste. A light touch is the difference between fluffy rice and a gummy mess.
  • Watch your heat. High heat doesn’t mean faster rice; it just means burnt rice. Once you hit that simmer, drop it down low. You want a gentle, steady heat that works with the steam, not a rolling boil that’s fighting against it.

The Quick Cheat Sheet for Perfect Rice

Stop eyeballing the liquid; stick to a reliable ratio (like 1:2 for standard white rice) so you aren’t stuck eating mush or crunching on undercooked grains.

Never skip the rinse—washing that extra starch away is the secret to getting fluffy, individual grains instead of one big sticky clump.

Patience is your best tool; once the timer goes off, let the pot sit covered for a few minutes to let the steam finish the job properly.

## The Secret to Not Wasting a Batch

“Look, you don’t need a fancy kitchen or a degree in culinary arts to get great rice; you just need to stop treating it like a ‘set it and forget it’ task and start respecting the rinse and the ratio. Once you nail those two things, you’ll stop throwing away mushy, half-eaten pots and start actually enjoying your dinner.”

Nathan Cole

You've Got This

Perfecting rice cooking: You've Got This.

At the end of the day, nailing the perfect pot of rice really just comes down to a few fundamental habits. Remember to rinse that starch away before the heat ever touches the pot, and don’t go overboard with the water—stick to your ratio so you don’t end up with a gummy mess. Once you get the heat dialed in and let it steam undisturbed, you’re basically a pro. It’s all about respecting the process and giving those grains the time they need to absorb everything properly without being rushed.

I know it might feel a little intimidating the first time you stand over a steaming pot, but I promise you, it gets easier every single time you try. Don’t sweat it if your first batch isn’t a total masterpiece; even the best cooks have dealt with a little extra moisture or a slightly crunchy grain now and then. The goal isn’t perfection on day one; it’s about building your confidence in the kitchen. So, grab your pot, trust your instincts, and get cooking. You’ll be surprised at how much better it tastes when you know you built it from scratch.

Frequently Asked Questions

What if I accidentally add too much water and end up with a gummy mess?

Look, we’ve all been there—you check the pot and it’s looking more like porridge than fluffy rice. Don’t toss it yet! If it’s just a little gummy, spread the rice out thin on a large baking sheet to let the steam escape and dry it out. If it’s a total mush-fest, don’t sweat it. Just lean into it: use that “failed” rice for a quick fried rice or a savory rice pudding.

Do I really need to use a specific kind of pot, or will any old saucepan work?

Look, you don’t need to go out and drop a hundred bucks on some fancy, high-tech rice cooker to get this right. Any old saucepan with a tight-fitting lid will do the trick. The real secret isn’t the brand of the pot; it’s making sure that lid actually stays put. If steam escapes, your water levels get wonky and you’ll end up with crunchy rice. Just find something heavy-bottomed if you can.

Can I use this same method for brown rice, or is that a whole different ballgame?

It’s a different ballgame, but don’t let that throw you. Brown rice is a bit more stubborn because of that outer bran layer, so you can’t just treat it like white rice and expect magic. You’ll need more water and a longer soak or simmer time to get it tender. Think of it like a slow-cook project versus a quick fix—it takes a little more patience, but the results are worth it.


Tips on how to keep your accounts secure.

How to Keep Your Online Accounts Secure

I’ll be honest: most of the advice you find online about how to keep your accounts secure feels like it was written by someone who spends way too much time in a windowless basement. They want to sell you expensive, complicated software suites or bury you in tech jargon that makes your head spin. It’s frustrating because it makes a serious problem feel unnecessarily intimidating. I’ve spent years tinkering with everything from old power tools to my own home network, and if there’s one thing I’ve learned, it’s that you don’t need a PhD in computer science to build a solid defense.

I’m not here to give you a lecture or push some overpriced subscription service you don’t need. Instead, I’m going to break this down into simple, actionable steps that actually work in the real world. We’re going to look at the high-impact moves you can make right now to lock your digital doors and windows without losing your mind in the process. My goal is to show you that securing your digital life is just like fixing a leaky faucet—once you have the right tools and a clear plan, it’s a totally doable weekend project.

Table of Contents

The Easy Way to Master Password Manager Best Practices

The Easy Way to Master Password Manager Best Practices.

Look, I get it. Trying to remember fifty different, complex passwords is a recipe for a headache, and most of us end up using the same three variations of our dog’s name. That’s where a password manager comes in. Think of it like a high-tech, digital lockbox for your life. Instead of your brain doing all the heavy lifting, you let a secure app generate and store long, random strings of gibberish for every single site you use. Following these password manager best practices is honestly the single biggest win you can grab for your digital security.

Once you’ve got the manager set up, you need to add one more layer of defense. I always tell people to turn on two-factor authentication wherever it’s offered. It’s that extra step—like a code sent to your phone—that keeps hackers out even if they somehow guess your master password. It might feel like an extra thirty seconds of work, but it’s a small price to pay for the peace of mind. It’s all part of building better cybersecurity hygiene without needing a degree in computer science to get it done.

Unlock the Real Two Factor Authentication Benefits Today

Unlock the Real Two Factor Authentication Benefits Today

If a password manager is your first line of defense, then Two-Factor Authentication (2FA) is the heavy-duty deadbolt on your front door. I used to think 2FA was just an annoying extra step—something that would slow me down when I was trying to quickly check my email. But after seeing how easy it is for hackers to guess even a “strong” password, I realized that relying on just one thing is a recipe for disaster. The real two-factor authentication benefits come when you realize that even if someone manages to snag your password, they still can’t get into your account without that second, physical piece of proof.

Setting it up is actually pretty straightforward. Instead of just relying on those SMS text codes—which can be intercepted if you’re unlucky—I recommend using an authenticator app on your phone. It’s a much better way of preventing identity theft online because the code is generated right there on your device and expires in seconds. It might take an extra five seconds of your time, but it’s a tiny price to pay for the peace of mind that comes with knowing your digital life is actually locked down.

5 Quick Wins to Tighten Up Your Digital Security

  • Audit your “Logged In” list. Most of us have old apps or devices sitting there that we haven’t touched in years. Go into your Google or Apple settings, look for “active sessions,” and kick off anything you don’t recognize. It’s like changing the locks when you move into a new place—better safe than sorry.
  • Watch out for the “Urgency Trap.” If you get an email or a text saying your account will be deleted in ten minutes unless you click a link, take a deep breath. That’s a classic scammer move. Instead of clicking that link, open your browser, type the website address in yourself, and log in that way to see if there’s actually a problem.
  • Clean up your email’s “forgot password” trail. If you use the same old email address for every single random newsletter and shop you’ve ever visited, that’s a big target. Try using a secondary “junk” email for those sign-ups so your main inbox—the one tied to your bank and important stuff—stays out of the line of fire.
  • Update your software (even when it’s annoying). I know, that little pop-up window telling you to restart your computer for an update is the ultimate mood killer when you’re in the middle of something. But those updates usually contain “patches” that fix security holes. Think of it like fixing a loose floorboard before someone trips on it.
  • Check if your info is already out there. There’s a site called “Have I Been Pwned” that’s actually super useful. You just plug in your email, and it tells you if your data was leaked in a big company hack. If it shows up, don’t freak out—just take it as a sign to change those specific passwords immediately.

The Bottom Line: Keeping It Simple

You don’t need to be a tech genius to stay safe; just get a solid password manager running and let it do the heavy lifting for you.

Treat two-factor authentication like a deadbolt on your front door—it’s an extra layer of defense that makes a huge difference.

Security isn’t a “one and done” thing, so just take small, regular steps to check your settings and keep your digital life running smoothly.

## The Big Picture

“Think of your digital security like locking up your house; you don’t need a high-tech fortress to stay safe, you just need to make sure you didn’t leave the back door wide open and the keys under the mat.”

Nathan Cole

Wrapping It All Up

Wrapping It All Up: Digital security tips.

Look, I know we just went through a lot of technical ground, but if you take away nothing else, just remember that security doesn’t have to be an all-or-nothing game. By setting up a solid password manager and turning on two-factor authentication, you’ve already done more than most people out there. You’ve essentially put a deadbolt on your digital front door instead of just relying on a flimsy latch. It might take a little bit of tinkering to get everything synced up and running smoothly, but once those systems are in place, they work in the background so you don’t have to constantly worry about it.

At the end of the day, my goal isn’t to turn you into a cybersecurity expert, but to help you feel like you’ve got a handle on your own life. Technology can feel overwhelming and, frankly, a little intimidating sometimes, but nothing is too complicated to figure out if you take it one step at a time. Don’t feel like you have to fix every single account by tonight; just pick one, get it secured, and move to the next one tomorrow. You’ve got this, and honestly, the peace of mind you’ll get from knowing your data is safe is well worth the effort.

Frequently Asked Questions

What happens if I lose my phone and can't get my two-factor authentication codes?

Look, I’ve been there—dropping a phone in a puddle or leaving it in a taxi is a total nightmare. If you’re locked out of your 2FA, don’t panic. First, hunt down those “backup codes” you (hopefully) saved when you set everything up. If those are gone, you’ll have to use the “account recovery” option on the site. It can be a bit of a grind, but just take it one step at a time.

Is it actually safe to keep all my sensitive passwords in one single app?

Look, I get it. It feels a little sketchy, right? Like putting all your eggs in one basket. But honestly, it’s much safer than the alternative—which is usually using “Password123” for everything. Think of a password manager like a heavy-duty deadbolt on your front door. Even if someone gets the key, they still have to deal with your two-factor authentication. It’s a much better trade-off than trying to remember fifty different codes yourself.

How often should I really be changing my passwords to stay ahead of hackers?

Honestly? If you’re using a solid password manager and unique, complex passwords for every site, you don’t need to go on a frantic changing spree every month. That’s just busywork. Instead, focus on “event-based” changes. If you get a notification about a data breach, or if you notice something weird with your login, change it immediately. Think of it like changing your oil—you don’t do it every Tuesday, you do it when the sensor tells you or when you’ve put in the miles.

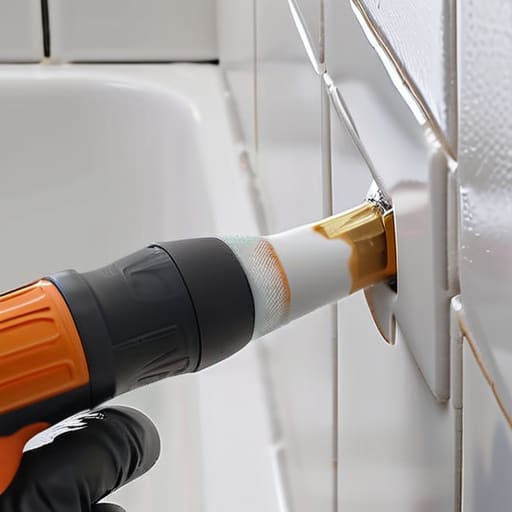
Professional guide on how to caulk.

How to Caulk Like a Pro (without the Mess)

I remember standing in my first apartment, staring at a jagged, moldy mess around the bathtub, feeling like I was staring at a professional-grade disaster. I honestly thought that learning how to caulk required some kind of secret, steady-handed wizardry that I just didn’t possess. I spent an hour at the hardware store—which, let’s be real, is my happy place—just trying to figure out why every tube of silicone looked exactly the same. But here’s the truth I learned the hard way: it’s not about having a surgeon’s hands; it’s about having the right setup and a little bit of patience.

If you’ve ever ended up with a wobbly, uneven bead of goo that looks more like a slug than a seal, don’t sweat it. I’m going to walk you through my personal, no-nonsense method for getting a clean, professional line without the headache. We’ll cover everything from picking the right stuff at the store to that final, satisfying smoothing step. By the time we’re done, you’ll realize that mastering how to caulk is actually totally figure-out-able, and your bathroom will look a whole lot better for it.

Table of Contents

Guide Overview

Total Time: 1-2 hours
Estimated Cost: $20-40
Difficulty: Beginner

Tools & Supplies

  • Caulking gun to apply the sealant
  • Caulk removal tool or utility knife to scrape old material
  • Small bucket or container for cleaning
  • Caulk tube (Silicone or Acrylic depending on surface)
  • Painter's tape for clean lines
  • Cleaning solution or rubbing alcohol to prep surface

Step-by-Step Instructions

  • 1. First things first, you’ve gotta get that surface ready. If you’re working over old, crusty caulk, don’t even try to layer new stuff on top of it—it’ll just peel off in a week. Grab a utility knife and carefully scrape away the old stuff until you’re down to the bare surface. Once that’s done, grab a damp rag and wipe it down with a bit of rubbing alcohol to make sure there’s no grease or dust left behind. If the surface isn’t bone dry before you start, nothing is going to stick.
  • 2. Next, you need to prep your caulk tube. Most people just jam the nozzle into the gun and go, but I’ve learned that’s a recipe for a mess. Cut the tip of the tube at a 45-degree angle, and keep the cut small to start. You want a tiny opening so you can control the flow. If the hole is too big right out of the gate, you’ll end up with a giant glob that’s a pain to clean up.
  • 3. Now, grab your caulk gun and load it up. Position the nozzle so it’s resting right against the corner or the gap you’re trying to fill. As you squeeze the trigger, move the gun at a steady, even pace along the line. Think of it like drawing a line with a pen; if you go too fast, the bead will be thin and won’t fill the gap, and if you go too slow, you’ll get a huge bulge. It’s all about that consistent pressure.
  • 4. Once you’ve laid down a bead, it’s time for the “magic” part: smoothing it out. Don’t just stare at it—get to work while it’s still wet. I like to use a small container of water or a spray bottle with a little bit of dish soap in it. Dip your finger in the soapy water and lightly run it along the bead to flatten it out. The soap is the secret sauce here because it prevents the caulk from sticking to your skin, which keeps the line looking sharp instead of messy.
  • 5. Don’t overdo the smoothing, though. If you go back and forth too many times, you’ll actually pull the caulk out of the gap you just filled. Just one or two smooth, decisive passes is usually all you need to get that professional look. If you see a little drip or a bump, don’t panic; just wet your finger and try to blend it in one more time.
  • 6. Finally, just step back and let it do its thing. Most silicone-based caulks need at least 24 hours to fully cure before you should get them wet or put any stress on them. I know it’s tempting to go back and check it every hour, but patience is your best friend here. Cover it with a piece of painter’s tape if you’re worried about dust landing in it while it dries.

First Clear the Way by Removing Old Caulk

First Clear the Way by Removing Old Caulk.

Look, I know it sounds like the most tedious part of the job, but you cannot skip this. If you try to lay new sealant right on top of the old stuff, it’s going to peel off faster than a cheap sticker. You’re essentially building a house on sand if you don’t start with a clean slate. I usually grab a sharp utility knife or a specialized caulk removal tool to get the bulk of it out. When I’m removing old caulk from around a sink or window, I try to be careful not to gouge the surrounding surface, but you’ve gotta be thorough.

Once the heavy lifting is done, don’t just call it a day. You’ll likely find tiny, stubborn bits of residue stuck in the corners. I like to use a stiff nylon brush or even a little bit of rubbing alcohol on a rag to really scrub that gap clean. This is especially huge when you’re caulking bathtub seams, because any leftover grime or soap scum will prevent a watertight seal. If that surface isn’t bone-dry and spotless, your new bead won’t stick, and you’ll be right back where you started.

Choosing Your Weapon Silicone vs Acrylic Caulk

Choosing Your Weapon Silicone vs Acrylic Caulk

Before you head to the hardware store, you’ve got to make a choice. Walking down that aisle, you’ll see a dozen different tubes, but it usually boils down to the classic debate of silicone vs acrylic caulk. If you’re working on something that’s constantly getting soaked, like caulking bathtub seams or kitchen backsplash areas, you want silicone. It’s waterproof, flexible, and stays looking good even when the house shifts a little. It’s your best bet for preventing water damage in those high-moisture zones.

Now, acrylic is a different beast. It’s much easier to work with because you can wipe away mistakes with a damp rag before it sets, making it a solid choice for baseboards or window frames where water isn’t a constant threat. The trade-off? It’s not as flexible or water-resistant as silicone. My rule of thumb is simple: if it’s going to get wet, go silicone; if it’s just for looks and trim, acrylic is your friend. Just make sure you grab the right one for the job so you don’t have to do this all over again next year.

Pro Moves to Keep Your Caulking From Looking Like a Mess

  • Don’t skip the masking tape. If you’re worried about your steady hand, run two strips of painter’s tape along both sides of the gap first. It keeps your lines razor-sharp, and you just peel them off when you’re done.
  • Keep a wet rag handy. No matter how careful you are, a little bit of caulk is bound to end up where it shouldn’t. Having a damp cloth ready to wipe away the excess immediately saves you a massive headache later.
  • Use a caulking tool or your finger, but don’t overdo it. I usually dip my finger in a little bit of soapy water before smoothing the bead. It helps the caulk glide instead of sticking to your skin and making a mess.
  • Watch your pressure. If you’re using a caulk gun, try to keep a steady, even squeeze. If you pump it too fast, you’ll get huge blobs; too slow, and you’ll end up with gaps that look like Swiss cheese.
  • Give it time to breathe. It’s tempting to run the shower or hit the sink right away, but resist that urge. Let it cure for the full time recommended on the tube so you don’t end up washing away all your hard work.

Quick Wins for a Clean Finish

Don’t rush the prep work; if you leave old, crusty caulk behind, your new bead is going to look a mess no matter how good your technique is.

Pick the right tool for the job, whether it’s silicone for that wet bathroom environment or acrylic for your indoor trim, so you aren’t fighting the material later.

Remember that it’s okay to mess up a bead—just wipe it away while it’s wet and try again. It’s all part of the learning process.

My Golden Rule for a Clean Finish

“Look, nobody’s going to win a beauty pageant for the neatest bead of caulk, but if you take the time to prep the surface and don’t rush the smoothing, you’ll end up with a seal that actually works instead of just looking like a mess.”

Nathan Cole

Finishing Strong

Applying sealant while finishing strong.

Once you’ve scraped away that old, crusty residue and picked the right tube for the job, the hard part is actually behind you. Just remember that a little patience goes a long way; don’t rush the application or skip the smoothing step with your finger or a tool. Whether you went with the heavy-duty silicone for your shower or a quicker acrylic for some baseboards, the goal is a clean, consistent bead that keeps the water out and the mess at bay. If you end up with a little extra mess on the edges, don’t sweat it—just wipe it away while it’s still wet and try again on the next section.

I know that looking at a messy gap can feel a bit intimidating at first, but honestly, it’s one of those small wins that makes a massive difference in how your home feels. There is something incredibly satisfying about looking at a freshly sealed sink or bathtub and knowing you didn’t have to call a pro to get it done. It’s not about being a master craftsman; it’s just about taking care of your space one step at a time. So, grab your caulk gun, take a deep breath, and get to it. You’ve totally got this!

Frequently Asked Questions

How long do I actually have to wait before I can get the area wet again?

The short answer? Don’t touch it with water for at least 24 hours. I know, waiting feels like forever when you just want your shower back, but patience is your best tool here. If you’re using silicone, it might feel “dry” to the touch in an hour, but it hasn’t actually cured deep down yet. Give it a full day to set properly so you aren’t dealing with a peeling mess next week.

Is there a trick to getting a smooth bead without making a huge mess on my tiles?

Honestly, I used to make a total disaster of this until I learned the finger trick. Here’s the secret: keep a small spray bottle of soapy water handy. Once you lay down your bead, lightly mist it with the soapy water. Then, dip your finger in that same mix and run it along the line. The soap prevents the caulk from sticking to your skin, letting you glide through for a smooth finish without the mess.

What do I do if I mess up the first pass and the line looks totally wonky?

Don’t sweat it—we’ve all been there. I once tried to caulk a backsplash and it looked like a jagged mountain range. If the line looks wonky, don’t try to just smear it more; you’ll just make a bigger mess. Grab a damp rag or a finger dipped in soapy water and smooth it out immediately. If it’s really bad, just wipe it all away with a putty knife and start that section over.

Using the eat the frog method.

Eat the Frog: Why You Should Do the Hard Thing First

I remember sitting at my kitchen table three years ago, staring at a pile of overdue invoices and a laptop that felt like it weighed fifty pounds. I had spent the entire morning “preparing” to work—organizing my pens, cleaning my screen, and checking my email for the tenth time—just to avoid the one massive, soul-crushing project that actually mattered. I was paralyzed by the sheer size of it, and honestly, most productivity gurus make it sound like you need a complex digital ecosystem or a $50 planner to fix that feeling. But the truth is, I didn’t need a new app; I just needed to figure out how to actually eat the frog method without feeling like I was swallowing a live animal.

I’m not here to sell you on some magical morning ritual that requires waking up at 4:00 AM or drinking green sludge. I just want to show you how to stop procrastinating by breaking that big, scary task into something you can actually handle. I’ve spent years tinkering with my own messy schedules, and I’ve boiled this down to a few no-nonsense steps that work in the real world. We’re going to get that heavy lifting out of the way early so you can actually enjoy your evening without that nagging sense of guilt hanging over your head.

Table of Contents

Breaking Down Big Tasks Using Brian Tracy Productivity Techniques

Breaking Down Big Tasks Using Brian Tracy Productivity Techniques

Now, I’m not just making this up as I go; there’s some real science behind this. A lot of what I do comes down to Brian Tracy productivity techniques, specifically his idea that your biggest, most daunting task is usually the one that moves the needle the most. If you’ve ever sat at your desk staring at a project that feels like a mountain, you know the feeling. The trick isn’t to climb the whole thing at once, but to look at the individual rocks. When I’m tackling a massive home renovation or a complex coding project, I use these strategies to stop the “paralysis by analysis” that keeps me from even starting.

To make this work, you have to get serious about prioritizing daily tasks before you even touch your coffee. I like to grab a scrap of paper—or a digital note if you’re that kind of person—and list out everything. Then, I circle the one thing that, if finished, would make me feel like the day was a win. That’s your frog. By focusing on that single item, you’re essentially using overcoming procrastination strategies to build momentum before the mid-afternoon slump hits.

Prioritizing Daily Tasks Without the Overwhelming Stress

Prioritizing Daily Tasks Without the Overwhelming Stress

Look, I’ve been there—sitting at my kitchen table with a coffee in one hand and a notebook in the other, staring at a list so long it felt like a grocery receipt from a small country. When you have twenty things to do, everything feels like a priority, which usually means nothing actually gets done. To stop the spiral, you have to stop treating your to-do list like a flat line. Instead, start prioritizing daily tasks by looking for the one item that, if finished, makes everything else easier or even unnecessary.

I like to use a simple “must, should, could” system to keep the stress from creeping in. I grab my notebook every morning and pick my “must”—that’s my frog. Once that’s handled, I move to the “shoulds.” This isn’t about complex time management for professionals or some high-tech app; it’s just about being honest with yourself about what actually moves the needle. If you can nail that one big thing before lunch, you’ve already won the day, and the rest is just gravy.

5 Ways to Actually Get That Frog Down Your Throat

  • Prep your workspace the night before. I’ve learned the hard way that if I spend twenty minutes hunting for a specific screwdriver or a lost charging cable, I’ll lose my momentum before I even touch the big task. Lay everything out so you can hit the ground running.
  • Don’t aim for perfection on the first pass. If your “frog” is a massive project, like cleaning out the garage or writing a huge report, don’t try to make it flawless right away. Just get the messy, ugly version done. You can always go back and polish it later, but getting the bulk of it out of the way is the real win.
  • Use a “buffer” task if you’re really stuck. Sometimes the frog feels too big to even look at. If you’re paralyzed, spend five minutes doing something tiny—like clearing your desk or answering one quick email—just to get your brain into “doing mode” before you tackle the heavy hitter.
  • Turn off the digital noise. You can’t eat a frog if your phone is buzzing every thirty seconds with notifications. Put it in another room or flip it face down. Treat that first hour of your day like a deep-work zone where nothing else exists except you and the task at hand.
  • Reward yourself when it’s over. This sounds simple, but it works. Once that big, scary task is checked off, give yourself a win. Whether it’s a decent cup of coffee, ten minutes of scrolling, or just a literal pat on the back, acknowledge that you did the hard part. It makes tomorrow’s frog a lot easier to swallow.

The Bottom Line: How to Actually Make This Work

Don’t let the big stuff paralyze you; identify your “frog” the night before so you can hit the ground running without wasting morning brainpower on deciding what to do.

Keep your momentum by tackling the hardest, most annoying task first—once that’s out of the way, everything else on your list feels like a breeze.

Be kind to yourself if you slip up, but remember that productivity isn’t about being perfect, it’s just about making sure the most important job doesn’t get pushed to tomorrow.

## The Real Secret to Getting Things Done

“Look, I know that feeling when you’ve got a project hanging over your head like a dark cloud all day. It drains your battery before you even start. But once you just bite the bullet and tackle that one nasty, difficult task first thing in the morning, everything else suddenly feels like a breeze. You aren’t just checking a box; you’re winning the day.”

Nathan Cole

Getting Your Hands Dirty

Getting Your Hands Dirty with productivity.

Look, I know it sounds a bit gross, but once you actually start using the Eat the Frog method, you’ll realize it’s less about the weird metaphor and more about taking control of your momentum. We’ve walked through how to break those massive, terrifying projects into bite-sized chunks and how to rank your to-do list so you aren’t just spinning your wheels on easy stuff. It’s about identifying that one heavy, annoying task that’s sitting in the back of your mind like a loose floorboard and finally dealing with it head-on before your coffee even gets cold. When you stop procrastinating on the big stuff, the rest of your day stops feeling like a constant uphill climb.

At the end of the day, I’ve learned through plenty of DIY fails and messy schedules that perfection is a trap. You don’t need a color-coded digital planner or a degree in time management to make this work; you just need the guts to start the hard thing first. Don’t let that “frog” sit on your plate all day until it gets even harder to swallow. Just grab your metaphorical spoon, dive in, and get it done. I promise you, that feeling of crossing off your hardest task by 9:00 AM is better than any caffeine kick you’ll ever get. You’ve got this.

Frequently Asked Questions

What if my "frog" is actually a series of tiny, annoying tasks instead of one big project?

I get it—sometimes the “frog” isn’t a giant project, but a swarm of tiny, buzzing gnats like unreturned emails or a messy inbox. Honestly? Those can be even more draining because they nibble at your brain all day. My trick is to group them. Pick a timer, set it for 20 minutes, and go on a “micro-task blitz.” Knock out as many as you can in one go. Once they’re dead, they’re dead.

Do I really have to do the hardest thing first thing in the morning, or can I tackle it later if I'm not a morning person?

Look, I’m not a “5:00 AM sunrise jogger” kind of guy, so I get it. If you’re a night owl, forcing a massive task onto your brain at dawn might just result in a staring contest with your screen. The “frog” isn’t about the clock; it’s about momentum. If your brain actually clicks into gear at 2:00 PM, tackle it then. Just don’t let it sit there all day, or it’ll haunt you.

How do I stop myself from procrastinating on the frog and just scrolling through my phone instead?

Look, I get it. That phone is a total siren song when a task feels heavy. My trick? Put the damn thing in another room before you even sit down. If it’s right next to you, you’ve already lost. I also use a “five-minute rule”: tell yourself you’ll only work on the frog for five minutes. Usually, once the engine’s running, the urge to scroll disappears. Just get moving first.

Tips on how to cook vegetables.

How to Cook Vegetables So They Actually Taste Great

I still remember sitting in my tiny first apartment, staring down a limp, sad-looking head of broccoli like it was a broken radiator I didn’t have the tools to fix. I’d tried following those fancy, over-complicated recipes online that required “emulsion techniques” and expensive oils, only to end up with a mushy, grey mess that tasted like nothing. It turns out, most of the high-end culinary advice out there makes learning how to cook vegetables feel way harder than it actually is. You don’t need a culinary degree or a kitchen full of gadgets to make something decent; you just need to stop treating your produce like it’s fragile.

I’m not here to give you a lecture on molecular gastronomy or sell you some overpriced spice kit. My goal is to show you that once you master a few basic, reliable methods, you can turn almost anything from the produce aisle into a solid meal. I’m going to break this down into simple, repeatable steps that work every single time, whether you’re roasting, steaming, or pan-searing. We’re going to strip away the fluff and focus on what actually works so you can get real food on the table without the headache.

Table of Contents

Mastering Healthy Vegetable Preparation Methods Without the Stress

Mastering Healthy Vegetable Preparation Methods Without the Stress

Look, I used to think “healthy” meant eating bland, sad-looking steamed broccoli that tasted like nothing. But after years of messing around in my own kitchen, I’ve learned that the secret isn’t about deprivation; it’s about choosing the right approach for the job. When you’re looking at healthy vegetable preparation methods, you really only need to master a couple of basics. If you’re in a massive rush, steaming is your best friend because it’s fast and keeps things light. However, if you actually want flavor, you’ve got to embrace the oven.

I’m a huge fan of the steaming vs roasting vegetables debate, and honestly, I usually land on roasting every single time. Roasting caramelizes the natural sugars, which turns a boring carrot into something that actually tastes like a treat. To do it right, you don’t need a kitchen full of fancy gadgets—just a sturdy sheet pan and a good knife. Once you get the hang of it, you’ll realize that making quick vegetable side dishes doesn’t have to be a chore; it’s just about letting heat and a little seasoning do the heavy lifting for you.

The Essential Vegetable Cooking Tools You Actually Need

The Essential Vegetable Cooking Tools You Actually Need

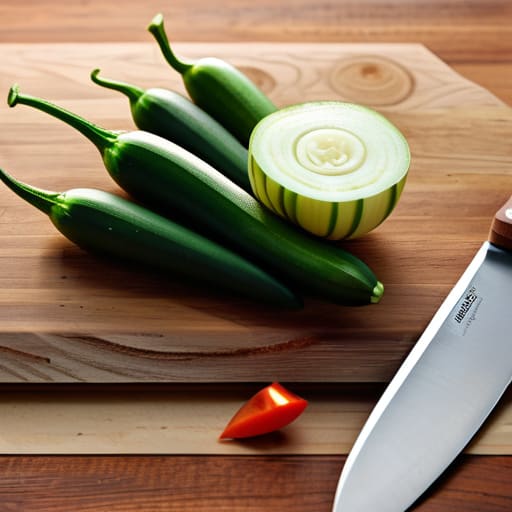
Look, I’ve walked into more hardware and kitchen stores than I’d care to admit, and if there’s one thing I’ve learned, it’s that you don’t need a kitchen full of expensive gadgets to get the job done. You really just need a few solid pieces of gear that won’t quit on you. For me, a heavy-duty chef’s knife is the absolute MVP. If your knife is dull, you’re going to struggle with everything from slicing peppers to dicing onions, and that’s when accidents happen. Pair that with a sturdy wooden cutting board, and you’re already halfway to mastering different healthy vegetable preparation methods.

Next up, let’s talk heat. If you want to experiment with steaming vs roasting vegetables, you’re going to want a reliable stainless steel sheet pan and a good steamer basket. A sheet pan is your best friend for those crispy, caramelized edges we all love, while a basket helps you keep things light and fresh. Throw in a high-quality cast iron skillet or a simple non-stick pan, and you’ve got the essential vegetable cooking tools to tackle pretty much any recipe I throw at you.

5 Pro Tips to Stop Making Mushy, Boring Veggies

  • Don’t crowd the pan. I learned this the hard way back when I was first learning to cook. If you throw a mountain of broccoli into a small skillet, it’s just going to steam in its own moisture and turn into a soggy mess. Give your veggies some breathing room so they actually get that nice, golden-brown sear.
  • Salt your water like the sea. If you’re boiling potatoes or blanching green beans, don’t be shy with the salt. You want to season the vegetable from the inside out while it’s cooking, not just toss salt on top at the very end when it’s already lost its flavor.
  • Respect the “hard” and “soft” rule. You can’t throw carrots and spinach into a pan at the same time and expect magic to happen. Start with the tough stuff—like root vegetables or thick stalks—and add the delicate greens in the last couple of minutes. It takes a little timing, but it makes a world of difference.
  • Use high heat for flavor. If you want that restaurant-quality char, don’t be afraid to crank up the heat a bit. Searing vegetables quickly at a higher temperature locks in the texture and brings out those natural sugars that make them taste sweet instead of just “healthy.”
  • Acid is your secret weapon. This is the one tip most people miss. If your roasted veggies taste a little “flat” or dull, don’t just reach for more salt. Squeeze a little fresh lemon juice or add a tiny splash of balsamic vinegar right before serving. That hit of acid wakes everything up.

The Bottom Line: Keep It Simple

Don’t sweat the fancy gear; a sharp knife and a decent pan are 90% of the battle.

Focus on texture and seasoning rather than complex recipes—salt, fat, and heat do the heavy lifting.

Start small with one or two veggies at a time so you don’t get overwhelmed in the kitchen.

My Golden Rule for the Kitchen

“Look, you don’t need a culinary degree or a kitchen full of fancy gadgets to make veggies taste great; you just need to stop treating them like an afterthought and start treating them like the main event—a little heat, a bit of seasoning, and a lot less fear goes a long way.”

Nathan Cole

Getting Stuck In

Getting stuck in with delicious vegetable cooking.

At the end of the day, cooking vegetables isn’t about following a rigid, scientific formula or owning every single gadget in the kitchen catalog. It’s about knowing that a sharp knife, a decent pan, and a little bit of heat can turn something boring into something actually delicious. We’ve covered how to prep them without losing your mind, the few essential tools that actually make a difference, and how to pick a method—whether it’s roasting for crunch or steaming for lightness—that fits your mood. Just remember: don’t be afraid to play with salt, fat, and acid. Once you realize that most veggies are incredibly forgiving, the intimidation factor just disappears.

Look, I know there are nights when the thought of chopping up a pile of broccoli feels like a massive chore. But I promise you, once you get that first bite of a perfectly seasoned, golden-brown roasted carrot, you’re going to feel like a total pro. Cooking is a skill just like fixing a leaky sink or wiring a new lamp; it takes a little practice, but it’s totally figure-out-able. So, grab whatever is sitting in your crisper drawer, get it into a pan, and just start. You’ve got this, and honestly, your body (and your taste buds) will thank you for it.

Frequently Asked Questions

How do I keep my veggies from turning into a mushy, overcooked mess?

Look, we’ve all been there—you’re trying to be healthy, and suddenly your broccoli looks like green sludge. The secret is heat and timing. First, don’t crowd the pan; if things are too packed, they steam instead of sear. Second, start with high heat to get a nice crust, then dial it back. Most importantly, test them! Poke a fork in; if it goes in with just a little resistance, pull them off the heat immediately.

Is there a trick to getting that perfect roasted texture without using a ton of expensive oils?

Honestly, I used to drown my veggies in oil thinking it was the only way to get that crunch, but I was wrong. The real secret? Don’t crowd the pan. If your veggies are touching, they’ll steam instead of roast, leaving you with a soggy mess. Toss them in a bowl with just enough oil to coat them lightly, spread them out on a sheet pan, and let the oven heat do the heavy lifting.

I’m always in a rush—what are the quickest ways to cook vegetables when I only have ten minutes for dinner?

Look, I get it. Some nights, the last thing you want to do is spend forty minutes hovering over a stove. When I’m in a rush, I lean on two things: high heat and small cuts. Toss some frozen peas or pre-sliced peppers into a screaming hot pan with a bit of oil—that’s a three-minute sauté right there. Or, just throw some broccoli in the microwave with a splash of water. Fast, easy, and done.

Guide on how to write a professional email.

How to Write Professional Emails People Actually Reply to

I remember sitting in my first real office job, staring at a blinking cursor for twenty minutes, sweating through my shirt because I was terrified that one wrong word would make me look like an amateur. I’d seen those “expert” career coaches online claiming you need a PhD in linguistics or a dozen fancy templates to sound competent, but honestly? That’s just expensive noise. Learning how to write a professional email isn’t about using big, stuffy words that make you sound like a 19th-century lawyer; it’s about being clear, being respectful, and getting to the point without sounding like a robot.

I’m not here to give you a lecture on corporate jargon or teach you how to write a novel every time you need to ask for a meeting. Instead, I’m going to break this down into a few practical, repeatable steps that actually work in the real world. I’ll show you how to structure your thoughts, nail the subject line, and hit that send button with total confidence. We’re going to strip away the fluff and focus on the simple mechanics so you can get back to your actual work.

Table of Contents

Mastering the Business Email Structure Without the Stress

Mastering the Business Email Structure Without the Stress

Think of a business email like a well-organized toolbox. You wouldn’t just toss a hammer, a screwdriver, and a handful of loose nails into a pile and call it a kit; you need a place for everything so you can actually find what you need. The same goes for your business email structure. You want a clear subject line that acts like a label on a bin, a polite greeting to open the door, a concise middle section where you get to the point, and a sign-off that doesn’t leave things hanging.

When you’re figuring out the formal vs informal email tone, I always tell people to err on the side of being a little too polite rather than too casual. If you’re emailing a boss or a new client, keep it tight. Avoid those common email etiquette mistakes like using too many exclamation points or writing a novel when a sentence would do. Keep your sentences punchy and your goal clear. Once you nail this basic framework, you’ll find that you spend way less time staring at a blinking cursor and more time actually getting your work done.

Crafting Professional Email Subject Lines That Actually Get Opened

Crafting Professional Email Subject Lines That Actually Get Opened

Think of your subject line as the front door to your message. If it looks broken or confusing, nobody is going to want to walk inside. I’ve definitely been guilty of leaving the subject line blank or just typing “Hey” in the past, but that’s one of those common email etiquette mistakes that makes you look a bit disorganized. Instead, you want to give the person on the other end a clear “preview” of what’s coming. A good rule of thumb is to keep it under six or seven words so it doesn’t get cut off on a smartphone screen.

When you’re working on your professional email subject lines, aim for a balance of clarity and urgency. If you’re reaching out about a specific project, include the project name right there in the title. If you’re writing professional follow-up emails after a meeting, mention the date or the specific topic you discussed. It’s all about making the recipient’s life easier. If they can tell exactly what you need before they even click “open,” you’ve already won half the battle.

Five Simple Rules to Keep Your Emails from Looking Like a Hot Mess

  • Keep it short and sweet. I know it’s tempting to write a novel when you’re explaining a problem, but most people are skimming. Get to the point in the first two sentences so they don’t have to go hunting for your actual request.
  • Watch your tone like you would a delicate recipe. Without seeing your face, people can easily mistake “directness” for “rudeness.” I always do a quick read-through to make sure I don’t sound like I’m barking orders.
  • The “One Goal” rule. Try to stick to one main topic per email. If you start jumping from a project update to a request for time off to a question about lunch, things are going to get lost in the shuffle.
  • Proofread, but don’t obsess. You don’t need a PhD in English, but a quick scan for “your” vs “you’re” saves you a lot of headache. I usually read my draft out loud once—if it sounds weird to my ears, it’ll look weird to theirs.
  • Always include a clear call to action. Don’t leave them guessing. Instead of saying “Let me know what you think,” try “Can you confirm if this works by Thursday at 3 PM?” It takes the guesswork out of it for everyone.

Quick Wins for Your Next Inbox Win

Keep it simple and structured; if you follow a clear layout, you won’t have to second-guess your tone halfway through.

Treat your subject line like a headline—make it clear and punchy so the person on the other end knows exactly why they’re clicking.

Don’t overthink the “professional” part; as long as you’re clear, respectful, and get to the point, you’re already ahead of most people.

## The Golden Rule of the Inbox

“Think of a professional email like a well-organized toolbox: you don’t need a million fancy gadgets, you just need the right tools in the right order so the person on the other end can find exactly what they need without digging through the junk.”

Nathan Cole

You’ve Got This

Mastering professional emails: You’ve Got This.

At the end of the day, writing a professional email isn’t about using big, fancy words to sound like a textbook. It’s really just about getting your point across clearly and respecting the person on the other side of the screen. We’ve covered how to build a solid structure, how to keep your tone from getting weird, and how to write those subject lines that actually make people want to click. If you can nail the basics—clear subject lines, a polite greeting, and a direct ask—you’re already ahead of most people in my inbox. Just remember to read it over once before you hit send; it’s the digital equivalent of double-checking that you actually turned the stove off before leaving the house.

I know that staring at a blank compose window can feel a bit daunting, especially if you’re worried about coming off the wrong way. But honestly? Most people are just looking for information and clarity, not a masterpiece of literature. Don’t let the fear of a typo or a slightly awkward sentence stop you from reaching out. Think of it like any other DIY project: you might not get it perfect on the first try, but with a little practice, you’ll find your rhythm. You are more than capable of handling this, so stop overthinking it and just get that message sent.

Frequently Asked Questions

How do I know when it's okay to be a little more casual or use an emoji?

Look, I get it—the line between “professional” and “stiff” can feel blurry. My rule of thumb? Read the room. If your boss or client uses a smiley face or keeps things breezy, you’ve got the green light to relax a bit. But if they’re all business, stick to the basics. I usually save emojis for people I’ve worked with for a while. When in doubt, err on the side of being a little more formal.

What should I do if I realize I made a huge mistake or a typo right after hitting send?

We’ve all been there—that instant pit in your stomach when you realize you just sent a typo or, worse, the wrong attachment. First, take a breath. Don’t panic-send five more emails. If it’s a small typo, let it go; most people won’t notice. If it’s a big one, like the wrong file or a major error, send a quick, polite follow-up immediately. Just say, “Apologies, please use this version instead.” Keep it brief, fix it, and move on.

Is there a limit to how long my email should be before I start losing people's attention?

Look, I’ve been there—staring at a screen, typing out a novel and wondering if I’ve gone too far. Here’s the truth: if your email looks like a wall of text, people are going to skim it or, worse, ignore it entirely. Aim for brevity. If you can say it in three short paragraphs instead of six, do it. Keep your main point front and center, and if it gets too long, just use bullet points.

Tips on how to use leftovers.

Clever Ways to Turn Leftovers Into New Meals

I’ve spent way too many nights staring into a fridge full of Tupperware, feeling like I was looking at a graveyard of wasted money rather than a meal. There’s this annoying myth floating around that you need some fancy culinary degree or a kitchen full of expensive gadgets to master how to use leftovers effectively. Honestly? That’s total nonsense. I used to think that if I wasn’t making some elaborate, gourmet “reconstructed” dish, I was failing, but I eventually realized that most of those high-end cooking shows are just overcomplicating things for the sake of drama.

I’m not here to give you any of that fluff. My goal is to show you that you can turn last night’s boring roasted chicken or that half-bag of wilted spinach into a solid, filling meal without spending an extra dime or an hour of your life. I’m going to break this down into simple, repeatable moves that actually work in a real kitchen. We’re going to stop treating old food like a chore and start treating it like the secret weapon it actually is for your budget and your schedule.

Table of Contents

Smart Food Waste Reduction Tips for Every Kitchen

Smart Food Waste Reduction Tips for Every Kitchen

Look, I’ve spent plenty of nights staring into a fridge full of random containers, wondering if I’m actually looking at dinner or just a science project. The trick isn’t just about throwing things in a Tupperware; it’s about having a game plan for repurposing cooked proteins. If you’ve got leftover steak or roasted chicken, don’t just reheat it until it’s dry as a desert. Instead, shred it for tacos or toss it into a quick stir-fry. It’s one of those creative kitchen hacks that saves you twenty minutes of prep time the next day.

Another thing I’ve learned from years of trial and error is that organization is half the battle. If you aren’t storing leftovers safely in airtight containers right away, you’re basically asking for them to go bad by Tuesday. I like to keep a “Use Me First” bin in the fridge for anything that’s nearing its expiration. This simple habit is one of my favorite food waste reduction tips because it takes the guesswork out of your morning routine. When you see that container front and center, you know exactly what’s for lunch.

Storing Leftovers Safely to Keep Everything Fresh

Storing Leftovers Safely to Keep Everything Fresh

Look, I’ve learned the hard way that if you don’t treat your leftovers right from the jump, you’re basically just prepping them for the trash can. I used to just shove whatever was left in a mismatched plastic tub and hope for the best, but that’s a recipe for soggy, sad meals. If you want to master storing leftovers safely, you’ve got to get a little more strategic. Invest in a few decent, airtight glass containers. They don’t hold onto smells like plastic does, and they keep things way fresher when you’re ready to dive back in.

Once you’ve got the storage part down, the real magic happens when you start repurposing cooked proteins. Instead of just reheating that same piece of chicken for the third time, treat it like a building block. A piece of steak becomes the star of a quick steak salad, or some roasted veggies can be tossed into a morning omelet. Think of your fridge as a pantry of ingredients rather than just a collection of “old food.” It’s one of those simple creative kitchen hacks that makes your life a whole lot easier during a busy work week.

5 Ways to Turn "Old" Food Into a Brand New Meal

  • Embrace the “Bowl Method.” If you’ve got a random assortment of leftovers—maybe some roasted veggies, a bit of leftover rice, and some grilled chicken—don’t try to recreate the original dish. Just throw them all into a bowl, top them with a fried egg or some hot sauce, and call it a “power bowl.” It’s fast, healthy, and saves you from staring blankly at the fridge.
  • Master the Art of the Frittata. This is my absolute favorite trick for when the fridge looks a little sad. Grab whatever leftover veggies, meats, or even that half-bag of spinach, toss them in a pan with some whisked eggs, and cook it up. It’s basically a way to turn “scraps” into a fancy-looking brunch that feels intentional rather than accidental.
  • Build a “Kitchen Sink” Soup. When you have small amounts of different things left over—a little bit of broth, some wilted greens, or a few chunks of sausage—they are perfect for a soup. Chop everything into bite-sized pieces, simmer it in a pot, and you’ve got a warm, comforting meal that costs you zero extra dollars.
  • Use Leftovers as “Flavor Boosters.” You don’t always need a full plate of leftovers to make a meal better. That extra bit of cooked quinoa can be tossed into a salad for texture, or a small amount of leftover taco meat can be folded into some scrambled eggs in the morning. Think of your leftovers as ingredients rather than just “old food.”
  • The Sandwich Upgrade. Stop settling for boring peanut butter and jelly. If you have leftover roasted turkey, pulled pork, or even just some sautéed mushrooms, put them between two slices of good bread with a bit of cheese. It turns a quick lunch into something that actually feels like a real meal, and it beats hitting the drive-thru every single day.

The Bottom Line: Making Leftovers Work for You

Stop treating leftovers like a chore; view them as a head start on your next meal so you can spend less time cooking and more time relaxing.

Invest in a few decent, airtight containers—it’s a small upfront cost that pays for itself by keeping your food from turning into science experiments in the fridge.

Get creative with your “repurposing” instead of just reheating; a little bit of spice or a different texture can make last night’s roast feel like a brand-new dish.

## The Golden Rule of the Fridge

“Leftovers aren’t just ‘old food’ waiting for their expiration date; they’re actually prepped ingredients for your next meal. If you stop looking at them as leftovers and start seeing them as a head start, you’ll save a ton of money and a lot of time in the kitchen.”

Nathan Cole

Making It Work for You

Making It Work for You with leftovers.

At the end of the day, mastering your leftovers is really just about a little bit of foresight and some smart organization. We’ve covered how to keep your food fresh with proper storage, how to slash your grocery bill by reducing waste, and a few ways to get creative so you aren’t just eating the same bland meal three nights in a row. It’s not about being a gourmet chef; it’s about working smarter, not harder in the kitchen. When you treat those extra portions as ingredients for your next meal rather than just “old food,” you’re saving time, money, and a whole lot of mental energy during those busy weeknights when you’d otherwise be staring blankly at the fridge.

I know it can feel a bit overwhelming when you first start trying to change your kitchen habits, but don’t feel like you have to overhaul everything overnight. Start small—maybe just by repurposing one single protein or committing to better container storage. I promise you, once you see that extra bit of roasted chicken turn into a killer taco night, you’ll feel that little win. Most things in life are just a matter of breaking them down into manageable steps, and your kitchen is no different. So, go ahead, dive into those containers, and show that leftovers who’s boss!

Frequently Asked Questions

How long can I actually keep these leftovers in the fridge before they become a science project?

Look, I’ve definitely been there—staring at a Tupperware container in the back of the fridge like it’s a ticking time bomb. As a rule of thumb, most cooked leftovers are good for about three to four days. After that, you’re playing Russian roulette with your stomach. If it smells funky, looks slimy, or has even a hint of fuzz, don’t risk it. Just toss it. It’s not worth the gamble.

Is it safe to reheat the same meal more than once, or am I playing with fire?

Look, I get it—you’re hungry and that lasagna looks amazing. But here’s the deal: try to avoid the “reheat loop.” Every time you heat food up and then let it cool back down, you’re playing a dangerous game with bacteria. It’s much safer to scoop out only what you need and reheat just that portion. If you absolutely have to reheat the whole batch, make sure it hits 165°F all the way through.

What’s the best way to revive soggy or stale leftovers so they don't taste like cardboard?

We’ve all been there—you pull a slice of pizza or some fries out of the fridge, and they’ve turned into sad, chewy cardboard. To fix this, ditch the microwave; it just makes things soggier. For crispy stuff like pizza or fried chicken, hit it with a dry skillet on medium heat or use an air fryer. If you’re dealing with stale bread, a quick spritz of water before a few minutes in a hot oven works wonders.

Person practicing task batching to save time.

Task Batching: Do Similar Work Together to Save Time

I remember sitting at my kitchen table last Tuesday, surrounded by half-finished emails, a pile of laundry that needed folding, and three different browser tabs open for a DIY project I was supposed to be researching. I felt like I was spinning my wheels in deep mud, jumping from one tiny thing to the next without actually finishing anything. I’d heard people talking about task batching like it was some high-level corporate secret, but most of the advice out there sounds like it was written by someone who spends their entire life in a glass office. Honestly, the idea that you need a complex digital system or a $50 planner to make it work is just nonsense.

Look, I’m not here to sell you on a complicated productivity cult or a fancy new app that’ll just end up being another distraction. I want to show you how to use task batching the way I use a good multi-tool: to make your life simpler, not more cluttered. I’m going to break this down into a few straightforward steps that actually work in the real world, whether you’re managing a freelance business or just trying to keep your house from falling apart. Let’s get to it.

Table of Contents

Reducing Context Switching to Reclaim Your Focus

Reducing Context Switching to Reclaim Your Focus

Think about how it feels when you’re halfway through fixing a leaky sink, but then you stop to answer a text, check an email, and look up a recipe for dinner. By the time you get back to the wrench, you’ve completely lost your rhythm. That’s exactly what happens to your brain when you jump between different types of work. Every time you switch gears, you’re paying a “mental tax.” This is what experts call reducing context switching, but I just call it “stopping the brain drain.” When you constantly flip-flop between a spreadsheet and a quick chat, you’re burning through your mental energy way faster than you should.

Instead of letting your focus get shredded, you want to aim for something closer to deep work techniques. When you group similar tasks together, you aren’t just being organized; you’re protecting your headspace. By staying in one “mode”—like handling all your phone calls at once or knocking out all your admin work in one go—you lower your cognitive load management struggles. It’s a lot easier to stay in the zone when you aren’t constantly fighting the urge to pivot to something else.

Simple Batch Processing for Entrepreneurs to Win Back Time

Simple Batch Processing for Entrepreneurs to Win Back Time

If you’re running your own show, you aren’t just the CEO; you’re also the marketing department, the customer service rep, and the person wrestling with the bookkeeping. When you jump from answering a client email to suddenly trying to draft a social media post, you’re burning mental fuel like crazy. This is where batch processing for entrepreneurs becomes a total lifesaver. Instead of letting little fires pop up all day, try setting aside one specific afternoon just for administrative grunt work. Once you get into that rhythm, you’ll realize you can knock out an entire week’s worth of invoices in half the time it usually takes you to do them one by one.

I used to think I had to be “on call” for everything, but that’s a fast track to burnout. I’ve found that treating my creative projects like a dedicated construction zone works wonders. By using deep work techniques—like shutting off notifications and focusing solely on one type of high-level task—I stop feeling like I’m constantly playing catch-up. It’s not about working harder; it’s about grouping your mental efforts so you can actually finish what you start.

5 Ways to Batch Your Way to a Saner Week

  • Group your “brainless” chores together. I’m talking about the stuff like answering quick emails, filing receipts, or clearing out your inbox. Don’t let these little things pepper your entire day like annoying mosquitoes; set aside 30 minutes in the afternoon to knock them all out at once.
  • Create a dedicated “Admin Hour.” Pick one specific time during the week—maybe Tuesday mornings when you’re actually feeling alert—to handle all the boring, necessary life stuff like paying bills, scheduling appointments, or updating your budget. Once that hour is up, you’re done with the paperwork.
  • Batch your meal prep, not just your cooking. If you’re already in the kitchen, don’t just make one dinner. Chop all your onions for the week, portion out your snacks, or cook a massive batch of grains. It’s way easier to do the “prep work” once than to pull out the cutting board every single night.
  • Use “Theme Days” if your schedule allows it. If you’re running a side hustle or a small business, try making Mondays your “Client Day” and Wednesdays your “Deep Work/Project Day.” It stops that feeling of being pulled in ten different directions every time the phone rings.
  • Protect your batches with a “Do Not Disturb” sign. When you’re in the middle of a batch—whether it’s deep-focus coding or a heavy cleaning session—put your phone in another room or turn on “Focus Mode.” The whole point of batching is to stay in the zone, so don’t let a random notification break your momentum.

The Bottom Line: How to Start Batching Today

Stop letting your day run you. Instead of jumping from an email to a phone call to a project, group those similar tasks together so you can actually stay in the zone.

You don’t need a fancy app to do this. Just look at your to-do list, find the stuff that feels “the same,” and carve out a specific block of time to knock them all out at once.

Be realistic with yourself. Start small—maybe just batching your emails or your meal prep—and once you see how much brainpower you save, you can tackle the bigger stuff.

## The Bottom Line on Batching

“Think of task batching like prepping your ingredients before you start cooking; it’s a lot easier to whip up a great meal when you aren’t stopping every two minutes to chop an onion or find a spatula.”

Nathan Cole

Getting Your Groove Back

Task batching for Getting Your Groove Back.

Look, I know it feels a bit weird at first to stop everything you’re doing just to focus on one specific type of chore, but the payoff is massive. By grouping your emails, your deep-work projects, and those annoying little administrative tasks into dedicated blocks, you’re finally stopping the constant mental whiplash that comes from jumping between tabs. We’ve talked about how cutting down on context switching saves your brainpower and how entrepreneurs can use this to stop playing defense and start playing offense. At the end of the day, task batching isn’t about working more hours; it’s about making sure the hours you actually put in don’t feel like a total slog.

If you’re feeling overwhelmed right now, don’t try to overhaul your entire life by Monday morning. Just pick one thing—maybe it’s all your phone calls or all your meal prepping—and try batching just that one area this week. You don’t need a complex system or a high-priced productivity coach to get this right; you just need a little bit of discipline and the willingness to try something new. I promise you, once you see how much headspace you actually reclaim when you aren’t constantly switching gears, you’ll wonder how you ever lived any other way. You’ve got this, so go ahead and take back your time.

Frequently Asked Questions

How do I know if a task is actually worth batching, or if I should just knock it out right away?

Here’s the rule of thumb I use: if it takes less than two minutes, just do it. Don’t even bother writing it down. But if it’s something that requires you to open an app, find a file, or get into a specific “mode”—like answering emails or sorting through receipts—that’s a prime candidate for batching. If the setup time feels longer than the task itself, save it for your batching block.

What do I do if an urgent "fire" pops up right in the middle of a scheduled batching block?

Look, I get it. You’re mid-way through an hour of deep work and suddenly your phone starts blowing up or a client sends an “emergency” email. Don’t panic. First, do a quick gut check: is this actually a fire, or just someone else’s lack of planning? If it’s a real crisis, pivot. Address it, then immediately write down exactly where you left off in your batch. That way, you can jump back in without the mental lag.

Is there a limit to how many similar tasks I should group together before my brain starts to fry?

Look, there’s definitely a “sweet spot.” If you try to batch every single email you receive for eight hours straight, you’re going to burn out by noon. I like to think of it like prepping ingredients for a big meal—you wouldn’t chop every single vegetable in the kitchen in one go; you’d do it in manageable piles. Aim for groups that take 60 to 90 minutes. Once you feel that mental fog rolling in, stop. Switch gears.

How to build work relationships at work.

How to Build Real Relationships at Work

I used to think that learning how to build work relationships meant I had to become some kind of polished, corporate shark who spent all day “networking” at awkward happy hours. Honestly, the whole idea of strategic socializing felt incredibly fake, like trying to follow a blueprint for a house that doesn’t even have a foundation. I spent my early twenties thinking that if I just kept my head down and did my job well, people would naturally respect me, but I quickly learned that being a ghost in the office actually makes your life a whole lot harder when things go sideways.

Look, I’m not here to give you a bunch of high-level management jargon or tell you to “leverage your synergies.” I want to show you that making real connections is a lot like fixing a leaky faucet—it’s just a series of small, manageable tasks that you can tackle one at a time. I’m going to break down exactly how to navigate the office social scene using a few no-nonsense steps that actually work in the real world. We’re going to skip the fluff and get straight to the stuff that makes your workday smoother and your professional life a lot more human.

Table of Contents

Improving Office Communication With Simple Real Conversations

Improving Office Communication With Simple Real Conversations

Improving Office Communication with Simple, Real Conversations

I used to think that being “professional” meant keeping my head down, staying silent in meetings, and only talking when I had a status report ready. I was wrong. If you want to actually get things done without the constant friction, you have to start improving office communication through the small stuff. It’s not about giving a polished keynote speech; it’s about the thirty seconds you spend asking a teammate how their weekend went or checking in on a project before it hits a breaking point. These tiny, unscripted moments are actually the foundation of building trust with colleagues.

When you move away from strictly formal emails and start having these brief, human check-ins, you’re doing more than just being friendly. You’re learning how to read the room and understand what people actually need from you. This is a huge part of navigating workplace dynamics without feeling like you’re playing a political game. It’s much easier to tackle a tough project with someone when you’ve already established a baseline of real, honest conversation during the quiet moments of the day.

Building Trust With Colleagues Through Small Consistent Wins

Building Trust With Colleagues Through Small Consistent Wins

When I was working on job sites, I learned pretty quickly that nobody trusts the guy who talks a big game but never shows up with the right tools. The office is exactly the same. You don’t build a reputation by giving a grand speech at a meeting; you do it by being the person who actually follows through. Whether it’s hitting a deadline or just sending that follow-up email you promised, those tiny, reliable actions are the foundation of building trust with colleagues. It’s about proving, bit by bit, that your word actually means something.

Think of it like restoring an old piece of furniture—you don’t just slap on a new coat of paint and call it a day. You have to sand down the rough edges first. In a professional setting, that means showing up consistently and being someone people can lean on when things get hectic. This kind of steady reliability is a huge part of navigating workplace dynamics without the drama. When you focus on these small, repeatable wins, you aren’t just checking boxes; you’re showing everyone that you’re a teammate they can actually count on.

Five Low-Stress Ways to Get in the Good Graces of Your Coworkers

  • Be the person who actually remembers the small stuff. If a teammate mentions their kid has a soccer game or they’re struggling with a broken coffee maker, follow up on it a few days later. It shows you’re actually listening, not just waiting for your turn to talk.
  • Offer a hand before you’re asked. You don’t have to take over their entire project, but if you see someone drowning in spreadsheets and you’ve got twenty minutes to spare, ask if you can take a small task off their plate. Those little favors build massive credit over time.
  • Master the “low-stakes” hang. You don’t need to be the life of the party at the Friday happy hour to build connections. Just showing up for ten minutes or grabbing a quick coffee in the breakroom helps you exist as a human being in their eyes, rather than just a name on an email.
  • Own your mistakes quickly and loudly. Nothing builds trust faster than saying, “Hey, I totally dropped the ball on that report, my bad. Here’s how I’m fixing it.” It takes the tension out of the room and shows people they can rely on your honesty when things go sideways.
  • Find your “work tribe” through shared interests. Whether it’s a group chat about the best lunch spots nearby or a shared hatred for a specific software update, finding those tiny commonalities makes the 9-to-5 grind feel a lot less lonely and a lot more like a team effort.

The Bottom Line: Keep It Simple

You don’t need to be the loudest person in the room or a master networking pro; just focus on being reliable and showing up for the small stuff.

Real connections are built in the “in-between” moments—like a quick chat by the coffee machine or a follow-up on a small task—rather than big, forced social events.

Treat your work relationships like a DIY project: start with a solid foundation of trust, take it one small step at a time, and don’t be afraid to make a few mistakes along the way.

## My Take on the Whole Thing

“Building work connections isn’t about mastering some high-level networking strategy or being the loudest person in the room; it’s really just about showing up, being reliable, and treating your coworkers like actual people instead of just names on an email chain.”

Nathan Cole

Don't Sweat the Small Stuff

Don't Sweat the Small Stuff at work.

At the end of the day, building better connections at work isn’t about mastering some complex corporate strategy or being the loudest person in the conference room. It’s really just about those small, intentional moves we talked about—actually talking to people instead of just emailing them, and showing up consistently so your team knows they can count on you. Whether you’re focusing on clearer communication or just trying to stack up a few small wins to prove your reliability, remember that consistency beats intensity every single time. You don’t need to overhaul your entire professional persona overnight; you just need to start making those tiny, positive adjustments one day at a time.

I know that walking into a room of people you don’t know well can feel a bit like trying to fix a plumbing leak without a wrench—a little intimidating and a lot of guesswork. But just like any DIY project, the hardest part is usually just getting your hands dirty and starting the work. Once you get into the rhythm of it, you’ll realize that most of your coworkers are just as human as you are, looking for the same respect and connection. So, take a breath, keep it simple, and just take that first step. You’ve totally got this.

Frequently Asked Questions

What do I do if I work in a remote or hybrid setup where I can't just walk over to someone's desk?

I get it—the “watercooler moment” doesn’t exist when you’re staring at a screen in your living room. Without those quick desk chats, you have to be a bit more intentional. I like to use the “five-minute buffer” rule: if you hop on a Zoom call, spend the first few minutes just catching up on real life before diving into the agenda. Also, don’t be afraid to use a quick Slack message just to say, “Hey, saw your win on that project, nice job!” It keeps things human.

How do I start building these connections without feeling like I'm being fake or "networking" too hard?

Look, I get it. The word “networking” makes me want to roll my eyes too—it sounds like something you do in a stiff suit at a hotel ballroom. But real connection isn’t a transaction; it’s just being a decent human. Don’t go in with an agenda. Instead of “working the room,” just focus on being curious. Ask someone how their weekend was or if they’ve tried that new deli down the street. Keep it low-stakes.

Is it possible to fix a relationship with a coworker if things have already gotten awkward or tense?

Look, I’ve been there. Whether it’s a project gone sideways or just a misunderstanding that turned into a heavy silence, awkwardness feels a lot like a stripped screw—it’s frustrating and hard to grip. But yeah, you can absolutely fix it. You don’t need a grand gesture; you just need to clear the air. Think of it like resetting a breaker. Once you address the tension directly and calmly, you can start rebuilding.

Creative wood pallet project ideas for beginners.

Wood Pallet Projects Anyone Can Build

If you’ve ever driven past a construction site or a local warehouse and seen those stacks of weathered wood sitting there, you’ve probably felt that itch to grab a crowbar and get to work. It’s easy to look at a pile of reclaimed wood and see nothing but a mess, but I see a goldmine of potential. Most people walk right past these because they think they need a master carpenter’s degree to do something with them, but honestly, finding the right pallet project ideas is more about having a plan than having expensive tools. You don’t need a shop full of heavy machinery; you just need a bit of grit and the right approach to turn that “trash” into something actually useful for your home.

In this guide, I’m skipping the overly complicated stuff that leaves you frustrated and covered in splinters. Instead, I’ve rounded up five solid, beginner-friendly projects that I know you can tackle in a single afternoon. We’re going to walk through everything from simple garden upgrades to some pretty cool indoor decor, breaking each one down into manageable steps. By the time we’re done, you’ll have a clear roadmap to transform those scraps into something you’re genuinely proud to show off.

Table of Contents

A vertical herb garden for your balcony

A vertical herb garden for your balcony.

If you’re living in a spot with zero yard space like I was for years, you don’t have to give up on growing your own food. A simple vertical herb garden is probably the easiest entry point for anyone looking to get their hands dirty without a massive commitment. You basically just lean a sturdy pallet against a sunny wall, line the slats with some landscape fabric, and fill those little pockets with soil.

The ultimate rustic entryway shoe rack

The ultimate rustic entryway shoe rack.

We’ve all been there—tripping over a mountain of sneakers and boots the second we walk through the front door. Instead of buying one of those flimsy plastic organizers that breaks after a month, you can use a pallet to build something that actually looks like it belongs in your home. It’s all about taking those heavy-duty slats and mounting them securely to your wall or even just standing them up in a corner.

A backyard cocktail or snack station

A backyard cocktail or snack station.

When the weather gets nice, I love hanging out on the deck, but I hate having to run back inside every five minutes for a refill. You can build a pretty killer outdoor bar by repurposing a couple of pallets into a standing table or a tiered serving station. It’s basically just a matter of stacking them and securing them with some heavy-duty screws so they don’t wobble when you’re setting down a heavy pitcher of lemonade.

Wall-mounted tool organizer for the garage

My garage used to be a total disaster zone until I realized I had a stack of free pallets sitting behind the local grocery store. If you’re like me and you have a million different screwdrivers, wrenches, and hammers scattered around, a pallet wall organizer is a total game-changer. You can mount the pallet vertically on your workbench wall and use the gaps to slide in your hand tools or even hang smaller items with some simple hooks.

A cozy outdoor lounge bench

If you have a larger pallet or two, you can actually build a bench that’s sturdy enough for a couple of grown adults to sit on. This is a slightly more advanced project because you’ll want to focus on the structural integrity, but I promise it’s well worth the effort once you’re sitting there with a cold drink. You essentially use the pallet as the base and then build up the seat using more slats to create a smooth surface.

A few things to remember before you start

Don’t rush into the build; spend a little extra time prepping your wood and making sure those pallets are actually safe to use around the house.

Start with something small that you can actually finish in a weekend so you don’t end up with a half-done pile of wood taking up space in your garage.

You don’t need a professional workshop to make this work—just a few basic tools and a bit of patience will get the job done.

## My take on working with wood

“At the end of the day, a pallet isn’t just a piece of junk sitting in a parking lot; it’s a head start on something great. You don’t need a master carpenter’s workshop to make it work—you just need a little patience, a decent saw, and the guts to start cutting.”

Nathan Cole

Getting Your Hands Dirty

Whether you decided to tackle a vertical herb garden for your kitchen, a rugged outdoor bench for the patio, or one of those custom wine racks, you’ve officially moved past the “just looking” phase. We’ve covered everything from basic structural builds to those smaller, more detailed decor pieces that really make a room pop. The main thing to remember is that every project, no matter how big or small, relies on the same fundamentals: a good sander, the right screws, and a little bit of patience with the wood. Don’t worry if your first attempt isn’t museum-quality; the goal here is to build something useful with your own two hands rather than buying something mass-produced that won’t last a season.

At the end of the day, these pallets aren’t just scraps of wood sitting in an alleyway or behind a grocery store; they are raw potential waiting for you to step in. I know that staring at a pile of rough-cut timber can feel a bit overwhelming at first, but I promise you that the feeling of sitting on a bench you actually built is worth every splinter. So, grab your safety glasses, clear off your workbench, and just start somewhere. You’ve got this, and I can’t wait to see what you end up creating.

Frequently Asked Questions

How do I know if a pallet is safe to use for indoor furniture or garden projects?

Look, before you start hauling those pallets into your living room, you’ve gotta check the stamps. It’s a total dealbreaker. Look for “HT”—that means Heat Treated, which is safe. If you see “MB,” put it back; that’s Methyl Bromide, a nasty pesticide you definitely don’t want near your kids or your garden soil. If there are no stamps at all, I’d play it safe and skip it. Better to be cautious than toxic.

What’s the best way to get all those stubborn nails out without splitting the wood?

Look, I’ve split more than a few good boards trying to rush this, so take it slow. First, grab a pry bar and a small scrap of thick wood to use as a fulcrum. Place the scrap against the pallet so you aren’t putting direct pressure on the surface. This distributes the force and keeps the wood from cracking. If the nail is really stubborn, give the head a quick tap with a hammer first to loosen it up.

Do I really need to sand these down, or can I just slap some stain on them and call it a day?

Look, I get it—you want to get to the fun part, not spend three hours fighting a sander. But if you just slap stain on raw pallet wood, it’s going to look blotchy and feel like a splinter waiting to happen. At the very least, hit them with a medium grit to smooth out the fuzz and open up the grain. It’s a little extra sweat now, but it saves you a massive headache later.