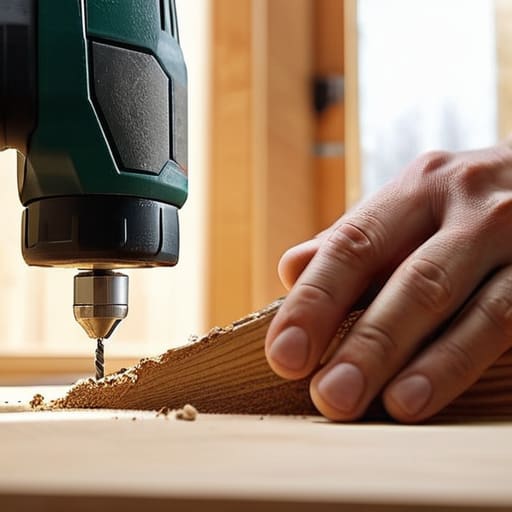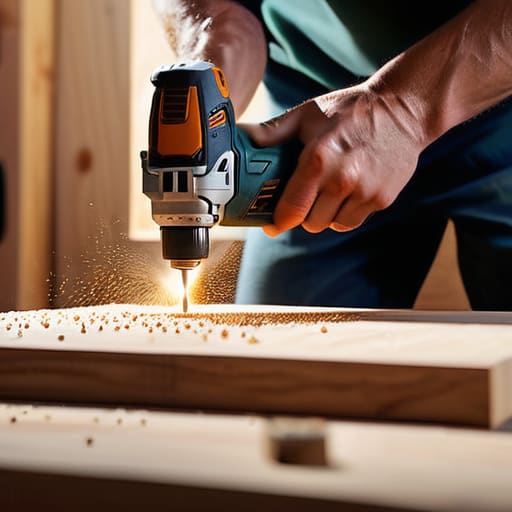
Tips on how to reduce food waste.

How to Reduce Food Waste in Your Kitchen

I was digging through the back of my fridge last Tuesday—trying to find that one lonely jar of pickles—when I found a bag of spinach that had basically turned into green slime. It’s a gut punch every time, isn’t it? You spend your hard-earned money at the grocery store, feeling all productive, only to realize you’re essentially tossing cash directly into the trash bin every single week. Most “experts” will tell you that you need fancy airtight containers or a high-tech composting system to fix this, but honestly, that’s just more clutter you don’t need. Learning how to reduce food waste shouldn’t feel like a second job or a massive lifestyle overhaul; it should just be about working smarter with what you’ve already got.

I’m not here to sell you on expensive gadgets or complicated meal-prepping rituals that take all Sunday afternoon. Instead, I want to share the straightforward, battle-tested habits I’ve picked up from years of cooking on a budget and living in small kitchens. I’m going to show you how to organize your fridge like a pro, shop with a plan, and actually use those leftovers instead of letting them die in a Tupperware container. Let’s get into it.

Table of Contents

Mastering Meal Planning for Beginners Without the Stress

Mastering Meal Planning for Beginners Without the Stress

Look, I used to think meal planning meant spending my entire Sunday afternoon prepping twenty identical Tupperware containers of steamed broccoli. That sounded miserable, and honestly, it’s why I kept quitting. But I’ve learned that meal planning for beginners doesn’t have to be a full-time job; it’s really just about looking at what you already have before you head to the store. If you check your pantry first, you’ll stop buying that third jar of cumin you don’t actually need, which is a massive win for reducing grocery bills.

The trick is to build a loose framework rather than a rigid schedule. Instead of a strict Monday-through-Friday menu, try picking two “anchor” proteins or veggies you can use in different ways throughout the week. Maybe you roast a big tray of sweet potatoes on Tuesday, and use the leftovers in a breakfast hash on Thursday. When you focus on flexible meal prep rather than perfection, you actually stick to it. It turns a chore into a way to keep your kitchen running smooth without the constant “what’s for dinner?” panic.

Reducing Grocery Bills by Using What You Already Own
Reducing Grocery Bills by Using What You Already Own

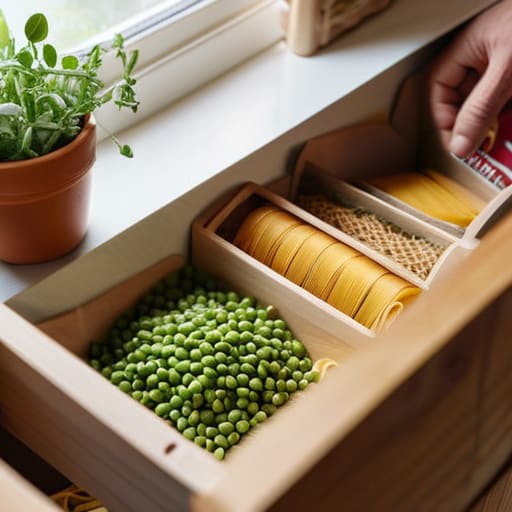
Before you even think about grabbing your keys and heading to the store, I need you to do one thing: open your pantry and your fridge. I know, it sounds like a chore, but it’s the fastest way to start reducing grocery bills without feeling like you’re living on ramen. Most of us have that “mystery bag” of frozen peas or a half-box of pasta hiding in the back that we completely forgot about. Instead of buying a whole new set of ingredients for a recipe, try to build your next meal around what’s already sitting there. I like to call it a “pantry raid”—it’s basically a game where the prize is extra cash in your pocket.

Once you’ve inventoried your stash, the next step is making sure nothing goes bad while it’s waiting its turn. This is where proper food storage techniques really save the day. I’ve learned the hard way that shoving a bag of spinach into the crisper drawer without a paper towel isn’t enough; you have to treat your produce with a little respect if you want it to last. If you catch something just before it turns, don’t toss it! Throw it in a pan or freeze it for later.

5 Simple Habits to Keep Your Food from Going Bad

  • Get to know your fridge’s “danger zones.” I learned the hard way that shoving everything into the crisper drawer doesn’t work; some veggies actually prefer the main shelf, and some fruits will make everything else rot if they’re too close. Take ten minutes to figure out what stays fresh where.
  • Master the art of the “Eat Me First” bin. I started using a small plastic container right at eye level in my fridge for all those half-used jars of salsa, lonely carrots, or leftovers. If it’s in the bin, it’s the priority for your next meal.
  • Stop treating your freezer like a black hole. We’ve all done it—tossed a bag of frozen peas in the back and forgotten it until 2026. Use a Sharpie to label every bag with the date and what’s inside, and try to keep the “old stuff” at the front.
  • Learn to love your scraps. Before you toss those onion skins, carrot tops, or herb stems, throw them into a bag in the freezer. Once you have a decent amount, boil them down into a homemade veggie stock. It’s basically free flavor and keeps a ton of waste out of the trash.
  • Don’t be afraid to “repurpose” instead of “replacing.” If those spinach leaves are looking a little limp, don’t toss them—wilt them into a pasta sauce or throw them in a smoothie. Most of the time, they’re still perfectly good; they just need a little heat or a blender to make them usable again.

The Quick Cheat Sheet for Less Waste

Shop your pantry first so you aren’t buying a third jar of mayo when you already have two hiding in the back.

Treat your fridge like a “first-in, first-out” system—move the older stuff to the front so you actually eat it before it turns into a science project.

Stop aiming for perfection with meal prep; just having a rough idea of what you’re eating for dinner prevents those expensive, last-minute takeout runs.

## The Real Secret to a Leaner Kitchen

“At the end of the day, reducing food waste isn’t about being some perfect, zero-waste guru; it’s just about looking at what you’ve already got in the pantry before you go clicking ‘add to cart’ again.”

Nathan Cole

Making It Stick

Making It Stick with intentional meal planning.

Look, I know it feels like a lot to juggle when you first start trying to change how you handle your kitchen. Between mapping out a meal plan that actually works and doing a quick inventory check of your pantry before you hit the store, it can feel like another chore on an already long to-do list. But once you start seeing those half-empty jars and forgotten vegetables actually getting used instead of rotting in the crisper drawer, you’ll realize it’s not about being perfect—it’s about being intentional. If you can master the art of using what you already have, you’re already winning the battle against waste and unnecessary spending.

At the end of the day, my goal isn’t to turn you into a professional chef or a master organizer; I just want you to feel like you’ve got a handle on your own home. Don’t get discouraged if you still end up tossing a bag of wilted spinach once in a while. Just take a breath, look at what’s left, and start fresh tomorrow. Most things in life—including a messy fridge—are totally figure-out-able if you just take them one small step at a time. You’ve got this.

Frequently Asked Questions

How do I actually know when food has gone bad versus when it’s just past its "best by" date?

Look, those “best by” dates are more like suggestions from the manufacturer than a countdown to disaster. They’re mostly about quality, not safety. To tell if something is actually sketchy, use your senses. If it smells off, looks slimy, or has fuzzy mold, toss it. For things like eggs, try the float test in water. If it sinks, you’re good; if it floats, it’s time to say goodbye. Trust your gut.

What are some easy ways to store produce so it doesn't turn into mush in the crisper drawer?

The secret to keeping your produce from turning into a science experiment is managing moisture. Most people just toss everything in the crisper, but that’s a recipe for mush. For leafy greens, wrap them in a paper towel before putting them in a container or bag; it absorbs that extra condensation. Also, keep your onions and potatoes far away from each other—they actually make each other spoil faster. It’s a small tweak, but it works.

I hate throwing scraps away, but what's the easiest way to start composting if I live in a small apartment?

Look, I get it. Tossing a perfectly good onion skin or coffee ground feels like a crime against your wallet. If you’re in a small apartment, don’t worry—you don’t need a massive backyard bin. Honestly, the easiest way to start is with a small, sealed countertop bin or even a “Bokashi” bucket. It uses fermentation to break down scraps without the smell or the mess. It’s small, tucked away, and totally doable.


Tips on how to save mobile data.

How to Save Mobile Data and Avoid Overage Fees

I was sitting in a coffee shop last Tuesday, staring at my phone in pure disbelief as I watched my data meter climb like a runaway freight train. I hadn’t even done anything crazy—just checked a couple of emails and scrolled through a news feed—but there it was: another massive chunk of my monthly allowance gone. It’s honestly ridiculous how much these carriers bank on us being too busy or too frustrated to figure out how to save mobile data ourselves. They want you to believe that the only solution is to cough up an extra twenty bucks a month for a “premium” plan, but I’m calling foul on that.

Look, I’m not here to give you a lecture on digital minimalism or tell you to throw your smartphone in a lake. I just want to help you stop bleeding money for things you don’t even need. In this guide, I’m breaking down the actual, hands-on tweaks I use to keep my usage under control without sacrificing my sanity. We’re going to skip the tech-jargon fluff and get straight to the settings and habits that actually work. By the time we’re done, you’ll have a solid game plan to reclaim your gigabytes and keep your bill exactly where it belongs.

Table of Contents

Stop Apps From Consuming Data in the Background

Stop Apps From Consuming Data in the Background

This is where most people lose their data without even realizing it. You think you’re just scrolling through a few photos, but in the background, your apps are busy updating, syncing, and refreshing content like they have an unlimited budget. It’s a sneaky way to drain your plan, but you can easily stop apps from consuming data by taking control of your settings.

On an iPhone, I usually head straight for the Cellular menu to see exactly which culprits are hogging the bandwidth. If you see an app you rarely use sitting there with a massive usage number, just toggle it off. For Android users, you’ll want to look for the option to limit background data usage within your connection settings. This basically tells your phone, “Hey, don’t go talking to the internet unless I actually open this app.” It’s one of those small tweaks that makes a massive difference in how long your data lasts throughout the month. I’ve done this on my own phone, and it’s been a total game-changer for avoiding those mid-month data warnings.

Monitor Mobile Data Consumption to See Where It Goes

Monitor Mobile Data Consumption to See Where It Goes

Before you start changing a dozen different settings, you need to figure out exactly who the culprit is. It’s easy to blame social media, but sometimes it’s a random weather app or a system update you forgot about. Most people don’t realize how much they’re actually burning through until they look at the breakdown. To monitor mobile data consumption effectively, head into your phone’s settings and look for the “Data Usage” or “Cellular” tab. This will give you a neat little list of every single app on your device and exactly how many megabytes (or gigabytes) they’ve eaten up over the last month.

Once you see that list, you’ll probably have a “eureka” moment. You might find that a game you haven’t played in weeks is still pulling data in the background, or that your video streaming app is set to high definition by default. Seeing the raw numbers helps you decide where to draw the line. Instead of guessing, you can make a surgical strike—targeting only the biggest offenders to save data while streaming or browsing. It’s all about working smarter, not harder, so you aren’t wasting time tweaking apps that aren’t actually costing you a dime.

5 Quick Wins to Stop the Data Drain

  • 1. Hunt down the “Data Saver” mode in your settings. Most modern iPhones and Androids have a built-in toggle that basically tells your phone, “Hey, don’t be greedy with the bandwidth.” It’s a lifesaver when you’re running low.
  • 2. Get your streaming apps on a diet. Whether it’s Netflix or YouTube, go into the app settings and manually lower the video quality. You don’t need 4K resolution on a five-inch screen, and your data plan will definitely thank you.
  • 3. Make your Wi-Fi work for you by downloading ahead of time. If you know you’re going to be on the train or out for the afternoon, download your Spotify playlists or Google Maps areas while you’re still plugged into your home internet.
  • 4. Watch out for those “Auto-Play” settings on social media. There is nothing quite as frustrating as scrolling through Facebook or Instagram and having five different videos start playing at once, eating up your gigabytes in the background.
  • 5. Turn off automatic app updates. There’s nothing worse than being halfway through a grocery shop only to realize your phone is currently downloading a 2GB system update in your pocket. Set your App Store or Play Store to “Update over Wi-Fi only.”

Quick Wins to Keep Your Data in Check

Take a look at your data usage settings first; it’s usually a few sneaky background apps draining your gigabytes without you even knowing it.

Turn off auto-updates for your apps when you’re on cellular data—letting them wait until you’re on Wi-Fi is one of the easiest ways to save.

Don’t let it stress you out; once you see exactly which apps are the culprits, you can manage them and stop seeing those “data limit reached” warnings.

## My Philosophy on Data

“Think of your mobile data like a leaky faucet in your kitchen; you can keep mopping up the puddles with expensive data top-ups, or you can just go under the sink, find the culprit, and tighten the valve. Once you know which apps are ‘dripping’ in the background, you stop paying for what you aren’t even using.”

Nathan Cole

Putting It All Together

Putting It All Together for data savings.

At the end of the day, saving your mobile data isn’t about living in a digital desert; it’s just about being a little more intentional with how you use your connection. We’ve covered a lot of ground here, from shutting down those data-hungry background apps that sneakily eat your allowance, to keeping a close eye on your usage logs so you aren’t blindsided by a massive bill at the end of the month. If you take even just two or three of these steps—like switching to Wi-Fi whenever you’re sitting at home or tightening up your social media settings—you’ll see a noticeable difference in your data balance almost immediately.

I know that staring at a “data limit reached” warning can feel pretty frustrating, but remember: this is one of those things that is totally figure-out-able. You don’t need to be a tech wizard or a network engineer to take control of your phone; you just need to tinker with the settings until they work for you. Once you get these small habits down, you won’t have to worry about constantly checking your meter. So, go ahead and dive into your settings, make those tweaks, and enjoy that extra breathing room on your plan. You’ve got this!

Frequently Asked Questions

Will turning off background data make my apps stop sending me important notifications?

That’s a great question, and honestly, it’s the one thing that worries me most before I start toggling settings. The short answer is: yes, it can. If you cut off background data entirely, some apps won’t be able to “check in” to tell you someone texted you or that your email arrived. My advice? Don’t go scorched earth. Instead of a total blackout, just pick the heavy hitters—like social media or video apps—and leave the essentials like WhatsApp or your calendar alone.

Is there a way to tell if my phone's operating system itself is the thing eating up all my gigabytes?

That’s a fair question, and honestly, it’s one of the most frustrating things to troubleshoot. To see if the OS is the culprit, head into your settings and look for “System Services” or “System Data” under your data usage breakdown. If you see huge chunks there, it’s usually just your phone grabbing big updates or syncing cloud backups. If it’s spiking, try scheduling those updates for when you’re on home Wi-Fi instead.

Does using "Data Saver" mode actually slow down my internet speed while I'm browsing?

Here’s the short answer: It’s not exactly “slowing down” your connection, but it can definitely feel that way. When you flip that switch, your phone stops grabbing high-res images and video in the background to save bytes. So, while your actual signal strength is fine, websites might look a little “crunchier” or take a second to load because they aren’t pulling in all the heavy, pretty stuff. It’s a trade-off: less data, but a slightly less polished experience.

Answering common job interview questions.

The Most Common Job Interview Questions and How to Answer Them

I still remember sitting in a plastic chair outside a manager’s office ten years ago, my palms sweating so much I thought I’d slide right off the seat. I had spent all night trying to memorize these polished, robotic scripts for common job interview questions, thinking I had to sound like a corporate textbook just to get a foot in the door. But honestly? That approach was a total disaster. I sounded like a broken GPS, and the interviewer looked at me like I was reciting a manual instead of actually talking to them.

Here’s the deal: you don’t need a fancy career coach or a list of rehearsed lies to nail an interview. Most of these questions are actually much more figure-out-able than they seem once you strip away the corporate jargon. In this guide, I’m going to show you how to break down the most frequent queries into simple, honest stories that reflect who you actually are. We’re going to skip the fluff and focus on practical, real-world answers that show you know your stuff and can get the job done.

Table of Contents

Mastering the Star Method for Interview Answers

Mastering the Star Method for Interview Answers.

Look, I know the feeling. You’re sitting there, the interviewer asks something like, “Tell me about a time you failed,” and suddenly your brain feels like a laptop with forty tabs open and a dying battery. That’s where the star method for interview answers comes in to save your skin. It’s basically a blueprint that keeps you from rambling. Instead of just telling a vague story, you break it down into four clear parts: Situation, Task, Action, and Result. It’s a lot like following a recipe; if you miss a step, the whole thing falls flat, but if you stick to the sequence, you’ll get a solid result every time.

When you’re practicing these behavioral interview techniques, don’t try to memorize a script word-for-word. That just makes you sound like a robot. Instead, focus on the structure. Think of the “Action” part as the meat of your answer—that’s where you show them how you actually roll. If you can nail that specific middle section, you’ll find that even the toughest questions become much more figure-out-able.

Handling Difficult Interview Questions Without Breaking a Sweat

Handling Difficult Interview Questions Without Breaking a Sweat

We’ve all been there—that moment when an interviewer leans in and asks something that feels like a curveball thrown straight at your head. Maybe it’s “Tell me about a time you failed,” or “What’s your biggest weakness?” Your stomach drops, and suddenly, your brain feels like a laptop with fifty tabs open. But here’s the secret: handling difficult interview questions isn’t about having a perfect, scripted response ready to go. It’s about staying calm enough to think on your feet.

When you get hit with a question that feels a bit personal or tricky, don’t rush to fill the silence with nervous chatter. Take a breath. It’s perfectly okay to say, “That’s a great question, let me think about that for a second.” This isn’t just a way to buy time; it’s a sign of professional interview etiquette that shows you’re thoughtful rather than impulsive. If you lean on the STAR method for interview answers like we talked about earlier, you’ll find that even the toughest questions can be broken down into a simple, logical story. You’ve got this.

5 Ways to Keep Your Cool When the Questions Start Coming

  • Treat it like a conversation, not an interrogation. I used to get so stiff during interviews, thinking I had to recite a script. Instead, try to view it as just two people seeing if they can work well together. If you relax, your real personality actually has a chance to shine through.
  • Keep your “stories” short and sweet. Just like when I’m explaining a DIY fix to a buddy, don’t get bogged down in the weeds. Give them the context, the action you took, and the result, then stop talking. If they want more detail, they’ll ask.
  • It’s okay to take a beat. If they hit you with a question that makes your brain stall, don’t feel like you have to blurt out the first thing that comes to mind. A simple, “That’s a great question, let me think about that for a second,” buys you all the time you need to get your thoughts in order.
  • Prep your “greatest hits” in advance. You don’t need to memorize answers for fifty different questions, but you should have three or four solid stories from your past work that show you’re a problem-solver. Most common questions are just different ways of asking you to tell one of those stories.
  • Turn the tables with your own questions. An interview is a two-way street. Having a couple of smart questions ready for them—like “What does a typical Tuesday look like in this role?”—shows you’re actually interested in the job, not just the paycheck.

The Bottom Line: You’ve Got This

Don’t try to memorize a script word-for-word; instead, prep a few solid stories using the STAR method that you can adapt to different questions.

When you hit a question that catches you off guard, take a breath and be honest—it’s much better to pause and think than to ramble through a nervous, messy answer.

Remember that an interview is just a conversation to see if you’re a good fit, so treat it like you’re just explaining your skills to a new coworker.

The Secret to Staying Calm

“Look, interview questions aren’t some secret code designed to trip you up; they’re just tools to see how you handle real life. If you stop trying to memorize a script and start thinking about how you’ve actually solved problems in the past, you’ll realize the answers are already in your toolkit.”

Nathan Cole

You've Got This

Motivational interview prep: You've Got This.

Look, I know sitting in that waiting room feels a lot like staring at a stripped screw or a tangled mess of wires—you just aren’t sure where to start without making things worse. But we’ve covered the ground here. We talked about using the STAR method to turn your messy work history into clear, structured stories, and we looked at how to tackle those curveball questions without losing your cool. Remember, the goal isn’t to memorize a script like some programmed robot; it’s about having a solid toolkit of examples ready to go so you can show them who you actually are.

At the end of the day, an interview is just a conversation to see if you and the company are a good fit for each other. It’s a lot more figure-out-able than it feels when your heart is racing. Don’t beat yourself up if you stumble over a word or need a second to think; even the pros have to recalibrate sometimes. Just take a breath, lean into your preparation, and trust your own experience. You’ve done the work, you’ve got the skills, and now you just have to go in there and show them. You’ve totally got this.

Frequently Asked Questions

What if I don't actually have a perfect "success story" to use for the STAR method?

Look, I get it. We’ve all been there—staring at a blank page trying to find some cinematic moment of triumph that just doesn’t exist. But here’s the secret: an interview isn’t a Hollywood audition. You don’t need a massive victory; you just need a moment where you solved a problem. Even something small, like fixing a scheduling conflict or helping a frustrated customer, works perfectly. It’s about showing how you think, not how much you won.

Is it okay to be honest if they ask about a weakness, or should I try to spin it into something positive?

Look, I get the urge to spin a weakness into a “fake” strength—like saying you’re “too much of a perfectionist.” Honestly? Don’t do that. It feels scripted and, frankly, a little dishonest. Instead, try being real about a genuine hurdle you’ve faced, then immediately show how you’re fixing it. It’s like telling a client you don’t have a specific tool, but you’ve already figured out how to borrow one. It shows you’re resourceful.

How do I handle those awkward silences when I'm trying to think of an answer without looking like I've completely blanked?

Look, we’ve all been there—your brain just hits a brick wall mid-sentence. Instead of panicking or filling the air with “um” and “uh,” just own the pause. Try saying something like, “That’s a great question, let me take a second to think of the best example for you.” It shows you’re thoughtful, not lost. It turns an awkward silence into a controlled moment. Most people actually respect that more than a rushed, messy answer.

Guide on how to say no.

How to Say No Without Feeling Guilty

I remember sitting on my workshop floor last Tuesday, surrounded by half-finished projects and a mountain of “quick favors” I’d promised to friends, coworkers, and even my neighbor. My back ached, my inbox was exploding, and I realized I was basically a human Swiss Army knife that everyone was using until the blades went dull. I used to think that being a “good guy” meant saying yes to every single request that came my way, but all that did was leave me with a messy schedule and zero energy for the things that actually matter. Learning how to say no isn’t about being selfish or rude; it’s about realizing that your time is a finite resource, just like the lumber in my shop, and if you give it all away, you’ve got nothing left to build with.

I’m not here to give you some flowery, psychological lecture on “assertiveness training” or tell you to go on a silent retreat. Instead, I want to give you a practical toolkit for setting boundaries that actually stick. I’m going to break down a few straightforward scripts and mental shifts that helped me stop overcommitting without feeling like a jerk. We’re going to treat your schedule like a renovation project: we’re clearing out the clutter so you can focus on the foundation.

Table of Contents

Overcoming People Pleasing With Simple Assertive Communication Techniques

Overcoming People Pleasing With Simple Assertive Communication Techniques

Look, I get it. For a long time, I was the guy who’d say “sure thing” to every favor, even when my own to-do list was screaming for help. I thought being helpful meant being a doormat, but I eventually realized that overcoming people pleasing isn’t about being rude; it’s about being honest. When you try to do everything for everyone, you end up doing a mediocre job at all of it because you’re spread too thin.

The trick is to lean into some basic assertive communication techniques that don’t feel like you’re picking a fight. Instead of a long-winded apology—which usually just makes you sound guilty—try the “Direct Pivot.” If a coworker asks for a last-minute project, don’t just say “I’ll try.” Instead, try: “I can’t take that on right now if I want to finish my current task by five.” It’s not an attack; it’s just a status report on your capacity. Once you start practicing these small, firm responses, you’ll find that people actually respect your time a lot more than you’d expect.

Refusing Requests Without Guilt Using Clear Honest Logic

Refusing Requests Without Guilt Using Clear Honest Logic

Look, I get it. When someone asks for a favor, your brain immediately goes into “fix-it” mode. You want to solve the problem, even if it means sacrificing your own afternoon. But here’s the thing I learned while working odd jobs: you can’t build a solid house on a shaky foundation, and you can’t build a productive life if you’re constantly overextended. Refusing requests without guilt isn’t about being selfish; it’s about being honest about your capacity. Instead of making up a wild excuse about your car breaking down, just stick to the facts. “I’d love to help, but I’ve already committed my evening to some personal projects,” is a perfectly valid answer.

When you use logic instead of drama, you’re actually practicing a high level of emotional intelligence in communication. If a colleague asks for help and you’re swamped, try saying, “If I take this on right now, I won’t be able to give my current project the attention it needs.” You aren’t attacking them; you’re just laying out the math. It keeps things professional and helps you maintain healthy interpersonal boundaries without feeling like the bad guy.

5 Quick Ways to Protect Your Time (Without Being a Jerk)

  • Use the “Pause Button” technique. When someone asks for a favor, don’t feel like you have to answer right that second. Just say, “Let me check my schedule and get back to you.” It gives you a chance to breathe and decide if you actually have the bandwidth before you commit.
  • Keep your explanation short. You don’t need to write a whole essay justifying why you can’t help. A simple, “I can’t take that on right now, but thanks for thinking of me,” works better than a long-winded excuse that sounds like you’re making stuff up.
  • Offer a “Trade-Off” instead of a flat refusal. If it’s a boss or a partner, try saying, “I can definitely help with that, but it means I won’t be able to finish [Project X] by Friday. Which one is the priority?” It puts the decision back on the logic of the situation.
  • Learn the “Soft No.” If you hate the idea of being blunt, try a middle ground. “I’d love to help, but my plate is completely full this week.” It’s honest, it’s polite, and it doesn’t leave much room for argument.
  • Practice on the small stuff. You wouldn’t try to rewire a whole house without testing a light switch first, right? Start saying no to small, low-stakes things—like that extra appetizer you don’t really want—to build up that muscle for the big stuff.

The Quick Fix: 3 Things to Remember When You’re Stuck Saying Yes

Treat your time like a finite budget; you wouldn’t spend money you don’t have, so don’t commit to tasks that’ll leave you broke.

Keep your refusals short and sweet—you don’t need a mountain of excuses to justify protecting your own schedule.

Remember that saying “no” to something extra is actually just saying “yes” to doing a better job on the stuff you’ve already promised to do.

## The Real Cost of Saying Yes

“Think of your time like a toolbox: if you keep letting everyone else borrow your best tools for their projects, you’re eventually going to find yourself standing there empty-handed when your own life needs a little fixing.”

Nathan Cole

Getting the Hang of It

Getting the Hang of It: Setting boundaries.

Look, I know this isn’t as easy as swapping out a lightbulb or tightening a loose screw. Learning to use those assertive communication techniques and backing up your refusals with honest logic takes some serious practice. It’s going to feel a little clunky at first, like trying to use a brand-new power tool without reading the manual. But remember, the goal isn’t to become some standoffish jerk; it’s about protecting your time and making sure you actually have the bandwidth to do a good job on the things that truly matter. Once you start setting these boundaries, you’ll find that your schedule becomes much more manageable and realistic.

At the end of the day, I’ve learned that saying “no” to the wrong things is the only way to say “yes” to the right ones. If you spend all your energy fixing everyone else’s problems, you’re going to run out of steam for your own life. Think of your time like a limited supply of materials in a workshop—you can’t build something great if you’re constantly giving your supplies away to every random project that walks through the door. Trust your gut, start small, and don’t be afraid to make a few mistakes along the way. You’ve got this, and I promise, the view from the other side of a well-placed “no” is totally worth it.

Frequently Asked Questions

What do I do if the person asking is my boss or someone I can't easily say no to?

Look, I get it. Saying “no” to a boss feels less like setting a boundary and more like poking a hornet’s nest. When you can’t just walk away, don’t just shut the door—offer a trade. Try the “Yes, if…” approach. “I can definitely take that on, but which of my current projects should I push back to make room for it?” It shifts the conversation from defiance to managing your workload like a pro.

How can I tell the difference between a genuine boundary and just being lazy?

Look, I get it. I’ve been there, staring at a pile of laundry or a broken sink, wondering if I’m actually “protecting my energy” or just being a couch potato. Here’s my rule of thumb: a boundary is about protecting your capacity to do better work or be a better person later. Laziness is just avoiding the discomfort of the task itself. If saying no leaves you feeling recharged and ready for what matters, it’s a boundary. If it just leaves you feeling sluggish and guilty, you might just be procrastinating.

Is there a way to say no without sounding like a jerk or burning a bridge?

Look, I’ve definitely been there—staring at a request and worrying that saying “not this time” is going to blow up a friendship or a job. The trick is to keep the focus on your capacity, not the person asking. Instead of a cold “no,” try something like, “I’d love to help, but my plate is totally full right now.” You’re not rejecting them; you’re just being honest about your bandwidth. It keeps things respectful and keeps the bridge intact.

Benefits of single tasking over multitasking.

Why Single-tasking Beats Multitasking Every Time

I remember sitting on my kitchen floor last Tuesday, surrounded by three half-finished projects: a disassembled toaster, a pile of overdue bills, and my laptop open to a work email that felt like it was written in a foreign language. I was trying to do it all at once, thinking I was being a high-performer, but honestly? I was just spinning my wheels. My brain felt like a cheap power tool with a frayed cord—lots of noise, but absolutely zero torque. That’s when it hit me that my obsession with multitasking was actually just a fancy way of being inefficient, and I desperately needed to get back to the basics of single tasking.

Look, I’m not here to sell you some expensive $500 productivity app or a complex “flow state” seminar. I’ve spent enough time tinkering with engines and code to know that if you try to tighten four bolts at the same time, none of them are going to stay tight. In this guide, I’m going to show you how to strip away the noise and tackle your day one piece at a time. We’re going to use some simple, practical steps to help you reclaim your focus and actually get things done without feeling like your head is going to explode.

Table of Contents

Fix Your Brain Function and Task Switching Problems

Fix Your Brain Function and Task Switching Problems.

Ever feel like your brain is a browser with fifty tabs open, and half of them are playing music you can’t find? That’s not just a feeling; it’s a real physiological tax. When you jump from an email to a spreadsheet and back to a text message, you aren’t actually “multitasking”—you’re just constantly hitting the brakes and restarting your engine. This is what experts call attention residue explained: even when you move to a new task, a piece of your focus stays stuck on the last thing you were doing. It’s like trying to drive a truck with the parking brake halfway engaged; you’re burning way more fuel just to move a few feet.

To get back on track, you need to focus on cognitive load reduction. Think of your mental energy like a battery; every time you switch gears, you’re draining it faster. Instead of trying to power through the chaos, try to clear the deck. By sticking to one job until it’s done, you stop that constant mental friction and finally give your brain the space to actually think instead of just reacting.

Reduce Your Cognitive Load Reduction to Clear the Mess

Reduce Your Cognitive Load Reduction to Clear the Mess.

Think of your brain like a workbench in my garage. If I’m trying to fix a vintage drill but the table is covered in half-finished plumbing repairs, old coffee mugs, and random scraps of wood, I’m going to struggle. That’s exactly what happens when you try to juggle too many open loops in your head. This is where cognitive load reduction comes into play. When you clutter your mental space with “I need to remember to call the bank” or “I wonder if I turned the oven off,” you’re leaving less room for the actual job at hand.

To clear the mess, you’ve got to get those distractions out of your skull and onto paper. I’ve found that a quick “brain dump” at the start of the day works wonders. Write down every nagging thought, then pick just one thing to tackle. By narrowing your focus, you’re practicing productivity through monotasking, which essentially means you’re giving your mind permission to stop scanning the horizon for problems and start focusing on the task right in front of you. It’s about making your mental workspace as clean as a freshly organized tool chest.

5 Ways to Stop the Chaos and Actually Get Stuff Done

  • Kill the notifications. Seriously. Every time your phone buzzes or a little red dot pops up on your screen, your focus takes a hit. Put your phone in another room or flip it face down. If it’s not screaming for your attention, it shouldn’t be.
  • Use a timer to stay on track. I like using a simple kitchen timer or a basic app to set a block of 25 minutes. Tell yourself you’re only doing one specific thing until that timer dings. It makes the mountain feel like a small hill.
  • Close your browser tabs. We’ve all been there—having twenty tabs open like it’s a scavenger hunt. It’s a mess. If you aren’t using a tab for the exact task you’re doing right now, close it or save it for later. Clear tabs, clear head.
  • Write down your “distraction list.” When you’re working and suddenly remember you need to buy lightbulbs or email your landlord, don’t switch tasks. Just scribble it on a notepad next to you and get back to work. You’ll tackle that list once your main job is done.
  • Prep your workspace the night before. Just like I’ll set out my tools before a project, try setting out your “work tools” for the next day. If you need to write a report, have the document open and ready. If you need to clean the garage, have the broom out. Removing that first bit of friction makes starting way easier.

The Bottom Line: How to Stop Spinning Your Wheels

Stop treating your brain like a browser with fifty tabs open; pick one job, close the rest, and actually get it done.

Clear out the mental clutter by writing things down so you aren’t wasting energy just trying to remember what you’re supposed to be doing.

Celebrate the small wins—finishing one single task feels a whole lot better than half-finishing five.

## The Real Secret to Getting Stuff Done

“Look, you wouldn’t try to fix a leaky sink while simultaneously trying to cook a three-course meal and answering emails; you’d just end up with a flooded kitchen and a burnt dinner. Your brain works the exact same way. Stop trying to do everything at once and just pick one tool, one task, and one goal until it’s finished.”

Nathan Cole

Getting It Done, One Thing at a Time

Getting It Done, One Thing at a Time.

Look, I know it feels like we’re supposed to be these superhuman machines that can answer emails while cooking dinner and listening to a podcast all at once. But as we’ve talked about, that’s just a recipe for a fried brain and a mountain of half-finished projects. By tackling that constant task-switching and actually clearing out the mental clutter through cognitive load reduction, you aren’t just being more efficient—you’re actually giving your brain a chance to breathe. It’s about moving away from that frantic, scattered feeling and moving toward a system where you actually finish what you start.

At the end of the day, I want you to remember that productivity isn’t about how much noise you can make or how many tabs you can have open in your browser. It’s about the satisfaction of looking at a completed task and knowing you did it right. Whether you’re fixing a sink, coding a new app, or just trying to get through your inbox, take it one step at a time. You don’t have to master your whole life by tomorrow morning; just focus on the one thing right in front of you. Trust me, once you start seeing those small wins pile up, you’ll wonder why you ever tried to do everything at once.

Frequently Asked Questions

How am I supposed to stay focused on one thing when my job literally requires me to respond to emails and Slack messages all day?

I hear you—that’s the million-dollar question. When your job feels like a constant barrage of pings, “just focusing” sounds like a joke. Here’s my workaround: stop treating every notification like a fire drill. Set specific “check-in” windows—say, once an hour—to blast through those messages. Outside of those windows, close Slack and turn off email alerts. You aren’t ignoring people; you’re just batching the chaos so you can actually get your real work done.

Is there a way to practice single-tasking without it feeling like I'm being incredibly slow or unproductive?

Look, I get it. When you first switch to single-tasking, it feels like you’re working in slow motion while the rest of the world is sprinting. It’s unnerving. But here’s the trick: stop measuring “productivity” by how many things you touch, and start measuring it by what you actually finish. Try setting a timer for just 20 minutes on one task. Once you see that finished result, you’ll realize you aren’t being slow—you’re actually getting stuff done.

What do I do when a sudden "emergency" pops up while I'm in the middle of a deep work session?

Look, I get it. You’re finally in the zone, and then—bam—the Wi-Fi dies or a client calls with a “crisis.” Don’t just drop everything; that’s how you lose your momentum. First, take ten seconds to decide: is this a real fire or just a loud noise? If it can wait, write down exactly where you left off so you don’t have to relearn it later. If it’s a real emergency, handle it, then reset.

Guide on how to use a drill.

How to Use a Drill: a Beginner’s Guide

I still remember the first time I tried to hang a heavy floating shelf in my first apartment; I was so intimidated by that heavy, black plastic tool sitting on the floor that I actually ended up just using command strips and hoping for the best. Looking back, I was terrified of the noise and the idea of accidentally drilling straight through my drywall and into the neighbor’s living room. But here’s the truth: most people think you need a degree in engineering to master power tools, when really, learning how to use a drill is just about understanding a few basic mechanics and having the right bit in your hand.

I’m not here to give you a technical manual that reads like a textbook. Instead, I’m going to walk you through the actual, hands-on stuff—the kind of lessons I learned the hard way while fixing up old houses and tinkering in my garage. We’ll cover everything from holding it steady so you don’t slip, to picking the right speed for the job. By the time we’re done, you’ll stop eyeing that tool with suspicion and start feeling like you can actually tackle your next weekend project with confidence.

Table of Contents

Guide Overview

Total Time: 30-60 minutes
Estimated Cost: $0 (assuming tools are owned)
Difficulty: Beginner

Tools & Supplies

  • Power Drill (Cordless or corded drill)
  • Drill Bits (Set of various sizes for drilling and driving)
  • Workpiece (Wood, metal, or plastic)
  • Safety Gear (Safety glasses and gloves)

Step-by-Step Instructions

  • 1. First things first, you’ve got to pick your bit. Don’t just grab the first thing you see in the plastic organizer; if you’re drilling into wood, you want a wood bit, and if you’re hitting metal, you need something sturdier. I always tell myself to double-check the tip before I even touch the drill, because using the wrong bit is the fastest way to ruin a project (and your mood).
  • 2. Once you have your bit, it’s time to load it into the chuck. That’s the part at the very front that looks like a little claw. You’ll twist it to open the jaws, slide your bit in there, and then tighten it back up. Most modern drills are “keyless,” so you can just tighten it by hand, but make sure it’s snug so the bit doesn’t wobble around when you start working.
  • 3. Now, let’s talk about setting your speed and torque. On the top of the drill, you’ll usually see a dial or a switch. For most DIY stuff, you’ll want to keep it on the lower setting for more control, especially if you’re driving a screw. I like to think of it like shifting gears in a car; you don’t want to go full throttle right out of the gate if you’re just trying to do some delicate work.
  • 4. Before you pull the trigger, mark your spot. I never, ever just start drilling blindly. Take a pencil or a nail and make a tiny little dent where you want the hole to go. This is a total lifesaver because it gives the bit a place to sit so it doesn’t skitter across your wood or wall the second you start spinning.
  • 5. Get into position and apply steady pressure. Hold the drill firmly with both hands if you can—one on the handle and one on the back to keep it steady. When you start the motor, don’t push like you’re trying to break through a floor; just lean into it gently. Let the tool do the heavy lifting, and if it starts to feel like it’s struggling, back off a little and try again.
  • 6. Finally, once you’ve reached the depth you want, slowly release the trigger. Don’t just yank the drill out of the hole while it’s still spinning at max speed, or you’ll end up with a messy, jagged hole. Bring the speed down, pull the bit out clean, and take a second to admire your handiwork. You did it!

Mastering the Basics Proper Drill Grip Technique and Safety

Mastering the Basics Proper Drill Grip Technique and Safety

Before you even pull the trigger, let’s talk about how you actually hold the thing. I learned the hard way that if you’re holding a drill like a delicate tea cup, you’re going to lose control the second the bit catches. You want to use a proper drill grip technique where your dominant hand holds the handle firmly, while your other hand wraps around the back of the tool to provide counter-pressure. This keeps the bit from “walking” across your workpiece and helps you stay steady. Think of it as being part of the machine rather than just holding it.

Safety isn’t just about wearing goggles—though you definitely should—it’s about staying in command of the tool. One of the most important cordless drill safety precautions is making sure your workpiece is clamped down tight; if the bit snags and your wood starts spinning, you’re going to have a bad time. Also, don’t forget to keep your fingers clear of the chuck and always double-check that you aren’t drilling into a wire or a pipe hidden behind the wall. Stay focused, stay steady, and you’ll do just fine.

The Right Tool for the Job Drill Bit Types and Uses

The Right Tool for the Job Drill Bit Types and Uses

Look, I’ve been there—standing in the middle of an aisle at the hardware store, staring at a wall of shiny metal bits, wondering which one won’t snap the second it touches my project. It’s easy to get overwhelmed, but once you understand the basic drill bit types and uses, everything gets a lot easier. For most of your standard wood projects, a twist bit is your best friend. If you’re working with metal, you’ll want something a bit tougher, like a HSS (high-speed steel) bit. But if you’re trying to figure out how to drill into masonry—like a brick patio or a concrete foundation—standard bits will just die on you. You’ll need a masonry bit, which has that distinct, blunt carbide tip designed to hammer through stone.

One pro tip I learned the hard way: always start by drilling pilot holes. If you try to drive a large screw into a piece of hardwood without a tiny starter hole, you’re either going to split the wood or burn out your motor. It’s a small extra step that saves a massive amount of headache.

Pro Moves to Keep Your Project from Going Sideways

  • Mark your spot with a tiny pilot hole first. If you just start driving a big bit into wood, it’s liable to wander off and ruin your alignment, leaving you with a crooked hole and a headache.
  • Don’t go full throttle right away. Start slow with a light squeeze on the trigger to get the bit seated, then ramp up the speed once you know you’re on track. It keeps things steady and prevents slipping.
  • Watch your pressure, but don’t lean your whole body weight into it. Let the tool do the heavy lifting. If you’re pushing too hard, you’re more likely to snap a bit or strip out the screw head.
  • Keep an eye on the “walking.” If you feel the drill starting to tilt or skid, stop immediately, reset your stance, and try again. It’s much easier to fix a small slip than a massive gouge in your material.
  • Listen to what the motor is telling you. If it starts sounding strained or high-pitched, you’re probably pushing too hard or using a bit that’s too dull. Back off a second, let it breathe, and adjust your approach.

Quick Wins to Keep You Moving

Don’t rush the process; take a second to double-check your bit and your grip before you pull the trigger so you aren’t fighting the tool halfway through.

Match your bit to your material every single time—using a wood bit on metal is a fast way to ruin a good tool and a frustrating afternoon.

Keep your eyes on the work and your body steady, and remember that if it feels like you’re losing control, just let go and reset.

## My Golden Rule for the Workshop

“A drill isn’t a weapon and it isn’t a magic wand; it’s just a tool. If you stop trying to muscle it into submission and start listening to how it feels in your hands, you’ll realize you’re in control, not the other way around.”

Nathan Cole

You've Got This

Using a power drill: You've Got This.

Look, I know that first time you pull the trigger and that motor whirs to life, it can feel a little overwhelming. But just remember what we talked about: keep your grip firm, pick the right bit for the material you’re working with, and always, always prioritize your safety gear. Once you stop overthinking the mechanics and start focusing on the steady pressure and the right speed, you’ll realize that using a drill isn’t some mysterious black art. It’s just about matching the right tool to the task and staying patient while you work. If you get a crooked hole or a stripped screw, don’t sweat it—even I mess up more often than I’d like to admit.

At the end of the day, a drill is more than just a piece of plastic and metal sitting in your toolbox; it’s your ticket to actually getting things done around the house. There is a specific kind of satisfaction that comes from looking at a shelf you hung or a project you finished and knowing you didn’t have to call a professional to do it for you. So, grab your safety glasses, head out to the garage, and start building something. You might be surprised at just how much you can accomplish once you stop being afraid of the noise.

Frequently Asked Questions

Is it okay to use a regular drill bit on metal, or am I going to ruin the bit?

Short answer? Don’t do it. If you try to use a standard wood or multipurpose bit on metal, you’re going to have a bad time. You’ll likely overheat the bit, dull the tip instantly, and end up frustrated with a piece of scrap metal that won’t budge. Grab yourself a dedicated HSS (High-Speed Steel) bit instead. They’re designed to handle that heat, and they’ll make the job feel smooth rather than a struggle.

How do I stop the drill from slipping when I'm trying to start a hole in something smooth?

I’ve been there—nothing’s more frustrating than watching your drill bit skate across a surface like it’s on ice. To stop that slip, start with a center punch or even a sharp nail. Give the spot a quick, firm tap with a hammer to create a tiny divot. That little notch gives your bit a place to sit so it stays put once you pull the trigger. It makes a world of difference.

What’s the deal with the torque settings—do I really need to mess with those, or can I just leave it on the highest setting?

Look, I get it—the temptation to just crank it to the max is real. But honestly? Leaving it on the highest setting is a quick way to strip a screw head or crack your workpiece. Think of torque like seasoning: too much of a good thing ruins the dish. If you’re driving small screws into soft wood, dial it down. Use the higher settings for heavy-duty drilling. It’s all about control, not just raw power.

Learn how to cook pasta perfectly.

How to Cook Pasta Like an Italian

I still remember my first apartment in my early twenties, staring at a box of spaghetti like it was some kind of high-stakes engineering project. I’d spent twenty bucks on fancy, artisanal noodles that promised the world, only to end up with a gummy, overcooked mess that tasted more like wet cardboard than a real meal. It turns out, you don’t need a culinary degree or a kitchen full of expensive gadgets to master the basics; you just need to stop overthinking it. I spent way too many nights failing at how to cook pasta perfectly because I was following those ridiculous, complicated recipes that make a simple weeknight dinner feel like a chore.

Look, I’m not here to sell you on some gourmet lifestyle or tell you that you need imported olive oil to get this right. I’m going to give you the straightforward, no-nonsense truth based on years of trial, error, and a whole lot of salty water. I’ll break down the actual mechanics of the process so you can walk into your kitchen with total confidence. We’re going to strip away the fluff and focus on the simple, repeatable steps that ensure you nail that perfect al dente bite every single time.

Table of Contents

Mastering Boiling Water for Pasta and Salting It Right

Mastering Boiling Water for Pasta and Salting It Right

First things first: don’t go trying to boil pasta in a tiny saucepan. You need a big pot with enough room for the noodles to swim freely. If they’re crowded, they’ll stick together into one giant, gummy mess. Once you get that boiling water for pasta going at a steady, rolling boil, it’s time for the most important part: the salt. I know it sounds like a lot, but you want that water to taste like the sea. This is your only chance to season the actual noodle, not just the sauce sitting on top of it.

Don’t be shy with the shaker, either. Salting pasta water heavily is the secret to achieving al dente texture that actually tastes good. While you’re at it, keep an eye on those bubbles. If the heat is too low, the temperature drops when you dump the pasta in, and you’ll end up with a mushy disaster. Just keep it hot, keep it salty, and you’re already halfway to a meal you can be proud of.

Choosing Types of Pasta Shapes and Cooking Times

Choosing Types of Pasta Shapes and Cooking Times.

Now, let’s talk about the actual pasta you’re pulling off the shelf. I used to think a box of penne was just a box of penne, but I quickly learned that types of pasta shapes and cooking times actually matter a lot depending on what you’re making. If you’re tossing something with a heavy, chunky meat sauce, go for the big stuff like rigatoni—the ridges and hollow centers act like little scoops for the goodness. If you’re doing a light, oil-based sauce, stick to something thin like spaghetti or angel hair so you don’t end up with a heavy, clumpy mess in your bowl.

The biggest mistake I see people make is ignoring the clock. Every shape has its own sweet spot, and that window is smaller than you think. You’re aiming for achieving al dente texture, which is just a fancy way of saying the pasta should have a slight, satisfying bite in the middle rather than being mushy. Always start tasting a piece about two minutes before the box says it’ll be done. Trust your taste buds over the label every single time.

Five Pro Moves to Level Up Your Pasta Game

  • Save a mug of that liquid gold. Before you drain the pot, scoop out a cup of the starchy pasta water. I use this as my secret weapon to loosen up sauces and help them cling to the noodles instead of just sliding off to the bottom of the bowl.
  • Stop rinsing your pasta like it’s a dirty dish. I know it feels intuitive to wash away the starch, but that’s exactly what you need for a silky sauce. Unless you’re making a cold pasta salad, keep that starch right where it belongs—on the noodles.
  • Don’t let the sauce wait for the pasta. Most people boil the noodles, drain them, and then start heating the sauce. By the time the sauce is ready, your pasta is a gummy mess. Get your sauce simmering and ready to go before the pasta even hits the water.
  • The “finish in the pan” trick is a game changer. Instead of just dumping sauce on top of plain noodles, toss the pasta directly into the skillet with your sauce for the last minute of cooking. It lets the pasta soak up the flavor from the inside out.
  • Trust your taste buds, not just the box. Package instructions are a decent starting point, but they aren’t law. Start testing your pasta a minute or two before the timer goes off. You want that slight “bite” in the middle—that’s the al dente magic that makes a meal feel professional.

Quick Wins for Your Next Pasta Night

Don’t trust the box blindly—start tasting your pasta a minute or two before the timer goes off so you can catch that perfect al dente bite.

Keep a little bit of that starchy pasta water in a mug before you drain the pot; it’s liquid gold for making your sauce stick to the noodles.

Give your pasta plenty of room to swim in a big pot of salted water so it doesn’t turn into a gummy, clumpy mess.

## The Golden Rule of the Pot

“Look, you don’t need a culinary degree to nail this; you just need to stop treating the pot like a science experiment and start treating it like a tool. Salt that water until it tastes like the ocean, keep your eyes on the clock, and trust your teeth more than the box instructions.”

Nathan Cole

You've Got This

Cooking perfect al dente pasta: You've Got This.

At the end of the day, nailing perfect pasta really comes down to a few simple habits. Remember to salt that water like the sea, pick a shape that actually holds onto your sauce, and—most importantly—keep a close eye on the clock. Don’t just rely on the box instructions; start tasting that pasta a minute or two early to find that sweet spot. Once you get the hang of checking for that perfect al dente bite, you’ll realize you don’t need a fancy culinary degree to make a killer meal. It’s all about those small, intentional tweaks that turn a basic box of noodles into something worth savoring.

Look, I know that sometimes standing over a steaming pot feels like just another chore on a long list, but there is something seriously rewarding about making something great with your own two hands. Cooking shouldn’t feel like a high-stakes exam; it should be a chance to unwind and create something delicious. So, don’t be afraid to make a few mistakes along the way—even I still overcook a batch of penne every once in a while. Just keep practicing, keep tasting, and remember that everything is figure-out-able. Now, grab a fork and go enjoy that meal!

Frequently Asked Questions

Is it actually worth saving a cup of that starchy pasta water, or is it just a kitchen myth?

Trust me, it’s definitely not a myth. I used to toss it down the drain without a second thought, but once I realized what it actually does, I never went back. That starchy water is basically liquid gold. When you swirl a splash into your sauce, it acts like a bridge, helping the sauce actually cling to the noodles instead of just sliding off to the bottom of the bowl. It’s a total game-changer.

Should I be tossing the pasta in sauce immediately, or is there a better way to make sure the flavors actually stick?

Don’t just dump that pasta into a bowl of sauce and call it a day. If you want that restaurant-quality cling, you’ve gotta marry them in the pan. Before you drain the noodles, scoop out a mug of that starchy pasta water. Toss your pasta directly into your sauce with a splash of that liquid gold and a knob of butter or a drizzle of oil. Give it a good toss over the heat; that starch acts like glue, making sure every single bite is coated perfectly.

What’s the best way to handle leftover pasta so it doesn't turn into a mushy mess the next day?

Don’t let your leftovers turn into a bowl of glue! The secret is to rinse that pasta under cold water immediately after draining to stop the cooking process and wash away excess starch. Once it’s cool, toss it with a tiny bit of olive oil so the pieces don’t stick together. When you’re ready to reheat, skip the microwave if you can—a quick sauté in a pan with a splash of water or sauce works wonders.

Effective salary negotiation tips for introverts.

Salary Negotiation Tips for People Who Hate Negotiating

I remember sitting in my first real office job, staring at a job offer letter and feeling like my stomach was doing backflips. I wanted to ask for more—I knew I was worth it—but I was terrified that if I spoke up, they’d just take the offer off the table. I’d spent hours reading these bloated, corporate “expert” blogs filled with jargon about leveraging synergies and market positioning, but none of it actually helped the guy sitting there with sweaty palms. Most of the advice out there regarding salary negotiation tips is way too polished and feels like it was written by someone who has never actually had to advocate for themselves in a real-world setting.

I’m not here to give you a script to memorize or a bunch of high-level corporate fluff. Instead, I want to break this down the same way I’d approach fixing a leaky sink or troubleshooting a stubborn engine: by looking at the parts, understanding how they work, and taking it one manageable step at a time. I’m going to share the practical, no-nonsense salary negotiation tips I’ve learned through trial, error, and a lot of hard conversations. We’re going to strip away the intimidation and focus on a simple, step-by-step plan so you can walk into that meeting feeling completely prepared.

Table of Contents

Mastering Market Value Research Without the Headache

Mastering Market Value Research Without the Headache

Before you even step into the office to talk numbers, you need to know what you’re actually worth in the current landscape. I used to think just looking at one job board was enough, but that’s a rookie mistake. To get a real handle on market value research, you’ve got to look at the data from a few different angles. Check out sites like Glassdoor or Payscale, but also keep an eye on recent job postings in your area that list salary ranges. It’s like checking the price of lumber before you start a deck build—you don’t want to go into the project without knowing the actual costs.

Once you’ve gathered your intel, don’t just focus on the base paycheck. A lot of people get stuck on the single number, but a solid total rewards negotiation involves looking at the whole picture. Think about things like extra PTO, professional development stipends, or even remote work flexibility. When you understand how all these compensation package components fit together, you’re not just asking for more money; you’re building a deal that actually works for your life.

Building Your Case With Total Rewards Negotiation

Building Your Case With Total Rewards Negotiation

Here’s the thing: if you focus solely on the number at the bottom of your paycheck, you’re leaving money on the table. I used to think a “raise” just meant a bigger direct deposit, but I quickly learned that a smart total rewards negotiation looks a lot bigger than just a base salary bump. Think of it like a toolkit; you might not need a bigger hammer, but you might really need a better drill or a more reliable level to get the job done.

When you sit down to talk, start looking at all the different compensation package components available to you. If the budget for your base salary is truly locked tight, don’t just walk away. Instead, pivot the conversation toward things like extra PTO, professional development stipends, a flexible remote schedule, or even a one-time signing bonus. It’s all about finding those extra pieces that make your work life easier and more sustainable. I’ve found that most managers have a bit more wiggle room in these “perk” categories than they do in the actual salary line, so don’t be afraid to ask for the full package.

Five ways to nail the actual conversation

  • Practice your “pitch” out loud—seriously. I know it feels goofy talking to your bathroom mirror, but saying your desired number out loud helps you stop stumbling over the words when you’re actually sitting across from your boss. You want it to roll off your tongue like you’ve said it a thousand times.
  • Embrace the power of the pause. After you state your number or make your request, just… stop talking. It’s tempting to fill that awkward silence with justifications or “umms,” but let the silence sit there. It gives your manager space to process and shows you’re confident in what you’ve asked for.
  • Always have a “Plan B” ready. If they come back and say the budget is totally locked for this quarter, don’t just walk away defeated. Have a secondary ask ready, like an extra week of PTO, a professional development stipend, or a remote work arrangement. If they can’t give you cash, see if they can give you flexibility.
  • Keep your emotions in check, even if you’re sweating under the table. If they push back, don’t take it personally. Treat it like a troubleshooting session—you’re just two people trying to find a solution that works for both sides. Staying calm and professional keeps you in the driver’s seat.
  • Get everything in writing. Once you finally shake hands on a deal, don’t just rely on a “sounds good” over coffee. Send a quick, friendly follow-up email summarizing what you discussed. It’s not about being distrustful; it’s just about making sure everyone is looking at the same blueprint before the work begins.

The quick version: What to remember for your next big talk

Don’t just guess what you’re worth; do the legwork beforehand by checking market rates so you’re walking into the room with facts, not just feelings.

Remember that your “pay” isn’t just the number on your paycheck—if they can’t budge on the salary, look at the bigger picture like extra PTO, remote days, or better benefits.

Approach the conversation like a project, not a confrontation; if you stay calm and stick to your prepared steps, you’ll realize the whole thing is way more figure-out-able than it seems.

## The mindset shift you need

“Look, negotiating your pay isn’t about being some shark in a suit; it’s just like fixing a leaky faucet. You don’t go in swinging a sledgehammer—you just gather your facts, identify the problem, and show exactly why the fix is worth the investment.”

Nathan Cole

You’ve Got This

Confident professional negotiating: You’ve Got This.

Look, I know the idea of sitting across from your boss and talking numbers feels a lot more intense than fixing a broken sink or troubleshooting a glitchy router. But if you take everything we’ve talked about—doing your homework on market rates, gathering your wins, and looking at the entire package like extra PTO or professional development—you’re not just asking for more money; you’re presenting a professional case. You’ve done the prep work, you know your value, and you’ve moved past the guesswork. Once you break the negotiation down into these smaller, manageable pieces, you’ll realize that getting what you’re worth is actually much more figure-out-able than it seems.

At the end of the day, don’t let the fear of a “no” keep you from even trying. Even if you don’t walk out with a massive check immediately, you’ve planted a seed and shown your employer that you are serious about your career growth. Treat this like any other DIY project: show up with the right tools, stay calm, and take it one step at a time. You deserve to be compensated for the hard work you put in every single day. So, take a deep breath, grab your notes, and go get what you’ve earned. I’m rooting for you.

Frequently Asked Questions

What do I do if they give me a flat "no" right after I make my ask?

Take a breath. A “no” isn’t a dead end; it’s just a pivot point. Don’t get defensive or shut down. Instead, ask for the “why” behind the decision—is it a budget freeze or a performance gap? Once you know, ask for a roadmap: “What specific milestones do I need to hit to revisit this in six months?” If they can’t do cash, ask for more PTO or a title bump. Keep the door open.

How do I bring up a raise if I haven't had a formal performance review in a while?

Look, I get it. It feels awkward to walk into your boss’s office and basically say, “Hey, remember me? Also, pay me more.” But if you haven’t had a review in a while, you actually have a great opening. Don’t just demand cash; use it as a reason to restart the conversation. Say something like, “I realized it’s been a minute since we sat down to look at my progress, and I’d love to schedule a formal check-in.” It’s much more figure-out-able when you frame it as seeking alignment rather than just asking for a handout.

Is it better to negotiate everything at once, or should I ask for things like extra PTO one by one?

Look, I get the temptation to play it safe and ask for things one by one, but that’s a mistake. Think of it like a home renovation: if you call the contractor every time you decide you want a different backsplash, you’re going to blow the budget and the timeline. Negotiate your whole “package”—salary, PTO, remote days—all at once. It shows you’ve done the math and keeps the conversation focused on one big win.

Guide on how to spot a phishing email.

How to Spot a Phishing Email Before It Fools You

I remember sitting at my kitchen table last Tuesday, coffee in hand, when an alert popped up that looked exactly like a legitimate notice from my bank. My heart did a quick little skip, and for a split second, I actually went to click it. It’s that gut-punch feeling of realization that you might have just handed over your digital keys to a stranger. Most people think you need a degree in cybersecurity to stay safe, but honestly, learning how to spot a phishing email isn’t about memorizing complex code or buying expensive software. It’s really just about developing a bit of a gut instinct for when something feels slightly off.

I’m not here to bore you with technical jargon or scare you into thinking every click is a disaster. Instead, I want to show you how to break these scams down into simple, manageable pieces so you can spot the red flags yourself. I’ll walk you through the exact same mental checklist I use to protect my own accounts, focusing on the practical signs that actually matter. My goal is to make sure you feel completely confident navigating your inbox without the constant worry of being tricked.

Table of Contents

Spotting the Signs of a Fraudulent Email

Spotting the Signs of a Fraudulent Email

The first thing I always tell my friends is to slow down. These scammers rely on you being in a rush, so they use high-pressure language to make you panic. They might claim your bank account is frozen or that you’ve won a prize that expires in ten minutes. This is a classic example of social engineering tactics—they aren’t hacking your computer; they’re trying to hack you. If an email feels like it’s trying to bully you into making a quick decision, that’s your first big red flag.

Next, you’ve got to get a little bit nitpicky with the details. Take a close look at the sender’s name. A lot of times, they’ll use a name you recognize, but if you go one step further and actually look at the email address itself, you’ll find the truth. Identifying spoofed sender addresses is a huge part of staying safe; for instance, instead of `[email protected]`, it might be something weird like `[email protected]`. It looks close at a glance, but it’s a total fake. Always hover your mouse over any buttons or links before clicking to see where they’re actually trying to send you.

Identifying Spoofed Sender Addresses Like a Pro

Identifying Spoofed Sender Addresses Like a Pro

Now, here is where things get a little sneaky. Scammers are getting really good at making an email look like it’s coming from someone you actually trust—like your bank, Netflix, or even your boss. This is a classic move in social engineering tactics, where they play on your trust to get you to let your guard down. The trick is to stop looking at the “Display Name” and start looking at the actual email address behind it.

If you see an email that says it’s from “PayPal Support,” don’t just take their word for it. Click or tap on the sender’s name to reveal the full address. If the name says PayPal but the actual address is something like `[email protected]` or some random string of numbers, you’ve caught them red-handed. Identifying spoofed sender addresses is all about looking for those tiny, intentional typos or extra characters that shouldn’t be there. It’s a bit like spotting a counterfeit tool in a hardware store; once you know what a real one looks like, the fakes start to stand out pretty quickly.

5 Quick Red Flags to Watch Out For

  • Watch out for the “Panic Button” tactic. If an email is screaming at you to “Act Now!” or saying your account will be deleted in two hours, take a breath. Scammers love to rush you because they know we make mistakes when we’re stressed.
  • Give the grammar a once-over. I’m not saying you need to be an English professor, but if an email from a huge company like Amazon or your bank looks like it was written by someone using a broken translation app, it’s probably a fake.
  • Hover before you click. This is a trick I learned a while back: before you click any link, just hover your mouse cursor over it. A little box will pop up showing you the actual web address. If the email says it’s from PayPal but the link points to some weird string of random letters, don’t touch it.
  • Be skeptical of “too good to be true” offers. If you suddenly get an email saying you won a $500 gift card or that you’ve inherited money from a long-lost relative, your internal alarm should be going off. If it feels like a scam, it usually is.
  • Check for generic greetings. Real companies you actually do business with usually know your name. If an email starts with “Dear Valued Customer” or “Dear Member” instead of using your actual name, it’s a sign they’re just casting a wide net to catch anyone.

Quick Tips to Keep Your Inbox Safe

Slow down and look closer; if an email feels “off” or creates a sense of panic, that’s your biggest red flag.

Always double-check the sender’s actual email address, not just the name they’ve typed in, to make sure they aren’t faking it.

When in doubt, don’t click—go directly to the official website or app yourself to handle whatever the email is asking for.

## A Quick Rule of Thumb

“Think of a phishing email like a suspicious stranger knocking on your door at midnight asking for your keys; if something feels off or they’re pushing you to act fast, trust your gut and just don’t open the door.”

Nathan Cole

Keep Your Guard Up and Your Data Safe

Keep Your Guard Up and Your Data Safe.

At the end of the day, spotting a phishing scam really comes down to slowing down and trusting your gut. We’ve covered a lot today, from squinting at those weirdly misspelled sender addresses to hunting down hidden links and watching out for that “too good to be true” sense of urgency. It might feel like a lot to keep track of, but once you start looking for these specific red flags, it becomes second nature. Just remember: if an email feels off, or if it’s asking you to hand over sensitive info out of the blue, it’s always better to stop and double-check through a separate, trusted channel rather than clicking that link.

I know that staring down a screen full of potential scams can feel a bit overwhelming, but don’t let it get to you. Cybersecurity isn’t about being a tech genius or a coding wizard; it’s just about having the right set of tools and the patience to use them. Think of it like learning to fix a leaky pipe—once you know where the pressure is coming from, you can plug the hole. You’ve got the skills now to protect yourself and your family, so stay curious and stay cautious. You’ve totally got this!

Frequently Asked Questions

What should I actually do if I realize I've already clicked a suspicious link or entered my password?

Don’t panic—we’ve all been there. The first thing you need to do is act fast. If you entered a password, go straight to that site and change it immediately. If you use that same password elsewhere, change those too. Next, if you clicked a link, run a quick virus scan on your computer just to be safe. Finally, keep a close eye on your bank statements for a few days. Better safe than sorry!

Can these phishing scams actually get into my text messages or WhatsApp, or is it just email?

Short answer: Absolutely. It’s not just email anymore. These scammers are getting way more comfortable moving into your texts (often called “smishing”) and apps like WhatsApp. They’ll send a frantic text about a “missed delivery” or a “problem with your bank account” because, let’s face it, we’re much more likely to click a link on our phones than in an inbox. Just treat a suspicious text with the same skepticism as a shady email.

Is there a way to set up my inbox so these fake emails don't even show up in the first place?

I wish I could just wave a magic wand and make them vanish, but it’s not quite that simple. You can definitely beef up your defenses by turning on “High” or “Strict” spam filters in your settings, and always keeping your email app updated. Think of it like putting a better screen on a window; it catches most of the bugs, but you still gotta keep an eye out for the ones that squeeze through.

Tips on how to fix slow wifi.

How to Fix Slow Wifi at Home

Ever since I started tinkering with home setups, I’ve realized that most tech companies love to sell you a solution that’s way too expensive for what you actually need. They’ll try to convince you that your entire router is junk and that you need to drop three hundred bucks on a fancy new mesh system just to get a decent signal in the kitchen. Honestly? That’s usually a load of nonsense. Most of the time, when you’re wondering how to fix slow wifi, the problem isn’t your bank account—it’s just a few simple tweaks you haven’t tried yet.

I’m not here to sell you a subscription or some high-end hardware you don’t need. My goal is to show you that most connection hiccups are totally figure-out-able with a little bit of common sense and a few minutes of your time. I’ve spent way too many late nights troubleshooting my own setup so you don’t have to, and I’ve boiled everything down into a few straightforward, DIY steps. We’re going to skip the tech jargon and get your speeds back up to where they should be, without breaking the bank.

Table of Contents

Check Your Internet Speed Test Results First

Check Your Internet Speed Test Results First.

Before we start moving furniture or digging through settings, we need to figure out if the problem is actually your signal or if your provider is just dragging its feet. I always start by running a quick test to see what I’m actually paying for. Head over to a site like Speedtest.net or Fast.com and run a couple of rounds. When you look at your internet speed test results, don’t just look at the big number; pay attention to the “ping” or latency too. If that number is sky-high, you’re dealing with lag, which is a different beast than just having a slow download.

I like to run these tests in two different spots: right next to the router and then in the room where the connection usually fails. This tells me immediately if I’m dealing with a bandwidth issue or if I just need to look into some wifi router placement tips. If the speed is great near the box but drops off a cliff in the bedroom, we know the signal is struggling to travel through your walls. Once we have those numbers, we aren’t just guessing anymore—we’re troubleshooting with a plan.

Reduce Wireless Interference With Simple Tweaks

Reduce Wireless Interference With Simple Tweaks.

If your speed test results came back looking a little pathetic, the culprit might not be your provider, but rather the invisible walls you’re fighting against. Most of us tuck our routers away in a corner or inside a cabinet to keep things looking tidy, but that’s a recipe for disaster. To really reduce wireless interference, you need to think about line-of-sight. I always tell people to get that router up high and out in the open. If it’s sitting behind a heavy TV or tucked under a metal desk, you’re basically asking your signal to run a marathon through a brick wall.

Another quick win involves changing wifi frequency bands depending on what you’re doing. If you’re sitting right next to the router, jump on the 5GHz band for that sweet, high-speed connection. But if you’re heading into the backyard, switch over to the 2.4GHz band; it’s slower, but it handles walls and distance much better. It’s all about optimizing your setup based on where you actually spend your time. A few little adjustments here can make a massive difference in how your tech behaves.

5 quick ways to get your signal back in gear

  • Give your router a classic “power cycle.” I know, it sounds cliché, but unplugging the thing for about 30 seconds and plugging it back in clears out the digital cobwebs and gives it a fresh start. It’s the DIY equivalent of a nap, and it works more often than you’d think.
  • Find a better home for your router. If yours is tucked away in a corner cabinet or buried behind a stack of books, you’re basically choking your signal. Get it up high and out in the open—ideally in a central spot in your house—so the waves can actually reach your devices.
  • Kick off the “bandwidth hogs.” If someone in the next room is downloading a massive 4K movie or a huge game update, your connection is going to tank. Check which devices are sucking up all the juice and see if you can pause those heavy tasks while you’re trying to get work done.
  • Switch up your frequency. Most modern routers have two bands: 2.4GHz and 5GHz. The 2.4GHz one travels through walls better, but the 5GHz one is way faster. If you’re sitting close to the router, try jumping onto the 5GHz band to dodge that congestion.
  • Update your router’s firmware. Just like your phone or laptop, your router needs software updates to run smoothly and fix bugs. Log into your router’s settings page once in a while to see if there’s an update waiting; it can make a world of difference in stability.

Quick wins to get your WiFi back on track

Run a speed test before you start tinkering so you actually know if the problem is your service provider or just your router acting up.

Move your router out of the shadows—getting it away from walls and other electronics can clear up a lot of the signal “noise” slowing you down.

Don’t overcomplicate it; most lag issues can be solved with a few simple adjustments to where your gear sits or a quick hardware reboot.

## A quick reality check

“Look, before you go out and drop a couple hundred bucks on a fancy new router, take a second to see what you’re actually working with. Most of the time, the problem isn’t that your internet is ‘broken’—it’s just that your signal is fighting an uphill battle through walls and clutter.”

Nathan Cole

Wrapping It All Up

Wrapping It All Up: Optimizing WiFi.

Look, I know it’s frustrating when you’re right in the middle of a movie or a crucial work call and everything just starts buffering. But if you follow what we’ve talked about, you’ve already done the heavy lifting. We started by running a speed test to see what we were actually working with, and then we moved on to clearing out that wireless interference by moving the router or adjusting the placement of your gear. Most of the time, fixing slow WiFi isn’t about buying a thousand-dollar mesh system; it’s about making a few smart, simple adjustments to the setup you already have. If you’ve checked your speeds and cleared the physical path for your signal, you’re already ahead of the game.

At the end of the day, technology can feel like this big, intimidating mystery, but I promise you, it’s a lot more figure-out-able than it seems. You don’t need a degree in network engineering to get your connection back on track—you just need a little patience and a willingness to tinker. Don’t let a spinning loading icon get you down. Keep tweaking, keep testing, and don’t be afraid to try a different approach if the first one doesn’t stick. You’ve got this, and once you get that signal running smooth again, you’re going to feel like a total pro.

Frequently Asked Questions

Is my old router actually the problem, or do I just need to change some settings?

It’s a fair question, and honestly, it’s usually a bit of both. If your router is more than five years old, it might just be struggling to keep up with all our modern gadgets. But before you go dropping cash on a new one, let’s look at your settings. Sometimes a simple firmware update or switching your frequency channel can breathe new life into old hardware. Let’s see if we can save you some money first.

Will buying those WiFi extenders actually work, or are they just a waste of money?

Look, I’ve been there—staring at a dead zone in the hallway and thinking a $50 extender is a magic fix. The honest truth? They’re a bit of a band-aid. They can help push a signal into a far corner, but they often cut your speed in half because they’re busy talking to both your router and your device at once. If you’ve got a big house, save your cash and look into a Mesh system instead.

How much does the number of devices connected in my house actually slow things down?

Think of your WiFi like a single garden hose. If you’re just watering a flower, the pressure is great. But if you hook up five more hoses to that same line, everyone’s getting a trickle instead of a spray. Every smart bulb, tablet, and gaming console is pulling from that same “bandwidth bucket.” If you’ve got a dozen devices all fighting for attention at once, that’s exactly why your Netflix starts buffering.