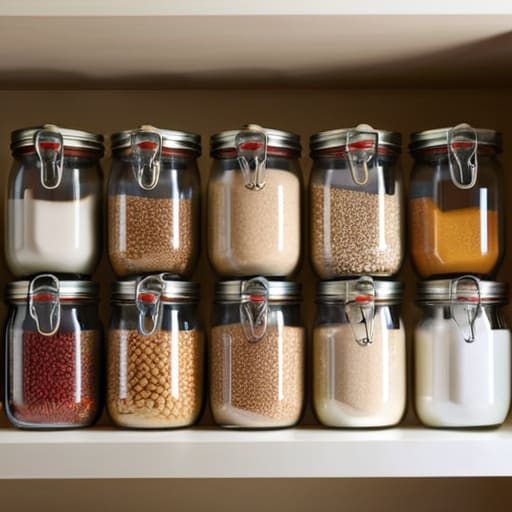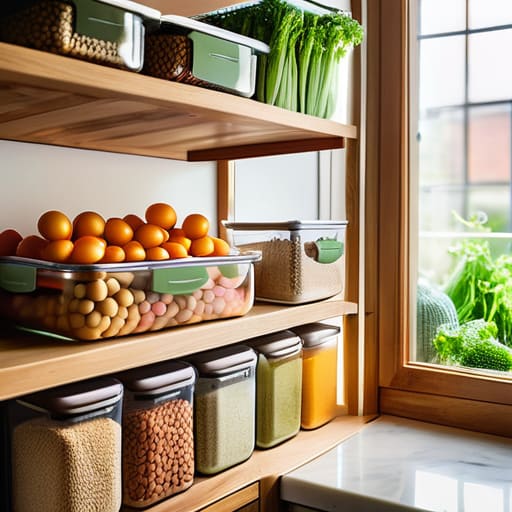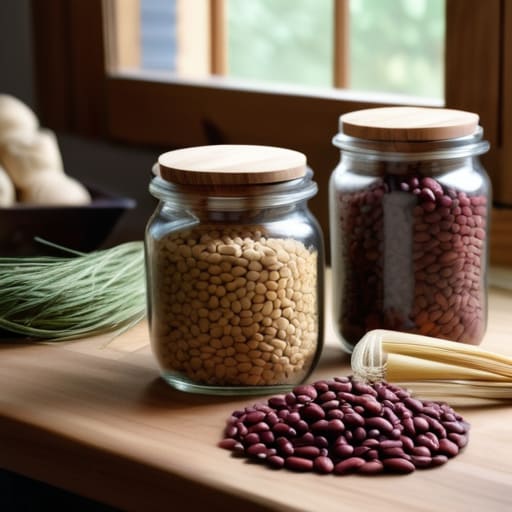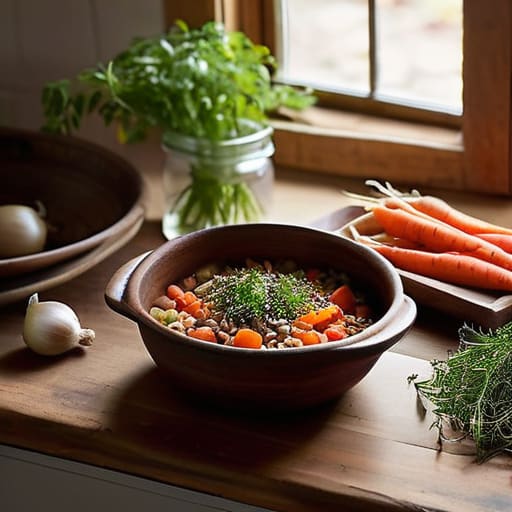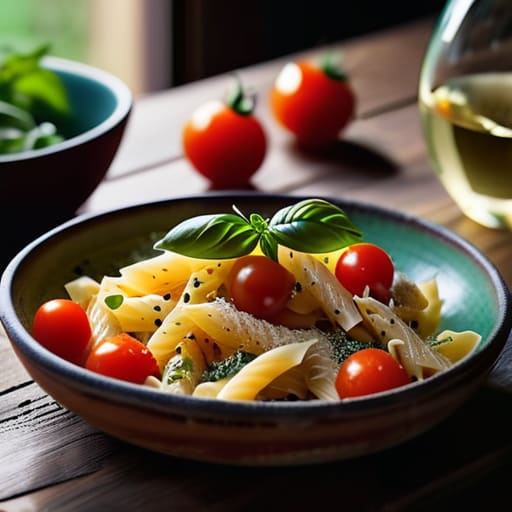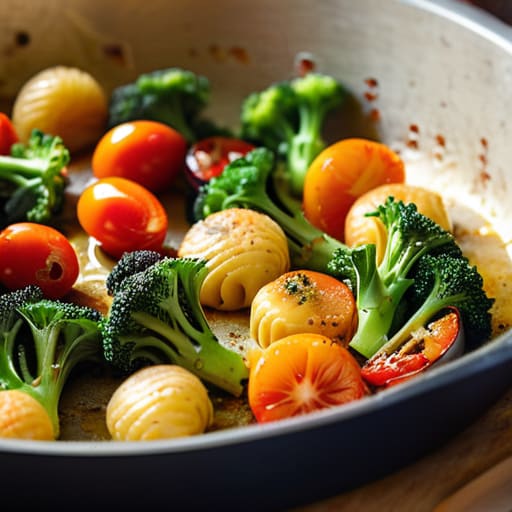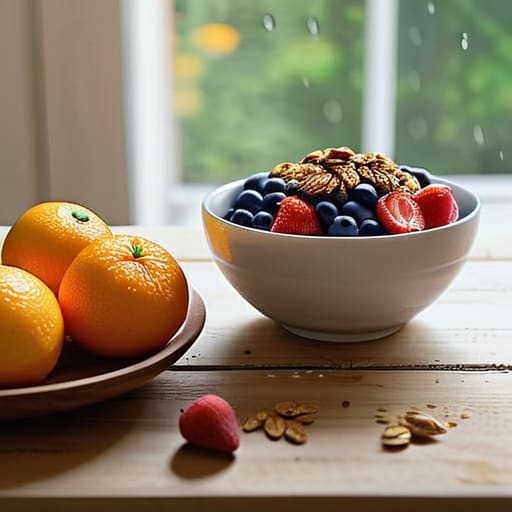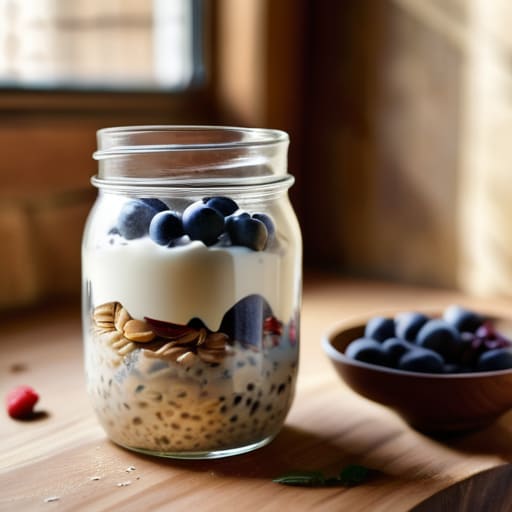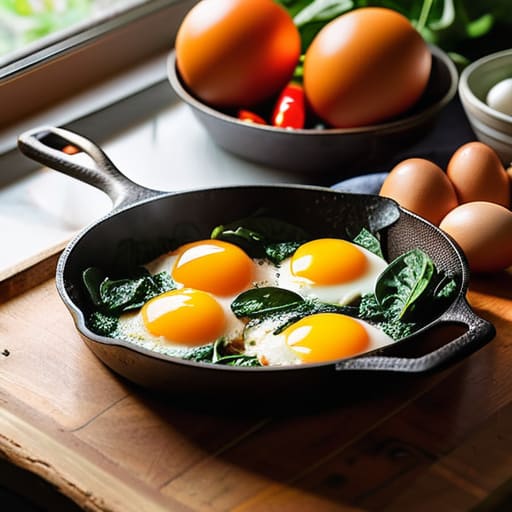
Guide on how to cook beans and lentils.

How to Cook Beans and Lentils (cheap, Healthy, Easy)

I still remember standing in my tiny first apartment kitchen, staring at a bag of dried chickpeas like they were some kind of high-tech puzzle I wasn’t smart enough to solve. I’d tried the “fancy” way once—following some overly complicated recipe that required three different types of aromatics and a specialized pot—and all I ended up with was a pot of mushy, tasteless disappointment. It’s a total myth that you need a culinary degree or a massive budget to master the basics; honestly, most people make things way harder than they need to be when learning how to cook beans and lentils.

Look, I’m not here to give you a lecture or a list of expensive gadgets you don’t need. I’m just going to show you how I do it in my own kitchen: simple, reliable, and foolproof. I’ll break down the actual mechanics of soaking, simmering, and seasoning so you can stop relying on those expensive, salty cans and start making stuff that actually tastes good. My goal is to make sure you walk away feeling like you’ve finally cracked the code on these pantry staples.

Table of Contents

Deciding on Soaking Dried Beans vs No Soak

Deciding on Soaking Dried Beans vs No Soak.

This is where most people get stuck before they even turn on the stove. You’ll see two schools of thought online: the old-school way where you prep everything the night before, and the “just throw it in” method. When you’re weighing soaking dried beans vs no soak, it really comes down to how much time you have and what kind of texture you’re after.

If you’ve got the patience, soaking is your best friend. It helps soften the skins and, more importantly, it’s a great trick for how to prevent gas from beans by breaking down those complex sugars that cause the bloat. Plus, it makes the actual cooking time a lot more predictable.

On the flip side, if you’re a busy person who forgets to plan ahead, you can absolutely skip the soak. You’ll just need to adjust your stovetop bean cooking method by adding more water and a bit more time to the clock. I personally love the soak for big batches, but if I’m craving a quick chili on a Tuesday, I don’t let a lack of prep stop me.

Mastering the Stovetop Bean Cooking Method

Mastering the Stovetop Bean Cooking Method.

Once you’ve decided whether you’re going the soak or no-soak route, it’s time to actually get the heat going. The stovetop bean cooking method is my personal favorite because it gives you the most control. Start by placing your beans in a heavy-bottomed pot—I always reach for my old Dutch oven—and cover them with at least two inches of fresh water. Bring that to a rolling boil, then immediately drop the heat down to a low, steady simmer. You’re looking for those lazy, small bubbles, not a violent boil that’ll mash your beans into mush.

The trick to getting this right is patience and keeping an eye on the clock, since cooking times for different bean varieties can vary wildly. A can of chickpeas is going to take a lot longer than a handful of red lentils. While they simmer, don’t be afraid to get creative with flavor; adding a bay leaf or a clove of smashed garlic to the pot early on makes a huge difference. Just remember to check the texture every twenty minutes or so to make sure you haven’t gone past the sweet spot.

5 Pro-tips to keep your beans from turning into mush

  • Don’t go overboard with the salt right at the start. I used to do this all the time, but adding salt too early can actually toughen up the skins. Wait until they’re mostly tender before you start seasoning heavily.
  • Keep an eye on your aromatics. If you want a deeper flavor without extra work, toss a smashed garlic clove, a bay leaf, or even a halved onion into the pot while they simmer. It’s a total game-changer for the broth.
  • Watch the acid levels. If you’re planning on adding tomatoes, lemon juice, or vinegar, wait until the beans are actually soft. Acid is a flavor powerhouse, but if you add it too soon, it can keep those beans hard no matter how long you boil them.
  • Use the “taste test” method instead of just relying on the timer. Every batch of dried beans is a little different—some are older and drier than others. Poke one with a fork; if it gives way easily, you’re golden.
  • Don’t toss that leftover cooking liquid! That bean liquor is packed with starch and flavor. If you’re making a soup or a stew later in the week, use that liquid instead of plain water to give your dish some serious body.

Quick wins for your next batch

Don’t overthink the soak; if you’re short on time, just rinse them well and go, but if you’ve got the night to spare, an overnight soak makes for a much creamier texture.

Watch your salt—don’t add it too early in the process or you might end up with tough skins, so wait until the beans are actually getting tender.

Keep an eye on the liquid levels throughout the simmer; you want them submerged, so keep a kettle of hot water nearby to top things off if they start looking thirsty.

## The secret to great beans

“Look, you don’t need a fancy pressure cooker or a culinary degree to get a great bowl of beans; you just need a little patience and the willingness to let them simmer until they’re exactly where you want them.”

Nathan Cole

Putting It All Together

Cooking dried beans: Putting It All Together.

Look, I know it feels like a lot when you first stare at a bag of dried beans and a recipe that asks for a twelve-hour soak, but once you get the hang of it, it’s totally manageable. Just remember the basics: decide if you have the time to soak them overnight for that extra creamy texture, or if you’re in a rush and need to go the no-soak route with a bit more simmering time. Keep an eye on your heat levels on the stovetop, don’t go overboard with the salt until they’re actually tender, and always keep a little extra water or broth nearby just in case. If you follow these simple steps, you’re going to end up with something much better—and way cheaper—than anything you’ll find in a tin can.

At the end of the day, cooking from scratch isn’t about being a gourmet chef; it’s about taking control of your kitchen and your budget. There is a certain kind of quiet satisfaction that comes from sitting down to a bowl of lentils you prepped yourself from a handful of dry seeds. Don’t sweat the small stuff if the first batch comes out a little too soft or a little too firm. Cooking is a skill, and just like fixing a leaky sink or troubleshooting a slow computer, you get better every single time you try. So, grab a pot, get some beans on the stove, and just start cooking. You’ve got this.

Frequently Asked Questions

Do I really need to add salt to the water at the beginning, or will that make the skins tough?

That’s a classic question, and I get it—you don’t want to end up with beans that feel like pebbles. But honestly? Go ahead and salt that water. Adding salt early actually helps season the bean all the way to the center, rather than just coating the outside. It won’t toughen the skins; in fact, it helps them stay intact while they soften. Just don’t overdo it—you can always add more at the end.

How can I tell if my beans are actually done without constantly poking them with a spoon?

Look, I’ve spent way too many evenings hovering over a pot, poking beans like I’m testing a ripe melon. Here’s the trick: stop using the spoon and start using your teeth. Take one bean out, let it cool for a second, and bite it. You’re looking for a creamy center with no grainy, chalky texture left. If it’s smooth all the way through, you’re golden. If it still feels a bit sandy, give them ten more minutes.

Can I use a slow cooker or an Instant Pot instead of the stovetop, and will the results be different?

You absolutely can. If you’re short on time or don’t want to hover over a stove, an Instant Pot is a total game-changer—it’s faster and much more “set it and forget it.” A slow cooker is great for a lazy Sunday, though you’ll want to watch the texture so they don’t turn to mush. The main difference? Pressure cooking keeps things tight and snappy, while slow cooking gives them that creamy, soulful vibe.

How to build a balanced meal guide.

How to Build a Balanced Meal Without Counting Anything

I used to think that learning how to build a balanced meal meant I had to buy a dozen different superfoods that cost more than my monthly electric bill or spend three hours prepping fancy salads that tasted like wet grass. Honestly, the whole “wellness” industry makes it feel like you need a PhD in nutrition just to get through a Tuesday night without crashing. It’s all a lot of noise, and frankly, it’s exhausting. Most of that high-end advice is just fluff designed to make you feel like you’re doing it wrong, when really, you’re just trying to get some fuel in your system so you can get on with your life.

Here’s my promise to you: we aren’t going to do any of that nonsense. I’m going to show you how to build a balanced meal using real-world logic and stuff you actually have in your pantry right now. I’ll break it down into a simple, repeatable framework that works whether you’re cooking in a gourmet kitchen or a tiny apartment with a single hot plate. My goal is to strip away the complexity and give you a no-nonsense toolkit so you can stop overthinking your plate and start feeling good about what you eat.

Table of Contents

Mastering the Protein Vegetable Carbohydrate Ratio

Mastering the Protein Vegetable Carbohydrate Ratio plate.

Now, I know looking at a bunch of different food groups can feel like you’re trying to solve a math equation, but let’s simplify it. Think of your plate as a construction project; you need the right materials in the right amounts so the whole thing doesn’t collapse. This is where the protein vegetable carbohydrate ratio comes into play. I like to think of protein as my foundation—it keeps me full and helps my muscles recover after a long day of DIY projects. If you’re just eating a mountain of pasta, you’re going to crash hard an hour later.

A good rule of thumb I live by is the healthy plate method. Try to aim for about a quarter of your plate being a solid protein source, another quarter for your carbs, and then let the vegetables take up the remaining half. This isn’t about strict calorie counting or being obsessive; it’s just about portion control for healthy eating that actually makes sense in a real kitchen. If you get this basic layout down, you’ve already done the hardest part of the job.

The Healthy Plate Method Made Simple

The Healthy Plate Method Made Simple visual.

Now, if you aren’t a fan of doing math while you’re hungry, don’t sweat it. You don’t need a spreadsheet to get this right. I like to use the healthy plate method because it’s visual and requires zero calorie counting. Think of your plate as a blueprint. Instead of worrying about exact grams, just look at the space you’re filling. If you aim to fill half your plate with colorful veggies, a quarter with protein, and the last quarter with your carbs, you’re already winning.

The real trick here is focusing on the nutritional density of foods rather than just the volume. It’s the difference between a plate of plain white pasta and a bowl of hearty farro tossed with roasted broccoli and grilled chicken. One leaves you crashing by 3:00 PM, while the other keeps you fueled for the evening. Once you get the hang of this visual split, you’ll find that portion control for healthy eating actually becomes second nature. It stops being about restriction and starts being about just getting the right mix on your fork.

Five Easy Ways to Nail Your Plate Every Single Time

  • Don’t get hung up on fancy labels. Whether it’s a bag of frozen peas, a can of chickpeas, or a fresh head of broccoli, just focus on getting some color and fiber onto the plate. It doesn’t have to be organic or expensive to count as a win.
  • Keep a “cheat sheet” of easy pairings in your head. I like to think in terms of “base + protein + crunch.” Think rice and black beans with some bell peppers, or pasta with chicken and sautéed spinach. Once you have a few go-to combos, you stop staring blankly at the pantry.
  • Use your pantry as your secret weapon. A balanced meal doesn’t always mean a trip to the grocery store. A tin of tuna, a jar of lentils, and some quick-cooking couscous can make a solid meal in about ten minutes if you’re stuck in a pinch.
  • Watch the “hidden” extras. I love a good sauce or dressing as much as the next guy, but it’s easy to accidentally turn a healthy bowl into a calorie bomb with too much mayo or heavy dressing. Use them as a garnish to add flavor rather than drowning everything.
  • Prep the boring stuff ahead of time. If I have a container of cooked quinoa or a chopped bag of salad in the fridge, building that balanced meal takes zero brainpower. It’s much harder to eat well when you’re staring at a pile of raw ingredients after a long day.

The Quick Cheat Sheet for Your Next Meal

Don’t sweat the math; just aim for a solid mix of protein, veggies, and carbs on every plate to keep your energy steady.

Use your eyes, not a scale—half the plate should be colorful veggies, a quarter protein, and a quarter grains or starches.

Keep it simple and repeatable so you aren’t standing in the kitchen staring at the pantry wondering what to do next.

## The Real Secret to Eating Well

“Forget the complicated nutrition charts and the fancy meal prep containers. Building a balanced meal isn’t about being perfect; it’s just about making sure you’ve got a little bit of everything on your plate so you actually feel good after you eat.”

Nathan Cole

Getting It Done in Your Own Kitchen

Getting It Done in Your Own Kitchen

Look, I know that staring at a pantry full of random ingredients can feel like trying to fix a plumbing leak without a wrench, but it’s really not that complicated once you have the right blueprint. Just remember the core essentials we talked about: grab a solid protein to keep you full, throw in some veggies for the nutrients, and add a healthy carb to keep your energy steady. You don’t need to be a Michelin-star chef or follow a strict, complicated math equation to get this right. If you can master that basic ratio, you can turn almost any pile of groceries into something that actually fuels your body instead of just filling your stomach.

At the end of the day, don’t let the pursuit of a “perfect” meal stop you from just making a good one. Most of the time, we overthink things that are actually pretty straightforward, and eating well is no different. Start small, use what you’ve got on hand, and don’t be afraid to experiment a little as you go. You’ve got the tools and the method now, so just get in there and give it a shot. I promise, once you start building these plates yourself, you’re going to feel a lot more in control of your health and a whole lot better every time you sit down to eat.

Frequently Asked Questions

What do I do if I'm on a tight budget and can't afford all these fresh veggies and proteins?

Look, I get it. I’ve definitely had those weeks where my bank account looks a lot leaner than my grocery list wants it to be. Don’t let the price of organic produce discourage you. Lean hard on frozen veggies—they’re just as nutritious and way cheaper. For protein, grab some dried beans, lentils, or canned tuna. They’re budget superstars. It’s not about being fancy; it’s just about making the most of what you’ve got.

How do I handle balanced meals when I'm eating out or grabbing something quick at a deli?

Look, I get it. Most of the time, I’m cooking at home, but even I end up grabbing a sandwich from the deli or hitting a drive-thru when life gets hectic. Don’t sweat it—you don’t need a kitchen to stay on track. Just use the same logic: look for the protein, grab a side of greens instead of fries, and watch the heavy sauces. It’s all about making the best choice available in the moment.

Is there a way to do this without having to track every single calorie or gram of food?

Honestly, if you’re anything like me, the idea of weighing out every gram of broccoli sounds like a total chore. Good news: you don’t need a spreadsheet to eat well. Forget the calorie counting and just use your eyes. Use your hand as a guide—a palm of protein, a fist of veggies, and a cupped hand of carbs. It’s much more “figure-out-able” and way less stressful than living by a math equation.

Useful kitchen tips and tricks for saving time.

Kitchen Tips and Tricks That Save You Time

I still remember my first apartment, a tiny studio where the “kitchen” was basically just a hot plate and a prayer. I spent more time scrubbing burnt grease off a cheap pan and wrestling with dull knives than I did actually eating. I used to think you needed a professional-grade setup and a cabinet full of specialized gadgets to make a decent meal, but honestly? Most of those fancy influencers are just selling you clutter. You don’t need a $400 immersion blender to get through a Tuesday night; you just need a few solid kitchen tips and tricks that actually work when you’re tired and hungry.

I’m not here to give you any of that over-the-top, “culinary masterclass” nonsense that requires a degree and a massive budget. My goal is to give you the real-world shortcuts I’ve picked up from years of trial, error, and way too many burnt dinners. We’re going to focus on practical, low-stress ways to organize your space, prep faster, and make your tools work for you instead of against you. I promise to keep things simple and figure-out-able, so you can spend less time stressing over the sink and more time actually enjoying your food.

Table of Contents

Mastering Meal Prep Efficiency Without the Stress

Mastering Meal Prep Efficiency Without the Stress

Look, I used to think meal prep meant spending my entire Sunday hunched over a cutting board, staring at a mountain of broccoli until my eyes crossed. It felt more like a chore than a way to save time. But after a few failed attempts that ended in a fridge full of mushy leftovers, I realized that meal prep efficiency isn’t about working harder; it’s about working smarter. The trick is to stop trying to cook ten different recipes at once and start focusing on building components.

Instead of making full meals, try prepping “building blocks”—like a big batch of roasted sweet potatoes, a tray of seasoned chicken, or a pot of quinoa. When you have these ready to go, assembly takes minutes rather than an hour. I also highly recommend investing in some decent food storage solutions, like glass containers that actually seal tight. It keeps everything fresher for longer and helps with reducing food waste, which is a huge win for both your wallet and your conscience. Once you get into this rhythm, you’ll stop dreading the weekday rush.

Building Culinary Skill Building Through Small Wins

Building Culinary Skill Building Through Small Wins.

Look, I used to think that becoming a “good cook” meant mastering a dozen complex French sauces or flipping omelets like a pro on a cooking show. But after years of trial and error in my own kitchen, I’ve realized that real culinary skill building is actually about the little things. It’s not about the fancy recipe; it’s about the mechanics. For example, I spent a whole weekend just practicing safe knife handling techniques on a pile of cheap onions. It sounds boring, I know, but once you stop worrying about whether you’re going to nick a finger, you actually start enjoying the rhythm of chopping.

Once you nail those small physical skills, everything else starts to click. You’ll find that you’re moving faster and feeling more confident. I’ve also learned that part of being a better cook is actually just being a better manager of your space. Taking ten minutes to focus on some basic kitchen organization ideas—like making sure your most-used spices are actually within reach—removes that mental friction that makes cooking feel like a chore. When your tools are ready and your hands know what to do, you stop following recipes like a manual and start actually cooking.

Five Quick Fixes to Stop the Kitchen Chaos

  • Get organized with a “landing zone.” Before you even start cooking, clear off a small section of your counter and keep it empty. This is your home base for ingredients, tools, or that half-empty coffee mug that always seems to migrate toward your prep area. It keeps the clutter from creeping into your workspace.
  • Stop fighting your knives. I learned the hard way that a dull knife is actually way more dangerous than a sharp one because it slips. You don’t need a professional sharpening service; just grab a decent honing rod and spend thirty seconds giving your blade a quick pass before you start chopping. It makes the whole process feel smoother and less like a chore.
  • Clean as you go—seriously. It sounds like something your mom would nag you about, but it’s a game changer. If you have two minutes while the onions are sautéing, use that time to toss the scraps in the bin and rinse the cutting board. You’ll actually enjoy eating your meal if you aren’t staring at a mountain of crusty dishes afterward.
  • Master the “Mise en Place” lite version. You don’t need to be a fancy French chef to use this. Just get all your ingredients out, chopped, and measured into little bowls or even just piles on a plate before you turn on the heat. There is nothing more stressful than realizing you forgot to mince the garlic while your butter is already browning in the pan.
  • Use your “dead time” for small wins. If you’re waiting for the water to boil or the oven to preheat, don’t just scroll on your phone. Use those three minutes to wipe down the stovetop or empty the dishwasher. It keeps the momentum going and means you aren’t stuck cleaning for an hour once the meal is over.

The Bottom Line: Making It Work in Your Kitchen

Don’t try to overhaul your entire life in one Sunday; pick one small habit, like chopping veggies ahead of time, and nail it before moving on to the next thing.

Keep your tools sharp and your workspace clear, because a cluttered counter is just a fast track to feeling overwhelmed and quitting halfway through a recipe.

Remember that mistakes are just part of the process—even I burn a few things now and then—so focus on the progress you’re making rather than being perfect.

My Kitchen Philosophy

“Look, you don’t need a culinary degree or a kitchen full of expensive gadgets to make something great; you just need a few solid habits and the confidence to know that if you mess up a recipe, you can always just try again tomorrow.”

Nathan Cole

Making It Your Own

Mastering kitchen basics by Making It Your Own.

Look, I know that trying to overhaul your entire kitchen routine all at once can feel like trying to fix a plumbing leak with nothing but duct tape—it’s messy and usually doesn’t hold up. But if you take what we talked about today—the small wins in skill-building and the way you streamline your meal prep—you’ll start to see the momentum build. You don’t need a professional chef’s setup or a kitchen full of expensive gadgets to get this right. It’s really just about mastering the basics and finding those tiny, repeatable habits that make your daily life run a little smoother.

At the end of the day, your kitchen is your territory, and it should work for you, not against you. Don’t get discouraged if you burn a batch of toast or if your prep work takes way longer than a YouTube video promised. That’s just part of the process. Every time you tackle a new technique or organize a drawer, you’re becoming more capable. My best advice? Just start where you are with whatever tools you’ve got. I promise you, once you get those first few wins under your belt, you’re going to feel like a total pro. Now, go get stuck in!

Frequently Asked Questions

I'm already feeling overwhelmed; what are the absolute must-have tools I need to get started without spending a fortune?

Look, I get it. Walking into a kitchen supply store is a recipe for buyer’s remorse. You don’t need a fancy sous-vide machine or a dozen specialized gadgets to make great food. Start with the “Big Four”: one decent chef’s knife, a sturdy cutting board, a heavy cast-iron or stainless steel skillet, and a good non-stick pan. Grab a basic set of measuring spoons and a digital thermometer too. That’s it. Everything else is just extra noise.

How do I keep my kitchen organized so I'm not constantly digging through messy drawers while I'm trying to cook?

Look, I’ve spent way too many dinners hunting for a spatula in a junk drawer while my garlic was burning. It’s frustrating. The trick is to organize by “zones.” Keep your oils, spices, and prep tools right where you actually use them. Use drawer dividers for the small stuff so things don’t migrate, and if you haven’t used a gadget in a year, get it out of your way. Clear counters, clear mind.

What can I do to make cleaning up much faster so I'm not stuck at the sink for an hour after every meal?

Look, I’ve spent way too many nights staring at a mountain of crusty dishes when I’d rather be on the couch. The secret? Clean as you go. Don’t wait until the meal is done to start the cleanup. While your onions are sautéing or the pasta is boiling, grab that sponge. Wash the prep bowls and cutting boards immediately. If you tackle the small stuff while you wait, you’ll finish the meal with a nearly empty sink.

Easy meals for beginners to cook.

Easy Meals Anyone Can Cook (even Beginners)

I remember my first apartment back in my early twenties—I was living on lukewarm takeout and questionable frozen pizzas because the thought of standing over a stove felt like a massive, intimidating chore. I used to think you needed a culinary degree or a kitchen full of fancy gadgets just to make something edible, but let me tell you, that’s a total myth. Most of the time, we overcomplicate things when we really just need a few easy meals for beginners to get our feet under us. Learning to cook isn’t about being a chef; it’s about taking control of your budget and your health without losing your mind in the process.

In this guide, I’ve pulled together five of my absolute favorite go-to recipes that are practically foolproof. I’m talking about real, hearty food that requires minimal cleanup and even less stress. I’ll walk you through exactly how to tackle these dishes so you can stop staring blankly at your pantry and start feeling confident in the kitchen. By the time we’re done, you’ll have a solid rotation of meals that prove cooking can actually be the best part of your day.

Table of Contents

The One-Pan Sheet Pan Roast

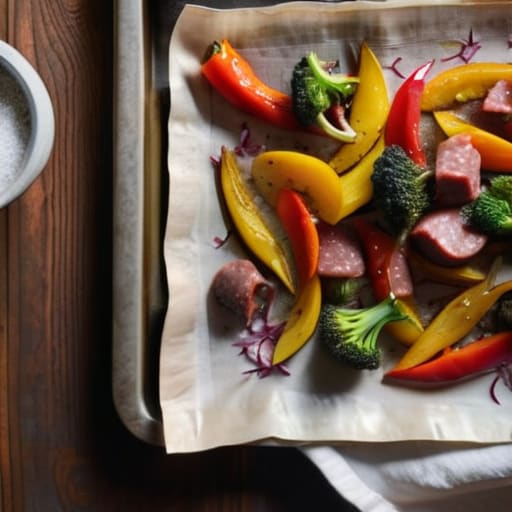
The One-Pan Sheet Pan Roast meal.

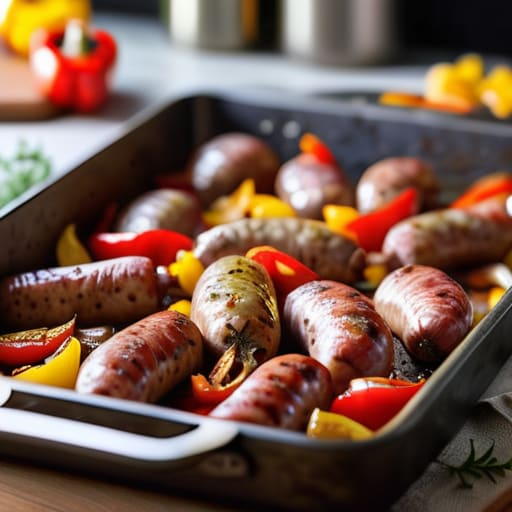
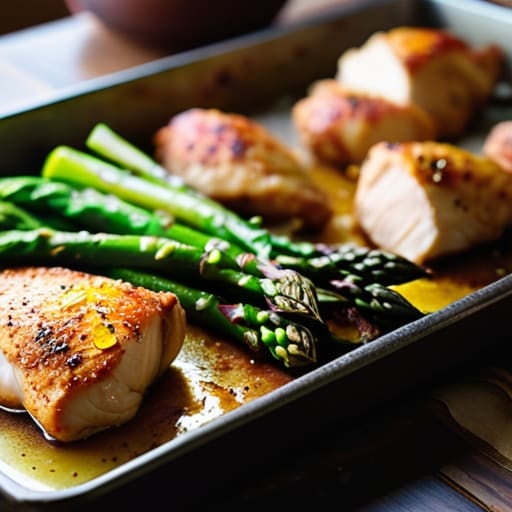
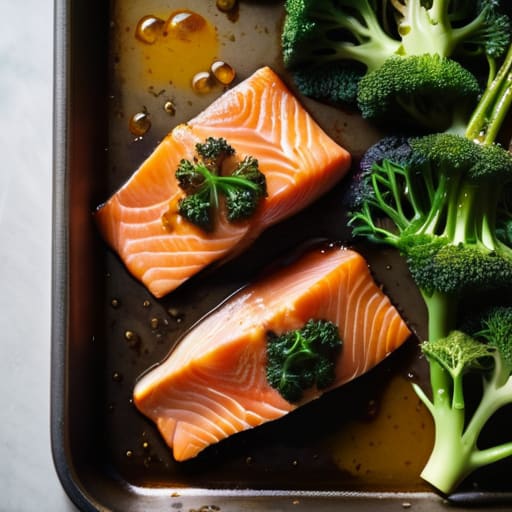
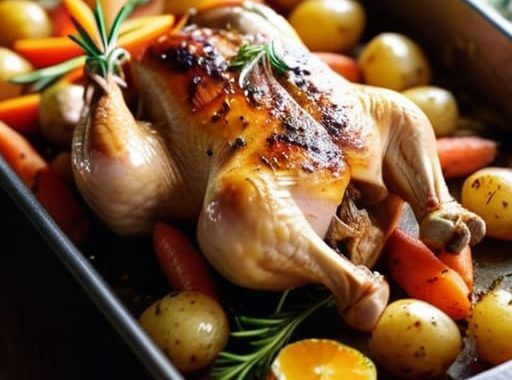
If you’re like me and hate spending your entire evening scrubbing pots and pans, this is your new best friend. I love a good sheet pan meal because it’s basically set it and forget it in the best way possible. You just grab some chicken thighs or sausages, chop up whatever veggies are looking sad in your fridge—broccoli, bell peppers, or sweet potatoes work great—toss them in some olive oil and salt, and spread them out on a baking sheet.

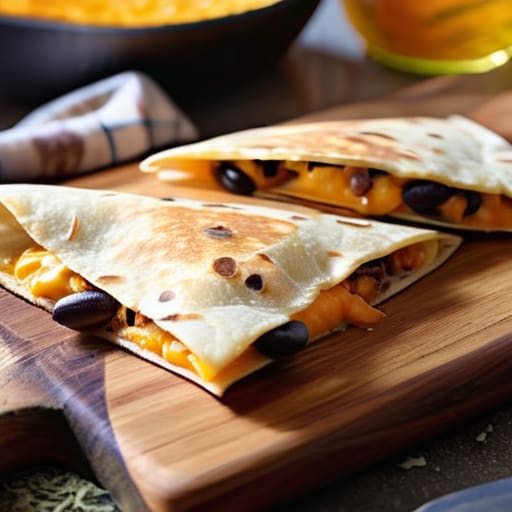
The "Everything" Quesadilla

The "Everything" Quesadilla with leftover ingredients.

I remember when I was first starting out, I thought “cooking” meant following a strict recipe with twenty different spices. Then I realized that a quesadilla is basically just a safety net for leftovers. It is the ultimate low-effort, high-reward meal. All you need is a tortilla, some cheese that actually melts, and whatever protein or veg you have lying around from yesterday’s dinner.

Classic Pesto Pasta with a Twist

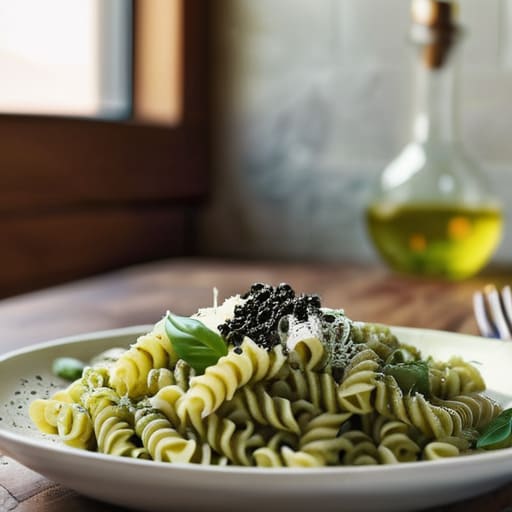
Classic Pesto Pasta with a Twist.

Pasta is the old reliable of the culinary world, but if you just boil noodles and eat them plain, you’re missing out. My go-to move when I’m tired but want something that feels actually fancy is using a high-quality store-bought pesto. It saves me a ton of time and effort, and honestly, most of the good stuff in the jar tastes better than what I can whip up on a Tuesday night anyway.

Hearty Breakfast-for-Dinner Scramble

There is no rule that says eggs are only for the morning. In fact, I think breakfast-for-dinner is one of the smartest hacks in the book. It’s incredibly inexpensive, takes less than ten minutes to cook, and you almost certainly have the ingredients in your kitchen right now. Whether it’s a simple scramble or a quick omelet, it hits the spot every single time.

Loaded Baked Potatoes

Don’t overlook the humble potato; it is arguably the most versatile tool in your kitchen arsenal. A baked potato is basically a blank canvas waiting for your creativity. You can scrub them off, prick them with a fork, and toss them in the oven (or even the microwave if you’re in a serious rush) to create a filling base that can handle just about anything.

The Bottom Line: Keeping It Simple

Don’t sweat the small stuff; if you burn a piece of toast or overcook the pasta, just keep moving. The goal is to get fed, not to win a Michelin star on your first try.

Focus on the “assembly” rather than the “art.” Most great beginner meals are just about combining a few good ingredients in the right order, so don’t feel like you need a culinary degree to make something delicious.

Build your confidence through repetition. Once you master these five basics, you’ll realize you already have the foundation to start tweaking recipes and making them your own.

My Philosophy on the Kitchen

“Look, you don’t need a culinary degree or a kitchen full of fancy gadgets to eat well. Cooking is just another skill, like fixing a leaky sink or wiring a lamp—once you stop overthinking the ‘rules’ and just focus on the steps, you’ll realize you’ve been able to do this all along.”

Nathan Cole

You've Got This

Look, I know that staring at a pile of raw ingredients can feel a lot like looking at a stripped screw—it’s frustrating and you just want to walk away. But if you take what we talked about today and apply it, you’ll see it’s much simpler than it looks. Whether you’re sticking to a single-pan pasta, mastering a basic sheet-pan chicken, or just learning how to not burn the garlic, you’re building a skill set that lasts. The goal isn’t to become a Michelin-star chef by Tuesday; it’s about using simple, repeatable wins to get decent food on the table without draining your bank account or your sanity.

At the end of the day, cooking is just another DIY project, and just like fixing a leaky faucet, the more you do it, the less intimidating it becomes. Don’t sweat the small stuff—if you overcook the noodles or the seasoning is a little off, just tweak it next time and keep moving. I promise you, there is a massive sense of pride that comes from sitting down to a meal you built with your own two hands. So, grab a pan, turn on some music, and just start cooking. You’re more capable than you think.

Frequently Asked Questions

I don't have a ton of fancy kitchen gear; can I still make these recipes with just a basic pan and a spatula?

Absolutely. Honestly, if you’ve got one decent pan and a spatula, you’re already halfway there. I’ve cooked most of my favorite meals over the years with nothing more than a basic skillet and a dream. You don’t need a kitchen full of gadgets to make something that tastes great. Just focus on getting the heat right and don’t be afraid to get a little messy. You’ve got this!

What’s the best way to prep these meals ahead of time so I'm not stuck in the kitchen every single night?

Look, I get it. The whole point of these recipes is to save you time, not turn your kitchen into a second job. My secret? Don’t cook everything at once—that’s how you end up with soggy leftovers. Instead, focus on “component prepping.” Chop all your veggies on Sunday, brown your meat in one big batch, and portion out your grains. When Tuesday rolls around, you’re just assembling, not starting from scratch.

If I'm on a tight budget, are there specific cheap ingredients I should keep on hand to make these even easier?

Look, I’ve spent plenty of weeks staring at a near-empty fridge, so I get it. To keep things cheap and fast, keep a “survival kit” of pantry staples: dried lentils or beans, a bag of rice, canned tomatoes, and some eggs. I also swear by frozen veggies—they’re cheaper than fresh, won’t rot in your crisper drawer, and you can toss them into almost anything. Having these on hand makes those easy meals feel even more effortless.

How to cook rice perfectly guide.

How to Cook Perfect Rice Every Single Time

I still remember the first time I tried to make a decent meal in my tiny, cramped apartment back in my early twenties. I was trying to impress a girl, but instead of a fluffy side dish, I ended up with a pot of gummy, semi-translucent sludge that looked more like wallpaper paste than food. It was embarrassing, and honestly, it felt like a total failure. I spent way too many nights staring at a steaming pot, wondering why the instructions on the bag never seemed to match what was actually happening in my kitchen. Learning how to cook rice perfectly shouldn’t feel like a high-stakes chemistry experiment or some mysterious ritual you can only master with a $500 smart cooker.

Look, I’m not here to sell you on some fancy, over-engineered gadget or a complicated set of rules that require a kitchen scale. I’ve spent years tinkering with everything from old power tools to stovetop burners, and I’ve learned that the best results usually come from the simplest methods. In this guide, I’m going to strip away the fluff and give you my straightforward, battle-tested approach. I’ll show you exactly how to get that light, airy texture every single time, so you can stop stressing the stove and just enjoy your dinner.

Table of Contents

Mastering the Rice to Water Ratio Without the Stress

Mastering the Rice to Water Ratio Without the Stress

Look, I’ve been there—staring at a pot of gummy, overcooked mush wondering where it all went wrong. Most of the time, the culprit isn’t your skill; it’s just a bad rice to water ratio. If you’re using a standard stovetop rice method, the golden rule for most long-grain white varieties is 1 part rice to 2 parts water. But here’s the thing: I’ve learned that “standard” is a loose term. If you’re using a rice cooker, those machines are pretty smart, but you still want to trust your eyes over the manual sometimes.

One trick I swear by to avoid mushy rice is getting serious about your prep. Don’t just dump the grains in the pot and walk away. Rinsing white rice under cold water until it runs clear is a total game-changer; it washes off that excess surface starch that turns your dinner into a sticky mess. Once you’ve got that starch under control, you’re already halfway to a perfect bowl. It’s a small habit, but it makes a massive difference in the final texture.

Why Rinsing White Rice Changes Everything

Why Rinsing White Rice Changes Everything.

If you’ve ever pulled a pot off the burner only to find a gummy, clumped-up mess, I’ve been there. It’s frustrating, especially when you’ve followed the recipe to a T. Most of the time, the culprit isn’t your heat control or your pot; it’s the surface starch. When you buy a bag of white rice, it’s coated in a fine, powdery starch. If you don’t get rid of that extra layer, it turns into a kind of “glue” during the cooking process, which is the fastest way to end up avoiding mushy rice becomes your new full-time job.

Think of rinsing white rice like washing the dust off a piece of lumber before you start building. You wouldn’t try to glue two pieces of wood together if they were covered in sawdust, right? It’s the same logic here. By running your rice under cold water in a fine-mesh strainer until the water runs clear, you’re stripping away that excess starch. This simple step ensures that each grain stays distinct, light, and fluffy once it hits the plate. It’s a small bit of extra work, but I promise it’s the secret weapon for better texture.

Five Little Tricks to Level Up Your Rice Game

  • Stop the stir. Once you’ve got your rice and water in the pot and it’s reached a simmer, put a lid on it and leave it alone. If you keep lifting the lid to peek, you’re letting all that precious steam escape, and that’s how you end up with unevenly cooked grains.
  • Let it rest before you touch it. This is the hardest part for me, but once the timer goes off, pull the pot off the heat and let it sit, covered, for about 10 minutes. It lets the moisture redistribute so the bottom layer isn’t a swamp while the top is dry.
  • Use the right gear. If you’ve got a heavy-bottomed pot, use it. Thin, cheap pots tend to have hot spots that scorch the rice at the bottom before the rest is even soft. A little extra weight goes a long way in keeping things even.
  • Fluff, don’t mash. When you finally go in with a fork or a rice paddle, be gentle. You want to lift and aerate those grains, not smash them into a paste. A light touch is the difference between fluffy rice and a gummy mess.
  • Watch your heat. High heat doesn’t mean faster rice; it just means burnt rice. Once you hit that simmer, drop it down low. You want a gentle, steady heat that works with the steam, not a rolling boil that’s fighting against it.

The Quick Cheat Sheet for Perfect Rice

Stop eyeballing the liquid; stick to a reliable ratio (like 1:2 for standard white rice) so you aren’t stuck eating mush or crunching on undercooked grains.

Never skip the rinse—washing that extra starch away is the secret to getting fluffy, individual grains instead of one big sticky clump.

Patience is your best tool; once the timer goes off, let the pot sit covered for a few minutes to let the steam finish the job properly.

## The Secret to Not Wasting a Batch

“Look, you don’t need a fancy kitchen or a degree in culinary arts to get great rice; you just need to stop treating it like a ‘set it and forget it’ task and start respecting the rinse and the ratio. Once you nail those two things, you’ll stop throwing away mushy, half-eaten pots and start actually enjoying your dinner.”

Nathan Cole

You've Got This

Perfecting rice cooking: You've Got This.

At the end of the day, nailing the perfect pot of rice really just comes down to a few fundamental habits. Remember to rinse that starch away before the heat ever touches the pot, and don’t go overboard with the water—stick to your ratio so you don’t end up with a gummy mess. Once you get the heat dialed in and let it steam undisturbed, you’re basically a pro. It’s all about respecting the process and giving those grains the time they need to absorb everything properly without being rushed.
I know it might feel a little intimidating the first time you stand over a steaming pot, but I promise you, it gets easier every single time you try. Don’t sweat it if your first batch isn’t a total masterpiece; even the best cooks have dealt with a little extra moisture or a slightly crunchy grain now and then. The goal isn’t perfection on day one; it’s about building your confidence in the kitchen. So, grab your pot, trust your instincts, and get cooking. You’ll be surprised at how much better it tastes when you know you built it from scratch.

Frequently Asked Questions

What if I accidentally add too much water and end up with a gummy mess?

Look, we’ve all been there—you check the pot and it’s looking more like porridge than fluffy rice. Don’t toss it yet! If it’s just a little gummy, spread the rice out thin on a large baking sheet to let the steam escape and dry it out. If it’s a total mush-fest, don’t sweat it. Just lean into it: use that “failed” rice for a quick fried rice or a savory rice pudding.

Do I really need to use a specific kind of pot, or will any old saucepan work?

Look, you don’t need to go out and drop a hundred bucks on some fancy, high-tech rice cooker to get this right. Any old saucepan with a tight-fitting lid will do the trick. The real secret isn’t the brand of the pot; it’s making sure that lid actually stays put. If steam escapes, your water levels get wonky and you’ll end up with crunchy rice. Just find something heavy-bottomed if you can.

Can I use this same method for brown rice, or is that a whole different ballgame?

It’s a different ballgame, but don’t let that throw you. Brown rice is a bit more stubborn because of that outer bran layer, so you can’t just treat it like white rice and expect magic. You’ll need more water and a longer soak or simmer time to get it tender. Think of it like a slow-cook project versus a quick fix—it takes a little more patience, but the results are worth it.

Tips on how to cook vegetables.

How to Cook Vegetables So They Actually Taste Great

I still remember sitting in my tiny first apartment, staring down a limp, sad-looking head of broccoli like it was a broken radiator I didn’t have the tools to fix. I’d tried following those fancy, over-complicated recipes online that required “emulsion techniques” and expensive oils, only to end up with a mushy, grey mess that tasted like nothing. It turns out, most of the high-end culinary advice out there makes learning how to cook vegetables feel way harder than it actually is. You don’t need a culinary degree or a kitchen full of gadgets to make something decent; you just need to stop treating your produce like it’s fragile.

I’m not here to give you a lecture on molecular gastronomy or sell you some overpriced spice kit. My goal is to show you that once you master a few basic, reliable methods, you can turn almost anything from the produce aisle into a solid meal. I’m going to break this down into simple, repeatable steps that work every single time, whether you’re roasting, steaming, or pan-searing. We’re going to strip away the fluff and focus on what actually works so you can get real food on the table without the headache.

Table of Contents

Mastering Healthy Vegetable Preparation Methods Without the Stress

Mastering Healthy Vegetable Preparation Methods Without the Stress

Look, I used to think “healthy” meant eating bland, sad-looking steamed broccoli that tasted like nothing. But after years of messing around in my own kitchen, I’ve learned that the secret isn’t about deprivation; it’s about choosing the right approach for the job. When you’re looking at healthy vegetable preparation methods, you really only need to master a couple of basics. If you’re in a massive rush, steaming is your best friend because it’s fast and keeps things light. However, if you actually want flavor, you’ve got to embrace the oven.

I’m a huge fan of the steaming vs roasting vegetables debate, and honestly, I usually land on roasting every single time. Roasting caramelizes the natural sugars, which turns a boring carrot into something that actually tastes like a treat. To do it right, you don’t need a kitchen full of fancy gadgets—just a sturdy sheet pan and a good knife. Once you get the hang of it, you’ll realize that making quick vegetable side dishes doesn’t have to be a chore; it’s just about letting heat and a little seasoning do the heavy lifting for you.

The Essential Vegetable Cooking Tools You Actually Need

The Essential Vegetable Cooking Tools You Actually Need

Look, I’ve walked into more hardware and kitchen stores than I’d care to admit, and if there’s one thing I’ve learned, it’s that you don’t need a kitchen full of expensive gadgets to get the job done. You really just need a few solid pieces of gear that won’t quit on you. For me, a heavy-duty chef’s knife is the absolute MVP. If your knife is dull, you’re going to struggle with everything from slicing peppers to dicing onions, and that’s when accidents happen. Pair that with a sturdy wooden cutting board, and you’re already halfway to mastering different healthy vegetable preparation methods.

Next up, let’s talk heat. If you want to experiment with steaming vs roasting vegetables, you’re going to want a reliable stainless steel sheet pan and a good steamer basket. A sheet pan is your best friend for those crispy, caramelized edges we all love, while a basket helps you keep things light and fresh. Throw in a high-quality cast iron skillet or a simple non-stick pan, and you’ve got the essential vegetable cooking tools to tackle pretty much any recipe I throw at you.

5 Pro Tips to Stop Making Mushy, Boring Veggies

  • Don’t crowd the pan. I learned this the hard way back when I was first learning to cook. If you throw a mountain of broccoli into a small skillet, it’s just going to steam in its own moisture and turn into a soggy mess. Give your veggies some breathing room so they actually get that nice, golden-brown sear.
  • Salt your water like the sea. If you’re boiling potatoes or blanching green beans, don’t be shy with the salt. You want to season the vegetable from the inside out while it’s cooking, not just toss salt on top at the very end when it’s already lost its flavor.
  • Respect the “hard” and “soft” rule. You can’t throw carrots and spinach into a pan at the same time and expect magic to happen. Start with the tough stuff—like root vegetables or thick stalks—and add the delicate greens in the last couple of minutes. It takes a little timing, but it makes a world of difference.
  • Use high heat for flavor. If you want that restaurant-quality char, don’t be afraid to crank up the heat a bit. Searing vegetables quickly at a higher temperature locks in the texture and brings out those natural sugars that make them taste sweet instead of just “healthy.”
  • Acid is your secret weapon. This is the one tip most people miss. If your roasted veggies taste a little “flat” or dull, don’t just reach for more salt. Squeeze a little fresh lemon juice or add a tiny splash of balsamic vinegar right before serving. That hit of acid wakes everything up.

The Bottom Line: Keep It Simple

Don’t sweat the fancy gear; a sharp knife and a decent pan are 90% of the battle.

Focus on texture and seasoning rather than complex recipes—salt, fat, and heat do the heavy lifting.

Start small with one or two veggies at a time so you don’t get overwhelmed in the kitchen.

My Golden Rule for the Kitchen

“Look, you don’t need a culinary degree or a kitchen full of fancy gadgets to make veggies taste great; you just need to stop treating them like an afterthought and start treating them like the main event—a little heat, a bit of seasoning, and a lot less fear goes a long way.”

Nathan Cole

Getting Stuck In

Getting stuck in with delicious vegetable cooking.

At the end of the day, cooking vegetables isn’t about following a rigid, scientific formula or owning every single gadget in the kitchen catalog. It’s about knowing that a sharp knife, a decent pan, and a little bit of heat can turn something boring into something actually delicious. We’ve covered how to prep them without losing your mind, the few essential tools that actually make a difference, and how to pick a method—whether it’s roasting for crunch or steaming for lightness—that fits your mood. Just remember: don’t be afraid to play with salt, fat, and acid. Once you realize that most veggies are incredibly forgiving, the intimidation factor just disappears.

Look, I know there are nights when the thought of chopping up a pile of broccoli feels like a massive chore. But I promise you, once you get that first bite of a perfectly seasoned, golden-brown roasted carrot, you’re going to feel like a total pro. Cooking is a skill just like fixing a leaky sink or wiring a new lamp; it takes a little practice, but it’s totally figure-out-able. So, grab whatever is sitting in your crisper drawer, get it into a pan, and just start. You’ve got this, and honestly, your body (and your taste buds) will thank you for it.

Frequently Asked Questions

How do I keep my veggies from turning into a mushy, overcooked mess?

Look, we’ve all been there—you’re trying to be healthy, and suddenly your broccoli looks like green sludge. The secret is heat and timing. First, don’t crowd the pan; if things are too packed, they steam instead of sear. Second, start with high heat to get a nice crust, then dial it back. Most importantly, test them! Poke a fork in; if it goes in with just a little resistance, pull them off the heat immediately.

Is there a trick to getting that perfect roasted texture without using a ton of expensive oils?

Honestly, I used to drown my veggies in oil thinking it was the only way to get that crunch, but I was wrong. The real secret? Don’t crowd the pan. If your veggies are touching, they’ll steam instead of roast, leaving you with a soggy mess. Toss them in a bowl with just enough oil to coat them lightly, spread them out on a sheet pan, and let the oven heat do the heavy lifting.

I’m always in a rush—what are the quickest ways to cook vegetables when I only have ten minutes for dinner?

Look, I get it. Some nights, the last thing you want to do is spend forty minutes hovering over a stove. When I’m in a rush, I lean on two things: high heat and small cuts. Toss some frozen peas or pre-sliced peppers into a screaming hot pan with a bit of oil—that’s a three-minute sauté right there. Or, just throw some broccoli in the microwave with a splash of water. Fast, easy, and done.

Tips on how to use leftovers.

Clever Ways to Turn Leftovers Into New Meals

I’ve spent way too many nights staring into a fridge full of Tupperware, feeling like I was looking at a graveyard of wasted money rather than a meal. There’s this annoying myth floating around that you need some fancy culinary degree or a kitchen full of expensive gadgets to master how to use leftovers effectively. Honestly? That’s total nonsense. I used to think that if I wasn’t making some elaborate, gourmet “reconstructed” dish, I was failing, but I eventually realized that most of those high-end cooking shows are just overcomplicating things for the sake of drama.

I’m not here to give you any of that fluff. My goal is to show you that you can turn last night’s boring roasted chicken or that half-bag of wilted spinach into a solid, filling meal without spending an extra dime or an hour of your life. I’m going to break this down into simple, repeatable moves that actually work in a real kitchen. We’re going to stop treating old food like a chore and start treating it like the secret weapon it actually is for your budget and your schedule.

Table of Contents

Smart Food Waste Reduction Tips for Every Kitchen

Smart Food Waste Reduction Tips for Every Kitchen

Look, I’ve spent plenty of nights staring into a fridge full of random containers, wondering if I’m actually looking at dinner or just a science project. The trick isn’t just about throwing things in a Tupperware; it’s about having a game plan for repurposing cooked proteins. If you’ve got leftover steak or roasted chicken, don’t just reheat it until it’s dry as a desert. Instead, shred it for tacos or toss it into a quick stir-fry. It’s one of those creative kitchen hacks that saves you twenty minutes of prep time the next day.

Another thing I’ve learned from years of trial and error is that organization is half the battle. If you aren’t storing leftovers safely in airtight containers right away, you’re basically asking for them to go bad by Tuesday. I like to keep a “Use Me First” bin in the fridge for anything that’s nearing its expiration. This simple habit is one of my favorite food waste reduction tips because it takes the guesswork out of your morning routine. When you see that container front and center, you know exactly what’s for lunch.

Storing Leftovers Safely to Keep Everything Fresh

Storing Leftovers Safely to Keep Everything Fresh

Look, I’ve learned the hard way that if you don’t treat your leftovers right from the jump, you’re basically just prepping them for the trash can. I used to just shove whatever was left in a mismatched plastic tub and hope for the best, but that’s a recipe for soggy, sad meals. If you want to master storing leftovers safely, you’ve got to get a little more strategic. Invest in a few decent, airtight glass containers. They don’t hold onto smells like plastic does, and they keep things way fresher when you’re ready to dive back in.

Once you’ve got the storage part down, the real magic happens when you start repurposing cooked proteins. Instead of just reheating that same piece of chicken for the third time, treat it like a building block. A piece of steak becomes the star of a quick steak salad, or some roasted veggies can be tossed into a morning omelet. Think of your fridge as a pantry of ingredients rather than just a collection of “old food.” It’s one of those simple creative kitchen hacks that makes your life a whole lot easier during a busy work week.

5 Ways to Turn "Old" Food Into a Brand New Meal

  • Embrace the “Bowl Method.” If you’ve got a random assortment of leftovers—maybe some roasted veggies, a bit of leftover rice, and some grilled chicken—don’t try to recreate the original dish. Just throw them all into a bowl, top them with a fried egg or some hot sauce, and call it a “power bowl.” It’s fast, healthy, and saves you from staring blankly at the fridge.
  • Master the Art of the Frittata. This is my absolute favorite trick for when the fridge looks a little sad. Grab whatever leftover veggies, meats, or even that half-bag of spinach, toss them in a pan with some whisked eggs, and cook it up. It’s basically a way to turn “scraps” into a fancy-looking brunch that feels intentional rather than accidental.
  • Build a “Kitchen Sink” Soup. When you have small amounts of different things left over—a little bit of broth, some wilted greens, or a few chunks of sausage—they are perfect for a soup. Chop everything into bite-sized pieces, simmer it in a pot, and you’ve got a warm, comforting meal that costs you zero extra dollars.
  • Use Leftovers as “Flavor Boosters.” You don’t always need a full plate of leftovers to make a meal better. That extra bit of cooked quinoa can be tossed into a salad for texture, or a small amount of leftover taco meat can be folded into some scrambled eggs in the morning. Think of your leftovers as ingredients rather than just “old food.”
  • The Sandwich Upgrade. Stop settling for boring peanut butter and jelly. If you have leftover roasted turkey, pulled pork, or even just some sautéed mushrooms, put them between two slices of good bread with a bit of cheese. It turns a quick lunch into something that actually feels like a real meal, and it beats hitting the drive-thru every single day.

The Bottom Line: Making Leftovers Work for You

Stop treating leftovers like a chore; view them as a head start on your next meal so you can spend less time cooking and more time relaxing.

Invest in a few decent, airtight containers—it’s a small upfront cost that pays for itself by keeping your food from turning into science experiments in the fridge.

Get creative with your “repurposing” instead of just reheating; a little bit of spice or a different texture can make last night’s roast feel like a brand-new dish.

## The Golden Rule of the Fridge

“Leftovers aren’t just ‘old food’ waiting for their expiration date; they’re actually prepped ingredients for your next meal. If you stop looking at them as leftovers and start seeing them as a head start, you’ll save a ton of money and a lot of time in the kitchen.”

Nathan Cole

Making It Work for You

Making It Work for You with leftovers.

At the end of the day, mastering your leftovers is really just about a little bit of foresight and some smart organization. We’ve covered how to keep your food fresh with proper storage, how to slash your grocery bill by reducing waste, and a few ways to get creative so you aren’t just eating the same bland meal three nights in a row. It’s not about being a gourmet chef; it’s about working smarter, not harder in the kitchen. When you treat those extra portions as ingredients for your next meal rather than just “old food,” you’re saving time, money, and a whole lot of mental energy during those busy weeknights when you’d otherwise be staring blankly at the fridge.

I know it can feel a bit overwhelming when you first start trying to change your kitchen habits, but don’t feel like you have to overhaul everything overnight. Start small—maybe just by repurposing one single protein or committing to better container storage. I promise you, once you see that extra bit of roasted chicken turn into a killer taco night, you’ll feel that little win. Most things in life are just a matter of breaking them down into manageable steps, and your kitchen is no different. So, go ahead, dive into those containers, and show that leftovers who’s boss!

Frequently Asked Questions

How long can I actually keep these leftovers in the fridge before they become a science project?

Look, I’ve definitely been there—staring at a Tupperware container in the back of the fridge like it’s a ticking time bomb. As a rule of thumb, most cooked leftovers are good for about three to four days. After that, you’re playing Russian roulette with your stomach. If it smells funky, looks slimy, or has even a hint of fuzz, don’t risk it. Just toss it. It’s not worth the gamble.

Is it safe to reheat the same meal more than once, or am I playing with fire?

Look, I get it—you’re hungry and that lasagna looks amazing. But here’s the deal: try to avoid the “reheat loop.” Every time you heat food up and then let it cool back down, you’re playing a dangerous game with bacteria. It’s much safer to scoop out only what you need and reheat just that portion. If you absolutely have to reheat the whole batch, make sure it hits 165°F all the way through.

What’s the best way to revive soggy or stale leftovers so they don't taste like cardboard?

We’ve all been there—you pull a slice of pizza or some fries out of the fridge, and they’ve turned into sad, chewy cardboard. To fix this, ditch the microwave; it just makes things soggier. For crispy stuff like pizza or fried chicken, hit it with a dry skillet on medium heat or use an air fryer. If you’re dealing with stale bread, a quick spritz of water before a few minutes in a hot oven works wonders.

Guide on how to meal plan effectively.

How to Meal Plan and Stop Wondering What’s for Dinner

I used to think that learning how to meal plan meant I had to spend my entire Sunday afternoon prepping twenty identical Tupperware containers of steamed broccoli and plain chicken, looking like I was training for a marathon I never signed up for. Honestly, that kind of rigid, “Pinterest-perfect” approach is a total scam that just leads to burnout and expensive food waste. Most of those influencers make it look like a professional kitchen operation, but for the rest of us just trying to get a decent dinner on the table after a long shift, it feels completely overwhelming.

I’m not here to sell you on a lifestyle you can’t maintain; I just want to show you that it’s actually much more figure-out-able than it looks. I’m going to walk you through my own no-nonsense system for getting your week under control without spending a fortune or losing your sanity. We’re going to break this down into a few simple, manageable steps so you can stop staring blankly at the fridge and start feeling actually prepared for the week ahead.

Table of Contents

Mastering Meal Prep for Beginners Without the Stress

Mastering Meal Prep for Beginners Without the Stress

Look, I used to think meal prepping meant spending my entire Sunday afternoon standing over a steaming pot like a mad scientist, filling dozens of identical plastic containers with bland chicken and broccoli. That’s the fastest way to burn out. Instead, I’ve learned that the secret to meal prep for beginners is to keep it flexible. You don’t need a complex blueprint; you just need a system that works for your actual life. I like to focus on “component prepping”—roasting a big tray of veggies, cooking a batch of grains, and prepping one solid protein. This way, you aren’t eating the exact same meal five days in a row, but you still have the building blocks ready to go when you’re tired after work.

The real magic happens when you pair this with some solid batch cooking strategies. If you’re already making a big pot of chili or a tray of lasagna, just double the recipe. It takes almost zero extra effort, but it buys you a “free” night later in the week. Don’t aim for perfection on your first try; just aim to make your Tuesday night a little less chaotic.

Budget Friendly Meal Planning to Save Your Hard Earned Cash

Budget Friendly Meal Planning to Save Your Hard Earned Cash

Let’s be real: grocery stores are designed to make you spend money you didn’t plan on spending. You walk in for milk and walk out with a cart full of stuff you don’t even need. To fight back, you’ve got to get serious about grocery list organization. Before you even step foot in the store, take a quick inventory of what’s already hiding in the back of your pantry or freezer. Building your meals around what you already own is the easiest way to practice budget friendly meal planning without feeling like you’re sacrificing flavor.

Once you’re at the store, stick to the perimeter and try to buy versatile staples like grains, beans, and seasonal veggies. I’m a huge fan of using batch cooking strategies to stretch a single grocery haul across the whole week. For example, if you roast a big tray of chicken and veggies on Sunday, those same ingredients can become a hearty salad on Monday and a quick stir-fry on Tuesday. It’s not about being perfect; it’s just about being intentional with your spending so you can keep more of your paycheck in your pocket.

5 Quick Wins to Keep Your Meal Plan from Falling Apart

  • Shop your own pantry first. Before you even touch a grocery app or head to the store, pull everything out of your cupboards. If you’ve got three cans of black beans and a box of pasta hiding in the back, that’s your starting point. Building meals around what you already own is the easiest way to keep your budget in check.
  • Don’t try to be a gourmet chef every single night. I’ve learned the hard way that if a recipe takes two hours of prep, I’m probably not going to do it on a Tuesday. Aim for “low-effort wins”—think sheet pan dinners, slow cooker stews, or even just a really good rotisserie chicken that you can repurpose for tacos the next day.
  • Pick a “theme” for your nights to stop the decision fatigue. When I can’t decide what to eat, I fall back on simple rules: Meatless Monday, Taco Tuesday, or Pasta Thursday. It sounds a little cheesy, but it narrows down your choices so you aren’t staring blankly at the fridge for twenty minutes every evening.
  • Build in “buffer nights” for when life gets messy. Some weeks, a friend calls you out for drinks or you just work late and end up exhausted. If you plan every single meal from Monday to Sunday, one unexpected event will wreck your whole system. Leave at least one or two nights a week as “flexible nights” or leftovers night.
  • Prep your ingredients, not just your meals. You don’t have to spend four hours on Sunday portioning everything into tiny plastic containers if that feels too intense. Just chopping your onions, washing your greens, or marinating your chicken ahead of time makes the actual cooking process feel way less like a chore when you’re tired after work.

The Bottom Line on Making Meal Planning Work

Don’t try to be a gourmet chef on day one; start by planning just three or four solid meals a week so you don’t burn out.

Shop your own pantry and freezer before you hit the grocery store to save money and stop buying stuff you already have.

Focus on “component prepping”—like cooking a big batch of grains or roasting extra veggies—rather than spending your entire Sunday boxing up identical Tupperware meals.

## The Big Picture

“Look, meal planning isn’t about being some master chef with a perfectly color-coded spreadsheet; it’s just about making sure you aren’t standing in front of an open fridge at 6:00 PM with zero ideas and a hungry family.”

Nathan Cole

You’ve Got This

Meal prepping success: You’ve Got This.

Look, I know it feels like a lot when you first start looking at a blank calendar and a grocery list. But we’ve covered the heavy lifting: you’ve got the basics of stress-free prep, and you know how to keep your wallet happy by shopping smart. The goal isn’t to become a professional chef overnight or to spend your entire Sunday in the kitchen; it’s just about building a system that actually works for your life. Whether you’re prepping full meals or just making sure you have the right ingredients for a quick Tuesday night stir-fry, you’re already ahead of the game compared to just winging it every single day.

At the end of the day, meal planning is just another tool in your kit, much like a good set of wrenches or a reliable chef’s knife. It’s about taking a little bit of control back from the chaos of a busy week. Don’t beat yourself up if a plan falls through or if you end up ordering pizza on a Friday—that’s just part of the process. The important thing is that you’re trying a new way to make things easier. Keep it simple, keep it flexible, and just keep moving forward. You’ve totally got this.

Frequently Asked Questions

I don't have a ton of extra time on Sundays; is there a way to do this without spending my entire afternoon in the kitchen?

Look, I get it. I’ve had plenty of Sundays where the last thing I wanted to do was stand over a stove for four hours. You don’t need a marathon session to make this work. Try “component prepping” instead. Just cook a big batch of one protein, one grain, and one roasted veggie. That’s it. You aren’t making full meals; you’re just building a toolkit of ingredients you can toss together in minutes all week.

How do I keep my meals from getting boring if I'm eating similar things throughout the week?

Look, I get it. Eating the same chicken and rice every night can feel like a chore. But here’s the secret: don’t change the base, change the vibe. Think of your meal as a foundation. One night, hit it with taco seasoning and lime; the next, go with soy sauce and ginger. Swap your sauce, switch your crunch with different nuts or seeds, or just toss in a new veggie. Small tweaks, big flavor.

What’s the best way to handle leftovers so they actually taste good on Tuesday or Wednesday?

The secret to leftovers that don’t taste like sad, soggy cardboard is all about how you store and reheat them. First, let them cool down before sealing the lid—trapping steam is what makes things mushy. Second, keep your sauces separate if you can; adding them right before you heat things up makes a huge difference. Finally, skip the microwave for everything except soup. A quick pan-sear in a skillet brings that texture back to life.

Essential pantry staples to always have.

Pantry Staples That Make Any Meal Possible

We’ve all been there: you stumble into the kitchen after a long, exhausting shift, starving and ready to eat, only to realize your fridge is looking pretty pathetic. You stare at a lonely jar of pickles and a half-empty carton of milk, feeling that familiar wave of defeat because you have nothing to actually make a meal with. It’s frustrating, it’s expensive when you end up ordering takeout, and honestly, it’s a total mood killer. I’ve spent plenty of my own hungry nights staring at empty shelves, which is exactly why I’m a huge believer in keeping a few reliable pantry staples to always have on hand. Having a small, smart backup system is the difference between a stressful scavenger hunt and a decent dinner.

In this guide, I’m stripping away all the fancy, overpriced gourmet nonsense and getting down to the brass tacks. I’ve narrowed it down to just five essential items that act as the building blocks for dozens of different meals. By the time you finish reading, you’ll know exactly how to build a bulletproof kitchen foundation that saves you time, money, and a whole lot of headache. Let’s get into it.

Table of Contents

The Versatile Power of Dried Pasta

The Versatile Power of Dried Pasta.

If there is one thing I learned living in tiny apartments on a budget, it’s that a box of dried pasta is basically a safety net in a box. It’s cheap, it lasts forever in the cupboard, and it doesn’t require any fancy skills to pull off. Whether you’re feeling fancy with some garlic and olive oil or you’re just throwing in a jar of sauce after a long day, it always hits the spot.

Canned Beans for Instant Protein

Canned beans for instant protein pantry staple.

I used to think cooking meant starting from scratch with raw ingredients, but man, was I wrong. Keeping a few cans of black beans or chickpeas in the pantry is a total game changer for anyone trying to eat better without spending a fortune. You just pop the lid, rinse them off, and suddenly you’ve got protein ready to go for a salad, a taco, or even a quick soup.

The Magic of Rice

Exploring The Magic of Rice.

Rice is the unsung hero of the kitchen, and I’m not just talking about the cheap stuff you get in the big bags. Having a reliable supply of long-grain white rice or even some jasmine rice means you always have a solid base for a meal. It’s the perfect canvas for whatever else you happen to have lying around, from leftover veggies to a piece of pan-seared chicken.

High-Quality Olive Oil

Now, I’m not saying you need the most expensive bottle on the shelf that costs as much as a new drill, but don’t skimp too much here. A decent bottle of extra virgin olive oil is the secret sauce to making simple pantry meals actually taste like something. It’s not just for sautéing; a little drizzle over some toast or a bowl of pasta can make a world of difference.

Canned Tomatoes for Instant Flavor

If you want to turn a few random ingredients into a real meal, you need canned tomatoes. I keep a couple of cans of crushed or diced tomatoes in the back of my pantry at all times because they are the ultimate shortcut to flavor. You can turn them into a quick marinara, a base for a chili, or even a chunky salsa if you’ve got the right spices.

The Bottom Line

You don’t need a massive, expensive grocery haul to eat well; just focus on building a foundation of versatile basics that play nice with whatever else you have in the fridge.

Think of your pantry as a toolkit. Just like I wouldn’t start a renovation without a hammer, don’t start cooking without these five essentials on hand.

The goal isn’t perfection—it’s about making life a little easier and saving yourself from that “what’s for dinner?” panic when you’re tired and low on cash.

The Secret to Not Stressing the Small Stuff

“A well-stocked pantry isn’t about having a gourmet supermarket in your kitchen; it’s about having that little safety net of basics so that when life gets hectic, you aren’t staring at an empty cupboard wondering what’s for dinner.”

Nathan Cole

Don't Overthink It

Look, you don’t need a massive, professional-grade pantry to make great food; you just need a solid foundation. By keeping these five essentials—your grains, canned goods, aromatics, oils, and spices—on hand, you’re basically building a safety net for your kitchen. Instead of staring blankly at a near-empty fridge after a long shift, you’ll know you have the building blocks to throw together a quick pasta, a hearty soup, or a simple stir-fry. It’s all about having those reliable basics ready to go so you aren’t forced to rely on expensive, processed takeout every single night.

At the end of the day, the goal isn’t to be a gourmet chef or to have a perfectly organized kitchen that looks like it belongs in a magazine. It’s about taking control of your space and your budget so you can actually enjoy the process of making something for yourself. Once you get these staples dialed in, you’ll realize that cooking isn’t some intimidating chore—it’s just another thing you can figure out. So, grab a few of these items on your next grocery run, get them in the cupboard, and start building your own kitchen confidence. You’ve got this.

Frequently Asked Questions

How do I know if these staples are actually still good to eat, or if I've let them sit in the back of the cupboard too long?

Look, we’ve all been there—finding a jar of spices or a bag of rice that’s been hiding behind the flour for a year. My rule of thumb? Trust your senses. If it smells off, looks weird, or has actual bugs in it, toss it. Don’t gamble with your stomach. For dry goods, check the “best by” date, but remember that’s usually about quality, not safety. If it’s just stale, it’s likely fine—just not delicious.

Is it worth spending a little extra on the name brands, or can I just grab the cheapest store version and still get a good meal out of it?

Look, I’ve been on both sides of this. If you’re buying canned beans, corn, or salt, honestly? Just grab the store brand. They’re basically identical and your wallet will thank you. But when it comes to things like olive oil or good spices, I usually spring for the name brand. Those are the flavors that actually carry the dish. My rule of thumb: save on the basics, spend a little extra on the stuff that does the heavy lifting.

What are some quick ways to mix these specific items together if I'm feeling extra lazy on a Tuesday night?

Look, we’ve all had those Tuesdays where even boiling water feels like too much work. If you’re feeling extra lazy, just toss some of those staples into a bowl with a splash of oil or a squeeze of lemon—instant grain salad. Or, if you’ve got a can of beans and some spices, just heat them up for a quick “pantry chili.” No fancy techniques needed; just mix, heat, and eat so you can get back to the couch.

Tips on how to reduce food waste.

How to Reduce Food Waste in Your Kitchen

I was digging through the back of my fridge last Tuesday—trying to find that one lonely jar of pickles—when I found a bag of spinach that had basically turned into green slime. It’s a gut punch every time, isn’t it? You spend your hard-earned money at the grocery store, feeling all productive, only to realize you’re essentially tossing cash directly into the trash bin every single week. Most “experts” will tell you that you need fancy airtight containers or a high-tech composting system to fix this, but honestly, that’s just more clutter you don’t need. Learning how to reduce food waste shouldn’t feel like a second job or a massive lifestyle overhaul; it should just be about working smarter with what you’ve already got.

I’m not here to sell you on expensive gadgets or complicated meal-prepping rituals that take all Sunday afternoon. Instead, I want to share the straightforward, battle-tested habits I’ve picked up from years of cooking on a budget and living in small kitchens. I’m going to show you how to organize your fridge like a pro, shop with a plan, and actually use those leftovers instead of letting them die in a Tupperware container. Let’s get into it.

Table of Contents

Mastering Meal Planning for Beginners Without the Stress

Mastering Meal Planning for Beginners Without the Stress

Look, I used to think meal planning meant spending my entire Sunday afternoon prepping twenty identical Tupperware containers of steamed broccoli. That sounded miserable, and honestly, it’s why I kept quitting. But I’ve learned that meal planning for beginners doesn’t have to be a full-time job; it’s really just about looking at what you already have before you head to the store. If you check your pantry first, you’ll stop buying that third jar of cumin you don’t actually need, which is a massive win for reducing grocery bills.

The trick is to build a loose framework rather than a rigid schedule. Instead of a strict Monday-through-Friday menu, try picking two “anchor” proteins or veggies you can use in different ways throughout the week. Maybe you roast a big tray of sweet potatoes on Tuesday, and use the leftovers in a breakfast hash on Thursday. When you focus on flexible meal prep rather than perfection, you actually stick to it. It turns a chore into a way to keep your kitchen running smooth without the constant “what’s for dinner?” panic.

Reducing Grocery Bills by Using What You Already Own

Reducing Grocery Bills by Using What You Already Own

Before you even think about grabbing your keys and heading to the store, I need you to do one thing: open your pantry and your fridge. I know, it sounds like a chore, but it’s the fastest way to start reducing grocery bills without feeling like you’re living on ramen. Most of us have that “mystery bag” of frozen peas or a half-box of pasta hiding in the back that we completely forgot about. Instead of buying a whole new set of ingredients for a recipe, try to build your next meal around what’s already sitting there. I like to call it a “pantry raid”—it’s basically a game where the prize is extra cash in your pocket.

Once you’ve inventoried your stash, the next step is making sure nothing goes bad while it’s waiting its turn. This is where proper food storage techniques really save the day. I’ve learned the hard way that shoving a bag of spinach into the crisper drawer without a paper towel isn’t enough; you have to treat your produce with a little respect if you want it to last. If you catch something just before it turns, don’t toss it! Throw it in a pan or freeze it for later.

5 Simple Habits to Keep Your Food from Going Bad

  • Get to know your fridge’s “danger zones.” I learned the hard way that shoving everything into the crisper drawer doesn’t work; some veggies actually prefer the main shelf, and some fruits will make everything else rot if they’re too close. Take ten minutes to figure out what stays fresh where.
  • Master the art of the “Eat Me First” bin. I started using a small plastic container right at eye level in my fridge for all those half-used jars of salsa, lonely carrots, or leftovers. If it’s in the bin, it’s the priority for your next meal.
  • Stop treating your freezer like a black hole. We’ve all done it—tossed a bag of frozen peas in the back and forgotten it until 2026. Use a Sharpie to label every bag with the date and what’s inside, and try to keep the “old stuff” at the front.
  • Learn to love your scraps. Before you toss those onion skins, carrot tops, or herb stems, throw them into a bag in the freezer. Once you have a decent amount, boil them down into a homemade veggie stock. It’s basically free flavor and keeps a ton of waste out of the trash.
  • Don’t be afraid to “repurpose” instead of “replacing.” If those spinach leaves are looking a little limp, don’t toss them—wilt them into a pasta sauce or throw them in a smoothie. Most of the time, they’re still perfectly good; they just need a little heat or a blender to make them usable again.

The Quick Cheat Sheet for Less Waste

Shop your pantry first so you aren’t buying a third jar of mayo when you already have two hiding in the back.

Treat your fridge like a “first-in, first-out” system—move the older stuff to the front so you actually eat it before it turns into a science project.

Stop aiming for perfection with meal prep; just having a rough idea of what you’re eating for dinner prevents those expensive, last-minute takeout runs.

## The Real Secret to a Leaner Kitchen

“At the end of the day, reducing food waste isn’t about being some perfect, zero-waste guru; it’s just about looking at what you’ve already got in the pantry before you go clicking ‘add to cart’ again.”

Nathan Cole

Making It Stick

Making It Stick with intentional meal planning.

Look, I know it feels like a lot to juggle when you first start trying to change how you handle your kitchen. Between mapping out a meal plan that actually works and doing a quick inventory check of your pantry before you hit the store, it can feel like another chore on an already long to-do list. But once you start seeing those half-empty jars and forgotten vegetables actually getting used instead of rotting in the crisper drawer, you’ll realize it’s not about being perfect—it’s about being intentional. If you can master the art of using what you already have, you’re already winning the battle against waste and unnecessary spending.

At the end of the day, my goal isn’t to turn you into a professional chef or a master organizer; I just want you to feel like you’ve got a handle on your own home. Don’t get discouraged if you still end up tossing a bag of wilted spinach once in a while. Just take a breath, look at what’s left, and start fresh tomorrow. Most things in life—including a messy fridge—are totally figure-out-able if you just take them one small step at a time. You’ve got this.

Frequently Asked Questions

How do I actually know when food has gone bad versus when it’s just past its "best by" date?

Look, those “best by” dates are more like suggestions from the manufacturer than a countdown to disaster. They’re mostly about quality, not safety. To tell if something is actually sketchy, use your senses. If it smells off, looks slimy, or has fuzzy mold, toss it. For things like eggs, try the float test in water. If it sinks, you’re good; if it floats, it’s time to say goodbye. Trust your gut.

What are some easy ways to store produce so it doesn't turn into mush in the crisper drawer?

The secret to keeping your produce from turning into a science experiment is managing moisture. Most people just toss everything in the crisper, but that’s a recipe for mush. For leafy greens, wrap them in a paper towel before putting them in a container or bag; it absorbs that extra condensation. Also, keep your onions and potatoes far away from each other—they actually make each other spoil faster. It’s a small tweak, but it works.

I hate throwing scraps away, but what's the easiest way to start composting if I live in a small apartment?

Look, I get it. Tossing a perfectly good onion skin or coffee ground feels like a crime against your wallet. If you’re in a small apartment, don’t worry—you don’t need a massive backyard bin. Honestly, the easiest way to start is with a small, sealed countertop bin or even a “Bokashi” bucket. It uses fermentation to break down scraps without the smell or the mess. It’s small, tucked away, and totally doable.