Effective DIY cleaning products for home use.

Diy Cleaning Products That Actually Work

I used to think that if a cleaner didn’t make my eyes water or smell like a chemical factory exploded in my kitchen, it probably wasn’t actually working. I spent way too much money on those neon-colored sprays in fancy bottles, convinced that the higher the price tag, the better the grime would disappear. But after years of scrubbing my own place and realizing most of those “specialized” formulas are just overpriced water and perfume, I got tired of the hustle. Honestly, the truth is that most diy cleaning products work better than the big-brand stuff, and they won’t leave your lungs feeling like they’ve been through a sandstorm.

I’m not here to sell you some complicated, five-page recipe involving rare essential oils that cost more than my monthly grocery bill. I’m going to show you how to use the basic stuff you probably already have sitting in your pantry to get a real professional clean. We’re going to stick to simple, effective methods that actually work on grease, soap scum, and whatever else life throws at you. My goal is to help you stop overpaying for chemicals and start feeling confident that you can tackle any mess with just a few household staples.

Table of Contents

Mastering Vinegar and Baking Soda Cleaning Without the Fuss

Mastering Vinegar and Baking Soda Cleaning Without the Fuss

Look, if you walk into any big-box store, they’ll try to sell you a dozen different bottles for every single surface in your house. Honestly? You don’t need them. The absolute heavy hitters for me are vinegar and baking soda. They are the backbone of cost-effective cleaning solutions that actually work. I always keep a big jug of white distilled vinegar in my pantry because it’s a powerhouse for cutting through grease and mineral deposits. When you mix it with baking soda, you get that satisfying fizz that helps lift grime out of grout or stuck-on food without you having to scrub your fingers raw.

The best part about sticking to these basics is that you’re using safe cleaning for pets and kids. I don’t love the idea of my dog licking a floor covered in harsh, synthetic chemicals, so I stick to the stuff I can actually pronounce. If you want to level up the experience, grab a bottle of lemon or tea tree essential oils. Adding a few drops to your spray bottle makes the whole house smell like a spa instead of a salad dressing factory. It’s simple, it’s cheap, and it just works.

Cost Effective Cleaning Solutions Using Pantry Staples

Cost Effective Cleaning Solutions Using Pantry Staples

If you’re looking to slash your grocery bill while keeping your place spotless, look no further than your spice rack and pantry. I’ve found that most of the heavy lifting in cleaning can be done with stuff you probably already have sitting in a cupboard. For instance, a little bit of lemon juice works wonders on stubborn hard water stains in the sink, and a dash of cornstarch can actually help you buff out streaks on glass. Using these cost-effective cleaning solutions means you aren’t throwing money away on fancy, single-use bottles that just end up in a landfill.

Beyond the basics, you can really level up your game by adding a few drops of essential oils for cleaning. If you’re tired of your house smelling like a science experiment, a tiny bit of lemon, tea tree, or lavender oil can turn a basic spray into something that actually smells great. The best part? This approach is a total win for anyone looking for safe cleaning for pets and kids. You don’t have to worry about your toddler crawling on a floor covered in harsh residues or your dog licking up something toxic. It’s simple, it’s cheap, and it just works.

Pro Tips to Keep Your DIY Cleaning from Turning into a Mess

  • Don’t mix vinegar and baking soda in a closed bottle. I learned that the hard way—they react and create gas, which can actually pop the lid off your spray bottle or cause a massive leak. Use them one after the other instead of trying to force them into one liquid.
  • Grab some old glass spray bottles if you can. Since things like essential oils or pure lemon juice can actually eat away at cheap plastic over time, glass is a much safer bet for keeping your concoctions stable and your hands clean.
  • Always do a “spot test” first. I know, I know, it sounds tedious, but before you douse that expensive marble countertop in your homemade citrus cleaner, wipe a tiny, hidden corner to make sure it doesn’t leave a dull spot or a stain.
  • Keep your labels clear and honest. There’s nothing worse than grabbing a bottle thinking it’s water, only to realize it’s a concentrated vinegar mix that stings your nose. Write exactly what’s inside and the date you made it on a piece of masking tape.
  • Less is usually more. It’s tempting to dump half a cup of dish soap into your homemade multi-surface spray, but that just leaves a sticky residue that actually attracts more dust. A few drops do the trick, and it’ll rinse off much cleaner.

The Quick Cheat Sheet for Scrappy Cleaning

You don’t need a chemistry degree or a cabinet full of expensive, neon-colored sprays to get a clean house; most of the heavy lifting can be done with stuff you already have in your pantry.

Keep your basics—like white vinegar, baking soda, and some dish soap—on hand at all times so you can whip up a solution the second a mess hits the floor.

Don’t overcomplicate it. The best DIY cleaners are the ones that are easy to mix, cheap to make, and actually get the job done without breaking the bank.

## My Philosophy on the Scrappy Clean

“Look, you don’t need a chemistry degree or a cabinet full of neon-colored sprays to get your house looking sharp. Most of the time, the stuff that actually works is already sitting in your pantry, waiting for you to stop overthinking it and just get to work.”

Nathan Cole

Final Thoughts from the Workbench

Final Thoughts from the Workbench cleaning tips.

Look, I know it can feel a bit overwhelming when you first swap out those neon-colored bottles for a jug of white vinegar and a box of baking soda. But once you get the hang of it, you’ll realize you’ve already mastered the heavy lifting. We’ve covered how to use vinegar to cut through grime, how baking soda acts as a gentle but effective scrub, and how your pantry is basically a goldmine of cleaning power. You don’t need a chemistry degree or a massive budget to keep your place looking sharp; you just need to stop overthinking it and start using what you already have on hand.

At the end of the day, this isn’t just about saving a few bucks at the grocery store—though that definitely feels good. It’s about taking a little bit of control back over your home and your health. There is a certain kind of quiet satisfaction that comes from knowing exactly what went into the spray you just used to wipe down your kitchen counters. So, don’t feel like you have to overhaul your entire cleaning cabinet overnight. Just pick one thing, try one recipe, and see how it goes. I promise you, it’s way more figure-out-able than you think.

Frequently Asked Questions

Is it actually safe to use vinegar on everything, or am I going to end up ruining my stone countertops?

That is a killer question, and honestly, I’m glad you asked before you went grabbing the spray bottle. Short answer: No, don’t use vinegar on everything. If you’ve got granite, marble, or any natural stone countertops, keep that vinegar far away. The acid will eat right through the sealant and dull the finish, leaving you with a permanent mess. Stick to mild dish soap and warm water for those—it’s safer and works just fine.

How long can I keep these homemade sprays in a spray bottle before they start smelling weird or losing their punch?

Here’s the deal: since we aren’t using heavy-duty preservatives, you can’t just make a gallon and forget about it. If you’re using just vinegar and water, you’re usually good for about two weeks. But if you add citrus peels or essential oils, try to use them up within a week. If it starts smelling funky or looks cloudy, toss it. Better to spend two minutes mixing a fresh batch than cleaning with something gross!

If I'm switching from store-bought chemicals to DIY stuff, do I need to do anything special to make sure I'm actually killing germs?

Look, I get the worry. When you’re used to those heavy-duty sprays, switching to pantry staples can feel like you’re just moving dirt around. Here’s the deal: vinegar is great for grime, but it isn’t a heavy-duty disinfectant. For high-traffic spots like cutting boards or bathroom handles, I use a simple 70% isopropyl alcohol spray. It kills the nasties fast and evaporates clean. Just stick to the basics and use it where it counts.

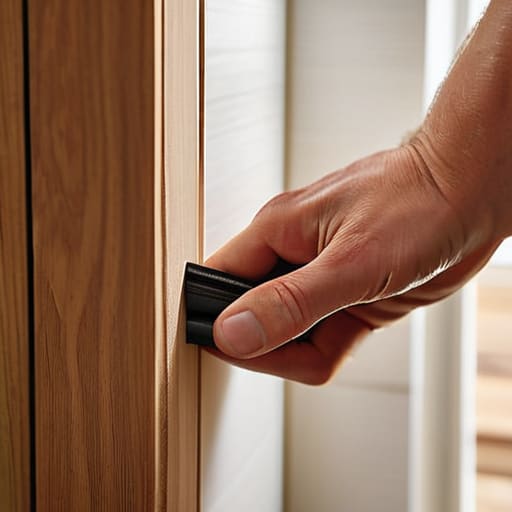
How to fix a squeaky door quickly.

How to Fix a Squeaky Door in Two Minutes

You know that feeling when you’re trying to sneak into the kitchen for a midnight snack, only to have your bedroom door let out a piercing, high-pitched scream that sounds like a banshee? I’ve been there more times than I’d like to admit. My old apartment had a door that sounded like it was protesting every single time I moved it, and I used to think I’d need to call a professional or replace the entire hinge assembly just to get some peace. But here’s the truth: learning how to fix a squeaky door isn’t some complex engineering project. It’s usually just a matter of a little bit of lubrication and a few minutes of your time.

I’m not going to suggest any fancy, expensive industrial tools that you’ll never use again. Instead, I’m going to show you how to tackle this using stuff you probably already have in your junk drawer or kitchen pantry. We’ll walk through the quickest ways to silence that noise, from the “quick fix” method to the more thorough deep-clean approach. My goal is to get that door swinging silently so you can stop jumping every time you walk through a room.

Table of Contents

Guide Overview

Total Time: 10-20 minutes
Estimated Cost: $0-10
Difficulty: Beginner

Tools & Supplies

  • Screwdriver for tightening loose hinge screws
  • Microfiber cloth for wiping away excess lubricant
  • Lubricant (WD-40, silicone spray, or white lithium grease) 1 can
  • Cleaning rag 1 piece

Step-by-Step Instructions

  • 1. First things first, you’re going to need to grab some lubricant. If you have a can of silicone spray or white lithium grease sitting in your garage, you’re golden. If not, don’t panic—even a little bit of petroleum jelly from the medicine cabinet can do the trick in a pinch. Just avoid using plain old cooking oil; it might work for five minutes, but it eventually gets gummy and attracts dust, which creates a bigger mess later.
  • 2. Before you start spraying stuff everywhere, take a damp rag and wipe down the hinges. Over the years, those metal joints collect a nasty mix of dust, hair, and old grime. If you try to lubricate right over that junk, you’re basically just making a thick, black sludge that’ll make the squeak even worse. Get them looking relatively clean so the lubricant can actually reach the metal.
  • 3. Now, here is the part where most people get lazy, but I want you to do it right: remove the hinge pin. Take a hammer and a large nail (or a screwdriver if you’re careful), place it at the bottom of the pin, and give it a few light taps until the pin pops upward. Once it’s out, set it aside on a piece of cardboard so you don’t lose it in the carpet. Trust me, losing a pin is a headache you don’t need.
  • 4. While that pin is out, take a look at it. If it looks rusty or pitted, give it a quick scrub with some steel wool or a rough rag. This is the perfect time to apply your lubricant directly to the pin itself. Instead of just spraying the door and hoping for the best, coating the pin ensures the oil gets exactly where the friction is happening.
  • 5. Slide the pin back into the hinge carefully. As you push it down, you might need to give it a few taps with the hammer to get it seated properly. Once it’s back in, swing the door back and forth a few times. This helps work the lubricant into the internal parts of the hinge. You’ll likely hear the squeak start to fade away with every swing.
  • 6. Finally, grab that damp rag again and wipe away any excess oil. You don’t want liquid dripping down your door frame or staining your flooring. If you used a spray, there might be some overspray on the metal, so just buff it off until it looks clean. Give the door one last test swing, and if it’s silent, you’re officially done!

Finding Household Items to Stop Door Squeaks Fast

Finding Household Items to Stop Door Squeaks Fast

Now, if you don’t have a can of specialized lubricant sitting in your junk drawer, don’t panic. I’ve been in plenty of situations where I needed to quiet a hinge immediately and didn’t want to run to the hardware store. You can actually find some great household items to stop door squeaks right in your kitchen or bathroom. A little bit of cooking oil (like olive or vegetable oil) on a Q-tip works wonders in a pinch, as does a bar of soap rubbed directly onto the hinge mechanism. Just a heads-up though: these are temporary fixes. They’ll stop the noise for a few days, but they can get a bit gummy over time, so don’t make them your permanent solution.

If you do decide to head to the store for something more long-term, you’ll likely run into the classic debate of WD-40 vs silicone spray for doors. Here’s my two cents: standard WD-40 is a great cleaner and helps loosen things up, but it actually evaporates pretty quickly. For real, long-lasting door hinge maintenance tips, I always recommend grabbing a silicone-based spray or even some white lithium grease. These stay on the metal longer and won’t attract as much dust, meaning you won’t be fighting that same squeak again next week.

Wd 40 vs Silicone Spray for Doors Which Wins

Wd 40 vs Silicone Spray for Doors Which Wins

So, you’ve got your supplies ready, but you’re staring at the shelf wondering which can goes in the can. This is the classic debate of WD-40 vs silicone spray for doors, and honestly, most people get it backwards. Here’s the deal: standard WD-40 is a fantastic cleaner and a great way to break up old, gunked-up grease, but it’s not a long-term lubricant. It evaporates pretty quickly, which means that annoying squeak might come crawling back in a week. If you just want a quick fix to stop the noise right this second, it’ll do the trick, but it’s not the gold standard for fixing noisy door hinges permanently.

If you want to do the job once and forget about it, go with the silicone spray. Silicone stays put, resists dust, and creates a slick barrier that lasts way longer. When I’m doing serious door hinge maintenance tips, I always reach for the silicone because it won’t attract as much grime over time. If the squeak is really stubborn, you might even need to try removing hinge pins to coat them directly, but for most of us, a good spritz of silicone is the real winner for long-term peace and quiet.

Pro Tips to Keep That Squeak from Coming Back

  • Clean those hinges first. If you just spray lubricant over years of dust and grime, you’re basically making a greasy sludge that’ll attract even more dirt. Give them a quick wipe with a rag before you add anything new.
  • Don’t overdo it. I’ve seen guys soak a hinge in oil like they’re trying to deep-fry it. A little goes a long way. If you use too much, it’s just going to drip down your door frame and leave a nasty stain.
  • Work the hinge, don’t just spray it. Once you apply your lubricant, swing the door back and forth a few times. You want that oil to actually get inside the pin and work its way through the mechanism, not just sit on the surface.
  • Listen to the “language” of the squeak. If it’s a high-pitched chirp, it’s usually just dry metal. If it’s a low, grinding sound, you might actually have a hinge that’s slightly bent or misaligned, and no amount of spray is going to fix that.
  • Keep a small can of silicone spray in your junk drawer. It’s way cleaner than the heavy-duty stuff and won’t leave that “mechanic shop” smell hanging around your hallway for three days.

Quick Reminders Before You Get Started

If you’re in a pinch, don’t panic—things like cooking oil or even a bit of petroleum jelly from the medicine cabinet can get you through the night.

Grab a dedicated lubricant like silicone spray if you want a long-term fix, but keep the WD-40 for cleaning off old gunk rather than as a permanent solution.

Always keep a rag handy to wipe away any extra drips so you don’t end up with oily streaks on your door or floor.

## The Big Picture

“A squeaky door isn’t just a minor annoyance; it’s a tiny, constant reminder of something that needs a little attention. But here’s the thing: you don’t need a professional or a fancy toolkit to handle it. Most of the time, it’s just a matter of a little grease and a few minutes of your time to get things running smooth again.”

Nathan Cole

Wrapping It All Up

Wrapping It All Up: Fixing squeaky hinges.

So, there you have it. Whether you ended up grabbing the heavy-duty silicone spray from the garage or just grabbed some cooking oil from the pantry to get through the night, you’ve officially tackled the problem. Just remember that the secret is all in the application—make sure you get that lubricant deep into the hinge pin so it actually does its job. If you find the squeak coming back in a few weeks, don’t sweat it; it just means you might need a slightly thicker grease next time. The main thing is that you didn’t call a handyman or spend money on a professional just to deal with a little bit of friction.

At the end of the day, fixing a squeaky door is about more than just getting some peace and quiet in your hallway. It’s about that small, satisfying feeling of looking at something that was broken and realizing you were the one who fixed it. I know some of these little household annoyances can feel like a mountain when you’re tired after work, but I promise you, they are totally figure-out-able. Keep your tools handy, keep experimenting, and don’t be afraid to get your hands a little dirty. You’ve got this!

Frequently Asked Questions

What if I lubricate the hinges and the squeak doesn't actually go away?

If you’ve lubed the hinges and that annoying sound is still hanging around, don’t sweat it—it just means the squeak is hiding somewhere else. Usually, it’s a sign that the hinge pin is worn out or there’s some grit trapped deep inside the mechanism. My advice? Pull the pin out entirely, clean it with some steel wool, and check if it’s bent. If it looks beat up, it’s time for a cheap replacement.

How often do I really need to grease my door hinges to keep them quiet?

Honestly, there’s no magic number, but I usually aim for a “once a year” tune-up just to be safe. If you live near the coast where salt air can mess with metal, or if you’ve got kids constantly slamming doors, you might need to do it more often. My rule of thumb? If you hear even the tiniest hint of a groan, don’t wait. Hit it with a little lube now before it turns into a real headache.

Is it safe to use cooking oil or vegetable oil if I'm in a pinch, or will that gunk up the hinges later?

Look, I get it—you’re in the middle of something and just want that noise gone now. But honestly? Skip the olive oil or vegetable oil. It might work for ten minutes, but cooking oils eventually go rancid and turn into this sticky, gummy mess that actually traps dust and grit inside your hinges. It’ll make the problem way harder to fix later. Stick to a real lubricant if you can; your future self will thank you.

First macrame for beginners wall hanging tutorial.

Macramé for Beginners: Your First Wall Hanging

I was sitting on my living room floor last Tuesday, surrounded by a chaotic bird’s nest of tangled cotton cord and feeling completely defeated. I had watched three different “easy” tutorials, but my hands felt like they were working against me, and nothing looked like the polished photos on Pinterest. It’s a common misconception that you need some kind of natural artistry or “knack” to get started, but honestly, that’s a load of junk. Learning macrame for beginners isn’t about being a born artist; it’s just about muscle memory and getting the tension right.

I’ve spent the last few days stripping away all the fluff and the complicated jargon to figure out what actually works when you’re starting from zero. In this guide, I’m going to walk you through the only three knots you actually need to know to make something beautiful. No expensive looms, no high-end studio setups—just you, some string, and a few straightforward steps that anyone can follow. We’re going to turn that frustration into something you can actually hang on your wall by the end of the weekend.

Table of Contents

Guide Overview

Total Time: 3-5 hours
Estimated Cost: $20-40
Difficulty: Beginner

Tools & Supplies

  • Scissors for clean cord cuts
  • Measuring tape for length accuracy
  • S-hooks or clothespins to hold work
  • Cotton macrame cord (3mm or 4mm, 1 roll)
  • Wooden dowel or ring (1 piece)
  • Clipboard or stand to secure project

Step-by-Step Instructions

  • 1. First things first, you’ve gotta grab your supplies, and don’t go overboard. You really only need some cotton cord (3mm or 4mm is the sweet spot for beginners), a sturdy pair of scissors, a wooden dowel or even a pretty fallen branch from your backyard, and some masking tape. I like to use a piece of tape to secure my dowel to the edge of a table so it doesn’t slide around while I’m working.
  • 2. Once you’re set up, it’s time to load your “workspace.” Cut your cords to about eight times the length of the finished project you’re aiming for—I usually go long because you can always trim it later, but you can’t add more cord once it’s knotted. Fold your cords in half, loop them over your dowel, and pull the loose ends through the loop to create a “Lark’s Head Knot.” This is basically the anchor that holds everything in place.
  • 3. Now we get into the actual knotting, and we’re starting with the absolute king of macrame: the Square Knot. Take four strands of cord; the two in the middle are your “filler” cords that stay still, and the two on the outside are your “working” cords. Cross the left cord over the middle ones to make a shape like a “P,” then tuck the right cord under the middle cords and up through the loop on the left. Pull it tight, and you’ve got your first real knot.
  • 4. To keep your pattern looking clean, you’ll want to repeat that Square Knot a few times in a row to create a horizontal line. This is called a “Square Knot Row.” If you feel like you’re getting a bit tangled, don’t sweat it; just take a breath and untie it. Even I mess up a knot every now and then, and it’s no big deal.
  • 5. If you want to add some texture and break up those straight lines, try a Spiral Stitch. All you do is perform half of the Square Knot over and over again—just the left side, then the left side again. Instead of alternating sides, you keep going in the same direction, and the cord will naturally start to twist into a beautiful spiral. It looks way more complicated than it actually is, I promise.
  • 6. As you work your way down, keep an eye on your tension. You want your knots to be firm, but don’t go pulling them so hard that you’re struggling to get the next one in. If you find your hands getting tired, that’s a good sign you’re doing it right, but make sure you’re staying consistent so the piece doesn’t look lopsided.
  • 7. Finally, once you’ve reached the length you want, it’s time for the satisfying part: the trim. Lay your piece flat on the floor or a table to see how the fringe looks. Use your sharpest scissors to cut the bottom into a clean straight line, or if you’re feeling fancy, trim them into a V-shape. Once you’re happy with it, hang it up and take a second to realize you just made something with your own two hands.

Picking Your First Cord With a Simple Cotton Cord Weight Guide

Picking Your First Cord With a Simple Cotton Cord Weight Guide

I’ll be the first to admit that walking into a craft store and seeing a mountain of different strings can feel a bit overwhelming. You might be wondering if you need that expensive, specialty fiber or if the cheap stuff will do. Honestly? For your first few tries, you want to keep it simple. I always recommend sticking to a 3mm or 4mm single-strand cotton cord. It’s forgiving, it’s easy on your hands, and it holds those basic macrame knot patterns beautifully without fraying like crazy while you’re still learning the ropes.

If you decide to go with a twisted cord instead of single-strand, just be prepared for a little more “fuzz” as you work. A single-strand cord is much smoother, which makes it my top pick for any macrame wall hanging tutorial you might be following online. Think of it like choosing the right screwdriver for a job—you don’t need the heavy-duty industrial version for a simple shelf, you just need something that fits the task. Grab a small spool of 3mm cotton, and I promise you’ll be making progress before your coffee gets cold.

The Only Essential Macrame Tools List You Actually Need

The Only Essential Macrame Tools List You Actually Need.

Look, I’ve walked into plenty of craft stores and felt that immediate urge to buy every shiny thing on the shelf, but let me save you some money right now. You don’t need a professional studio setup to get started. For my essential macrame tools list, I keep it strictly to the basics: a sharp pair of fabric scissors, a measuring tape, and something to hold your work while your hands are busy. A simple wooden dowel or even a sturdy branch from your backyard works perfectly as a base.

If you want to get a little more organized, grab a piece of masking tape and a clipboard. I use the tape to secure my cords to a table so they don’t slide around while I’m practicing basic macrame knot patterns. It might feel a little “DIY” in the unpolished sense, but it works every single time. The goal here isn’t to have a pristine workspace; it’s to have the right gear to actually start building. Don’t let a lack of fancy equipment stop you from diving into your first project.

Five Pro-Tips to Keep Your First Project from Turning Into a Tangle

  • Don’t overthink your knots. When you’re starting out, it’s tempting to try and make every single loop look perfect, but honestly? Just focus on getting the pattern right. Your first few pieces are going to have some quirks, and that’s okay—it’s part of the charm.
  • Watch your tension like a hawk. This is the one thing that trips me up even after years of DIYing. If you pull one knot super tight and the next one a bit loose, your whole piece is going to look wonky and lopsided. Try to keep a steady, relaxed hand throughout the whole process.
  • Work on a flat, stable surface. I know it’s tempting to hang your cord from a doorway or a shower rod right away, but for your first few knots, I highly recommend taping your cords down to a table or a clipboard. It stops the constant swaying and lets you actually see what your hands are doing.
  • Keep a “scrap pile” handy. You’re going to trim a lot of cord as you go, and you’ll likely make a few mistakes that require you to start a section over. Instead of tossing those bits, throw them in a little bin. They’re great for practicing new knots without wasting your good, expensive cord.
  • Take breaks before you get frustrated. If you feel yourself starting to fight with the cord or if your fingers are getting cramped, just walk away. Go grab a coffee or tinker with something else for twenty minutes. Most “mistakes” are just caused by tired eyes, and you’ll fix them much faster with a fresh perspective.

Quick Tips to Keep You Moving

Don’t sweat the small stuff; if your first few knots look a little wonky, that’s totally normal—just keep going and you’ll find your rhythm.

Stick to the basics at first by using a decent cotton cord and the essential tools we talked about so you don’t get overwhelmed by gear you don’t need.

Remember that macrame is all about the process, so focus on getting one knot right at a time instead of worrying about the finished product right away.

My Best Advice Before You Start

“Look, your first few knots are probably going to look a little wonky, and that’s totally fine. Don’t get hung up on making it look like a professional showroom piece right out of the gate; just focus on getting the rhythm down and enjoying the process of making something with your own two hands.”

Nathan Cole

You’ve Got This

Macrame beginner practicing knots, You’ve Got This.

Look, I know it can feel a bit overwhelming when you’re staring at a pile of tangled cord and a bunch of new knots, but you’ve already done the hard part. You’ve picked out your tools, found the right cotton cord weight so your hands don’t cramp up, and you’ve got the basic steps down. Just remember that macrame isn’t about being perfect; it’s about getting your hands dirty and learning through trial and error. If a knot looks a little wonky or your tension is uneven on the first try, don’t sweat it. Just untie it, take a breath, and start again. That’s how I learned to fix everything from leaky sinks to wonky shelves, and it’s exactly how you’re going to master this craft.

At the end of the day, the best part of DIY isn’t having a perfectly curated home—it’s that feeling of pride when you look at something and say, “I made that myself.” Whether you end up making a tiny plant hanger or a massive wall tapestry, you’re building a skill that belongs entirely to you. Don’t get caught up in the fancy stuff you see on social media; just keep knotting and enjoy the process. I promise, once you finish that first piece, you’re going to feel like you can tackle just about anything. Now, get out there and start creating!

Frequently Asked Questions

How do I keep my cords from fraying or getting all fuzzy while I'm working?

There’s nothing more frustrating than getting halfway through a knot only to realize your cord looks like it went through a blender. To keep things clean, try to avoid pulling your cord too aggressively or snagging it on any rough edges on your workspace. If you’re working with a particularly fuzzy cotton, I usually keep a small pair of sharp embroidery scissors handy to snip off those stray fibers as I go. It keeps your project looking sharp!

Do I really need a wooden dowel to start, or can I just tie my project to a door handle or a branch?

Honestly? You definitely don’t need a fancy wooden dowel to get moving. I’ve used everything from a sturdy tree branch in my backyard to a heavy-duty door handle when I was first starting out. The goal is just to have something solid that won’t budge while you’re pulling those knots tight. As long as it’s steady and won’t snap or slide around, go for it. Don’t let a lack of supplies stop your momentum!

How much cord should I actually cut before I start so I don't run out halfway through a knot?

Here’s the golden rule I live by: always cut more than you think you need. I usually follow the “four-to-one” rule for beginners. If you want your finished piece to be 12 inches long, start with cords that are at least 48 inches. It feels like a waste of string at first, but trust me, nothing kills my momentum faster than running out of cord mid-knot and having to re-thread everything.

Guide on how to build a bookshelf.

How to Build a Simple Bookshelf From Scratch

I was standing in the middle of my living room last Saturday, staring at a pile of expensive, particle-board shelving I’d bought from a big-box store, wondering why it felt so flimsy. It’s a common trap: we think that learning how to build a bookshelf requires a massive workshop, a professional-grade table saw, and a degree in carpentry. But honestly? That’s just a myth that keeps people from actually starting. Most of the time, you don’t need a garage full of expensive gear; you just need a solid plan and a few basic tools that won’t break the bank.

In this guide, I’m going to strip away all the complicated jargon and show you exactly how I tackle these projects. I’ll walk you through selecting the right wood, making clean cuts, and getting those shelves perfectly level without losing your mind. This isn’t about building a museum piece; it’s about creating something sturdy and functional that actually fits your space. By the time we’re done, you’ll have a finished piece of furniture you can actually be proud of, all without needing a master’s degree in woodworking.

Table of Contents

Guide Overview

Total Time: 4-6 hours
Estimated Cost: $60-120
Difficulty: Beginner

Tools & Supplies

  • Circular saw or hand saw for cutting wood to size
  • Power drill for driving screws and pre-drilling holes
  • Measuring tape for precise layout
  • Sandpaper for smoothing rough edges
  • Level to ensure the unit is straight
  • 1×6 lumber (approx. 4-5 boards of 8ft length)
  • Wood screws (1.5 inch, 1 box)
  • Wood glue (1 bottle)
  • Sandpaper (various grits)
  • Wood stain or paint (1 quart)

Step-by-Step Instructions

  • 1. First things first, you’ve gotta get your materials together so you aren’t running back to the hardware store halfway through the job. Grab some 3/4-inch plywood or pine boards for the main frame, a thin sheet of plywood for the back, and a box of wood screws. I always tell people to measure twice and cut once, so grab a tape measure, a pencil, and a saw before you get started.
  • 2. Once you’ve got your wood, it’s time to cut your side panels and your shelves. If you’re working with a circular saw, make sure you have a straight edge to guide you so your cuts don’t end up looking like a mountain range. You want your side pieces to be the same height and your shelves to be the exact same length, otherwise, your books are going to look a little wonky when you finally set them up.
  • 3. Now, let’s get the frame together. Lay one of your side panels flat on the ground and mark where you want your shelves to sit. I like to use a little scrap piece of wood as a spacer to make sure every shelf is at the exact same height. Once you’ve marked your spots, drill some pilot holes first; this is a pro tip that prevents your wood from splitting when you drive those screws in.
  • 4. Line up your first shelf with the marks you made and start driving those screws through the side panel and into the edge of the shelf. Don’t go too crazy with the drill right away—you want to be able to adjust things slightly if they aren’t lining up perfectly. Once everything is screwed in tight, stand the frame up to make sure it’s sturdy and not wobbling like a table with a short leg.
  • 5. This is the part most people try to skip, but don’t you dare: you need to attach the back panel. A bookshelf without a back is basically just a wobbly wooden frame waiting to collapse. Lay the unit face down, align your thin plywood sheet over the back, and nail it into place around the edges. This adds the structural integrity you need to keep the whole thing from leaning to one side.
  • 6. Finally, it’s time for the fun part—making it look good. You can leave the wood raw for a rustic vibe, or grab a can of paint or stain to match your room. I usually go with a simple matte finish, but if you’re feeling fancy, you can even add some edge banding to hide those rough plywood edges. Once the finish is dry, load up your favorite reads and take a victory lap around the room.

Gathering Essential Carpentry Supplies Without Breaking the Bank

Gathering Essential Carpentry Supplies Without Breaking the Bank.

Look, I’ve been there—standing in the middle of a big-box hardware store aisle, staring at a wall of power tools and feeling like I need a second mortgage just to get started. It’s easy to think you need a professional workshop to pull this off, but honestly? You don’t. When you’re hunting for essential carpentry supplies, my best advice is to focus on the basics. You really only need a solid saw, a drill, a level, and some decent clamps. Instead of buying a brand-new, high-end kit, check out local pawn shops or even Facebook Marketplace. You can often find high-quality, older tools that just need a little cleaning to work perfectly.

Another trick I use to keep costs down is being smart about your materials. If you’re following certain woodworking tools for beginners guides, you might see fancy hardwoods mentioned, but for your first project, don’t be afraid of pine or even high-grade plywood. It’s much more forgiving and way easier on your wallet. Just make sure you have a good tape measure and a square; getting the measuring and cutting wood part right the first time is the best way to avoid wasting money on ruined boards.

Mastering Measuring and Cutting Wood With Total Confidence

Mastering Measuring and Cutting Wood With Total Confidence

Look, I’ll be the first to admit that nothing makes my palms sweat quite like a saw blade. We’ve all been there: you stare at that expensive piece of lumber, the tape measure is in your hand, and you suddenly forget how math works. But here’s the secret I learned from my dad: measure twice, cut once isn’t just a cliché; it’s a survival tactic. When you’re measuring and cutting wood for your first project, don’t just eyeball it. Use a sharp pencil to mark your lines, and always account for the “kerf”—that’s the tiny bit of wood the saw blade actually turns into sawdust. If you don’t account for that width, your pieces are going to end up a hair too short, and trust me, that’s a headache you don’t want.

Once you’ve got your marks, take a breath. If you’re using a hand saw, let the tool do the heavy lifting instead of forcing it through the grain. If you’ve moved up to a power saw, make sure your workpiece is clamped down tight. Even if you’re following specific custom shelving unit plans, steady hands and a solid grip are what really make the difference between a professional-looking shelf and a wobbly mess.

Five little tricks to keep your project from turning into a headache

  • Measure twice, cut once—and then measure a third time if you’re feeling nervous. I’ve lost more good wood to a “measure once and hope for the best” attitude than I care to admit.
  • Don’t skip the sanding. It’s tempting to just slap the finish on once the glue dries, but a little extra time with some sandpaper now means you won’t be dealing with splinters or a rough surface later.
  • Use a square every single time you make a mark. If your corners aren’t a true 90 degrees, your bookshelf is going to lean like the Tower of Pisa, and no amount of clever styling will fix that.
  • Check your level constantly. Even if your cuts are perfect, if your base isn’t sitting flat on the floor, the whole thing will feel wobbly. A quick check with a level can save you a massive amount of frustration.
  • Pilot holes are your best friend. If you try to drive a screw straight into the wood without drilling a tiny hole first, you’re basically asking for the wood to split right down the middle. Take the extra thirty seconds to drill the hole first.

Two cents to remember before you start

Measure twice and cut once—it sounds like a cliché for a reason, and it’ll save you a lot of wasted lumber and frustration.

You don’t need a professional-grade workshop to get this done; a few solid hand tools and some patience will take you much further than an expensive power tool set ever could.

Don’t sweat the small imperfections; a little bit of sanding and some decent wood filler can turn a “DIY project” into a piece of furniture you’re actually proud to show off.

## The real secret to the build

“Look, you’re going to mess up a measurement or cut a board a hair too short at some point—I definitely have. But don’t let a crooked shelf stop you; the goal isn’t perfection, it’s building something with your own two hands that actually holds your books.”

Nathan Cole

You Did It: Time to Load Up Those Books

You Did It: Time to Load Up Those Books

Once you’ve finished sanding down those rough edges and you’ve finally tightened up that last screw, take a second to step back and look at what you’ve actually accomplished. We went from a pile of raw lumber and a messy shopping list to a solid, functional piece of furniture that didn’t exist yesterday. It wasn’t just about the precision of your cuts or finding the right budget-friendly supplies; it was about following the process, staying patient when the measurements got tricky, and seeing it through to the end. You’ve navigated the hardware store, mastered the saw, and built something with your own two hands.

I know there might be a few tiny imperfections or a slightly crooked shelf, but honestly? That’s the best part. Those little marks are proof that this wasn’t a factory-made piece of junk from a big-box store—it’s a project that has some soul. Don’t let the fear of a mistake stop you from starting your next build. Whether it’s a bigger cabinet or a simple birdhouse, just remember that everything is figure-out-able if you take it one step at a time. Now, go grab your favorite novels, get them off the floor, and start filling those shelves up. You earned it.

Frequently Asked Questions

What should I do if I mess up a cut and end up with a piece of wood that's too short?

First off, take a breath. We’ve all been there, and I promise you aren’t the first person to “short” a board. Don’t toss it in the scrap pile just yet! If it’s only off by a hair, you might be able to adjust your design slightly. If it’s a major miss, try repurposing that piece into a smaller brace, a decorative trim, or even a custom spacer. Mistakes are just unexpected design opportunities.

Is it better to use screws or nails to keep the shelves from sagging over time?

If you’re worried about those shelves bowing under the weight of your heavy hardcovers, go with screws every single time. Nails are great for quick framing, but they can pull loose over time as the wood shifts. Screws actually bite into the material and hold that tension much better. Just make sure you drill pilot holes first so you don’t split your wood—trust me, I’ve learned that the hard way!
How do I make sure the whole thing is actually level and doesn't wobble once it's standing?

There’s nothing more frustrating than spending all day building something only to have it rock back and forth like a seesaw. To fix this, grab a spirit level and check your shelf on all sides before you even think about securing it. If your floor is wonky, don’t sweat it—just use some thin wood shims under the uneven corner. It’s a quick, cheap fix that makes a world of difference in stability.

DIY ideas on how to make wall art.

Diy Wall Art Ideas That Look Store-bought

I used to think that if I wanted my place to look decent, I had to drop a couple hundred bucks at a high-end home decor store just to find something that didn’t look like it came out of a factory. But honestly? That’s a total myth. You don’t need a massive budget or a degree in fine arts to fix those empty, depressing spaces in your living room. I learned the hard way that learning how to make wall art is less about being “talented” and more about having the right plan and a few basic tools. Once I stopped overthinking it and started experimenting with what I already had in my garage, I realized that some of my favorite pieces are the ones I built myself for next to nothing.

In this guide, I’m going to strip away all the fluff and show you exactly how to get started. We aren’t doing anything overly complicated or pretentious here; I’m talking about real-world projects that actually look good. I’ll walk you through picking the right materials, avoiding the common mistakes that turn a project into a mess, and executing your vision step-by-step. By the end of this, you’ll have the confidence to stop staring at blank walls and finally start creating something you’re proud to hang up.

Table of Contents

Guide Overview

Total Time: 3-5 hours
Estimated Cost: $30-60
Difficulty: Beginner

Tools & Supplies

  • Paintbrushes various sizes for application
  • Painter's tape for creating clean lines
  • Pencil for sketching designs
  • Canvas or wood panel 1 unit
  • Acrylic paint set 1 set
  • Palette 1 unit
  • Water cup 1 unit

Step-by-Step Instructions

  • 1. First things first, you need to decide what kind of vibe you’re going for. Don’t get stuck in “analysis paralysis” here—just pick a style that doesn’t make you cringe. Are we talking about minimalist line drawings, some rugged reclaimed wood pieces, or maybe some colorful abstract canvas work? Once you’ve got a general direction, grab a notebook and jot down a few colors or textures that match your room. This keeps you from wandering aimlessly into the craft aisle later.
  • 2. Next, let’s talk supplies. I’m a big believer in not overspending on stuff you’ll only use once, so check your junk drawer or the back of your closet before hitting the store. You’ll likely need your base material (like a canvas, a wooden board, or even a thick piece of heavy cardstock), some kind of adhesive or paint, and a few basic tools like brushes or even a sponge. If you’re doing something wood-based, make sure you have some sandpaper handy because smooth edges make all the difference between a professional look and a DIY disaster.
  • 3. Now, prep your workspace. I can’t tell you how many times I’ve ended up with dried acrylic paint on my dining room table because I was too lazy to lay down some protection. Grab some old newspapers, a cheap plastic tablecloth, or even just some cardboard boxes from your last delivery. Clear off a flat surface and get organized by laying out all your tools in the order you’ll use them. It sounds tedious, but it saves you from that frantic “where’s the tape?” scramble halfway through.
  • 4. Time to get your hands dirty and start the actual creation. If you’re painting, start with your background colors first—don’t try to do the fine details until the base is completely dry. If you’re working with textures or collage elements, layer them from the bottom up. The trick here is to embrace the imperfections. If a line isn’t perfectly straight, don’t sweat it; sometimes that slight bit of character is exactly what makes handmade art look so much better than something mass-produced from a big-box store.
  • 5. Once your piece is looking the way you want, you have to let it cure. This is the hardest part for me because I want to hang it up immediately, but patience is a virtue when it comes to glue and paint. If you try to hang a piece that’s still tacky, you’re going to end up with a mess on your wall and a ruined project. Give it at least a few hours—or even overnight if you’re using heavy-duty materials—to make sure everything is set solid.
  • 6. Finally, let’s get that beauty off the workbench and onto the wall. Don’t just slap a nail in and hope for the best. Use a level (or a leveling app on your phone if you don’t have a physical one) to make sure it’s not sitting crooked. I usually like to test the placement by leaning the art against the wall first to see how the light hits it. Once you’re happy, secure it firmly, step back, and take a second to actually admire your work. You built this, and that’s a pretty great feeling.

Budget Friendly Wall Decor Without the Designer Price Tag

Budget Friendly Wall Decor Without the Designer Price Tag

Look, I get it. You walk into a high-end home goods store, see a piece of art that actually looks decent, and then you see the price tag. It’s enough to make you want to walk right back out. But here’s a secret from someone who’s spent way too much time browsing aisles: you don’t need a massive bank account to pull off modern home decor DIY projects that look intentional rather than “cheap.” Most of the time, you’re just paying for a brand name, not the actual soul of the piece.

If you’re working with a tight budget, my best advice is to raid your local thrift store or even your own junk drawer. You can find incredible mixed media art supplies—like old frames, interesting scraps of fabric, or even interesting hardware—that add character you just can’t buy new. I love using heavy-duty textured paste or even just some joint compound from the hardware store to create a textured art tutorial vibe on a basic canvas. It adds that high-end, tactile feel without the designer markup. Just keep it simple, keep it tactile, and don’t be afraid to get a little messy.

Mastering Abstract Canvas Painting Techniques in Simple Steps

Mastering Abstract Canvas Painting Techniques in Simple Steps

If you’re feeling a little intimidated by a blank canvas, don’t sweat it. Abstract art is honestly one of the best ways to practice because there is no “wrong” way to do it. One of my favorite abstract canvas painting techniques is the layering method. Instead of trying to paint a perfect picture, just start by applying a base color, let it dry, and then layer different shades or even some texture paste on top. It’s all about building depth rather than precision.

To really level up your piece, I highly recommend experimenting with some mixed media art supplies. I’ve found that grabbing a cheap palette knife or even an old credit card from your junk drawer can create amazing ridges and grooves that a standard brush just can’t mimic. This is a great way to nail that high-end, textured look without spending a fortune on professional studio tools. Just remember: if you make a stroke you don’t like, just let it dry and paint right over it. That’s the beauty of abstract work—you can always pivot.

5 Pro Tips to Keep Your Projects from Looking Like a Mess

  • Don’t skip the layout test. Before you hammer a single nail into the drywall, grab some painter’s tape or even just some old newspaper and mock up your art on the wall. It’s way easier to move a piece of paper than it is to patch a hole because you hung something too high.
  • Mix up your textures. If every single piece of art you hang is a flat canvas, your room is going to feel a little “one-note.” Try throwing in some wood elements, a woven basket, or even a framed piece of vintage fabric to give the wall some actual depth.
  • Think about your lighting. You can make a ten-dollar thrift store find look like a gallery piece if you hit it with the right light. A simple, inexpensive battery-operated picture light can completely change the vibe of your DIY project.
  • Mind the “eye level” rule. I see this all the time—people hang art way too high. A good rule of thumb is to aim for the center of the piece to be about 57 to 60 inches from the floor. It feels weird at first, but it makes the whole room feel more professional.
  • Embrace the imperfection. If you’re doing something handmade, like a wood print or a painted canvas, don’t sweat the tiny wobbles. That’s what makes it yours. If it looks too perfect, it starts looking like something you just bought from a big-box store, and we’re here to make something real.

Quick Wins to Remember

Don’t sweat the perfection—the best part about DIY wall art is that there are no real rules, so just start creating and adjust as you go.

You don’t need a massive budget to make a statement; some thrift store finds and a bit of elbow grease can look better than anything from a big-box retailer.

Always prep your space before you dive in, because nothing kills a good creative groove like realizing you’re missing a crucial tool or making a mess you can’t clean up.

## The Real Secret to Decorating

“Look, you don’t need a massive budget or a degree from an art school to make a space feel like home. You just need to stop staring at that empty wall and start playing with what you’ve already got. Most of the best stuff I’ve ever hung up wasn’t ‘perfect’—it was just something I made with my own two hands.”

Nathan Cole

Don't Stop at the First Project

Don't Stop at the First Project.

Look, we’ve covered a lot of ground here, from keeping things cheap and budget-friendly to getting your hands messy with some abstract canvas work. Whether you ended up repurposing old finds or diving headfirst into a fresh painting, the most important thing is that you actually made something with your own two hands. You don’t need a professional studio or a massive bank account to transform a room; you just need a little bit of patience and the right approach to breaking the project down into manageable chunks. Once you’ve got the basics of texture, color, and framing under your belt, you’ll realize that customizing your space is way more rewarding than just clicking “add to cart” on a generic piece of decor.

My biggest piece of advice as you wrap this up is to embrace the imperfections. If a line isn’t perfectly straight or the paint drips a little more than you planned, don’t sweat it—that’s just character. That’s what makes it yours. Every DIYer I know started with something that looked a little wonky, but that’s exactly how you learn the ropes. So, hang that piece up with pride, take a look at what you’ve accomplished, and start thinking about what’s next on your list. You’ve got the tools, you’ve got the steps, and most importantly, you’ve proven to yourself that you can figure it out.

Frequently Asked Questions

What’s the best way to hang my new art without putting massive holes in the drywall?

Look, I’ve definitely made the mistake of over-drilling holes in a wall I actually liked, so I get it. If your art isn’t heavy-duty, skip the hammer and nails entirely. Command Strips are your best friend here—just make sure you clean the wall with rubbing alcohol first so they actually stick. If it’s a bit heavier, grab some slim picture hangers; they use tiny pins that leave almost zero trace once you pull them out.

I’m worried about the colors clashing—how do I know if my DIY piece actually fits my room's vibe?

Look, I’ve definitely stared at a half-finished project and thought, “Is this actually going to look good or am I just making a mess?” Here’s my trick: grab some painter’s tape and a few scraps of your art, then stick them on the wall. Better yet, take a photo of the wall with your phone and use a basic editing app to “overlay” the colors. If it feels jarring, tweak the palette before you commit.

Are there any specific tools I absolutely need, or can I just wing it with stuff I already have around the house?

Look, I’m a big believer in using what you’ve got, but there’s a line between “winging it” and “making a mess.” You don’t need a professional studio, but grab a decent set of brushes and some painters’ tape so you aren’t fighting your tools. If you’re painting, definitely have some old rags and drop cloths handy—trust me, your carpet will thank you. Use what you have, but don’t skip the basics!

How to fix a running toilet guide.

How to Fix a Running Toilet and Save on Your Water Bill

There I was, sitting on my living room floor at 11:00 PM, staring at the bathroom door while that constant, ghostly hissing sound echoed through the whole house. It felt like I was literally flushing money down the drain every single minute. Most people think that once a toilet starts acting up, you’re looking at a massive plumbing bill or a frantic call to an expensive professional, but that is a total myth. Learning how to fix a running toilet is actually one of those “entry-level” DIY wins that you can tackle with nothing more than a pair of steady hands and a little bit of patience.

I’m not going to bore you with technical jargon or tell you to buy a whole new tank assembly when you don’t need to. Instead, I’m going to walk you through the exact, no-nonsense steps I use to get things quiet again. We’ll look at the common culprits—like a finicky flapper or a misaligned float—and I’ll show you how to swap them out without making a mess. My goal is to get you from frustrated homeowner to confident fixer in under twenty minutes, so you can finally enjoy some peace and quiet.

Table of Contents

Guide Overview

Total Time: 30-60 minutes
Estimated Cost: $10-30
Difficulty: Beginner

Tools & Supplies

  • Adjustable wrench for loosening water supply valve
  • Screwdriver for securing tank components
  • Sponge or cloth for removing excess water
  • Replacement flapper (1 unit)
  • Replacement fill valve (1 unit)
  • Replacement tank lever/handle (1 unit)

Step-by-Step Instructions

  • 1. First things first, you’ve gotta see what’s actually going on inside that tank. Go ahead and pop the lid off the toilet tank and set it aside on a towel or something soft so you don’t crack it. Once the lid is off, flush the toilet and watch the water level. You’re looking to see if the water is constantly pouring into the overflow tube (that open pipe in the middle) or if it’s leaking out from the bottom of the tank into the bowl.
  • 2. If the water is spilling over the top of that overflow tube, your float is likely the culprit. The float is that ball or cylinder that rises with the water to tell the valve when to shut off. If it’s set too high, the water never stops coming. You can usually fix this by adjusting the screw on the float assembly to lower it, or by simply bending the metal rod down a bit if you’ve got an older style.
  • 3. Now, if the water level looks fine but you still hear that constant hissing, it’s probably the flapper. This is that rubber plug at the bottom of the tank that lifts up when you flush. Over time, these things get old, warped, or covered in mineral buildup, and they stop making a tight seal. Reach in there (it’s just water, don’t worry about it) and feel the flapper. If it feels slimy or looks cracked, it’s time for a replacement.
  • 4. Before you run to the hardware store, check the chain that connects the flush handle to the flapper. If the chain is too long, it can get caught underneath the flapper, preventing a seal. If it’s too tight, it might be pulling the flapper up constantly. You want just a little bit of slack—enough so the flapper drops down and sits flat every single time.
  • 5. If the flapper and the float both look okay, the problem might be the fill valve itself. This is the tall assembly on the side of the tank that brings the water in. If it’s old and crusty, it might just be giving up the ghost. These are pretty cheap and easy to swap out, but you’ll want to turn off the water supply valve (the little knob on the wall behind the toilet) before you start unscrewing anything.
  • 6. Once you’ve identified the part that’s acting up, head to your local hardware store—and yes, I mean actually go inside and look around, even if you only need one thing. Grab the exact replacement part, bring your old one with you if you can to match it up, and follow the simple installation instructions. Most of these parts are designed to just twist or clip right into place.
  • 7. After you’ve swapped the part or adjusted the settings, turn your water supply back on and give it a few test flushes. Watch the tank fill up and make sure the water stops exactly where it’s supposed to. If the hissing is gone and the water stays put, you did it! Take a second to appreciate that you just saved yourself a plumber’s visit and a chunk of change.

Finding the Culprit Among Common Toilet Tank Leak Causes

Finding the Culprit Among Common Toilet Tank Leak Causes

Before you go out and buy a whole new tank assembly, you’ve got to play detective for a minute. Most of the time, the issue is one of three common culprits. First, check that rubber flapper sitting at the bottom. If it looks warped, slimy, or feels brittle, it’s likely not sealing correctly. When that happens, you’ll usually just need to replace the toilet flapper to get things back to normal. It’s a cheap part and a five-minute job.

Next, take a look at the water level itself. If the water is constantly spilling into the overflow tube, you’re probably dealing with a toilet fill valve adjustment issue. It’s less about something being “broken” and more about the float being set a little too high. Finally, give the handle a wiggle. If the chain is too tight or tangled in a clogged toilet tank mechanism, it can keep the valve propped open just enough to let water escape. Once you spot which one is acting up, you’re already halfway to the finish line.

A Simple Plan to Replace Toilet Flapper and Parts

A Simple Plan to Replace Toilet Flapper and Parts

Once you’ve identified the problem, it’s time to roll up your sleeves. If the rubber is looking cracked or feels slimy, you’ll need to replace the toilet flapper to get things back to normal. Before you dive in, I always recommend turning off the water supply valve behind the toilet and flushing once to empty the tank. It makes the job a whole lot cleaner and prevents a mini-flood in your bathroom. Grab a new flapper that matches your model, and when you drop it in, make sure the chain has just a little bit of slack. If it’s too tight, it’ll pull the flapper up prematurely; too loose, and it won’t seal properly.

While you’re in there, don’t ignore the other moving parts. Sometimes the issue isn’t the rubber, but a faulty toilet fill valve adjustment that’s causing the water to constantly overflow into the tube. If your water level is sitting way too high, take a second to tweak that adjustment screw. It’s a quick win that can save you a ton on your water bill.

A Few Pro Tips to Save You Time (and a Trip to the Hardware Store)

  • Don’t just buy any flapper; take the old one with you to the store. There are a dozen different sizes and materials out there, and nothing’s more frustrating than getting home only to realize the new one doesn’t fit your specific model.
  • Check your water level before you start tearing things apart. If the water in the tank is too high, it’ll constantly spill into the overflow tube, making you think you have a broken part when you actually just need to adjust the float.
  • Keep your hands out of the “gunk zone” if you can. If you see a lot of mineral buildup or slime around the seal, give it a quick scrub with an old toothbrush before you install new parts—it’ll help everything seat properly and prevent leaks.
  • Avoid the “over-tighten” trap. When you’re putting things back together, especially the tank-to-bowl bolts, tighten them until they’re snug, but don’t go overboard. If you crank them too hard, you’ll crack the porcelain, and then you’re looking at a much bigger, much more expensive problem.
  • Test your work immediately. Once you’ve finished the fix, flush the toilet a few times and then just sit and watch it for a minute. You want to make sure that water level stabilizes and that the silence actually stays silent.

The Quick Fix Cheat Sheet

Most running toilets aren’t broken beyond repair; they’re usually just suffering from a worn-out flapper or a misaligned chain that you can swap out in ten minutes.

Always grab a few extra replacement parts—like a new flapper or a different length chain—before you start, so you don’t end up stuck halfway through the job.

Don’t let a little water noise stress you out; once you identify the culprit, you’ll realize it’s a simple fix that saves you money and a headache.

## The Big Picture

“Look, a running toilet isn’t a plumbing emergency; it’s just a tiny machine that’s lost its rhythm. Don’t let the sound drive you crazy—once you pop that tank lid off and see what’s actually going on, you’ll realize it’s way more figure-out-able than it sounds.”

Nathan Cole

You've Got This

Fixing a running toilet: You've Got This.

At the end of the day, fixing a running toilet really comes down to a little bit of investigation and a few basic parts. Whether it was a worn-out flapper that needed swapping, a misaligned float arm, or a simple adjustment to the fill valve, you’ve successfully tackled one of those annoying little household headaches that tends to drive people crazy. Just remember to double-check that everything is seated correctly and that the water level in the tank is sitting right where it should be before you call it a day. Taking those extra two minutes to ensure the seal is tight can save you from having to revisit the same problem next week.

I know that staring at the guts of a toilet tank can feel a bit intimidating if you aren’t used to it, but I promise you—you did the hard part just by getting your hands dirty. There is a specific kind of satisfaction that comes from hearing that water finally stop running and knowing you were the one who fixed it without calling an expensive plumber. Don’t let the small stuff intimidate you. Every time you knock out a repair like this, you’re building the confidence to take on the next project, no matter how big it might seem. Keep at it, and I’ll see you in the next guide.

Frequently Asked Questions

I replaced the flapper but it’s still running—what else could it be?

Man, I’ve been there. You swap the flapper, feeling all proud, and then—trick, trick, trick—it starts running again. Don’t toss the whole toilet out the window just yet. If the flapper didn’t do it, check your fill valve; if it’s faulty, it won’t shut off properly. Also, take a look at the water level. If it’s too high, it’s likely spilling into the overflow tube. It’s usually just one more tiny tweak.

Do I really need to buy a whole new fill valve kit, or can I just fix the one I have?

Honestly, you probably don’t need to drop money on a whole new kit just yet. If it’s just a little bit of debris or a worn-out seal, a quick cleaning or a cheap replacement part might do the trick. But, if that fill valve is old, crusty, or won’t stop hissing no matter what you do, just bite the bullet and grab a new one. It’s a cheap fix that saves a massive headache later.

How do I know if the leak is coming from the tank or the base of the toilet?

Here’s the trick: grab a piece of dry paper towel and wipe around the bottom of the toilet where it meets the floor. If the towel comes away soaking wet, you’re likely looking at a leak from the base—usually a bad wax ring. But, if the floor stays dry and the water is only inside the tank or trickling down the back, it’s a tank issue. Check the tank first; it’s much easier to fix.

Guide on how to make candles.

How to Make Your Own Candles at Home

I used to think that if I wanted a candle that actually smelled like something—and didn’t just smoke like a chimney—I’d have to drop twenty bucks at a boutique shop. I’d see those fancy DIY kits online with a million specialized tools and think, there’s no way I can do that in my cramped kitchen. But here’s the truth: learning how to make candles isn’t about having a professional laboratory or a massive budget. It’s really just about understanding a few basic principles of heat and scent, and honestly, most of the “expert” gear you see online is just unnecessary fluff that gets in the way of the actual work.

In this guide, I’m stripping away all the complicated jargon and expensive gadgets to show you the real way to get it done. I’ll walk you through exactly what supplies you actually need, how to avoid those common “tunneling” mistakes, and how to get a scent throw that actually fills a room. My goal is to give you a straightforward, no-nonsense roadmap so you can stop overthinking it and start pouring. By the time we’re done, you’ll be making custom scents that look and smell better than the store-bought stuff.

Table of Contents

Guide Overview

Total Time: 1-2 hours
Estimated Cost: $30-60
Difficulty: Beginner

Tools & Supplies

  • Double boiler or heat-proof bowl and pot for melting wax
  • Thermometer to monitor wax temperature
  • Pouring pitcher for controlled pouring
  • Wick centering tool or clothespin to hold wicks straight
  • Soy or paraffin wax (1 lb)
  • Candle wicks (5-10 count)
  • Fragrance oils (1 oz)
  • Glass jars or tins (2-4 count)

Step-by-Step Instructions

  • 1. First things first, you need to gather your gear. You don’t need a professional laboratory, but you do need the right basics: some soy wax flakes (they’re easier for beginners than beeswax), cotton wicks, some scent oils, and a few glass jars or tins. I always grab a double boiler setup—if you don’t have one, just put a glass bowl over a pot of simmering water. It’s much safer than trying to melt wax directly on a burner, which is a one-way ticket to a messy kitchen disaster.
  • 2. Once your setup is ready, it’s time to melt that wax. Pour your wax flakes into the top of your double boiler and turn the heat to medium-low. You want to be patient here; don’t try to rush the process by cranking up the heat. Just keep an eye on it until everything is completely liquid and clear. If you see any bits of solid wax floating around, give it a little stir with a wooden spoon to help it along.
  • 3. While the wax is melting, let’s prep your containers. This is the part people usually skip, but it’s the secret to a candle that actually stays upright. Take your wicks and use a tiny bit of melted wax or a glue dot to secure them right in the center of your jar. I like to use a clothespin or even a popsicle stick with a hole in it to hold the wick steady across the top of the jar so it doesn’t lean while the wax cools.
  • 4. Now comes the fun part: adding the scent. Once your wax is fully melted, take it off the heat and let it cool down for just a minute or two. If you add the fragrance oil while the wax is boiling hot, you’ll actually burn off the scent before the candle even sets. Pour in your fragrance oils—start with about an ounce per pound of wax—and stir it slowly and thoroughly for at least two minutes to make sure it’s fully incorporated.
  • 5. It’s time for the big pour. Slowly trickle the scented wax into your prepared jars. You want to go easy so you don’t create any air bubbles, which can make the surface look bumpy and weird later. Leave about a half-inch of space at the top of the jar. If you see any bubbles forming on the surface, you can gently tap the side of the jar to help them rise to the top and pop.
  • 6. Now, the hardest part for me: waiting. You need to let your candles sit undisturbed at room temperature. Don’t stick them in the fridge to speed things up; that’ll cause the wax to crack. Just let them hang out for at least 24 hours. Once they look solid and feel firm, trim the wick to about a quarter-inch above the wax. This ensures you get a clean, even burn the first time you light it.

Finding the Right Soy Wax Candle Making Supplies

Finding the Right Soy Wax Candle Making Supplies

Now, before you go running out to the nearest craft store, let’s talk about what you actually need to grab. If you’re just starting out with candle making for beginners, my best advice is to keep it simple but don’t skimp on the basics. You’ll want to hunt down a decent kit or source your soy wax candle making supplies from a dedicated supplier rather than a general hobby shop if you can. The quality of your wax makes a huge difference in how clean that candle burns, and honestly, it’s much more rewarding when you aren’t fighting with clumps or uneven surfaces.

When it comes to the little details, pay close attention to your wicks. Choosing the best wick types for candles is actually a bit of a science; if the wick is too small, you get a tunnel, and if it’s too big, you get a smoky mess. I also highly recommend picking up a few high-quality essential oils for scented candles rather than cheap synthetic fragrances. They smell a lot more natural and won’t give you that headache I used to get from those drugstore varieties. Just grab the essentials first, and you can always expand your stash later.

Mastering Your Candle Pouring Temperature Guide

Mastering Your Candle Pouring Temperature Guide tips.

This is where a lot of folks get tripped up, but honestly, once you get the hang of it, it becomes second nature. Think of temperature like cooking a steak; if you pull it off the heat too early or too late, the whole thing changes. When you’re following a candle pouring temperature guide, you aren’t just being picky—you’re ensuring your candle looks professional rather than lumpy. If you pour the wax while it’s too hot, you might end up with sinkholes or a surface that looks like a dried-up lakebed. On the flip side, if you wait until it’s too cool, it can get “slushy” and won’t settle smoothly against the sides of your jar.

I’ve learned the hard way that patience is your best tool here. I always keep a digital thermometer handy because eyeballing it just doesn’t work. If you’re using essential oils for scented candles, the temperature is even more critical. If the wax is scorching hot when you stir them in, you might actually burn off that lovely scent you paid good money for. Aim for that sweet spot where the wax is clear but starting to look a tiny bit cloudy—that’s usually your golden window for a perfect, smooth finish.

Five Pro-Tips to Save You from a Wax-Filled Mess

  • Don’t skimp on the thermometer. I know it’s tempting to just “eyeball it” like I do when I’m cooking a steak, but wax is picky. If you add your fragrance oil when the wax is too hot, you’ll actually burn off the scent, and your candle will end up smelling like nothing once it’s lit.
  • Centering your wick is everything. There is nothing more frustrating than finishing a beautiful candle only to have the wick drift to the side and melt the glass unevenly. I like to use a simple clothespin or even a popsicle stick across the top of the jar to keep that wick standing perfectly straight while the wax sets.
  • Give your candles plenty of “cure time.” This was a big lesson for me early on. Even if the candle looks solid and smells great, the fragrance needs time to actually bond with the wax. Let your soy candles sit for at least a week (two is even better) before you light them for the first time.
  • Watch out for “frosting.” If you’re using soy wax, you might see some white, crystalline patterns on the surface. Don’t panic—it doesn’t mean you failed. It’s just a natural characteristic of soy. To minimize it, try to keep your workspace at a consistent, warm temperature while the candles are cooling.
  • Clean your gear immediately. Once that wax hardens, it’s a pain to deal with. My trick is to keep a little bit of leftover warm wax in a paper towel to wipe out my melting pot while it’s still warm. It saves you a massive headache when you’re cleaning up at the end of the night.

Quick Tips to Keep Your Candle Making on Track

Don’t rush the process—patience is your best tool, especially when it comes to hitting that perfect pouring temperature so your candles don’t end up with weird cracks or holes.

Get your supplies right from the jump; investing in decent soy wax and quality wicks makes the difference between a candle that smells great and one that’s a total headache to light.

Remember that it’s okay to mess up a batch here and there—even I’ve had a few failed pours—so just treat every mistake as a chance to learn how your wax behaves.

## The Real Secret to Great Candles

“Look, you’re probably going to mess up your first batch—maybe the wick is wonky or the scent is a little weak—but don’t sweat it. Candle making isn’t about being perfect; it’s just about getting your hands dirty, learning how the wax reacts, and realizing that you’ve got this.”

Nathan Cole

You’ve Got This: Final Thoughts on Your First Batch

You’ve Got This: Final Thoughts on Your First Batch

Now that we’ve walked through the whole process, I hope you see that making your own candles isn’t some mysterious science reserved for experts. From picking out the right soy wax to hitting that perfect pouring temperature, it really just comes down to being patient and paying attention to the details. Remember, it’s totally normal if your first few attempts aren’t absolute masterpieces. Maybe the wick is a little crooked or the scent isn’t quite as strong as you hoped, but that’s just part of the learning curve. The most important thing is that you did it yourself rather than just buying something off a shelf.

At the end of the day, I want you to step back and enjoy the sense of accomplishment that comes with creating something from scratch. There is a specific kind of satisfaction in lighting a candle in your living room and knowing you were the one who measured the wax and blended the oils. Don’t be afraid to experiment with new scents or different containers as you get more comfortable. Most things in life are just a series of small, manageable steps, and you just proved that to yourself today. Now, go grab a drink, light that first candle, and enjoy the glow of a job well done.

Frequently Asked Questions

Why are my candles getting those weird little sinkholes or cracks on top once they cool?

Man, I’ve been there. You finish a perfect pour, wait for it to set, and then—bam—you’ve got a crater or a crack staring back at you. It’s frustrating, but don’t sweat it; it happens to the best of us. Usually, it’s just a temperature issue. If your wax cools too fast or you pour it while it’s too hot, it shrinks unevenly. Try pouring in a warmer room or using a heat gun to smooth things over.

Can I use any kind of essential oil, or do I need specific fragrance oils for this to work?

That’s a great question, and honestly, one I wish someone had told me when I first started tinkering with this. You can use essential oils, but it’s not always a straight swap. Essential oils are natural and great, but they can be finicky with heat and might not throw much scent when the candle is lit. Fragrance oils are engineered specifically to play nice with wax. If you want a heavy scent, go fragrance; if you want natural, go essential—just keep an eye on those temperatures!

How long do I actually need to let the candles sit before I can light them for the first time?

I know the feeling—you’ve finished pouring, the house smells amazing, and you just want to light that first candle. But hold your horses! If you’re using soy wax, you really need to let them cure for at least one to two weeks. I know, it feels like an eternity, but that extra time lets the wax and fragrance oil fully bond. Trust me, it makes a massive difference in how much scent you actually get.

Creative diy home decor ideas on budget.

Diy Home Decor Ideas on a Budget

We’ve all been there: you’re sitting on your couch, looking around your living room, and realizing it just feels… off. Maybe it’s a bit too sterile, or perhaps it’s just staring back at you with that same beige emptiness you’ve had since move-in day. You want a space that actually feels like home, but the thought of dropping a massive paycheck at a high-end furniture boutique makes your stomach churn. I used to think that having a stylish house was reserved for people with bottomless bank accounts, but I’ve learned that the best diy home decor ideas aren’t about how much you spend; they’re about how you use your hands to breathe life into a room.

In this post, I’m breaking down five specific projects that will take your space from “rental basic” to “actually awesome” without breaking your budget. I’m talking about real, hands-on tasks that you can tackle this weekend with just a few basic tools and a bit of grit. By the time we’re done, you’ll have a roadmap to transform your space using simple, figure-out-able steps that make decorating feel less like a chore and more like a win.

Table of Contents

Give Old Shelves a Second Life

Give Old Shelves a Second Life.

I’ve spent way too many weekends staring at those cheap, particle-board shelves that look like they belong in a dorm room rather than a home. Instead of tossing them, grab a sander and some decent sandpaper to smooth out those rough edges. Once you’ve got a clean surface, a fresh coat of dark walnut stain or even just a matte black paint can make a massive difference in how they feel in your living room.

The Magic of Floating Mantels

The Magic of Floating Mantels on walls.

If you’ve got a blank wall that’s just staring at you, a floating wood mantel is one of the easiest ways to add some warmth to a room. You don’t need to be a master carpenter to pull this off; you just need a solid piece of reclaimed wood and a few heavy-duty brackets. I personally love using reclaimed timber because the natural knots and imperfections give the room an instant sense of history and soul.

Upcycled Mason Jar Lighting

Rustic Upcycled Mason Jar Lighting with copper.

We all have that cabinet full of empty glass jars, so let’s stop letting them collect dust and start using them. You can turn a simple mason jar into a pretty pendant light or even a rustic candle holder with just a bit of effort. I like to take a few jars, clean them up thoroughly, and use a bit of copper spray paint on the lids to give them a more sophisticated, industrial vibe.

Custom Framed Textile Art

Sometimes you find a cool patterned fabric or even a vintage bandana that just doesn’t fit into your wardrobe, but it’s too nice to throw away. Instead of letting it sit in a drawer, turn it into textile art. All you really need is a sturdy wooden frame and some heavy-duty staples. I usually stretch the fabric tight over a piece of foam board before securing it, which keeps everything looking crisp and professional.

The Painted Accent Corner

You don’t have to commit to painting an entire room just to change the vibe. If you’re feeling a bit hesitant about a big color change, try painting just one corner or a single architectural feature, like a window frame or a built-in nook. I’ve found that a deep forest green or navy can create a stunning focal point that makes the rest of your furniture really pop.

The Bottom Line: Keep It Simple and Start Small

You don’t need a massive budget or a professional contractor to make a space feel new; most of the best changes come from small, intentional tweaks you can do yourself.

Don’t get paralyzed by perfectionism—the goal isn’t to make it look like a showroom, it’s to make it look like your home.

Always measure twice and buy your supplies only when you’re ready to go; it keeps the project from turning into a pile of expensive, half-finished clutter.

## The Real Secret to a Great Home

“At the end of the day, your home shouldn’t look like a page from a showroom catalog; it should look like a collection of things you actually built, fixed, or finished yourself. That’s where the real character comes from.”

Nathan Cole

Final Thoughts Before You Grab Your Tools

Look, I know it can feel a little overwhelming when you stare at a blank wall or a dated corner of your living room, but we just covered how much you can actually achieve with a bit of elbow grease. Whether you decided to tackle that custom shelving project, refresh your old furniture with a new coat of paint, or just hang some framed art to break up the monotony, the goal was never about perfection. It was about taking those small, manageable steps—from prepping your surfaces to picking the right hardware—to create something that actually feels like home. You don’t need a massive renovation budget or a professional contractor on speed dial to see a real difference in your space.

At the end of the day, the best part of these projects isn’t even the finished product sitting in your living room; it’s that feeling of looking at something and knowing, “I did that myself.” There is a specific kind of confidence that comes from picking up a screwdriver or a paintbrush and actually seeing a result. So, don’t let the fear of making a mistake keep you from starting. If you mess up a measurement or get a little too much paint on the floor, just wipe it up and try again. Most things are way more figure-out-able than they seem, so go ahead and get started. You’ve got this.

Frequently Asked Questions

I don't have a ton of fancy tools in my garage; can I still pull these projects off with just a basic screwdriver and some glue?

Honestly? Absolutely. I’ve pulled off more projects with a screwdriver and a bottle of wood glue than I care to admit. You don’t need a workshop full of power tools to make something look good; you just need a little patience and the right approach. If a project calls for something more heavy-duty, I’ll tell you upfront. But for most of these, if you can turn a screw and wait for glue to dry, you’re golden.

What’s the best way to make sure my DIY decor actually looks "intentional" and not just like a bunch of random junk I found in the attic?

That is the million-dollar question. I’ve definitely been there—standing in a room surrounded by “cool” stuff that just looks like a yard sale exploded. The secret is a cohesive color palette or a repeating material. If you’re using reclaimed wood for a shelf, maybe throw a wooden bowl on the table. Pick two or three main tones and stick to them. It ties the random pieces together so they look like a choice, not an accident.

How do I know which paints or finishes are actually durable enough to handle everyday wear and tear in a busy house?

Look, don’t just grab the cheapest can on the shelf because the color looks pretty. In a busy house, you need to check the sheen. For walls that get touched constantly—like hallways or kids’ rooms—aim for satin or eggshell; they hide imperfections but can actually take a sponge to them. For trim and doors, go with semi-gloss or even high-gloss. They’re tougher and way easier to wipe down when life happens.

Elegant upcycling furniture ideas for expensive looks.

Upcycling Furniture Ideas That Look Expensive

I’ve walked into more than a few thrift stores and garage sales only to see someone about to toss out a piece of furniture that just needed a little love. It honestly breaks my heart a bit. We’ve all been there—staring at a scratched-up side table or a dresser with a busted drawer, thinking it’s nothing more than expensive firewood. But before you head to the landfill or drop a fortune on something brand new from a big-box store, I want you to pause. There is so much potential hiding under that peeling veneer, and finding creative upcycling furniture ideas is the best way to build a home that actually has some character without draining your bank account.

In this guide, I’m going to show you that you don’t need a professional workshop to make a massive impact. I’ve rounded up five specific projects that are totally doable even if your only tools are a screwdriver and a can of paint. We’re going to walk through five different ways to take common, tired pieces and turn them into something you’d actually be proud to show off. Let’s get to work and turn that junk into something truly awesome.

Table of Contents

Give that old dresser a fresh coat of life

Give that old dresser a fresh coat of life.

We’ve all seen them sitting on the curb or gathering dust in a garage sale—those heavy, outdated dressers with the wood grain that just doesn’t match anything modern. Instead of hauling it to the dump, grab a sander and some high-quality primer. I usually tell people to start with a good sanding session to get rid of that old, sticky varnish so the new paint actually sticks.

Turn a wooden ladder into a rustic bookshelf

Turn a wooden ladder into a rustic bookshelf.

If you have an old wooden ladder leaning in the shed, don’t let it just sit there collecting cobwebs. You can turn it into a killer piece of shelving for your living room or even a plant stand for the porch. All you really need to do is find some sturdy wooden planks that are wide enough to sit on the rungs, and then secure them in place.

Upgrade your dining chairs with new fabric

Upgrade your dining chairs with new fabric.

You don’t need to replace your whole dining set just because the chairs look a little tired or the fabric is stained. Most of the time, the “bones” of the chair are perfectly fine; it’s just the seat that’s seen better days. If you can find a staple gun and some durable upholstery fabric, you’re halfway there.

Transform a side table with contact paper

Sometimes you don’t want to go full-blown “construction mode” with saws and sanders, and that is totally fine. If you have a small side table or a nightstand with a surface that’s seen better days, contact paper is your best friend. I’m talking about the heavy-duty stuff, not the thin stuff you use for school projects.

Reclaim old crates for organized storage

I’ve always been a sucker for a good wooden crate, whether it’s an old wine crate or something found in an attic. Instead of letting them clutter up your workspace, you can turn them into modular storage units for your office or even your pantry. A quick sanding is a must to avoid any nasty splinters, but otherwise, they are ready to go right out of the box.

Quick tips before you grab your tools

Don’t overthink it—the goal isn’t perfection, it’s making something you actually love using.

Always clean and prep your surface thoroughly; a good sand or a quick wipe-down makes all the difference in how your finish turns out.

Start small with projects that don’t require a massive budget so you can build your confidence as you go.

My Take on Giving Old Stuff New Life

“At the end of the day, upcycling isn’t about being a master craftsman or having a fancy studio; it’s just about looking at a piece of junk and seeing the potential that’s hiding under the scratches. Most of the time, all a good chair needs is a little bit of sanding, a fresh coat of paint, and the confidence to know you can do it yourself.”

Nathan Cole

Don't Be Afraid to Get Your Hands Dirty

Look, I know that seeing a pile of old wood or a chipped-up nightstand can feel a little overwhelming at first. But whether you’re just slapping on some fresh paint to hide a scratch, swapping out those dated brass handles for something modern, or going all out with a full sanding and stain, you’ve seen that it’s really just about taking it one step at a time. We covered everything from simple cosmetic fixes to more involved structural changes, and the main takeaway is that you don’t need a professional workshop to make a massive impact. All you really need is a bit of patience and the right mindset to turn something destined for the landfill into the centerpiece of your room.

At the end of the day, upcycling isn’t about making something look “perfect” or like it just came off a showroom floor. It’s about the satisfaction of looking at a piece of furniture and knowing you were the one who gave it a second chance. Don’t let the fear of making a mistake stop you from starting; even if a coat of paint goes on a little wonky, that’s just part of the character. So, grab your sandpaper, clear off your workspace, and just start building something better. You’ve totally got this.

Frequently Asked Questions

Do I really need to sand everything down before I start painting, or can I get away with just a quick wipe?

Look, I get the temptation to skip the sanding—I’ve definitely been there when I just want to get a project finished. But here’s the truth: if you want the paint to actually stick, you can’t just wipe it down. A quick cleaning gets rid of the dust, but it won’t fix a slick, glossy finish. Give it at least a light scuff with some medium-grit sandpaper. It creates “tooth” for the paint to grab onto.

What's the best way to make sure my new paint job doesn't just peel off in six months?

Look, I’ve seen it happen a dozen times: you spend all Saturday painting, only to have the finish flake off like a bad sunburn by summer. The secret isn’t actually the paint—it’s the prep. You’ve got to clean that surface, sand down any old, loose bits, and, most importantly, use a good primer. If you skip the prep work, you’re basically just painting over a mess, and that’s where the peeling starts.

I'm on a pretty tight budget—are there cheap ways to fix up furniture that's actually a bit beat up or damaged?

Look, I’ve been there. When you’re watching every cent, a cracked tabletop or a wobbly chair feels like a reason to head to the thrift store, but don’t do it yet. Most “damage” is just a surface fix away. Grab some wood filler for those gouges, a cheap sanding block, and a small can of stain or paint. It’s way cheaper than buying new, and honestly, there’s nothing more satisfying than fixing something yourself.

Guide on how to build a desk.

How to Build a Sturdy Desk for Under $100

I was standing in the middle of a big-box furniture aisle last Tuesday, staring at a particle-board desk that cost more than my first car, and I just couldn’t wrap my head around it. Why are we paying a premium for something that’s basically glorified compressed sawdust held together by hope and a few tiny screws? Most people think learning how to build a desk requires a massive workshop or a degree in carpentry, but that’s just not true. I learned the hard way, scraping my knuckles on cheap flat-pack furniture, that you don’t need a professional studio to create something actually sturdy that won’t wobble the second you lean on it.

In this guide, I’m stripping away the jargon and the expensive, unnecessary tools to show you a way that actually works. I’ll walk you through selecting the right wood, making the cuts, and putting it all together without the headache. My goal is to give you a blueprint that is straightforward and doable, even if your only tool is a basic drill. We’re going to build something you’ll be proud to actually use every single day.

Table of Contents

Guide Overview

Total Time: 4-6 hours
Estimated Cost: $100-200
Difficulty: Beginner

Tools & Supplies

  • Power Drill for driving screws
  • Circular Saw for cutting wood to size
  • Sandpaper for smoothing surfaces
  • Measuring Tape for accurate dimensions
  • 1 Wood Desktop (e.g., butcher block or plywood)
  • 4 Table Legs (wood or metal)
  • Wood Screws (box of assorted sizes)
  • Wood Glue (one bottle)

Step-by-Step Instructions

  • 1. First things first, you’ve got to get your materials together. I usually head to the local lumber yard rather than a big-box store because the wood is often cut more precisely, but you can do either. You’ll need a solid piece of plywood or a butcher block for the top, some 2x4s for the frame, a box of wood screws, and some wood glue. Don’t forget to grab a tape measure and a pencil; you’ll be living by them for the next few hours.
  • 2. Once you’re back in the garage or your workspace, it’s time to measure and cut your legs. If you’re using 2x4s, I like to cut four identical pieces to whatever height feels right for your chair. Pro tip: measure twice and cut once, because there is nothing more frustrating than realizing your desk is going to wobble because one leg is a quarter-inch shorter than the others.
  • 3. Now, let’s build the support frame. This is the skeleton of your desk that keeps everything from sagging in the middle. Lay out your boards to create a rectangle that sits just inside the perimeter of your desktop, then screw them together. I always recommend applying a thin bead of wood glue to the joints before you drive the screws in; it makes the whole structure way more solid in the long run.
  • 4. Next, we need to attach that frame to the desktop. Flip your desktop upside down on a clean surface—maybe lay down an old moving blanket so you don’t scratch the finish—and place your frame on top of it. Center it carefully, then use a few screws to secure the frame to the wood. Just be careful not to use screws that are longer than the thickness of your desktop, or you’ll have a very unpleasant surprise poking through the top.
  • 5. With the heavy lifting done, it’s time to flip the beast over. This is usually the part where I realize I should have asked a friend for a hand, so take your time and don’t strain your back. Once it’s standing on its own, give it a little shake. If it wobbles, you might need to add a small shim under one of the legs or check if your floor is even.
  • 6. Finally, let’s make it look like something you’d actually want in your house. Grab some sandpaper—start with something coarse like 80 grit and work your way up to a fine 220—and smooth out all those rough edges. After a quick wipe-down to get the dust off, apply a simple wood stain or a clear polyurethane. It doesn’t have to be a masterpiece, but a little bit of finish goes a long way in making it feel truly finished and professional.

Finding Your Perfect Custom Desk Dimensions

Finding Your Perfect Custom Desk Dimensions.

Before you start sawing through any lumber, you’ve got to talk about the math. I’ve made the mistake of building a desk that was just a little too high, and let me tell you, my lower back hasn’t forgiven me since. When you’re figuring out your custom desk dimensions, don’t just guess based on the space you have left in your room. Sit in your actual office chair, pull it up to where you’d normally work, and measure the distance from the floor to your elbows. That’s your sweet spot for height.

You also need to think about your workflow. If you’re someone who loves a clean, clutter-free look, you might want to lean into some minimalist desk design ideas by keeping the surface depth shallow—maybe around 24 inches. But, if you’re a dual-monitor person like me, you’re going to need that extra depth so you aren’t staring at your screens from two inches away. Take a second to map out your gear on the floor using some painter’s tape; it’s a total game-changer for visualizing the footprint before you commit to the build.

Gathering a Simple Desk Assembly Materials List

Gathering a Simple Desk Assembly Materials List.

Before you head out to the hardware store—and trust me, I know the temptation to just wander the aisles is real—you need a solid desk assembly materials list in your hand. There is nothing worse than getting halfway through a project only to realize you’re one specific screw or a small bracket short. I always tell people to double-check their measurements against their list twice. Grab a notebook and jot down everything from the tabletop material to the specific type of wood glue you’ll need. If you’re aiming for a clean look, look into minimalist desk design ideas that rely on fewer, higher-quality components rather than a mountain of cheap hardware.

When you’re picking out your supplies, don’t feel like you need a professional workshop. You really only need a few essential woodworking tools for beginners, like a drill, a level, and a good measuring tape. My best tip? Invest a little extra in your fasteners. Using high-quality screws instead of the bargain-bin stuff is the easiest way to ensure sturdy desk frame construction that won’t wobble the first time you lean on it.

Pro tips to keep your build from turning into a headache

  • Don’t skip the “dry fit.” Before you even touch a screwdriver or a drop of wood glue, lay everything out exactly how it’s going to sit. It’s a lot easier to realize a leg is crooked now than it is when you’re halfway through drilling holes.
  • Invest in a decent sander. You might think you can get away with just some sandpaper and some elbow grease, but trust me—your forearms (and your skin) will thank you if you use a power sander to get that surface smooth before you stain it.
  • Level your workspace first. If your garage floor or your kitchen table is wonky, your desk is going to be wonky. Use a level to make sure your building surface is flat so you aren’t fighting gravity while you work.
  • Measure twice, drill once—seriously. It sounds like a cliché for a reason. I’ve definitely spent an afternoon staring at a piece of expensive wood wondering why the screw is sticking out the side because I rushed a measurement. Slow down.
  • Mind your pilot holes. If you’re working with harder woods, don’t just drive a screw straight in or you’ll split the grain and ruin the whole look. Drill a small pilot hole first to give the screw a path to follow.

The bottom line on your new desk

Don’t overthink the design; a simple, sturdy build is always better than a complicated one that might wobble halfway through your workday.

Measure twice and buy once—getting those dimensions right from the start saves you a massive headache (and extra trips to the hardware store) later on.

You don’t need a professional workshop to pull this off, just the right basic tools and a little bit of patience to see it through.

A quick word of advice

“At the end of the day, don’t sweat the perfection. A desk doesn’t need to look like it came out of a high-end showroom to be a win; if it’s sturdy, it’s exactly the right size for your life, and you built it with your own two hands, then you’ve already nailed it.”

Nathan Cole

You've Got This: Time to Put It All Together

You've Got This: Time to Put It All Together

Now that you’ve got your measurements dialed in and your materials gathered, the hardest part is actually behind you. We’ve walked through the tricky stuff—from figuring out those custom dimensions so you aren’t hunching over your keyboard, to making sure you have every single screw and bracket ready before you even pick up a drill. Just remember to take it slow during the actual assembly. Double-check your alignment, keep your workspace organized, and don’t be afraid to measure twice and cut once. If you follow these steps, you aren’t just building a piece of furniture; you’re building something that was made specifically for you.

There is a certain kind of magic in sitting down at a desk and knowing you built it with your own two hands. Sure, there might be a tiny scratch here or a slightly uneven edge there, but that’s just character—it’s proof of the work you put in. I promise you, that feeling of pride when you finally set your laptop down on a finished surface is worth every bit of the effort. So, grab your tools, clear off that floor space, and get to work. You’ve totally got this, and I can’t wait to hear how your new setup turns out!

Frequently Asked Questions

What kind of wood should I pick if I'm on a tight budget but still want it to look decent?

If you’re watching your wallet, skip the fancy hardwoods like oak or walnut for now. I usually lean toward pine or even high-quality plywood. Pine is super affordable and easy to work with, though it can be a bit soft. If you go the plywood route, grab a thick sheet of birch—it looks surprisingly sharp once you sand it down and hit it with a good stain. It’s a total budget win.

Do I really need power tools for this, or can I get away with just a basic screwdriver and a hammer?

Look, I get it—power tools can feel like a huge, expensive jump. If you’re just assembling a pre-made kit, a screwdriver and hammer will get you there. But if we’re talking about building one from scratch like I’m suggesting, you’re going to want at least a cordless drill. Trying to drive long wood screws by hand is a recipe for a sore wrist and a lot of frustration. Trust me, your hands will thank you.

How do I make sure the desk doesn't wobble like crazy once I actually put my computer on it?

Nothing kills the vibe of a fresh build like a desk that shakes every time you type. To stop the wobble, focus on two things: stability and leveling. First, make sure your joints are tight—if you’re using screws, don’t over-tighten, but make sure they’re snug. Second, if your floor is uneven, grab some adjustable leveling feet or even just some felt pads. It’s a small tweak that makes a massive difference in how solid it feels.