Healthy and nutritious kid friendly meals.

Kid-friendly Meals That Aren’t Just Chicken Nuggets

We’ve all been there: it’s 5:30 PM, the kitchen is a mess, and you’re staring into a fridge that seems to contain nothing but half an onion and some questionable yogurt. Trying to get a decent dinner on the table when you’re exhausted is hard enough, but trying to find kid friendly meals that won’t result in a massive tantrum or a plate of wasted food? That’s a whole different level of stress. I used to think that feeding kids meant either spending a fortune on takeout or spending three hours hovering over a stove, but I’ve learned that it’s usually much more figure-out-able than that.

In this guide, I’m breaking down five of my absolute go-to recipes that are easy on your wallet and even easier on your sanity. I’ve narrowed these down to the essentials—the kind of meals you can whip up with minimal cleanup and maximum success. By the time you finish reading this list, you’ll have a solid game plan for those hectic weeknights, proving that you don’t need a culinary degree to serve up something your family will actually enjoy eating.

Table of Contents

Sheet Pan Chicken and Veggie Nuggets

Sheet Pan Chicken and Veggie Nuggets.

If you’re tired of the frozen aisle stuff that’s mostly mystery breading, this is your new best friend. I love this because you just chop up some chicken breast and whatever veggies your kids aren’t currently boycotting—think broccoli or carrots—toss them in olive oil and a little seasoning, and let the oven do the heavy lifting. It’s a one-pan wonder that saves you from a mountain of dishes after dinner.

The "Build-Your-Own" Taco Bar

The "Build-Your-Own" Taco Bar setup.

One of the biggest hurdles I ran into when I started cooking for others was the “I don’t like that” factor. A taco bar completely bypasses that battle because it puts the power in the kids’ hands. You just set out small bowls with seasoned ground beef (or beans if you’re going meatless), shredded cheese, lettuce, and maybe some mild salsa, and let everyone assemble their own masterpiece.

One-Pot Creamy Mac and Peas

One-Pot Creamy Mac and Peas recipe.

We all know the blue box is a lifesaver, but I’ve learned how to level up a homemade version without making it complicated. By cooking the pasta right in a mix of milk and a little broth, you create a naturally creamy sauce that sticks to the noodles perfectly. I always throw a handful of frozen peas into the pot during the last three minutes of boiling; it’s a sneaky way to add greens without a fight.

English Muffin Mini Pizzas

When the workday gets chaotic and you realize you forgot to defrost anything, these mini pizzas are my go-to emergency meal. Instead of fighting with dough, just grab a pack of English muffins and split them open. They make the perfect little “crusts” that are sturdy enough to hold toppings but soft enough for little hands to manage. It’s a total game-changer for those hectic weeknights.

Breakfast for Dinner Quesadillas

I’m a big believer that rules are meant to be broken, and “breakfast for dinner” is one of my favorite ways to shake things up. A cheesy egg quesadilla is basically a warm, handheld hug. You just scramble a few eggs, fold them into a flour tortilla with a generous amount of cheese, and crisp it up in a pan with a tiny bit of butter.

The Bottom Line

Don’t overthink it—the best kid-friendly meals are usually the simplest ones that use ingredients you already have in your pantry.

It’s all about the “deconstructed” trick; if they can see what’s in their food and pick it apart themselves, they’re way more likely to actually eat it.

Focus on making the process easy on you, too, because a meal isn’t a win if you’re too exhausted to enjoy the quiet after the kids finally go to bed.

My Take on the Kitchen Chaos

“Look, you don’t need a culinary degree or a massive grocery budget to get dinner on the table; you just need a few reliable staples and the confidence to know that even if they only eat the pasta and the cheese, you still won a battle today.”

Nathan Cole

You've Got This

At the end of the day, getting dinner on the table shouldn’t feel like a battleground. Whether you’re leaning on those quick one-pan pastas, stretching a budget with simple bean tacos, or finding a way to sneak some veggies into a familiar favorite, the goal is the same: getting fed without the stress. We looked at how keeping things simple—using pantry staples and familiar flavors—can take the pressure off your wallet and your sanity. You don’t need a culinary degree or a massive grocery budget to make something that actually tastes good and keeps the kids from complaining. It’s all about finding your rhythm with these basic, reliable wins.

I know there are nights when the kitchen feels like the last place you want to be, especially after a long day of work or chasing toddlers. But I promise you, most of these meals are way more figure-out-able than they seem at first glance. Don’t sweat the small stuff, like a slightly messy kitchen or a kid who decides they suddenly hate broccoli. Just keep it simple, keep it practical, and remember that progress is better than perfection. You’re doing a great job, and once you nail a few of these go-to recipes, you’ll realize you’ve got the tools to handle whatever the week throws at you.

Frequently Asked Questions

How can I sneak extra veggies into these meals without my kids noticing?

Look, I get it. I’ve been there, trying to convince a kid that a piece of broccoli is “fun.” My trick? Don’t fight the texture; just hide the color. If you’re making pasta sauce, throw some steamed carrots or red peppers in the blender until it’s smooth. For those nuggets or meatballs, finely grate some zucchini into the mix. If it looks and tastes like the “real” thing, you’ve already won the battle.

What are some ways to keep the grocery bill low when I'm prepping these recipes for the week?

Look, I’ve been there—staring at a receipt and wondering where all my cash went. To keep costs down, I swear by two things: shop your pantry first and buy in bulk. Before you hit the store, see what grains or cans you already have. When you do shop, grab the store brands and look for seasonal produce. It’s all about working smarter with what you’ve got so you aren’t overspending on extras.

My kids are super picky about textures—can I swap out some of these ingredients for something easier for them?

Absolutely. I’ve been there—my nephew won’t touch anything “mushy,” so I’ve had to get creative. If a recipe calls for something with a tricky texture, just swap it for a familiar safe zone. Instead of soft veggies, try roasting them until they’re crispy. If they hate chunks, throw everything in a blender for a smooth sauce. The goal is to get the nutrition in without the dinner table meltdown. You’ve got this!


Tips on how to stay motivated.

How to Stay Motivated When You Don’t Feel Like It

I remember sitting on my garage floor three years ago, surrounded by half-finished projects and a pile of rusted tools I’d promised myself I’d restore. I was staring at a broken lawnmower engine, feeling completely paralyzed, wondering how to stay motivated when even the smallest task felt like dragging a boulder uphill. Most of the “productivity gurus” online would tell you that you just need a fancy new planner or a 5:00 AM cold plunge to fix your mindset, but honestly? That’s just expensive nonsense. When you’re stuck in the weeds, you don’t need a lifestyle overhaul; you just need to stop staring at the mountain and start looking at your feet.

I’m not here to sell you on some magical overnight transformation or a complex system that takes more work to maintain than the actual job. Instead, I want to share the no-nonsense, grit-and-grease methods I’ve learned from years of tackling DIY projects and messy schedules. I’m going to show you how to break your biggest, most intimidating goals into tiny, manageable wins that you can actually finish before dinner. We’re going to focus on simple, repeatable steps that work in the real world, not just in a perfect productivity app.

Table of Contents

Setting Achievable Goals to Stop the Overwhelm

Setting Achievable Goals to Stop the Overwhelm.

Look, I’ve been there. I once decided I was going to renovate my entire guest bathroom in a single weekend. By Saturday afternoon, I was staring at a pile of plumbing parts and a half-demolished wall, feeling completely paralyzed. That’s the trap: we set these massive, sweeping goals that look great on paper but end up feeling like a mountain we can’t possibly climb. When you aim too high too fast, you aren’t just tired; you’re actually sabotaging your own progress.

The trick to setting achievable goals is to stop looking at the finished product and start looking at the very next step. Instead of saying “I’m going to overhaul my entire career,” try saying “I’m going to spend twenty minutes updating my resume tonight.” It sounds small, maybe even a little silly, but it works because it builds momentum. By focusing on these tiny, manageable wins, you’re actually utilizing the psychology of intrinsic motivation. You start feeling successful early on, and that feeling is exactly what keeps you moving forward when the initial excitement wears off.

Using Overcoming Procrastination Techniques for Small Wins

Using Overcoming Procrastination Techniques for Small Wins.

Look, I’ve been there. You’re sitting on the couch, staring at a project—maybe it’s a pile of laundry or a massive spreadsheet—and you just can’t move. It’s not because you’re lazy; it’s usually because your brain is trying to protect you from something that feels too big. One of my favorite overcoming procrastination techniques is the “five-minute rule.” I tell myself I only have to work on the task for five minutes. If I want to quit after that, fine. But usually, once I’ve actually broken the seal, the hardest part is over.

That little burst of movement does something weird to your brain. It triggers a sense of accomplishment that feeds into the psychology of intrinsic motivation, making you actually want to keep going because you’ve already proven you can do it. It’s about building momentum, not perfection. Instead of worrying about the finish line, just focus on the next tiny, physical action in front of you. Once you get that first small win under your belt, the rest of the day starts feeling a whole lot more doable.

5 Ways to Keep Your Momentum When the Tank Hits Empty

  • Build a “Done” list instead of just a “To-Do” list. We’re all great at staring at what’s left to do, which feels heavy. At the end of the day, write down everything you actually finished—even if it was just answering three emails. It proves to your brain that you’re actually moving.
  • Fix your environment to stop the friction. If you want to work out but your sneakers are buried in the closet, you aren’t going to do it. Lay your gear out the night before. If you need to focus on a project, clear the coffee mugs off your desk. Make the right choice the easiest one to make.
  • Find your “Why” before you lose it. When I’m halfway through a messy kitchen remodel, I don’t think about the sanding; I think about how good that finished island is going to look. Remind yourself of the end result, not just the grind in the middle.
  • Use the “Five-Minute Rule” to trick your brain. Usually, the hardest part of any job is just picking up the tool. Tell yourself you’ll only work on that task for five minutes, and if you want to quit after that, you can. Most of the time, once you’ve started, the hardest part is over.
  • Don’t beat yourself up when you slip. I’ve had days where I spend more time scrolling on my phone than actually being productive, and it happens to everyone. Don’t let one bad afternoon turn into a bad week. Just reset and start fresh on the next task.

The Quick Version: What to Keep in Mind

Stop trying to build the whole house in a day; focus on one small, manageable task at a time to keep the overwhelm away.

Use those tiny wins to build momentum, because once you get that first little thing done, the next one feels a whole lot easier.

Be kind to yourself when things stall out—motivation isn’t a straight line, so just reset and pick up where you left off.

## The Secret to Keeping the Momentum

“Motivation isn’t some magical lightning bolt that hits you out of nowhere; it’s more like starting an old engine. You don’t need a miracle to get moving, you just need to give it a little nudge, get the gears turning with one small task, and let the momentum do the heavy lifting for you.”

Nathan Cole

Getting You Over the Finish Line

Getting You Over the Finish Line.

Look, I know that staring down a massive project or a long list of chores can feel like trying to fix a house with nothing but a butter knife. It’s overwhelming. But we’ve covered a lot of ground today, and if you remember nothing else, remember this: stop trying to tackle the whole mountain at once. By setting goals that actually feel doable and using those small-win techniques to beat procrastination, you’re essentially building a toolkit. You aren’t just waiting for motivation to strike like lightning; you’re building momentum one small, intentional step at a time.

At the end of the day, perfection is a trap that keeps us stuck on the couch. You don’t need to have a perfect plan or a sudden burst of superhuman energy to get moving. You just need to start where you are with whatever tools you’ve got in your hands right now. Whether you’re tackling a messy kitchen, a daunting career move, or just trying to get through a tough week, just keep chipping away. I promise you, once you get that first little win under your belt, the rest of the job starts to look a whole lot more figure-out-able. You’ve got this.

Frequently Asked Questions

What do I do when I've set small goals but still feel like I'm just spinning my wheels?

Look, I’ve been there. You check off the little tasks, but it feels like you’re just running in place on a treadmill. When that happens, it usually means your “small goals” aren’t actually moving the needle on the big stuff. Stop focusing on the busy work. Take a beat, look at your master list, and ask: “If I only did one thing today that actually matters, what would it be?” Then, do just that.

How do I stay motivated when the project I'm working on gets boring or repetitive?

Look, I’ve been there. It’s like sanding a deck—the first hour is exciting, but by hour four, you’re just staring at wood dust and wishing you were anywhere else. When the novelty wears off, stop relying on “feeling” inspired. Instead, gamify it. Set a timer for twenty minutes and see how much you can knock out, or throw on a podcast you actually like. Treat it like a repetitive chore that just needs a finish line.

Is there a way to get my drive back if I've already fallen off the wagon for a few days?

Look, I’ve been there. I once spent three days straight on the couch after a project went sideways, feeling like a total failure. Here’s the truth: the “wagon” isn’t a physical thing you can fall off of; it’s just a mental trap. Don’t waste energy beating yourself up about the lost days. Just pick one tiny, easy task right now—something that takes five minutes—and do it. That’s how you restart the engine.

Guide on how to spray paint.

How to Spray Paint Anything for a Flawless Finish

I remember standing in my garage three years ago, staring at a rusted metal chair I’d found on the curb, feeling completely defeated by a single can of Krylon. I thought I knew how to do it, but after ten minutes, the whole thing looked like a drippy, orange-peel nightmare instead of a smooth finish. Most people think you need a fancy compressor or a professional booth to get a clean look, but that’s just not true. Learning how to spray paint isn’t about having the most expensive gear; it’s really just about mastering a few simple movements and knowing when to pull the trigger.

I’m not here to sell you on some magic spray that fixes everything in one coat. Instead, I want to show you the real-world way to get a finish that actually lasts. I’ll walk you through the prep work that most people skip, how to time your passes so you don’t end up with those dreaded drips, and the secret to choosing the right primer for whatever project you’ve got on the workbench. Let’s get to work and turn that junk into something you’re actually proud to show off.

Table of Contents

Guide Overview

Total Time: 1-3 hours (plus drying time)
Estimated Cost: $30-60
Difficulty: Beginner

Tools & Supplies

  • Spray paint cans (the primary coating agent)
  • Drop cloths (to protect surrounding surfaces)
  • Sandpaper (to smooth the surface before painting)
  • Masking tape (to define edges and protect areas)
  • Surface cleaner or degreaser (1 bottle)
  • Primer (1-2 cans depending on surface area)
  • Protective mask (1 unit for safety)

Step-by-Step Instructions

  • 1. First things first, you’ve got to get your workspace ready. I can’t tell you how many times I’ve tried to spray paint on a kitchen table only to end up with a permanent mist of neon green on my countertop. Find a spot that’s well-ventilated—ideally outdoors or in a garage with the door wide open—and lay down some old newspapers or a cheap drop cloth. You want to create a “safe zone” where you don’t have to worry about stray droplets landing on anything precious.
  • 2. Next, give your item a serious cleaning. If you’re painting an old metal tool or a wooden chair, any leftover grease, dust, or old wax is going to act like a shield, and your new paint will just peel right off a week later. Grab some warm soapy water or a bit of rubbing alcohol and scrub the surface until it’s spotless. Once it’s clean, make sure it is completely dry before you even think about touching that spray can.
  • 3. Now, let’s talk about masking. This is the part where most people get lazy, but trust me, it’s the secret to a professional look. Use some painter’s tape to cover up any parts you don’t want colored—like hinges, handles, or decorative trim. I like to go a little overboard with the tape because it’s much easier to peel off a piece of tape than it is to sand down a mistake later on.
  • 4. Before you start spraying, give your can a good, long shake. I’m talking at least a full minute of vigorous shaking. You want all those pigments and solvents to be perfectly mixed inside the can. A pro tip I learned the hard way: spray a quick “test burst” onto a piece of cardboard first. This clears out the nozzle and lets you see if the spray pattern is consistent before you commit to your actual project.
  • 5. When you’re ready to paint, keep your distance and move with purpose. Hold the can about 8 to 12 inches away from the object and move in steady, sweeping motions. The biggest mistake I see is people trying to cover everything in one thick coat; that is a one-way ticket to a messy, dripping disaster. Instead, aim for several thin, light layers. It’s much better to do three light coats than one heavy one that runs.
  • 6. Patience is your best friend here. After your first coat is on, step back and let it dry according to the instructions on the can. Don’t be tempted to rush in and add more while it’s still tacky. Once the first layer is dry to the touch, go in with the second. If you follow this “layering” approach, you’ll end up with a finish that looks smooth and even rather than bumpy and cheap.
  • 7. Finally, once the paint is fully cured, it’s time for the most satisfying part: the reveal. Carefully peel off your painter’s tape while the paint is still slightly soft (but not wet!) to get the cleanest lines. If you’re painting something that’s going to get a lot of use, like a metal shelf or a garden tool, consider adding a clear coat of spray sealer at the very end to help it hold up against the elements.

Choosing the Best Spray Paint for Beginners

Choosing the Best Spray Paint for Beginners.

Look, walking down the paint aisle at the hardware store can feel a bit overwhelming when you’re staring at fifty different cans that all look exactly the same. If you’re just starting out, my best advice is to look for a brand that offers a consistent, fine mist rather than one that comes out in big, chunky globs. For your first few projects, the best spray paint for beginners is usually a high-quality all-purpose enamel. It’s forgiving, it covers well, and it doesn’t require a PhD to use correctly.

One thing I learned the hard way—and trust me, I’ve made the mess—is that you shouldn’t skip the foundation. Even if the can says “paint + primer,” I still recommend grabbing a dedicated primer for spray painting if you’re working with metal or plastic. It acts like a glue that keeps your color from peeling off later. Also, don’t forget to grab some basic spray paint safety equipment, like a decent respirator mask. You don’t want to be breathing in those fumes while you’re focused on getting that perfect, smooth finish.

Essential Spray Paint Safety Equipment You Need

Look, I know it’s tempting to just grab a can and start spraying, but please don’t skip the safety gear. I’ve learned the hard way that breathing in those fumes is no joke, especially if you’re working in a garage or a small shed. You really need a decent respirator mask—not just a cheap paper dust mask—to keep those chemical particles out of your lungs. I also highly recommend wearing safety goggles. There is nothing quite as annoying as a fine mist of pigment landing right in your eye halfway through a project.

Beyond just protecting your lungs and eyes, think about protecting your workspace. If you aren’t careful, you’ll end up with a fine layer of overspray on everything from your workbench to your shoes. I always lay down some heavy-duty drop cloths or even old cardboard to catch the extra mist. A good rule of thumb is to over-protect your surroundings more than you think you need to. It’s a lot easier to clean up a piece of plastic than it is to scrub paint off your driveway.

Five Pro Tips to Keep Your Project from Turning into a Mess

Five Pro Tips to Keep Your Project from Turning into a Mess
  • Shake that can like your life depends on it. I know it sounds silly, but if you don’t shake the can for at least a full minute, you’re going to end up with chunky, uneven paint that looks like a disaster.
  • Test your spray on a piece of scrap cardboard first. Every can sprays a little differently, so take thirty seconds to see how the mist comes out before you aim it at your actual project.
  • Keep the can moving, always. If you hold the nozzle in one spot for too long, you’ll get a massive drip that’ll take forever to dry, so keep that steady, sweeping motion going.
  • Don’t try to do it all in one go. It’s way better to do three or four super thin, light coats than to try and drown the object in one thick layer. Thin coats prevent those annoying runs.
  • Watch the weather, especially if you’re working outside. If it’s super humid or windy, your paint isn’t going to settle right, so wait for a calm, dry day to get the best finish.

Quick Tips to Keep Your Project on Track

Don’t rush the prep work—a clean, sanded surface is the secret to a finish that actually looks professional instead of bubbly or flaky.

Remember that thin, light coats are your best friend; it’s way better to do three quick passes than one heavy, dripping mess.

Always test your spray pattern on a piece of scrap cardboard first so you know exactly how the paint behaves before you hit your actual project.

## My Golden Rule for Spray Painting

“Look, don’t go chasing that perfect, factory-smooth finish on your first try; just focus on steady hands and light coats, because once you stop rushing the process, you’ll realize you’ve actually got this.”

Nathan Cole

You've Got This

Spray painting prep tips: You've Got This.

At the end of the day, spray painting is all about the prep and the patience. Just remember that a clean, sanded surface and the right safety gear are what stand between you and a professional-looking finish. Don’t rush the process by trying to cover everything in one heavy coat; instead, focus on those light, even passes that let the paint build up naturally. Whether you’re refreshing an old wooden chair or giving a metal tool box a new lease on life, sticking to these basics will keep your drips to a minimum and your results looking sharp.

I know it can feel a little intimidating when you first pick up that can and hear that rattle, but I promise you, the learning curve is much shorter than you think. Every expert I know started with a messy drip or a missed spot, and honestly, that’s just part of the fun of figuring it out. So, don’t let the fear of a little overspray keep you from starting that project sitting in your garage. Grab your mask, find a good breezy spot, and just get to work. You’ll be surprised at how much pride you take in seeing something old become something brand new, all because you decided to do it yourself.

Frequently Asked Questions

How do I stop the paint from running or leaving those annoying drips?

Trust me, I’ve spent more time cleaning up ugly drips than I’d like to admit. The secret is all in the “light coat” method. Don’t try to cover everything in one go; that’s a recipe for a mess. Instead, spray several thin, misty layers, waiting a few minutes between each. Also, keep that can moving! If you linger too long in one spot, gravity is going to win, and you’ll be sanding out drips all afternoon.

How long do I actually need to wait between coats before it's dry enough to touch?

I know the feeling—you’ve just finished a great first coat and you’re dying to see how it looks. But seriously, resist the urge! Generally, you want to wait about 15 to 30 minutes between light coats. If you touch it too soon, you’ll leave fingerprints or, worse, pull the paint right off. If the instructions say an hour, give it the full hour. Patience now prevents a massive headache later.

Can I spray paint something that's already been painted, or do I have to strip it down to the bare surface first?

Short answer: Yes, you absolutely can! You don’t always need to go all the way back to bare metal or wood. If the old paint is stuck on tight and isn’t peeling or flaking, you’re good to go. Just don’t skip the prep—give it a good sanding to scuff up the surface so the new layer has something to grab onto. A quick clean to remove any grease, and you’re ready to spray.

Guide on how to build a portfolio.

How to Build a Portfolio That Gets You Hired

I remember sitting at my kitchen table three years ago, staring at a blank screen and feeling like a total fraud. I had the skills, sure, but I had no idea how to actually prove it to someone who wasn’t my mom. I kept seeing these flashy, high-end designer templates online that made me think I needed a degree in web design just to figure out how to build a portfolio that didn’t look like a middle school project. It felt like there was this massive, expensive barrier between me and my next job, and honestly, it was exhausting just thinking about it.

But here’s the thing: you don’t need a fancy agency or a massive budget to show people what you can do. I’ve spent a lot of time breaking down complex projects into manageable pieces, and a portfolio is no different. In this guide, I’m going to show you my no-nonsense approach to gathering your work, picking your best hits, and laying them out so they actually make sense to a hiring manager. We’re going to skip the fluff and focus on a simple, repeatable plan that gets the job done.

Table of Contents

Curating Best Projects Without the Stress

Curating Best Projects Without the Stress.

Look, I get it. You sit down at your computer, open a blank folder, and suddenly every single thing you’ve ever done feels either “too messy” or “not good enough.” It’s easy to fall into the trap of thinking you need to show everything you’ve ever touched, but that’s a one-way ticket to burnout. When you’re curating best projects, less really is more. Think of it like cleaning out a junk drawer or prepping a meal; you don’t throw everything in the pan. You pick the ingredients that actually make the dish work.

Instead of drowning in every minor task, aim for three to five solid pieces that actually prove you know your stuff. If you’re looking at digital portfolio examples for inspiration, notice how the pros don’t just dump files into a folder. They tell a story. I like to use a simple case study structure for my main pieces: what was the problem, what did I do, and how did it turn out? This keeps you from rambling and helps a hiring manager see your brain in action without making them read a novel.

Finding Inspiration in Digital Portfolio Examples

Finding Inspiration in Digital Portfolio Examples.

When you’re staring at a blank screen, the hardest part isn’t the work itself—it’s figuring out how to present it. I used to think I had to reinvent the wheel, but honestly, looking at some solid digital portfolio examples is like looking at a blueprint before starting a renovation. You aren’t copying their style; you’re just seeing how they handled the layout and flow. I spent a good chunk of my last project scrolling through sites like Behance or even just personal blogs to see how pros were showcasing creative work without making it look cluttered.

Don’t just look at the pretty pictures, though. Pay attention to the “why” behind their choices. I like to see how people use a clear case study structure to explain their process. Instead of just dumping a finished file online, they show the messy middle—the problems they hit and how they fixed them. That’s the stuff that actually gets you hired. Once you see how others bridge the gap between “here is a thing I made” and “here is how I think,” the whole process starts to feel a lot more figure-out-able.

5 Ways to Stop Staring at a Blank Screen and Actually Build Your Portfolio

  • Focus on the “why” behind your work. Don’t just dump a screenshot or a finished product onto a page; tell me what problem you were trying to solve and how you fixed it. I’ve learned that people care way more about your thought process than a polished final result.
  • Keep your tech stack simple. You don’t need a fancy, expensive website builder to look professional. Whether it’s a clean Notion page, a simple Squarespace site, or even a well-organized PDF, if it’s easy to navigate, you’re winning.
  • Quality over quantity, every single time. I’d rather see three killer projects that show off your range than ten mediocre ones that make you look like you’re just padding the pages. If a project doesn’t make you proud, leave it in the archives.
  • Make it easy for people to contact you. It sounds obvious, but don’t make a recruiter hunt for your email address. Put a clear “Get in Touch” button or a simple contact link right at the bottom of every page. Don’t make them work to hire you.
  • Test it on your phone. I know, I know—you’re building this on a big monitor—but most people are going to glance at your link while they’re grabbing coffee or riding the bus. If your portfolio looks wonky on a mobile screen, you’ve already lost them.

The Bottom Line: Just Get It Moving

Don’t try to show off every single thing you’ve ever done; pick your five best “wins” and let them do the heavy lifting for you.

Stop staring at a blank screen—look at what others are doing to get your gears turning, but don’t feel like you have to copy them to be good.

Perfection is the enemy of progress here, so just get your work laid out clearly and remember that you can always tweak it later once it’s actually live.

## Stop Aiming for Perfection

“A portfolio isn’t a museum of your perfect moments; it’s just a toolbox that shows people what you’re capable of building. Don’t get stuck trying to polish every single thing until it shines—just pick your best work, show how you solved the problem, and get it out there.”

Nathan Cole

Just Get It Out There

Organizing a portfolio: Just Get It Out There.

Look, I know that staring at a blank screen or an empty website feels a lot like staring at a pile of unorganized lumber in a garage—it’s messy, it’s intimidating, and you aren’t quite sure where to start. But we’ve broken it down: you’ve picked your best work, you’ve looked at what others are doing for a bit of inspiration, and now you have a roadmap. Remember, your portfolio doesn’t need to be some high-tech, polished masterpiece on day one. It just needs to be honest and organized. Focus on showing what you can actually do, rather than trying to pretend you’re a seasoned pro with twenty years of experience.

If there is one thing I’ve learned from fixing old engines and troubleshooting glitchy laptops, it’s that perfection is the enemy of progress. If you wait until every single pixel is perfect, you’ll never actually hit “publish.” Just get the foundation laid, show off your wins, and let it grow as you go. Your portfolio is a living thing; it’s going to change as you learn new skills and take on bigger projects. So, stop overthinking it, trust the process, and just start building. You’ve got this.

Frequently Asked Questions

I don't have a ton of professional experience yet; can I still build a portfolio using personal projects or schoolwork?

Absolutely. Look, I’ve spent plenty of time fixing things with nothing but a junk drawer of tools and some YouTube tutorials, so I get the hesitation. But here’s the truth: a portfolio isn’t a trophy case for big corporations; it’s proof that you know how to solve problems. Whether it’s a killer school project or a side hustle you started in your garage, if you can show the process, you’ve got something worth sharing.

How much stuff is too much? I don't want to overwhelm people, but I also don't want to look like I haven't done anything.

Look, I get the anxiety. It’s like cleaning out a garage—you want to show off the cool vintage tools, but if you pile everything in the driveway, nobody can see the good stuff. Aim for three to five solid projects. That’s the sweet spot. Quality always beats quantity. I’d much rather see three deep dives that show how you solve problems than twenty shallow snapshots that don’t tell a real story.

Do I actually need my own website, or is just sharing a Google Drive link or a LinkedIn profile enough?

Look, I get the temptation to just toss a Google Drive link at someone to save time. It’s easy. But honestly? It feels a bit like handing a client a loose pile of blueprints instead of a finished model. A dedicated website—even a simple, cheap one—shows you actually care about the presentation. If you’re in a pinch, LinkedIn is great, but a personal site is where you really own the room.

Tips on how to organize your photos.

How to Finally Organize Your Digital Photos

I was sitting on my couch last Sunday, trying to find that one decent shot of my dog from three years ago, when I realized I had over 14,000 files scattered across two old hard drives and a cloud account I can barely remember the password to. It’s a mess, and honestly, most of the “expert” advice out there makes it sound like you need a degree in data science or a massive monthly subscription to some fancy AI service just to figure out how to organize your photos. I’m not buying it. You don’t need a complicated system or a high-priced tech consultant; you just need a solid plan that actually works for a normal person with a busy life.

I’ve spent the last few weeks tinkering with different setups, testing what sticks and what just creates more digital clutter, so you don’t have to. I’m going to show you exactly how to tackle this project without losing your mind or spending a fortune. We’re going to break this down into a few simple, repeatable steps so you can finally stop scrolling through chaos and actually start enjoying your memories again.

Table of Contents

Building a Simple Digital Photo Management Workflow

Building a Simple Digital Photo Management Workflow

Before you start clicking and dragging files around like a madman, you need a game plan. I call this building your digital photo management workflow. Think of it like setting up a workshop; if you just toss your tools in a pile on the floor, you’ll never find the screwdriver when you actually need it. You need a consistent path for a photo to travel from the moment you snap it on your phone to the moment it’s safely tucked away in a permanent folder.

First, decide on your “landing zone.” I usually grab everything from my phone and my camera and dump it into one single “Inbox” folder on my computer. From there, the goal is to move them into a logical structure—usually by year and then by month or event. To make this really stick, you’ve got to look into solid photo backup strategies. I’m a big believer in the “3-2-1 rule”: keep three copies of your stuff, on two different types of media, with one copy stored off-site (like in the cloud). Once that safety net is in place, you can start the fun part of actually sorting through the clutter.

Sorting Large Image Libraries Without Losing Your Mind

Sorting Large Image Libraries Without Losing Your Mind

Look, I get it. You open that “Downloads” folder or your camera roll, see 5,000 unidentifiable files, and immediately want to close your laptop and walk away. It’s overwhelming. When I first started sorting large image libraries, I tried to do it all in one weekend. Big mistake. You’ll burn out by hour two and end up with a mess that’s worse than when you started. The secret isn’t brute force; it’s about setting a timer for twenty minutes a day. Treat it like cleaning out a messy garage—you don’t do the whole thing at once, you just tackle one shelf at a time.

Once you stop trying to swallow the whole elephant, you can start focusing on the heavy lifting: metadata and tagging photos. Instead of just dumping files into folders named “Summer 2022,” take a second to add a few quick keywords. It feels like extra work upfront, but I promise you, it’s the difference between finding that one perfect shot in seconds or scrolling for an hour. If you combine this with a solid set of photo backup strategies, you aren’t just tidying up; you’re actually building a system that works for you.

Five quick wins to keep your digital clutter from winning

  • Stop naming files “IMG_4829.” Seriously. If you’re moving photos to a hard drive, take thirty seconds to rename the folder to something like “2023_Summer_Camping_Trip.” Future-you will thank you when you aren’t scrolling through a sea of random numbers trying to find that one shot of the sunset.
  • Use the “Favorites” feature like it’s your best friend. You don’t need to organize every single blurry shot of your lunch. Just hit that little heart or star icon on the absolute winners. That way, when you want to make a quick album or show someone a photo, you’re only digging through the gold, not the gravel.
  • Get a “holding pen” folder for new imports. I like to dump everything new into one single folder labeled “To Be Sorted.” It keeps your main library clean while you work through the pile at your own pace, rather than letting new chaos bleed into your organized stuff.
  • Don’t be afraid to hit the delete button. I know, I know—it feels wrong to delete a photo. But if you have ten nearly identical shots of the same thing, pick the best one and kill the other nine. Deleting the junk isn’t losing memories; it’s making room for the ones that actually matter.
  • Set a “maintenance” timer. Don’t try to organize ten years of photos in one weekend; you’ll burn out and quit. Instead, set a timer for fifteen minutes once a week—maybe while you’re waiting for your coffee to brew—to tidy up a single month or a specific event. Small bites are much easier to swallow.

The bottom line on getting your photos under control

Don’t try to tackle the whole mountain at once; just pick one folder or one month at a time so you don’t burn out.

Build a system that actually works for your daily life, even if it’s just a simple folder structure, rather than trying to follow some complex pro photographer’s setup.

The goal isn’t perfection—it’s being able to actually find that one great shot of your dog or that family vacation without scrolling for twenty minutes.

## The big picture

“At the end of the day, you aren’t just moving files around or renaming folders; you’re building a way to actually find those memories when you want to look back on them. Don’t get bogged down in perfection—just focus on making it easy enough that you actually use the system you build.”

Nathan Cole

Getting Over the Finish Line

Getting Over the Finish Line with organization.

Look, I know it feels like a mountain right now, but we’ve already done the heavy lifting. We talked about building a workflow that actually works for your life, setting up a system that doesn’t require a computer science degree, and the best ways to tackle those massive, overwhelming folders without losing your sanity. The main thing to remember is that you don’t have to do it all in one afternoon. Whether you’re moving files to a dedicated external drive or finally tagging those blurry shots from your 2019 road trip, the goal is consistency over perfection. Just take it one folder, one month, or one event at a time, and before you know it, your digital mess will be a properly managed library.

At the end of the day, these aren’t just files on a hard drive or pixels on a screen; they are your memories. We organize our tools in the garage and our spices in the kitchen so we can actually use them, and your photos are no different. You shouldn’t be spending your time scrolling through digital clutter; you should be enjoying the moments those pictures capture. So, grab a coffee, pick one small folder to start with, and just get moving. You’ve totally got this, and I promise that feeling of finally finding that one perfect photo in seconds is worth every bit of the effort.

Frequently Asked Questions

What’s the best way to handle all those blurry shots or accidental screenshots that clutter up my library?

Look, we’ve all been there—you’re scrolling through a memory and suddenly you’re staring at a blurry shot of a sidewalk or a screenshot of a grocery list from three months ago. My trick? Don’t try to fix them; just kill them. Once a week, sit down with a coffee and do a “trash sweep.” Search your library for “screenshots” or just scroll quickly, hitting delete on the junk. If it’s not a keeper, toss it.

Should I be paying for extra cloud storage, or is there a way to keep everything organized on a physical hard drive?

Look, I get it—those monthly cloud subscriptions add up fast. Honestly? You don’t need to pay for more cloud space if you’re willing to do a little legwork. I personally swear by a high-quality external hard drive. It’s a one-time cost, and you actually own the hardware. My rule of thumb: use the cloud for your “active” photos you want on your phone, but dump the heavy archives onto a physical drive.

How do I make sure I don't lose all these organized photos if my computer crashes or my phone gets lost?

Look, there’s nothing worse than doing all this hard work only to have a hardware failure wipe the slate clean. Don’t leave your memories to chance. I follow a simple “3-2-1 rule”: keep three copies of your photos, on two different types of media (like your computer and an external hard drive), with one copy stored off-site—usually in a cloud service like Google Photos or iCloud. It’s cheap insurance against a total disaster.

Easy comfort food recipes for cozy nights.

Easy Comfort Food Recipes for a Cozy Night in

We’ve all been there: it’s been a long, draining day, the weather is acting up, and the last thing you want to do is stand over a stove for two hours following a recipe that looks like it was written in code. When life gets heavy, you just want something that feels like a hug in a bowl, but most of the time, “comfort food” feels synonymous with “massive pile of dishes” or “expensive grocery run.” I used to think that making a real, soul-warming meal required a culinary degree and a pantry full of stuff I couldn’t pronounce, but I’ve learned that finding easy comfort food recipes is actually more about smart shortcuts than fancy techniques.

I’ve spent way too many weeknights staring blankly into my fridge, so I’ve done the trial and error for you. In this guide, I’m breaking down five of my absolute favorite go-to meals that hit that spot every single time without wrecking your kitchen or your budget. You’re going to learn how to whip up hearty, delicious dishes using minimal equipment and basic ingredients you probably already have in your cupboard. Let’s get into it and get you fed!

Table of Contents

One-Pan Creamy Garlic Pasta

One-Pan Creamy Garlic Pasta in skillet.

There are nights when the thought of washing five different pots and pans makes me want to just order pizza, and that is exactly why this pasta is my go-to. You basically throw your noodles, some garlic, chicken broth, and a splash of cream into a single skillet and let it all simmer together. The starch from the pasta stays in the pan, which makes the sauce unbelievably silky without you having to do any fancy chef tricks.

Sheet Pan Sausage and Peppers

Roasted Sheet Pan Sausage and Peppers.

If you aren’t a fan of standing over a stove stirring things, you need to embrace the magic of the sheet pan. I grab a pack of good quality Italian sausages, some bell peppers, and an onion, chop them into bite-sized chunks, and toss them all on a baking sheet with olive oil and dried oregano. You just slide it into a hot oven and let the heat do all the heavy lifting while you kick back for twenty minutes.

The Ultimate Grilled Cheese Upgrade

The Ultimate Grilled Cheese Upgrade sandwich.

Now, I know what you’re thinking—it’s just a sandwich, right? But if you treat it like a real meal, it can be the best thing you eat all week. Forget those thin, processed slices; I always reach for a sharp cheddar or a creamy gruyère. My secret weapon is spreading a thin layer of mayonnaise on the outside of the bread instead of butter. It sounds weird, I know, but it gives you a much more even, golden-brown crunch that butter just can’t match.

Skillet Loaded Baked Potatoes

I used to think you had to wait an hour for a potato to bake in the oven, but you can actually cheat the system using a heavy skillet. By cutting your potatoes into smaller cubes and sautéing them with a lid on, you trap the steam and cook them through much faster. I like to season them heavily with salt, pepper, and smoked paprika so they have a bit of a savory crust once they’re tender.

Quick Beef and Broccoli Stir-Fry

When I have a craving for takeout but don’t want to spend thirty bucks on delivery, this stir-fry is my secret weapon. You just need some thinly sliced steak, a bag of frozen broccoli florets, and a basic sauce made from soy sauce, ginger, and a little honey. The key is to get your pan ripping hot before you add the meat so you get a nice sear instead of just boiling it in its own juices.

My Final Tips for Stress-Free Cooking

Don’t sweat the small stuff; if you’re missing one ingredient or your pan isn’t quite the right size, just pivot and keep going.

Prep your workspace before you turn on the heat so you aren’t scrambling to chop onions while your garlic is already burning.

Focus on the flavor, not the perfection—at the end of the day, the goal is a meal that tastes good and makes you feel fueled.

My Philosophy on Good Food

“Look, you don’t need a culinary degree or a kitchen full of fancy gadgets to make something that feels like a hug in a bowl. Real comfort food isn’t about perfection; it’s about those simple, reliable recipes that hit the spot every single time without making you want to pull your hair out.”

Nathan Cole

Bringing It All Home

At the end of the day, these recipes aren’t about having a professional chef standing over your shoulder or owning a kitchen full of expensive gadgets. Whether you’re throwing together that one-pan pasta when you’re exhausted or slow-cooking a batch of chili to fill the house with warmth, the goal is the same: good food with minimal fuss. We’ve looked at how you can use simple pantry staples and basic techniques to create something that actually tastes like a hug in a bowl. Remember, the secret isn’t in a complicated recipe book; it’s in keeping things simple so you can actually enjoy the meal instead of stressing over the cleanup.

I know that some days, even the thought of boiling water feels like too much work. But I promise you, once you take that first bite of something warm and homemade, you’ll realize it was well worth the effort. Don’t worry about making everything look perfect for a photo; just focus on making it taste right for you. Most things in life—including cooking—are much more figure-out-able than they seem at first glance. So, grab your favorite pan, turn on some music, and just start cooking. You’ve totally got this, and I can’t wait to hear which one becomes your new go-to.

Frequently Asked Questions

Can I swap out some of these ingredients if I’m trying to eat a little healthier without losing that cozy feeling?

You absolutely can. I do this all the time when I’m trying to keep things a bit lighter. Swap heavy cream for Greek yogurt or coconut milk, and try whole-grain pasta instead of the white stuff. You can even toss in a handful of extra spinach or frozen peas to get some greens in there. The trick is keeping those warm spices like garlic and cumin high—that’s where the “cozy” actually lives.

What are some good ways to prep these meals ahead of time so I’m not stuck in the kitchen all week?

Look, I get it—the whole point of these recipes is to save you time, not turn you into a full-time sous chef. To stay ahead, I swear by “component prepping.” Instead of making full meals, chop all your veggies and portion out your proteins on Sunday. You can also brown your ground meat or simmer a big batch of sauce ahead of time. Store everything in airtight containers, and you’re just minutes away from dinner.

Are there any specific kitchen tools I actually need for these, or can I get by with just the basic stuff I already have?

Honestly, don’t go out and buy a bunch of fancy gadgets just for these recipes. I’m a big believer in using what you’ve already got. A decent chef’s knife, a heavy skillet, and a solid spatula will get you through almost everything I mentioned. If you’ve got those basics, you’re golden. Save your money for better ingredients—that’s where the real flavor lives anyway. Just grab what’s in your drawer and let’s get cooking.

Guide on how to mend clothes.

How to Mend Clothes and Make Them Last Longer

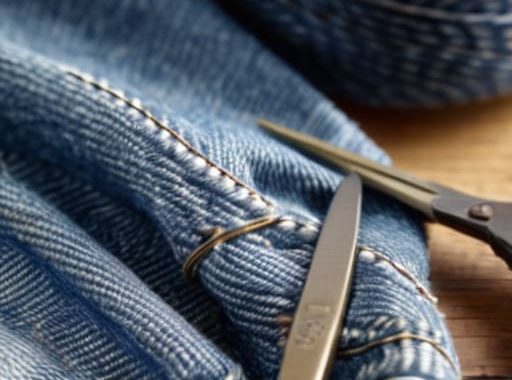
I was standing in front of my closet last Tuesday, staring at my favorite pair of heavy-duty denim jeans, feeling that familiar sting of defeat. There it was: a jagged tear right along the thigh that looked like it had been through a war zone. My first instinct was to toss them in the donation bin and head straight to the mall, but then I remembered something my dad used to say about not throwing away things that still have life in them. Most people think you need a fancy sewing machine or a degree in fashion design to fix a snag, but that’s just not true. Learning how to mend clothes isn’t about being a master tailor; it’s just about having the right mindset and a few basic tools to keep your gear in the game.

In this guide, I’m going to strip away all the complicated jargon and show you the real-world methods I use to keep my wardrobe together. We aren’t going for runway perfection here; we’re aiming for repairs that are strong, functional, and look totally natural. I’ll walk you through everything from basic needlework to simple patches so you can stop spending money on replacements and start feeling like a pro.

Table of Contents

Guide Overview

Total Time: 30-60 minutes per garment
Estimated Cost: $15-30
Difficulty: Beginner

Tools & Supplies

  • Hand sewing needles of various sizes
  • Fabric scissors for clean cuts
  • Seam ripper for removing old threads
  • All-purpose polyester thread (3-5 assorted colors)
  • Fabric patches or scraps (2-3 pieces)

Step-by-Step Instructions

  • 1. First things first, you’ve gotta grab your gear. You don’t need a professional tailor’s kit, but you should have a decent needle, some thread that actually matches the color of your fabric, and a pair of sharp scissors. If you’re fixing something heavy like denim, go grab a thicker thread so it doesn’t snap the second you sit down.
  • 2. Clean up the damage site. I know it sounds weird, but you really want to trim away any frayed or loose threads that are hanging around the hole. If you leave those little fuzzy bits there, your stitches are just going to snag on them, and you’ll end up with a messy-looking patch instead of a clean fix.
  • 3. Thread the needle and tie a knot. This is the part where most people get frustrated, so take a breath. Run the thread through the eye of the needle, pull it until you have a good length, and tie a sturdy knot at the very end. If you’re working with a really thin fabric, try using a smaller knot so it doesn’t create a weird bump on the inside of the shirt.
  • 4. Start your first stitch. Don’t just dive into the middle of the hole; instead, start about a quarter-inch away from the edge of the tear. Push the needle through the fabric from the back to the front, then bring it back down a little further away. You’re essentially building a foundation of stitches that will hold the edges together without pulling the fabric too tight.
  • 5. Use the “running stitch” for small holes. If it’s just a tiny nick, you can just go in and out in a straight line like you’re drawing with thread. Keep your stitches close together—think of it like a tight fence. If you space them too far apart, the hole is just going to keep growing every time you do laundry.
  • 6. Try the “darning” method for bigger gaps. If you’ve got a real chunk missing, you’ll need to weave. Go back and forth across the hole horizontally to create a bunch of parallel lines, then go vertically over them to create a little woven grid. It looks a bit like a tiny basket, and it’s honestly the most solid way to make sure that hole stays closed for good.
  • 7. Tie it off and double-check. Once you’ve covered the damage, don’t just pull the needle out and call it a day. Bring the needle to the underside of the fabric, loop the thread through itself to create a knot, and pull it nice and snug. Give the fabric a gentle tug to make sure everything feels secure before you head back out into the world.

The Sewing Kit Essentials You Actually Need

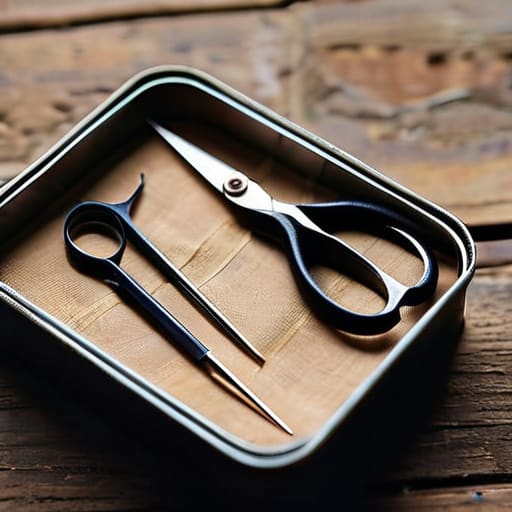
The Sewing Kit Essentials You Actually Need.

Look, you don’t need to go out and buy one of those massive, velvet-lined sewing chests that costs a fortune. Honestly, most of that stuff is just clutter. To get started, I usually just grab a small, sturdy tin or a zippered pouch and keep it in my junk drawer. The real sewing kit essentials are pretty simple: a handful of decent needles (get a variety of sizes), a few spools of high-quality thread in neutral colors like black, grey, and navy, and a sharp pair of small scissors. If you’ve got those, you’re already halfway there.

I also highly recommend picking up a pack of “safety pins” and some sewing notions like thimbles or seam rippers. If you’re planning on tackling more heavy-duty projects, like learning how to patch denim holes, you’ll definitely want some heavy-duty thread and maybe a few scraps of similar fabric to work with. Having the right tools doesn’t make the job “fancy,” it just makes it way less frustrating when you’re trying to fix a favorite pair of jeans on a Tuesday night.

Mastering Basic Sewing Stitches for Beginners

Mastering Basic Sewing Stitches for Beginners.

Before you dive into the heavy lifting, you’ve got to get a feel for how the needle actually moves through the fabric. Don’t worry about making everything look like it came straight off a runway; the goal here is durability. I always tell people to start with a simple running stitch for basic seams, but if you’re looking to actually save a garment, you’ll want to practice a few basic sewing stitches for beginners like the backstitch. The backstitch is my absolute go-to because it creates a continuous, strong line that won’t unravel the moment you pull your favorite jeans on in the morning.

Once you’ve got the rhythm down, you can start tackling the trickier stuff. If you’ve got a hole in a pair of heavy-duty jeans, you aren’t just sewing lines; you’re looking at fabric reinforcement methods like using a scrap of denim underneath the tear to give your stitches something solid to grab onto. If you’re dealing with something thinner, like a sweater or a sock, you might want to look into a darning socks tutorial style of weaving to fill in those gaps. It takes a little patience, but seeing a hole disappear is a massive win.

Pro Moves to Keep Your Repairs from Looking Like a Patchwork Quilt

  • Don’t just eyeball the color; grab a few different shades of thread from the store. Sometimes a slightly lighter thread looks more intentional than trying to find a “perfect” match that doesn’t exist.
  • Turn the garment inside out while you’re working. It’s way easier to manage the tension and see what you’re doing when you aren’t fighting against the outside of the fabric.
  • Use a thimble if you’re working with heavy stuff like denim or canvas. Your fingers will thank you, and it keeps your stitches from getting all wonky when you’re pushing through thick seams.
  • Always leave a little “give” in your stitches. If you pull the thread too tight, the fabric will bunch up and look stiff, which is a dead giveaway that it’s been mended.
  • Test your knot on a scrap piece of similar fabric first. I know it sounds extra, but there’s nothing worse than realizing your tension is all wrong halfway through a repair on your favorite jeans.

The Quick Version: What to Remember

Don’t let a small tear scare you off; most clothing damage is way more “figure-out-able” than it looks once you have the right needle and thread.

You don’t need a massive, expensive sewing machine to get the job done—a few solid hand-stitching basics will carry you through 90% of your repairs.

Take your time and match your thread color as closely as possible; it’s the difference between a repair that stands out and one that disappears into the fabric.

## A New Way to Look at a Rip

“I’ve learned that a loose thread or a small tear isn’t a sign that a piece of clothing is dead; it’s just an invitation to get your hands dirty and make it even better than it was before.”

Nathan Cole

You’ve Got This

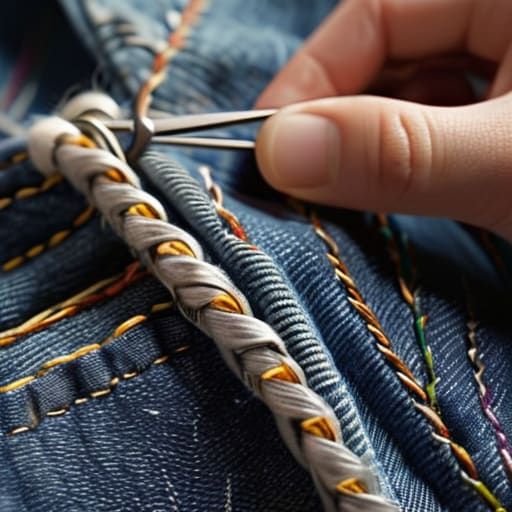
Mending denim with confidence: You've Got This.

Look, I know that staring at a pile of ripped jeans or a loose button can feel a little intimidating at first, but you’ve already done the hard part. We’ve gone over the essential kit you need, walked through those foundational stitches, and broken down the actual mechanics of the repair. Once you realize that mending isn’t some mysterious art form reserved for grandmothers, but just a series of small, manageable movements, the whole thing changes. You don’t need a professional sewing machine or a degree in textile design to keep your favorite gear in rotation; you just need a little patience and the right thread.

At the end of the day, mending is about more than just saving a few bucks or keeping a shirt out of the landfill—though those are huge wins. It’s about the satisfaction of fixing something with your own two hands instead of just clicking “add to cart” on a replacement. There is a real, tangible sense of pride that comes from wearing a sweater that has a tiny, neat repair right where it used to be broken. So, don’t let a small tear stop you. Grab your needle, find some good light, and remember that most things in life are just a few stitches away from being good as new.

Frequently Asked Questions

What if I mess up a stitch and it looks even worse than the original hole?

Look, we’ve all been there. I once tried to fix a hem and ended up making it look like a topographical map of the Rockies. Don’t panic. The best move is to grab your seam ripper (or a sharp pair of small scissors) and carefully undo the mess. It’s much better to start fresh than to try and “patch” a bad stitch. Take a breath, re-thread your needle, and try again. You’ve got this.

Can I actually fix clothes that have a massive tear or a missing chunk of fabric?

Look, I’ll be honest: if there’s a giant gaping hole where a chunk of fabric used to be, a simple stitch won’t cut it. But don’t toss it in the bin just yet! You can definitely save it using a patch or even some cool embroidery to cover the damage. It’s less about “fixing” the hole and more about “rebuilding” the area. It takes a bit more patience, but it’s totally doable.

Do I really need a sewing machine for this, or can I get away with just a needle and thread?

Honestly? You can absolutely skip the machine for now. I’ve mended more holes and loose buttons with nothing but a needle, some thread, and a bit of patience than I have with a fancy sewing machine. Machines are great for big projects, but for the everyday stuff—like a ripped seam or a missing button—hand sewing is faster, cheaper, and way less intimidating. Just grab a needle and get to work. You’ve got this.

Guide on how to set goals.

How to Set Goals You’ll Actually Follow Through on

I used to think that learning how to set goals meant buying a $30 leather-bound planner and spending hours mapping out “vision boards” that looked more like art projects than actual plans. Honestly, most of that high-level productivity stuff feels like a total scam designed to make you feel like you aren’t doing enough. I spent years staring at these massive, intimidating lists of “life achievements,” feeling more paralyzed than motivated, thinking I just didn’t have the right secret system to get things done.

But here’s the thing I learned after years of DIY projects and messy career shifts: you don’t need a fancy framework or a guru to tell you what to do. You just need to treat your ambitions like a home renovation—you wouldn’t try to remodel an entire kitchen in one afternoon, so why try to fix your whole life at once? In this guide, I’m going to show you a no-nonsense approach to breaking things down into manageable chunks. We’re going to skip the fluff and focus on practical steps that actually work in the real world, so you can stop overthinking and start doing.

Table of Contents

Using the Smart Goal Framework to Simplify Your Vision

Using the Smart Goal Framework to Simplify Your Vision

Now, I know what you’re thinking—another “framework”? I get it. When I was first trying to get my life organized, these corporate-sounding terms felt like extra homework. But the SMART goal framework actually works because it stops you from being vague. Instead of saying, “I want to get better at woodworking,” which is about as helpful as saying “I want to be better at stuff,” you give yourself a real target. You make it Specific, Measurable, Achievable, Relevant, and Time-bound. It’s like having a blueprint before you start swinging a hammer; it keeps you from wasting energy on things that don’t actually move the needle.

The real magic happens when you start distinguishing between short term vs long term goals. If your big dream is to renovate an entire kitchen, that’s your long-term vision. But if you don’t break that down into small, bite-sized tasks—like “buy a new faucet by Saturday”—you’ll burn out before you even pick up a wrench. By using these simple, actionable checkpoints, you turn a massive, intimidating project into a series of small wins that actually keep you moving forward.

Balancing Short Term vs Long Term Goals for Real Progress

Balancing Short Term vs Long Term Goals for Real Progress

Here’s where a lot of people trip up: they get so caught up in the “big picture” that they forget to actually move their feet, or they get so obsessed with the small stuff that they lose sight of why they started in the first place. It’s a lot like renovating a kitchen. If you only focus on picking the perfect backsplash (the long-term vision), you’ll never actually swing a hammer. But if you only focus on tightening one screw at a time without a blueprint, you’ll end up with a half-finished mess. Finding the sweet spot between short term vs long term goals is what keeps you from burning out or spinning your wheels.

I like to think of long-term goals as my North Star—they give me direction—while my short-term goals are the actual steps on the ladder. To keep things from feeling overwhelming, I use a few simple goal tracking methods, like a basic checklist or a habit tracker on my phone, to celebrate the small wins. When you knock out those little daily tasks, it builds the momentum you need to tackle the massive projects. It makes the whole process feel less like a mountain climb and more like a series of manageable DIY projects.

5 Ways to Keep Your Goals from Falling Apart

  • Write them down on something you actually see. I’ve learned the hard way that a goal living only in my head is just a wish. Whether it’s a sticky note on your bathroom mirror or a note on your phone’s home screen, get it out of your brain and into the physical world so you can’t ignore it.
  • Focus on the “why” before the “what.” If you’re setting a goal just because you feel like you should, you’re going to quit the second things get annoying. Ask yourself why this actually matters to you. If the reason doesn’t fire you up, pick a different goal.
  • Build in some “wiggle room.” Life happens. A kid gets sick, a car breaks down, or you just have a week where you’re totally wiped out. If your plan is too rigid, one bad day will make you feel like a failure. Build in buffer days so a setback doesn’t become a total shutdown.
  • Celebrate the tiny wins. We tend to wait until the very end to feel good, but that’s a recipe for burnout. If your goal is to save $1,000, celebrate when you hit that first $100. It keeps the momentum going and reminds you that you’re actually making progress.
  • Review and tweak as you go. Setting a goal isn’t like setting a concrete foundation; it’s more like adjusting a recipe while you’re cooking. If you realize halfway through that a goal is too big or just plain wrong for you, change it. It’s much better to pivot than to keep heading down a path that doesn’t work.

The Bottom Line: Keep It Simple and Keep Moving

Don’t let the big picture paralyze you; use the SMART method to turn those massive, scary dreams into actual, bite-sized tasks you can tackle this week.

Make sure you’re playing the long game without ignoring the present—balance those big “someday” ambitions with small, immediate wins to keep your momentum from stalling.

Remember that progress isn’t a straight line, so be kind to yourself if things get messy, adjust your plan, and just keep figuring it out one step at a time.

## The Big Picture vs. The Small Stuff

“Setting a goal is a lot like starting a home renovation project: if you only look at the blueprints for the whole house, you’ll freeze up. But if you just focus on getting the right tools ready for the first small task, you’ll realize you’re actually making progress before you even know it.”

Nathan Cole

Getting Started (Before You Overthink It)

Getting Started (Before You Overthink It) roadmap.

Look, we’ve covered a lot of ground here. We talked about using the SMART framework to take the guesswork out of your planning, and we looked at how to balance those big, long-term dreams with the small, everyday wins that actually keep you moving. The main thing I want you to take away is that goal setting isn’t about being perfect or having a rigid, unbreakable master plan. It’s really just about creating a roadmap so you aren’t wandering around in the dark. If you keep your targets specific and make sure you’re checking off those small milestones along the way, you’ll find that progress becomes much more predictable and a lot less intimidating.

At the end of the day, the hardest part isn’t the planning—it’s actually picking up the tools and getting to work. You might feel like you need to have every single detail mapped out before you take the first step, but trust me, you don’t. Most things are much more figure-out-able once you’re actually in the thick of it. So, don’t let the fear of a messy start keep you stuck on the sidelines. Just pick one small thing, write it down, and make your first move today. You’ve got this.

Frequently Asked Questions

What do I do if I set a goal and then completely lose motivation halfway through?

Look, I’ve been there. I once spent three weeks trying to restore an old drill only to stare at it in the garage for a month because I just… couldn’t. When that happens, stop beating yourself up. Usually, it means your goal is either too big or you’ve lost your “why.” Take a step back, shrink the task down to something tiny—like just cleaning the tool—and find your momentum again. Progress isn’t a straight line.

How do I know if a goal is actually worth my time or if I'm just setting myself up for burnout?

Look, I’ve been there—chasing a project just because I felt like I should, only to end up staring blankly at a half-finished task three weeks later. To avoid burnout, ask yourself: “Does this actually move the needle for my life, or am I just checking a box?” If the thought of starting makes you feel energized, go for it. If it just feels like a heavy weight in your gut, it might be time to scrap it.

Is it better to focus on one big goal at a time, or can I work on a few different things at once without getting overwhelmed?

Look, I’ve learned this the hard way while trying to renovate a bathroom and learn coding at the same time: if you bite off more than you can chew, you’ll end up with nothing finished. My rule of thumb? Pick one “big rock”—that main project that really moves the needle—and maybe one or two “small pebbles” on the side. It keeps you moving without burning you out before you even get started.

Essential sewing basics for beginners guide.

Sewing Basics: Everything a Beginner Needs to Know

I remember sitting on my floor three years ago, staring at a tangled bird’s nest of thread and a pile of expensive fabric, feeling like a total idiot. I’d bought this fancy kit because a video made it look easy, but all I ended up with was a ruined shirt and a massive headache. Most people will tell you that you need a $500 machine and a studio full of specialized tools to get started, but honestly? That’s a load of junk. You don’t need a masterclass to master the sewing basics for beginners; you just need to stop overcomplicating the process and get your hands dirty.

I’m not here to feed you some polished, perfect version of crafting that looks like a Pinterest board. I want to show you the real way to do this—the way that involves a few mistakes, a lot of unpicking seams, and a whole lot of figuring it out as you go. My goal is to strip away the intimidation and give you a straight-up, no-nonsense roadmap. We’re going to break this down into simple, manageable steps so you can actually finish a project and feel that massive sense of pride that comes from making something yourself.

Table of Contents

Your Essential Sewing Machine Tools and Supplies List

Your Essential Sewing Machine Tools and Supplies List

Before you dive into your first project, you don’t need to go out and buy a massive, expensive kit that takes up half your closet. I’ve learned the hard way that starting with too much gear just leads to clutter. Instead, focus on a solid sewing notions and supplies list that covers the fundamentals. You’ll definitely need a decent pair of fabric shears—and please, for the love of all things holy, never use them on paper—a seam ripper (your new best friend when things go sideways), a handful of versatile all-purpose pins, and a good measuring tape.

Beyond the handheld stuff, your machine needs a few specific companions to actually function. Make sure you have a variety of thread colors and a few extra universal needles on hand. If you’re working with anything more specific, like stretchy knits or heavy denim, you’ll want to research different sewing fabric types for novices so you don’t snap a needle mid-stitch. Getting these basics right from day one means you won’t be pausing every five minutes to run back to the craft store.

How to Thread a Sewing Machine Without the Stress

How to Thread a Sewing Machine Without the Stress

I’ll be honest: the first time I sat down in front of a sewing machine, I felt like I was trying to pilot a cockpit. There are so many little loops, levers, and tension dials that it’s easy to feel overwhelmed. But here’s the secret—learning how to thread a sewing machine isn’t about memorizing a complex blueprint; it’s just about following a path. Most machines actually have a little numbered guide etched right into the plastic or printed in the manual. I always tell people to take a deep breath and treat it like a scavenger hunt. If you follow the numbers in order, you’re almost guaranteed to succeed.

One of the most common sewing mistakes to avoid is rushing this part or skipping a single guide. If you miss one tiny loop, your thread won’t tension right, and you’ll end up with a bird’s nest of tangled mess under your fabric. Before you even touch the thread, make sure your bobbin is wound evenly and seated correctly in its housing. Once you’ve got the top thread through the guides and the needle, give it a little tug to make sure it’s seated. If it feels secure, you’re ready to go.

Five ways to keep your first sewing project from turning into a total mess

  • Don’t go overboard on the fabric aisle. I know, those fancy silks and heavy denims look amazing, but for your first few runs, stick to a simple cotton quilting fabric. It doesn’t slip around under the needle, which means you won’t be fighting your machine every two seconds.
  • Ironing isn’t just for your work shirts. Seriously, if you want your seams to actually look like they belong on a piece of clothing and not a crumpled paper bag, you’ve got to press them as you go. A quick pass with the iron makes a world of difference in how professional your project looks.
  • Get yourself a decent pair of fabric shears and—I cannot stress this enough—never, ever use them to cut paper. I learned that the hard way back in my twenties. Paper dulls the blades instantly, and once those scissors are dull, they’ll chew up your fabric instead of cutting it.
  • Slow down your foot pedal. When you’re starting out, it’s tempting to just stomp on that pedal to get the job done, but that’s how you end up with a bird’s nest of tangled thread. Treat it like a car: ease into the gas, find your rhythm, and keep a steady, slow pace.
  • Embrace the “seam ripper” lifestyle. You are going to make mistakes. I make them every single time I sit down to sew. Don’t let a crooked line ruin your mood; just grab your seam ripper, undo the mess, and try again. It’s not a failure, it’s just part of the process.

Quick wins to keep you moving

Don’t go overboard at the craft store; stick to the basics like good fabric shears and a handful of versatile threads so you don’t get overwhelmed (or broke) before you even start.

If you get stuck threading the machine, don’t sweat it—just slow down, follow the arrows, and remember that even the pros have to double-check their work sometimes.

The goal isn’t perfection on your first try; it’s about getting that first straight line down so you can build the confidence to tackle bigger projects.

My philosophy on getting started

“Look, you’re probably going to bird-nest your thread or sew a seam crooked at first, and that is totally fine. Don’t let a bit of tangled string convince you that you aren’t cut out for this; sewing isn’t about being perfect, it’s just about being patient enough to figure it out one stitch at a time.”

Nathan Cole

You've Got This

Sewing machine setup: You've Got This.

Look, I know it can feel like a lot when you first sit down in front of a machine. Between getting your supplies organized and finally figuring out that tricky threading process, it’s easy to feel a bit overwhelmed. But just remember: you’ve already done the hardest part by actually starting. You’ve got your tools ready, you know your way around the thread, and you’ve cleared the biggest hurdles that stop most people before they even take their first stitch. Once you get those fundamentals down, everything else—from sewing a straight seam to fixing a loose hem—is just a matter of consistent practice and patience.

My biggest piece of advice? Don’t aim for perfection on your first go. I’ve ruined more pieces of fabric than I care to admit, and honestly, that’s just part of the learning curve. Every crooked stitch or tangled thread is just a lesson in disguise. The goal isn’t to be a master tailor by next Tuesday; it’s to realize that you have the power to create something with your own two hands. So, grab that fabric, push that pedal, and don’t be afraid to make a mess. You’re doing great, and I can’t wait to see what you build next.

Frequently Asked Questions

I’ve got my machine and thread, but what kind of fabric should I actually start with so I don't end up frustrated?

Look, don’t go buying any fancy silk or stretchy jersey just yet. If you try to sew something slippery or super thin, you’re going to end up fighting the machine, and that’s a quick way to lose your mojo. Stick to a mid-weight, 100% cotton—think an old bedsheet or a basic quilting cotton. It stays put, it’s easy to pin, and it actually behaves when you’re trying to guide it through the needle.

How do I know if I'm sewing a straight line or if I'm accidentally veering off course?

Look, I’ve been there—staring at a seam that’s suddenly decided to take a scenic detour. The trick is to stop looking at the needle and start looking at the edge of your fabric. Use that edge like a literal guide rail. If you’re still struggling, grab some masking tape and stick a straight line on your machine’s throat plate. It sounds low-tech, but having a visual “road” to follow makes all the difference.

Is it worth buying a fancy sewing machine right away, or should I just stick with a basic one until I know what I'm doing?

Look, I’ve been there—standing in the middle of a big-box store aisle, staring at a machine that looks like it belongs on a spaceship. Here’s my take: don’t break the bank just yet. You don’t need a thousand-dollar computerized beast to sew a straight line or fix a hem. Grab a reliable, mid-range mechanical machine. It’s sturdier, easier to learn, and won’t make you wince if you accidentally jam a needle. Master the basics first; upgrade once you actually need the fancy stuff.

Professional development tips for career growth.

Simple Ways to Keep Growing Your Career

I’ve spent a lot of time listening to “experts” drone on about career climbing, and honestly, most of the professional development tips I hear sound like they were written by someone who has never actually had to clock in on a Monday morning. They talk about “synergy” and “leveraging paradigms” like they’re reading from a script, but they never actually tell you how to get from point A to point B without losing your mind. It’s all a lot of expensive fluff that makes you feel like you need a master’s degree just to figure out your next move. To me, it feels like being handed a complicated blueprint for a house when you don’t even have a hammer yet.

I’m not here to sell you a seminar or some high-priced coaching package. Instead, I want to give you the straight-up, practical version of professional development tips that actually work in the real world. We’re going to skip the corporate jargon and focus on small, actionable wins you can implement right now—the kind of stuff that builds real momentum without draining your bank account or your sanity. Let’s just break it down into a few doable steps and get to work.

Table of Contents

Mapping Your Path With Smart Setting Professional Growth Goals

Mapping Your Path With Smart Setting Professional Growth Goals

When I first started out in contracting, I used to think “getting better” just meant working more hours. I was wrong. Real progress comes from setting professional growth goals that actually mean something, rather than just picking random skills out of a hat. Think of it like planning a home renovation; you wouldn’t just start tearing down walls without a blueprint. You need to figure out where you are now and exactly where you want to end up.

A great way to start is by doing a quick skill gap analysis on yourself. Grab a notebook and be honest: what’s the one thing holding you back from that next level? Maybe it’s technical stuff, but more often than not, it’s the soft skills for career advancement—like learning how to actually lead a meeting without breaking a sweat. Once you identify those holes, you can stop guessing and start building. Instead of trying to learn everything at once, pick one specific area to tackle each month. It keeps the mountain from looking too steep and keeps you moving forward.

Finding Your Gaps Through a Simple Skill Gap Analysis for Employees

Finding Your Gaps Through a Simple Skill Gap Analysis for Employees

Think of a skill gap analysis like checking your toolbox before starting a big renovation. You wouldn’t start building a deck only to realize halfway through that you’re missing a circular saw, right? Doing a skill gap analysis for employees—or just for yourself—is about looking at where you are now and comparing it to where you want to be in a year or two. It’s not about beating yourself up over what you don’t know; it’s about making a realistic inventory of the tools you still need to pick up.

To do this, I like to grab a notepad and make two columns. On the left, list the tasks you nail every single day. On the right, list the things that make you sweat or the responsibilities you see people in higher roles handling effortlessly. This is where you’ll spot the holes. Maybe you’ve got the technical side down, but you need to lean into soft skills for career advancement, like better communication or conflict resolution. Once you see those gaps clearly, you stop guessing and start targeting your training.

5 Ways to Level Up Without Losing Your Mind

  • Find a “Low-Stakes” Mentor. You don’t need to hunt down a CEO for coffee. Look for that person in your office or industry who is just two steps ahead of you. They still remember what it was like to be in your shoes, and their advice is usually way more practical for the day-to-day grind.
  • Treat Learning Like a Side Project. I don’t try to overhaul my entire life on a Monday morning. Instead, I pick one specific thing—like learning a new software shortcut or mastering a presentation style—and spend just 20 minutes a day on it. It’s about steady progress, not a sudden sprint.
  • Build a “Win Folder.” This is a total game-changer for your confidence. Every time a boss sends a “thanks” email or you nail a tough project, screenshot it and toss it in a folder. When you’re feeling stuck or prepping for a raise, you’ve got a documented list of exactly why you’re awesome.
  • Mix Up Your Input. If you only read the same industry blogs, you’re going to get stuck in a loop. I like to look at how people in totally different fields solve problems. Sometimes a trick I learned from a DIY plumbing video actually helps me think more logically about a workflow problem at my desk.
  • Don’t Forget the “Soft” Stuff. We spend so much time obsessing over technical skills, but being the person who actually knows how to listen or manage a calendar is just as important. Being easy to work with is a skill in itself, and it’s one that’s always in high demand.

The Bottom Line: How to Keep Moving Forward

Don’t try to climb the whole mountain at once; pick one specific skill or goal and focus on making real, measurable progress there first.

Treat your career like a DIY project—regularly check in to see what tools (or skills) you’re missing so you aren’t caught off guard when a new opportunity pops up.

Remember that growth isn’t always about a massive promotion; sometimes it’s just about getting a little bit better at what you do every single day.

## The Big Picture

“Think of your career like a home renovation project: you don’t just tear down every wall on day one. You start by figuring out what’s broken, grab the right tools, and tackle one small fix at a time until the whole place feels right.”

Nathan Cole

Don't Overthink It, Just Start

Don't Overthink It, Just Start career growth.

Look, I know that staring down a massive career overhaul feels a lot like looking at a pile of disassembled engine parts or a kitchen renovation that’s gone sideways. It’s easy to get paralyzed by the scale of it all. But we’ve already done the heavy lifting by mapping out where you actually want to go and identifying those specific skill gaps that are holding you back. You don’t need to master everything by next Tuesday; you just need to pick one tool and start using it. Whether that means signing up for a single online course or finally asking a mentor for twenty minutes of their time, the goal is to turn that overwhelming mountain into a series of manageable, everyday tasks.

At the end of the day, professional growth isn’t about reaching some perfect, finished state where you suddenly know everything. It’s much more like my hobby of restoring old tools—it’s a process of constant, steady tinkering. You’re going to hit some rusty spots, and you might even strip a screw here or there, but that’s just part of the work. The most important thing is that you keep showing up and keep trying to figure it out. You’ve got the roadmap now, so stop staring at the blueprint and get your hands dirty. You’ve totally got this.

Frequently Asked Questions

I know what skills I'm missing, but how do I actually find the time to learn them without burning out at my current job?

Look, I get it. Trying to squeeze learning into a forty-hour work week feels like trying to fix a leaky pipe while the water’s still running. You can’t just add more to an overflowing bucket. Instead of trying to find “extra” time, try the “micro-habit” approach. Spend just fifteen minutes during your morning coffee or your lunch break on one specific task. It’s about small, consistent wins rather than marathon sessions that leave you fried.

Should I be focusing on learning new technical tools, or is it more important to work on "soft skills" like communication and leadership?

Honestly? It’s a bit of both, but think of it like building a house. Technical tools are your hammer and saw—you can’t build anything without them. But soft skills? That’s your blueprint and your ability to work with a crew. If you’ve got great tools but can’t communicate, the whole project falls apart. Don’t pick one; just aim for a solid balance so you can actually use those tools effectively.

How do I know if the professional development I'm doing is actually going to help me get a promotion or a better salary?

Look, I get it. You don’t want to spend your weekends grinding through a certification just to end up in the exact same spot a year from now. To see if it’s working, look for “signal.” Are you being handed higher-stakes projects? Are you solving problems that used to go over your head? If your new skills aren’t changing the nature of your daily tasks, they probably aren’t moving the needle on your paycheck yet.