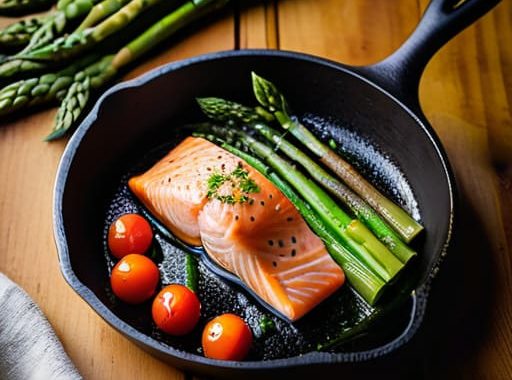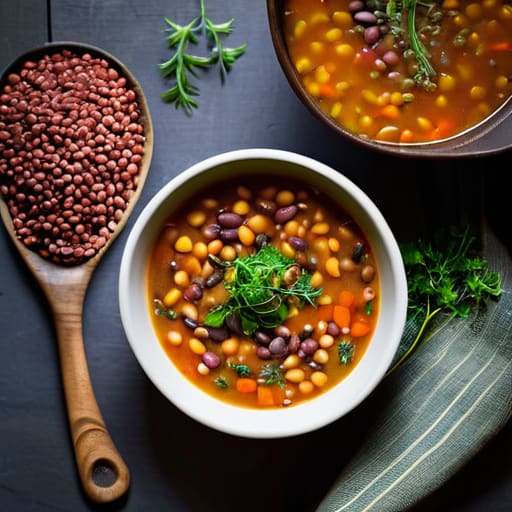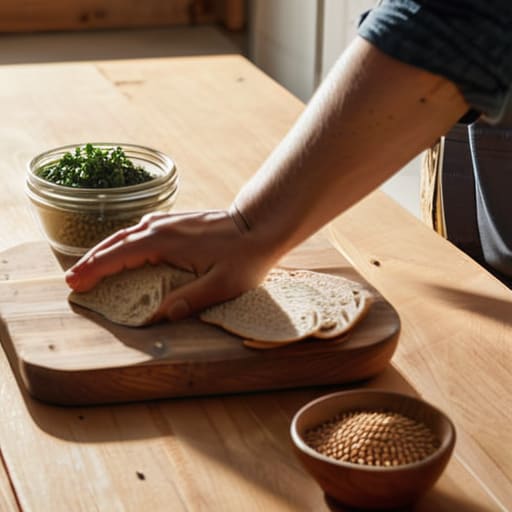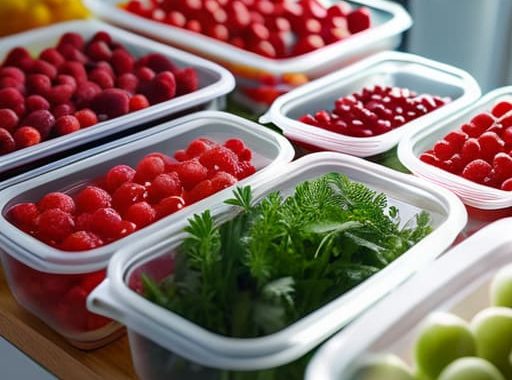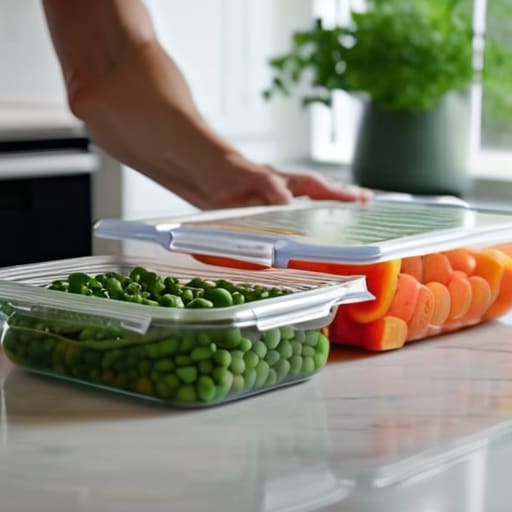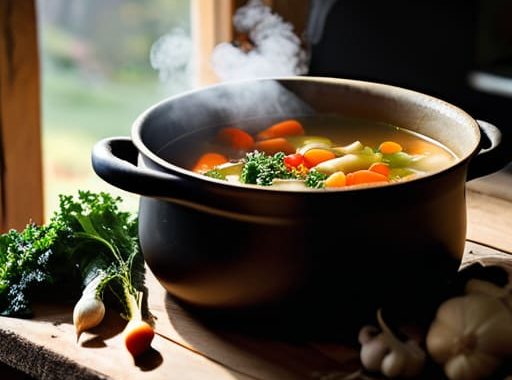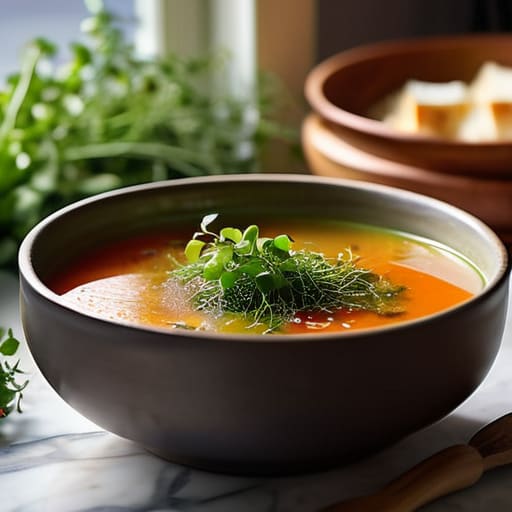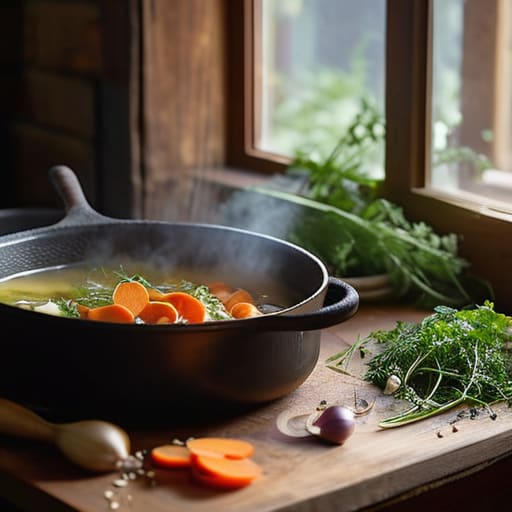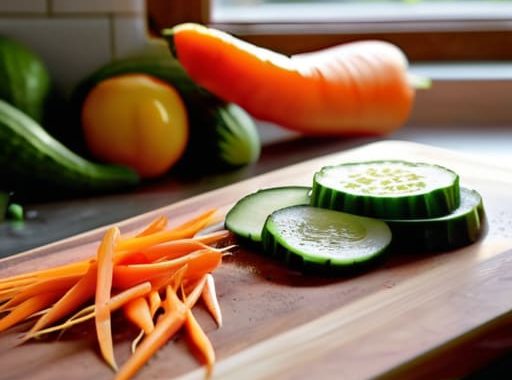
Easy simple sheet pan dinners for cleanup.

Simple Sheet-pan Dinners for Effortless Cleanup

Look, I get it. By the time Tuesday rolls around, the last thing anyone wants to do is stand over a hot stove for an hour or face a mountain of crusty pots and pans in the sink. I’ve been there—staring into a half-empty fridge after a long day, wondering if a bowl of cereal counts as a real meal. That’s exactly why I’m such a huge advocate for simple sheet pan dinners. It’s the ultimate “work smarter, not harder” hack for your kitchen. You just toss your ingredients on a tray, slide it into the oven, and let the heat do the heavy lifting while you actually relax for a minute.

In this guide, I’m breaking down five of my absolute favorite go-to recipes that prove you don’t need a culinary degree to eat like royalty. I’m talking about meals that are high on flavor but low on effort, using basic ingredients you can probably find at your local grocery store right now. Whether you’re a total beginner or just a busy person looking to reclaim your evening, these five ideas will show you how to master the art of the one-pan wonder without any of the usual kitchen drama.

Table of Contents

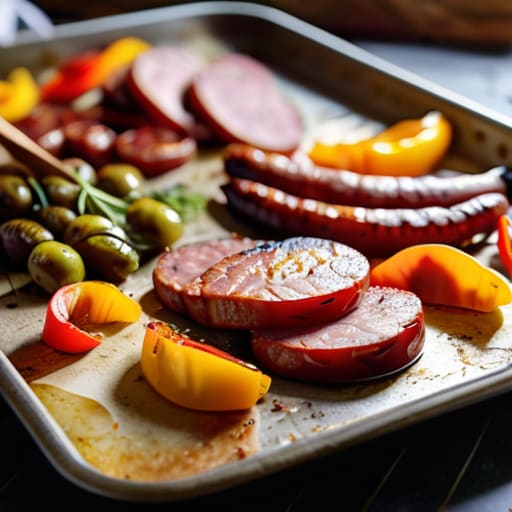
Sausage, Peppers, and Onions

Sheet pan Sausage, Peppers, and Onions.

This is my absolute go-to when I realize I haven’t been to the grocery store in four days and my fridge is looking a little sad. You just grab a pack of good Italian sausages, some bell peppers, and an onion, chop them up roughly, and toss them on the tray with a heavy hand of olive oil and dried oregano. The best part is that the juices from the sausage flavor everything else on the pan, so you don’t even need a fancy sauce to make it taste professional.

Lemon Garlic Chicken and Asparagus

Lemon Garlic Chicken and Asparagus dish.

If you’re feeling like you need a “real” meal that isn’t just heavy comfort food, this one is a lifesaver. I usually grab some chicken thighs—bone-in, skin-on is the way to go if you want that extra crispy skin—and lay them out alongside a bunch of trimmed asparagus. I just smash a few cloves of garlic over the whole thing and squeeze half a lemon over the top before it hits the heat.

Honey Mustard Salmon and Broccoli

Sheet pan Honey Mustard Salmon and Broccoli.

I used to think salmon was intimidating to cook, but honestly, once you realize you can just throw it on a sheet pan, it’s a total game changer. I like to whisk together a quick glaze of honey, Dijon mustard, and a splash of soy sauce, then brush it over the fillets along with some broccoli florets. The broccoli gets these amazing charred edges that soak up all that sweet and tangy mustard goodness.

Beef and Potato Hash

This one is basically a warm hug on a plate, and it’s perfect for those nights when you just want something hearty. I take some thinly sliced steak or even just some ground beef, toss it with cubed potatoes and whatever root veggies you have lying around, and season it heavily with salt, pepper, and maybe some smoked paprika. The key is to cut the potatoes small so they cook through completely without the meat getting overdone.

Mediterranean Shrimp and Veggie Medley

When the weather gets a little warmer and I don’t want a heavy meal, I lean hard into this Mediterranean-style setup. You just grab some peeled shrimp, cherry tomatoes, zucchini slices, and some kalamata olives, then toss them in olive oil and some dried thyme. The tomatoes basically burst in the oven, creating their own little sauce that coats the shrimp perfectly.

The Bottom Line on Sheet Pan Success

Don’t overthink the ingredients; as long as you have a protein, a veggie, and a decent seasoning, you’ve got a win on your hands.

Prep is your best friend—chopping everything into similar sizes ensures it all cooks evenly so you aren’t biting into a raw carrot next to a burnt chicken wing.

Invest in a good quality parchment paper or a silicone mat to make cleanup a breeze, because the best part of a one-pan meal is not having a mountain of dishes to scrub afterward.

## My Golden Rule for the Kitchen

“At the end of a long day, the last thing I want to do is play Tetris with a mountain of pots and pans; a good sheet pan dinner is about getting real food on the table with as little cleanup drama as possible.”

Nathan Cole

Getting Started in Your Own Kitchen

Look, the beauty of these sheet pan meals isn’t just that they taste great, but that they actually work for a real life. We’ve covered everything from the classic roasted chicken and veggies to those quick, spicy sausage bakes that save me on my busiest nights. The main thing to remember is that you don’t need a culinary degree or a kitchen full of fancy gadgets to pull this off. Just pick your protein, grab whatever vegetables are looking good in the fridge, toss them in some olive oil and seasoning, and let the oven do the heavy lifting. Once you get the hang of timing your ingredients so everything finishes at the same time, you’ll realize that dinner doesn’t have to be a chore.

At the end of the day, I want you to realize that cooking shouldn’t feel like another item on a stressful to-do list. It’s just about making something decent for yourself without the mountain of dishes or the hour-long cleanup. If you burn a batch or the veggies come out a little too soft, don’t sweat it. That’s just part of the process, and honestly, it usually still tastes fine with a bit of extra salt. You’ve got this. Grab a pan, get cooking, and enjoy the win of a homemade meal that didn’t cost you your entire evening.

Frequently Asked Questions

How do I make sure the meat is cooked through without turning my veggies into mush?

That’s the million-dollar question, right? There’s nothing worse than biting into a raw chicken breast only to find your broccoli has turned into gray mush. My trick? Timing and size. I always chop my “hard” veggies (like carrots or potatoes) into smaller pieces and my “soft” ones (like zucchini or peppers) into bigger chunks. If you’re using something really dense, like cauliflower, toss it in five minutes before the rest. It’s all about the prep.

Can I prep these ingredients ahead of time, or do I need to chop everything right before cooking?

You can absolutely prep ahead of time. In fact, if you’re like me and usually running behind after work, prepping is a lifesaver. Chop your veggies and proteins a day early, toss them into a sealed container or a heavy-duty Ziploc bag, and keep them in the fridge. When you’re ready to eat, just dump them onto the pan, season, and slide them in. It turns “cooking” into just “assembling.”

What’s the best way to clean the pan afterward so I'm not scrubbing for an hour?

Look, I get it. The whole point of a sheet pan dinner is to save time, not spend your entire evening hunched over the sink scrubbing burnt bits. Here’s my trick: while the pan is still warm (not scorching hot!), pour in some hot water and a generous squirt of dish soap. Let it sit for ten minutes. Usually, the residue just lifts right off. If it’s really stubborn, grab some coarse salt to scrub away the stuck-on bits.

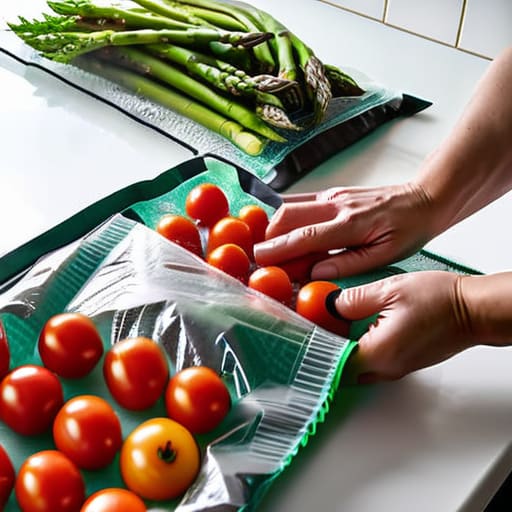
Tips on how to store food properly.

How to Store Food So It Stays Fresh Longer

I’ll never forget the smell of a bag of wilted, slimy spinach hitting me from the bottom of my fridge back in my twenties. I had just spent thirty bucks on a “healthy” grocery haul, only to watch half of it turn into a science experiment within three days. It’s incredibly frustrating because most of the advice you find online about how to store food properly makes it sound like you need a chemistry degree or a dozen specialized, expensive airtight containers just to keep a head of lettuce crisp. Honestly, most of that high-end kitchen gear is just marketing fluff designed to separate you from your hard-earned cash.

I’m not here to sell you on fancy gadgets or complicated systems that take more time than they save. Instead, I want to show you how to use what you already have in your kitchen to stop throwing money in the trash. I’ve spent years tinkering with my own kitchen setup and learning through trial and error, so I’m going to give you the straight-up, no-nonsense truth. I’ll break down simple, practical habits that actually work, so you can keep your groceries fresh and your budget intact without the headache.

Table of Contents

Simple Pantry Organization Tips to Extend Grocery Shelf Life

Simple Pantry Organization Tips to Extend Grocery Shelf Life

First things first, let’s talk about your pantry. I used to just shove everything into the cupboard and hope for the best, but that’s a recipe for finding a fuzzy bag of flour six months too late. One of my favorite pantry organization tips is to group things by how you actually use them—baking supplies in one spot, canned goods in another. This makes it way easier to see what you actually have before you head to the store, which is a huge win for your wallet.

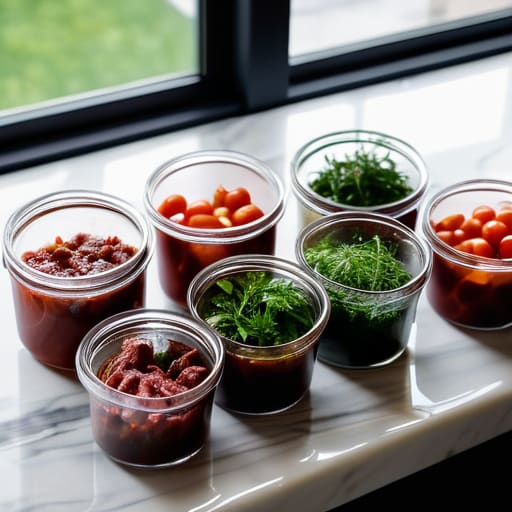
If you really want to level up, you need to ditch the flimsy, half-opened bags that come from the store. I’ve learned the hard way that investing in some decent glass or BPA-free plastic jars makes a massive difference. The airtight container benefits are huge because they keep moisture out and pests away, which is key for preventing food spoilage in dry goods like pasta, rice, or cereal. Plus, let’s be honest, seeing your ingredients neatly lined up in clear jars makes you feel like you actually have your life together. It’s a small change that goes a long way.

Mastering Refrigerator Temperature Settings for Better Freshness

Mastering Refrigerator Temperature Settings for Better Freshness

Now, let’s talk about the big chill. I used to just set my fridge to whatever number it came with and call it a day, but I realized that was a huge mistake. If your fridge is too warm, your milk turns sour before you can even finish the carton; if it’s too cold, you’re basically turning your lettuce into ice. To get the best results, you really need to dial in your refrigerator temperature settings to stay between 37°F and 40°F. I always keep a cheap analog thermometer on one of the middle shelves just to be sure, because those digital displays on the front can be notoriously unreliable.

Once you’ve got the temp dialed in, you can start focusing on preventing food spoilage by where you actually place things. Don’t just shove everything in the door—that’s the warmest spot in the whole unit! Keep your dairy and meat in the back where it’s coldest, and leave the crisper drawers for your veggies. It’s a small tweak, but it makes a massive difference in how long your groceries actually stay edible.

5 Quick Wins to Keep Your Food from Going Bad

  • Don’t just toss everything in the crisper drawer. I’ve learned the hard way that some veggies, like carrots, actually stay crunchy way longer if you store them in a jar of water in the fridge.
  • Keep your onions and potatoes far away from each other. It sounds weird, but if you store them together, the moisture from the onions will make your potatoes sprout and go soft before you can even use them.
  • Give your berries a little TLC by washing them in a vinegar-water soak. It sounds like an extra step, but it actually kills off that fuzzy mold and keeps them fresh for a few extra days.
  • Treat your bread like a VIP and keep it out of the fridge. The cold air actually dries it out faster, so unless you’re planning on not eating it for a week, keep it on the counter in a bread box or just freeze it.
  • Use your freezer as your secret weapon. If you see that spinach or those herbs starting to wilt, don’t toss them—chop them up, throw them in a bag, and freeze them for your next smoothie or soup.

Quick Wins to Keep Your Food Fresh

Treat your fridge like a tool kit—keep it organized and at the right temperature so you aren’t constantly hunting for stuff or letting things wilt.

Stop throwing money in the trash by using your pantry the right way; a little bit of organization goes a long way in keeping your dry goods from going stale.

Remember that food storage isn’t about being perfect, it’s just about making a few smart, simple tweaks that save you time and cash in the long run.

## A Quick Reality Check

“Look, I’ve definitely been the guy throwing away a bag of slimy spinach and a carton of fuzzy strawberries, and let me tell you—it feels like throwing cash straight into the trash. Storing food right isn’t about being a gourmet chef; it’s just about being smart with what you’ve already paid for.”

Nathan Cole

Making It Stick

Organizing kitchen systems for Making It Stick.

Look, I know that keeping track of every single head of lettuce or bag of flour feels like a second job, but it really does pay off. By just taking a few extra minutes to get your pantry organized and making sure your fridge is actually running at the right temperature, you’re doing more than just tidying up—you’re saving hard-earned cash. It’s about those small, repeatable habits, like checking your expiration dates once a week or grouping your dry goods so nothing gets lost in the back of a dark cupboard. Once you get these simple systems in place, you’ll stop seeing so much food end up in the trash, and your kitchen will feel a whole lot more manageable.

At the end of the day, don’t feel like you have to overhaul your entire kitchen in a single afternoon. I’ve learned through plenty of wasted groceries and messy counters that the best way to change is to just start small. Pick one shelf or one drawer this week and get it right. Before you know it, you’ll have a rhythm down that makes cooking easier and keeps your budget on track. Trust me, once you see how much less you’re throwing away, you’ll realize that most things are totally figure-out-able if you just take them one step at a time. You’ve got this!

Frequently Asked Questions

Should I keep my onions and potatoes together, or will that make them spoil faster?

Keep them apart! I learned this the hard way when I accidentally turned a whole bag of potatoes into mush. Onions release ethylene gas, which basically tells your potatoes to start sprouting and rotting way faster than they should. Think of it like this: they’re roommates that just don’t get along. Keep your potatoes in a cool, dark spot, and stash your onions somewhere else entirely to keep both of them fresh longer.

Is it actually worth it to buy those airtight containers, or can I just use what I already have in the cupboard?

Honestly, don’t go out and drop a bunch of cash on fancy matching sets just yet. If you’ve got old glass jars from pasta sauce or decent Tupperware lying around, use them! They do the job just fine. I only suggest investing in actual airtight containers for things that go stale fast—like coffee, flour, or crackers. For everything else, save your money and stick to what you’ve already got in the cupboard.

How do I know if a piece of produce has actually gone bad or if it's just a little bruised?

Look, I’ve been there—staring at a slightly soft peach, wondering if I’m about to get food poisoning or just wasting good fruit. Here’s my rule of thumb: if it’s just a soft spot or a bruise, trim that part away and use the rest. But if it smells funky, looks slimy, or has actual fuzzy mold growing on it? Toss it. When in doubt, trust your nose and your gut. Better safe than sorry.

Guide on how to cook eggs.

How to Cook Eggs Every Way (and Nail It)

I still remember standing in my first tiny apartment kitchen, staring at a greasy pan and a carton of eggs like they were some kind of high-tech puzzle I couldn’t solve. I’d tried following those fancy, over-the-top cooking shows where everything looks effortless, but I usually ended up with something that looked more like rubber than breakfast. It’s frustrating because people make learning how to cook eggs seem like this culinary art form that requires expensive copper pans and a chef’s degree, but honestly? That’s total nonsense. You don’t need a gourmet setup to get a decent meal on the table when you’re hungry and tired.

I’m not here to give you some flowery, complicated recipe that requires twenty different ingredients you don’t have in your pantry. My goal is to strip away the fluff and show you that this is one of the most figure-out-able skills you can master. I’m going to walk you through a few foolproof methods that actually work in a real-world kitchen, using the basic tools you already own. We’re going to break this down into simple, actionable steps so you can stop guessing and start actually enjoying your breakfast.

Table of Contents

Mastering Egg Cooking Temperatures for Perfect Results

Mastering Egg Cooking Temperatures for Perfect Results

Here’s the deal: heat is everything. I learned the hard way that if you treat a pan like it’s always on high, you’re going to end up with rubbery, sad-looking breakfast. Most of the magic happens in the tiny differences between “warm” and “hot.” When you’re looking for that perfect egg yolk consistency, you have to respect the thermometer (or at least your eyes). For example, if you’re going for creamy scrambled eggs, you want low and slow. If you crank the heat too fast, the proteins tighten up immediately, and you lose that velvety feel.

If you’re moving away from the pan and toward the pot, timing becomes your new best friend. I always keep a mental boiled egg timing guide handy because even sixty seconds can be the difference between a jammy, golden center and a chalky, overdone mess. It’s all about controlling the energy you’re putting into the food. Once you get a feel for how different heat levels affect the whites and yolks, you’ll stop guessing and start actually cooking with confidence.

The Secret to Achieving Your Ideal Egg Yolk Consistency

The Secret to Achieving Your Ideal Egg Yolk Consistency

This is where most people get tripped up, but honestly, it’s just a game of patience and a little bit of timing. Whether you’re craving a runny yolk to dip toast into or something jammy and rich, the trick is realizing that the yolk reacts to heat almost instantly once the whites have set. If you’re going the soft-boiled route, I always keep a boiled egg timing guide taped to my fridge. Even a thirty-second difference can be the gap between a liquid gold center and a yolk that’s gone completely chalky.

If you’re more of a breakfast-sandwich person, you’ll want to focus on your egg yolk consistency during the frying process. I like to turn the heat down low and put a lid over the pan for the last minute; that gentle steam cooks the top of the white without turning the yolk into rubber. It’s one of those small tweaks that makes a massive difference in how the final dish feels. Once you nail that balance, you’ll realize that getting it exactly how you like it is way easier than it looks.

Five little tricks to make your eggs taste like a pro made them

  • Grab yourself some fresh eggs from the fridge right before you start. If they sit out on the counter and get too warm, they’re way harder to crack cleanly without getting tiny shards of shell in your pan.
  • Don’t be afraid of a little fat. Whether it’s a knob of salted butter or a tiny splash of olive oil, you need that lubricant to keep the whites from sticking to the pan like glue.
  • Use a non-stick pan if you have one, but give it a quick wipe down first. Any leftover residue from yesterday’s dinner can mess with how the egg slides around.
  • Keep a lid handy. If you’re poaching or frying and want that beautiful, soft-set top without overcooking the bottom, just pop a lid over the pan for thirty seconds to trap the steam.
  • Season at the very end. If you salt your eggs too early while they’re still liquid, it can actually change the texture and make them a bit watery. Hit them with the salt and pepper right before they hit the plate.

The quick rundown: What you need to remember

Temperature is your best friend; keep that heat low and steady to avoid rubbery whites or burnt bottoms.

Don’t be afraid to experiment with your timing—finding that sweet spot for your yolk is all about trial and error.

It’s way more figure-out-able than it looks, so grab a pan and just start practicing; you’ll nail it in no time.

## My Golden Rule for the Kitchen

“Look, you don’t need a culinary degree or some fancy copper pan to get this right; you just need to respect the heat and realize that a little patience goes a lot further than a high flame ever will.”

Nathan Cole

You’ve Got This

Perfectly cooked eggs: You've Got This.

Look, I know it might seem like a lot to keep track of—managing your heat so you don’t end up with rubbery whites, or timing that yolk just right so it’s perfectly jammy instead of a watery mess. But once you get the hang of these basics, you’ll realize that cooking eggs isn’t some high-stakes culinary exam; it’s just about paying attention to the pan. Whether you’re scrambling them up for a quick breakfast or trying to nail a fancy poached egg for brunch, just remember to keep your temperature in check and don’t be afraid to adjust as you go.

At the end of the day, the most important thing is that you actually get in there and try it. You might burn a few, or your first fried egg might look a little more “rustic” than a restaurant version, but that is exactly how you learn. Every time you turn on that stove, you’re building a skill that stays with you for life. Don’t let a simple egg intimidate you—embrace the mess, enjoy the process, and remember that even the best chefs started exactly where you are right now. Now, go grab a pan and get cooking!

Frequently Asked Questions

Do I really need to use butter, or can I get away with just using oil from a spray can?

Look, you can definitely use the spray oil if you’re in a rush or trying to keep things light, but if you want that classic breakfast flavor, butter is king. It adds a richness that oil just can’t touch. If you do go the spray route, just make sure your pan is nice and hot first so the eggs don’t immediately bond to the surface. It’s all about what you’ve got in the pantry.

How do I know if my eggs are actually fresh before I crack them into the pan?

The easiest way to do this without making a mess is the “float test.” Grab a glass of water and drop your egg in. If it sinks to the bottom and stays flat, it’s golden. If it stands up on one end but stays submerged, it’s getting older but still fine to use. But if it floats to the top? Toss it. That means too much air has gotten in there, and it’s best to play it safe.

What’s the best way to clean up the pan if I end up with that stubborn, crusty egg residue stuck to the bottom?

Don’t go at it with a metal scrubber right away—you’ll ruin that non-stick surface I spent good money on. Instead, just pour in a little water and a drop of dish soap while the pan is still warm. Bring it to a simmer on the stove for a minute or two. That heat breaks the bond of that crusty residue, making it slide right off with a soft sponge. Easy win.

Tips on how to cook on a budget.

How to Cook Great Meals on a Tight Budget

I remember sitting in my first studio apartment back in my early twenties, staring at a receipt that looked more like a phone number than a grocery bill. I was exhausted from working odd jobs, and the idea of figuring out how to cook on a budget felt like another massive project I didn’t have the tools for. I used to think that eating well meant buying those fancy organic pre-cut veggies or spending a fortune on “specialty” ingredients that just sat in my pantry gathering dust. Honestly, most of the advice you see online makes it sound like you need a culinary degree and a massive time commitment just to avoid eating instant noodles for the third night in a row.

But here’s the thing: most of that stuff is just noise. I’ve spent years tinkering in my kitchen and learning through trial and error, and I’ve realized that feeding yourself well is actually a lot like fixing a leaky faucet—it’s just about having the right approach. In this guide, I’m going to skip the fluff and give you the straight-up, practical steps I use to keep my meals delicious without draining my bank account. We’re going to focus on simple swaps and smart habits that actually work in the real world.

Table of Contents

Smart Meal Planning for Beginners to Stop the Stress

Smart Meal Planning for Beginners to Stop the Stress

Look, I used to be the guy who would walk into a grocery store without a plan, grab whatever looked good, and then stare blankly at the fridge on Tuesday night wondering what to make. That’s a one-way ticket to expensive takeout or, even worse, letting a bag of wilted spinach die in the crisper drawer. If you want to actually see your savings grow, you’ve got to get comfortable with meal planning for beginners. It isn’t about being a gourmet chef or spending hours in the kitchen; it’s just about making a roadmap before you ever step foot in the store.

The trick is to start small. Instead of trying to plan twenty-one different meals, just pick three or four solid dinners you know you’ll actually eat. Once you have those, you can build an affordable grocery list ideas around them, focusing on low cost pantry staples like rice, beans, and pasta. When you know exactly what you’re looking for, you stop impulse-buying those pricey snacks that blow your budget. It takes a little bit of brainpower upfront, but the peace of mind is worth every second.

Building Your Low Cost Pantry Staples Foundation

Building Your Low Cost Pantry Staples Foundation

Once you’ve got your meal plan sketched out, the next step is to stop treating your kitchen like a high-end boutique and start treating it like a workshop. You need a solid base of materials that won’t expire the moment you look away. I’m talking about low cost pantry staples like dried beans, lentils, rice, oats, and pasta. These are the “lumber” of the cooking world—they aren’t flashy, but they provide the structure for almost every meal. If you keep these on hand, you’ll never find yourself staring blankly at an empty fridge at 6:00 PM, wondering what to do.

When I’m grocery shopping on a budget, I try to avoid the “middle aisles” filled with expensive, pre-packaged snacks and instead focus on these versatile basics. Spices and oils are your finishing touches; they’re what turn a plain bowl of rice and beans into something that actually tastes like a real meal. By investing a little bit of money upfront in these shelf-stable essentials, you’re essentially building a safety net that makes every future meal much cheaper and a whole lot faster to whip up.

5 Pro-Tips to Keep Your Grocery Bill From Spiraling

  • Master the art of the “Meatless Monday” (or any day, really). Meat is usually the biggest chunk of the grocery bill, so swapping a steak for a hearty lentil stew or a black bean taco night once or twice a week can save you a ton of cash without leaving you hungry.
  • Stop buying pre-cut stuff. I know, it’s tempting to grab the pre-chopped onions or the bagged salad when you’re tired, but you’re paying a massive premium for someone else to use a knife. Buy the whole head of lettuce and the bag of onions; it takes five extra minutes of prep, but it keeps more money in your pocket.
  • Shop your own kitchen first. Before you head out to the store, take a good look in your pantry and freezer. I’ve saved so many dinners just by realizing I already had a box of pasta and a jar of marinara hiding in the back. If you know what you already have, you won’t buy duplicates.
  • Embrace the frozen aisle. People think frozen veggies are “lesser,” but they’re actually a budget lifesaver. They’re picked at peak ripeness, they won’t rot in your crisper drawer if you forget about them for a week, and they’re way cheaper than the fresh stuff out of season.
  • Learn to love “Leftover Makeovers.” Don’t just eat the same boring leftovers the next day. Turn last night’s roasted chicken into a chicken salad sandwich, or toss those leftover veggies into an omelet for breakfast. It turns “scraps” into a brand-new meal and keeps your food waste—and your spending—at zero.

The Bottom Line: Keeping Your Kitchen Budget-Friendly

Stop treating every meal like a new project; when you lean on those pantry staples you’ve already built up, you save money and a whole lot of mental energy.

Planning isn’t about being perfect or following a rigid, boring schedule—it’s just about having a rough roadmap so you aren’t making expensive, last-minute decisions when you’re hungry.

Remember that most of the “expensive” parts of cooking are the extras; if you master the basics and swap out the pricey stuff for smart alternatives, you’ll eat better for way less.

My Philosophy on the Kitchen Budget

“Eating well doesn’t require a gourmet grocery budget; it just requires a little bit of strategy and the willingness to trade fancy packaging for smart, simple ingredients you can actually work with.”

Nathan Cole

Putting It All Into Practice

Putting It All Into Practice with cooking.

At the end of the day, cooking on a budget isn’t about deprivation or eating bland, sad meals; it’s about being a little more intentional with how you shop and prep. We’ve talked about how much easier life gets when you have a solid meal plan to guide you and a pantry stocked with those versatile, low-cost staples that can turn into a dozen different dishes. When you stop making impulse buys at the grocery store and start leaning on the ingredients you already have, you’ll see those savings start to pile up. It’s really just a series of small, smart adjustments that eventually turn into a much more sustainable way of living.

I know it can feel a bit daunting when you’re staring at a receipt that’s way higher than you wanted it to be, but please don’t get discouraged if you don’t get it perfect right away. I’ve definitely had weeks where my “plan” went totally out the window, and that’s okay. The goal isn’t perfection; it’s just about making things a little more figure-out-able one meal at a time. Just grab your grocery list, keep it simple, and remember that you’ve totally got this. Once you get into the rhythm of it, you’ll realize that taking control of your kitchen is one of the best ways to take control of your life.

Frequently Asked Questions

How do I keep my food from going bad if I'm buying in bulk to save money?

The “Bulk Buy Trap” is real—you save five bucks today only to toss twenty bucks of spoiled spinach next week. My rule of thumb? Buy for the freezer, not the fridge. If you’re grabbing a massive bag of rice or frozen veggies, make sure you have airtight containers or heavy-duty freezer bags ready. For things like meat, portion them out before they freeze so you aren’t thawing a whole slab for one taco night.

What are some cheap ways to add flavor to basic pantry staples so I don't get bored eating the same thing?

Look, I get it. Eating beans and rice every night can feel like a chore if everything tastes the same. The secret isn’t expensive gourmet ingredients; it’s all about the “flavor trifecta”: acid, heat, and aromatics. A squeeze of lime or a splash of vinegar wakes up a dull stew, while some decent chili flakes or even just toasted garlic adds that punch. Grab a few cheap spices—cumin, smoked paprika, or dried oregano—and suddenly, that basic pantry meal feels like a real dish.

Is it actually cheaper to meal prep everything on Sunday, or am I just spending more on groceries upfront?

That’s a great question, and honestly, I used to wrestle with it too. Here’s the deal: meal prepping on Sunday usually costs more that specific day because you’re buying in bulk to stock the fridge. But if you look at the weekly total, you’ll almost always come out ahead. It stops those “I’m too tired to cook” $25 takeout orders from creeping in. Think of it as an upfront investment to save your wallet later.

Quick and easy dinner recipes for weeknights.

Easy Dinner Recipes for Busy Weeknights

We’ve all been there: it’s 6:00 PM, you’re staring blankly into a fridge that looks more like a graveyard for half-used condiments, and the thought of a complicated recipe feels like climbing a mountain. Between work, errands, and just trying to keep your head above water, the last thing anyone needs is a kitchen disaster or a mountain of dishes. I used to think that eating well meant spending hours hovering over a stove, but I’ve learned that finding reliable, easy dinner recipes is actually the secret to surviving the week without losing your mind—or your budget.

I’m not talking about those fancy, twenty-step meals you see on TV that require ingredients you can’t even pronounce. Instead, I’ve rounded up five of my absolute favorite go-to meals that are actually doable for anyone, even if your only kitchen experience is boiling water. These are the kind of one-pan, low-effort wins that I rely on when I’m tired but still want something better than a lukewarm takeout box. Stick with me, and I’ll show you how to turn a few basic staples into a solid meal in no time at all.

Table of Contents

The One-Pan Sheet Pan Sausage and Veggies

The One-Pan Sheet Pan Sausage and Veggies.

Look, I’ve had plenty of nights where the thought of scrubbing three different pots makes me want to just order pizza. That’s why I swear by the sheet pan method. You just chop up some smoked sausage, whatever veggies are looking sad in your crisper drawer—bell peppers, onions, or broccoli work great—and toss them all on a baking sheet with some olive oil, salt, and pepper. Throw it in a hot oven and let the magic happen while you actually relax for twenty minutes.

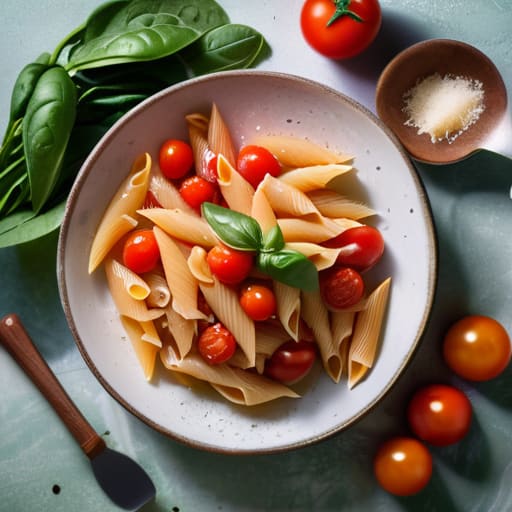
Pantry-Staple Pesto Pasta

Quick Pantry-Staple Pesto Pasta meal.

We’ve all been there: it’s 6:30 PM, you’re exhausted, and the fridge is looking pretty empty. When I’m in that spot, I head straight for the pantry. A box of pasta and a jar of decent pesto is basically a lifesaver. It takes about ten minutes to boil the water, and once that pasta is tender, you’re basically halfway to a gourmet-feeling meal without needing a culinary degree.

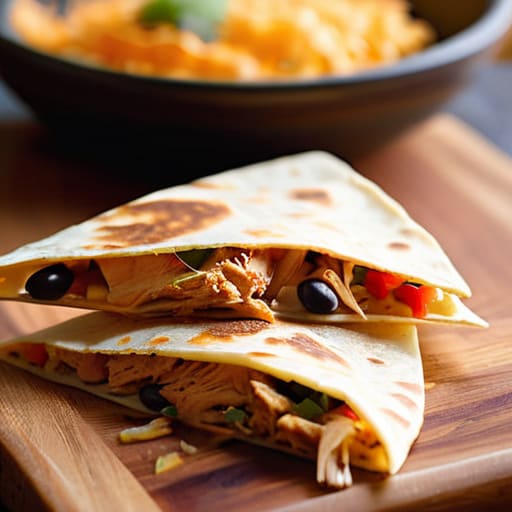
Loaded Black Bean Quesadillas

Loaded Black Bean Quesadillas with melted cheese.

If you’ve got tortillas and a can of black beans, you’ve got a dinner. I used to think quesadillas were just for kids, but once you start loading them with actual substance, they become a total staple in my rotation. Just rinse those beans, smash a few of them with a fork so they don’t roll out of the tortilla, and layer them with whatever cheese you have on hand.

Skillet Ground Beef and Rice Bowls

This is one of those “workhorse” meals that I find myself making at least once a week. It’s basically a deconstructed version of a burrito bowl, but you do it all in one skillet to save on cleanup. Brown some ground beef or turkey, throw in some garlic powder and onion powder, and then mix in some pre-cooked rice or even a bag of frozen rice medley.

The "Everything" Breakfast for Dinner

Sometimes, the easiest way to handle a tough day is to lean into the comfort of breakfast. I call this my “emergency dinner” because you almost always have the ingredients sitting in the fridge. Scrambled eggs, a couple of slices of toast, and maybe some bacon or sausage if you’re feeling fancy. It’s fast, foolproof, and honestly, it’s hard to mess up an egg.

The Bottom Line on Stress-Free Cooking

Keep your pantry stocked with a few “emergency” staples so you’re never staring blankly at an empty fridge when you’re tired.

Don’t sweat the small stuff—if a recipe calls for an ingredient you don’t have, just swap it for something similar and keep moving.

The goal isn’t a five-star meal every night; it’s about getting something decent on the table without losing your mind or your budget.

## My Philosophy on the Kitchen

“Look, I’m not trying to win a Michelin star here. At the end of a long day, I just want something that tastes good, fills me up, and doesn’t leave me with a mountain of dishes that makes me want to quit cooking altogether. If it’s simple enough to pull off when you’re tired, it’s a win in my book.”

Nathan Cole

Getting It Done in the Kitchen

Look, at the end of the day, these five recipes aren’t about becoming a Michelin-star chef or spending three hours scrubbing pots and pans. They’re about cutting the chaos out of your evening. Whether you went with the one-pan roasted chicken or that quick pasta, the goal was the same: getting a decent, warm meal on the table without losing your mind. You don’t need a pantry full of exotic spices or a kitchen full of fancy gadgets to make this work; you just need a little bit of prep and the willingness to try something new. Once you realize how few moving parts these meals actually have, you’ll stop seeing dinner as a daunting chore and start seeing it as something you can actually manage.

If you messed up a step or the seasoning wasn’t quite right, don’t sweat it. I’ve burnt more toast and over-salted more soups than I care to admit, but that’s just part of the process. The real win isn’t a perfect plate; it’s the fact that you did it yourself. Cooking is a skill just like fixing a leaky sink or troubleshooting a router—it gets easier the more you roll up your sleeves and dive in. So, pick one of these for tomorrow night, keep it simple, and give yourself some credit for taking control of your kitchen. You’ve got this.

Frequently Asked Questions

Can I swap out the proteins in these recipes if I'm trying to save even more money or eat more plant-based?

Absolutely. In fact, that’s my favorite way to cook. I’m always swapping things out based on what’s on sale or what’s sitting in my pantry. If chicken is pricey, grab some canned chickpeas or black beans—they’re cheap, filling, and work great in almost any pan. If you’re going plant-based, lentils or firm tofu are your best friends here. Just keep an eye on your cooking times, and you’ll be golden.

What are some basic pantry staples I should keep on hand so I can whip these up even faster?

Look, I’ve learned the hard way that half the battle is just having the right stuff in the cupboard before you even start cooking. To move fast, keep these basics on hand: olive oil, kosher salt, black pepper, garlic powder, and a few dried herbs like oregano or crushed red pepper. Grab some rice, pasta, and canned beans too. If you’ve got those, you’re never more than ten minutes away from a solid meal.

If I'm cooking for a bigger family, how easy is it to scale these recipes up without making a massive mess?

Scaling up is actually where these kinds of recipes shine, but you’ve gotta be smart about it. My rule of thumb? Don’t just double everything in one pan or you’ll end up with a soggy mess. Grab a larger heavy-duty sheet pan or a bigger Dutch oven to keep the heat even. If you’re doing a massive batch, I usually prep everything in bowls first—it keeps the counter from looking like a disaster zone while you work.

Guide on how to cook fish.

How to Cook Fish Without the Fear (or the Smell)

I still remember the first time I tried to make salmon for a date. I’d watched a fancy cooking show where the chef used tweezers and talked about “delicate textures,” and I ended up with a grey, rubbery mess that smelled like a pier at low tide. It was embarrassing, and it honestly made me think that learning how to cook fish was some kind of high-level culinary magic reserved for people with expensive degrees. But here’s the truth: you don’t need a sous-chef or a kitchen full of gadgets to get a perfect sear. Most of the “rules” you see online are just unnecessary complications designed to make a simple task feel much harder than it actually is.

I’m not here to give you a lecture on molecular gastronomy or tell you to buy a hundred-dollar thermometer. Instead, I’m going to show you the practical, no-nonsense way to handle a fillet without stressing out. We’re going to break this down into a few repeatable steps—from getting the pan hot enough to knowing exactly when to flip it—so you can walk into your kitchen with actual confidence. My goal is to make sure that the next time you pull a piece of fish out of the fridge, you feel completely in control.

Table of Contents

Picking the Best Fish for Beginners Without the Stress

Picking the Best Fish for Beginners Without the Stress

I know the seafood counter can feel like a high-stakes test you didn’t study for, but I promise it’s not as intimidating as it looks. When you’re starting out, you want something forgiving—fish that won’t fall apart the second it hits the heat. I always tell people that the best fish for beginners are the “meaty” varieties like salmon or halibut. These guys are sturdy and have a bit more fat to work with, which means they stay juicy even if you overcook them by a minute or two.

If you’re feeling a bit budget-conscious or just want to avoid the guesswork of a busy market, don’t sleep on the freezer aisle. I’ve found that some of the best fresh vs frozen fish tips involve realizing that high-quality frozen fillets are often flash-frozen at peak freshness, making them super consistent for a weeknight meal. Just make sure you thaw them completely in the fridge before you start. Once you’ve picked your piece, don’t worry too much about fancy techniques; just grab some salt, pepper, and a squeeze of lemon, and you’re already halfway there.

Fresh vs Frozen Fish Tips for a Better Meal

Fresh vs Frozen Fish Tips for a Better Meal

Now, here is the big debate: should you head to the seafood counter or grab something from the freezer aisle? Honestly, there isn’t a wrong answer here, but there are definitely some fresh vs frozen fish tips I’ve learned the hard way. If you’re buying fresh, just make sure it smells like the ocean, not like “fishy” fish. If it has a strong odor, leave it on the shelf.

On the flip side, don’t sleep on the frozen stuff. In fact, for many of us, frozen is actually better because it’s flash-frozen at the peak of freshness. My biggest piece of advice? If you go the frozen route, thaw it completely in the fridge overnight before you even think about touching a pan. If you try to cook a half-frozen fillet, you’ll end up with a soggy mess that’s impossible to flip. Once it’s thawed and patted dry with a paper towel, you’re ready to go. It’s all about setting yourself up for a win before the heat even hits the stove.

5 Simple Ways to Stop Fearing the Frying Pan

  • Pat that fish dry like your life depends on it. I know it sounds extra, but if your fillet is wet when it hits the pan, it’s going to steam instead of sear. Grab some paper towels and get it bone-dry so you get that crispy skin we’re all after.
  • Don’t be afraid to turn up the heat. A common mistake I see is people cooking on medium-low because they’re scared of sticking. Get your oil shimmering hot first; that heat creates a natural barrier that helps the fish release from the pan once it’s actually cooked.
  • Resist the urge to poke it. I get it, you want to see if it’s done, but every time you flip or move that fillet too early, you risk breaking it into a million pieces. Let it sit. If it’s sticking, it’s usually telling you it isn’t ready to flip yet.
  • Season right before it hits the heat. If you salt your fish and let it sit on the counter for twenty minutes, the salt pulls moisture out of the flesh. Just season it right as you’re ready to drop it in the pan to keep that texture perfect.
  • Use the “flake test” instead of a timer. Every stove and every piece of fish is different, so a recipe’s timing is really just a suggestion. Take a fork and gently press near the thickest part; if it flakes easily along the natural lines, you’ve nailed it.

Quick Wins for Your First Fish Night

Don’t overthink the selection—if it smells like the ocean and looks firm, you’re already halfway to a win.

Frozen is totally fine, just make sure you thaw it properly in the fridge so the texture doesn’t get mushy.

Focus on the heat; getting that pan hot before the fish hits the surface is the secret to preventing it from sticking.

My Golden Rule for the Kitchen

“Look, you don’t need a culinary degree to make a great piece of fish; you just need to stop overthinking it. If you can master the heat in your pan and learn to listen to that sizzle, you’re already halfway to a meal that tastes like you spent way more money than you actually did.”

Nathan Cole

You’ve Got This

Cooking perfect fish: You’ve Got This.

At the end of the day, cooking fish isn’t about being a Michelin-star chef; it’s about knowing a few basics so you don’t end up with a burnt mess. We’ve covered how to pick out a solid piece of fillet, why you shouldn’t be afraid of the frozen aisle, and how to keep things simple in the kitchen. Just remember to watch your heat and don’t be afraid to use a meat thermometer if you’re feeling unsure. If you focus on getting the pan hot and respecting the ingredients, you’re already halfway to a restaurant-quality meal right in your own kitchen.

I know that first time you drop a piece of salmon into a sizzling pan, your heart might race a little. I’ve been there, staring at a piece of whitefish wondering if I just ruined dinner. But here is the secret: even if it comes out a little overdone, it’s still going to taste great with a squeeze of lemon and some salt. Most things in life—and definitely most things in the kitchen—are just a matter of trial and error. So, grab a fillet, turn up the heat, and just give it a shot. You might be surprised at how much you actually enjoy it.

Frequently Asked Questions

How do I know when the fish is actually done without overcooking it and making it dry?

The “is it done yet?” panic is real, but you don’t have to guess. My go-to move is using an instant-read thermometer—it’s a total game changer. Aim for 145°F, but honestly, if you pull it off the heat at 140°F and let it rest for a minute, it’ll hit that sweet spot perfectly. If you don’t have a thermometer, just flake it with a fork; if it separates easily without being mushy, you’re golden.

Do I really need to buy a meat thermometer, or is there an easier way to tell?

Look, I get it. You don’t want another gadget cluttering up your kitchen drawer. Honestly? If you’re just starting out, you don’t need one, but I’ll be real with you: a cheap digital thermometer is a total game-changer for peace of mind. If you really want to skip it, just watch for the flakes—when the fish pulls apart easily with a fork, it’s usually ready. Just don’t overdo it!

What's the best way to get that crispy skin I see in restaurants without it sticking to the pan?

That restaurant-style crispy skin is the holy grail, but I’ll be honest—it’s usually the part that makes people want to give up on pan-searing. The secret isn’t a fancy technique; it’s moisture control. Grab some paper towels and pat that skin bone-dry before it even touches the pan. Then, get your oil shimmering hot, lay the fish in away from you, and—this is the hard part—don’t touch it until it naturally releases.

Tips on how to cook without a recipe.

How to Cook a Great Meal Without a Recipe

I remember standing in my first tiny apartment kitchen, staring at a half-empty jar of salsa, a limp bell pepper, and some leftover chicken, feeling completely defeated because I didn’t have a printed instruction manual to tell me what to do next. I used to think that if I wasn’t following a precise list of measurements, I was just making a mess. But honestly, that’s a total lie. Most of those fancy, step-by-step guides actually strip the fun out of eating, and they definitely don’t help when you’re staring at a random assortment of ingredients in your fridge at 7:00 PM. Learning how to cook without a recipe isn’t about being a professional chef; it’s about realizing that food is way more flexible than a textbook makes it out to be.

I’m not here to give you some flowery culinary lecture or tell you to buy a thousand-dollar knife set. Instead, I’m going to show you how to use common sense and basic logic to turn whatever you have on hand into a solid meal. I’ll break it down into simple, repeatable patterns—like balancing salt, fat, and acid—so you can stop stressing over the fine print and start trusting your gut.

Table of Contents

Mastering the Art of Understanding Cooking Ratios

Mastering the Art of Understanding Cooking Ratios

Once you stop staring at the measurements on a page, you start seeing the patterns. That’s where understanding cooking ratios comes into play. Think of it like building a house; you don’t need a blueprint for every single nail if you understand how the frame holds together. In the kitchen, it’s all about the relationship between your base, your fats, and your acids. If you’ve got a heavy, creamy pasta sauce that feels a bit “blah,” you don’t need a new recipe—you probably just need a splash of lemon juice or vinegar to cut through that weight.

This is the backbone of true pantry staple cooking. Instead of hunting for a specific jar of pre-made sauce, you learn that a certain amount of tomato paste plus a splash of broth and some garlic will always get you 90% of the way there. Once you grasp these basic proportions, you stop being a follower and start being a creator. It’s less about math and more about learning the rhythm of the ingredients so you can pivot on the fly without breaking a sweat.

Building Flavor Profiles With Simple Pantry Staple Cooking

Building Flavor Profiles With Simple Pantry Staple Cooking

Once you’ve got the ratios down, the real fun begins with pantry staple cooking. You don’t need a spice cabinet filled with expensive, hard-to-find herbs to make something taste professional. Most of the time, I’m just working with the basics: garlic powder, dried oregano, some red pepper flakes, and maybe a splash of soy sauce or vinegar. The trick is learning how these little guys interact. I like to think of it as building a foundation; you start with your base fats and aromatics, and then you layer in the heavy hitters.

Instead of staring at a list of ingredients, try practicing some basic flavor profiling techniques by playing with the five tastes: salty, sweet, sour, bitter, and umami. If a sauce tastes a bit flat, don’t just reach for more salt—try a squeeze of lemon or a teaspoon of honey. It’s all about balance. Once you start seasoning by taste rather than by measurement, you’ll stop feeling like you’re following a script and start feeling like you’re actually in control of the pan.

5 Ways to Stop Stressing and Start Cooking

  • Taste as you go. This is the big one. I can’t tell you how many times I’ve followed a recipe to the letter only to realize it’s missing a pinch of salt or a squeeze of lime. Grab a clean spoon, taste your sauce, and ask yourself: “Does this need more acid, more salt, or more heat?”
  • Learn your “flavor families.” Instead of memorizing a specific dish, learn which flavors play nice together. If you’ve got garlic, ginger, and soy sauce, you’re basically halfway to a great stir-fry. If you’ve got lemon, thyme, and olive oil, you’re set for roasted chicken. Once you see the patterns, the recipe becomes optional.
  • Use your senses, not just your eyes. A recipe might tell you to cook something for ten minutes, but your ears and nose are much better judges. Listen for that sizzle in the pan—if it goes quiet, your heat is too low. Smell the aromatics; when the onions turn translucent and smell sweet, you know you’re on the right track.
  • Don’t fear the “improvised” ingredient. If a recipe calls for heavy cream and you only have half-and-half or even a bit of Greek yogurt, just use it. I’ve learned more from my “oops, I’m out of this” moments than I ever did from a cookbook. Most of the time, the substitution actually makes the dish better.
  • Keep a “control” dish in your repertoire. Pick one thing you make well—maybe it’s a basic pasta sauce or a simple roasted veggie medley. Use that as your baseline. When you want to try something new, start with that familiar foundation and then start tweaking it one variable at a time until it feels like your own.

The Quick Cheat Sheet for Cooking by Feel

Stop obsessing over exact measurements and start thinking in ratios—once you know the basic balance of fats, acids, and seasonings, you can wing almost any dish.

Keep your pantry stocked with “flavor lifters” like garlic, dried herbs, and vinegars so you can fix a bland sauce on the fly without needing a grocery run.

Trust your senses over the printed page; if it looks too dry, add a splash of liquid, and if it tastes flat, hit it with some salt or acid until it sings.

## The Secret to Getting Comfortable

“A recipe is just a map, but once you know the terrain, you don’t need to stare at the paper anymore—you just start driving.”

Nathan Cole

Trust Your Gut and Get Cooking

Trust Your Gut and Get Cooking.

At the end of the day, cooking without a recipe isn’t about being a professional chef or having some magical intuition; it’s just about understanding the mechanics of flavor. Once you’ve wrapped your head around basic ratios and how to lean on your pantry staples to build a foundation, the fear of “messing up” starts to disappear. You stop looking at a pile of random vegetables and see a potential meal. Remember, it’s all about balancing those salty, sour, and fatty elements until the pan tastes right to you. If you can master the logic behind the ingredients, you can cook almost anything with whatever happens to be in your fridge.

I know it feels a little intimidating to close that cookbook and just start tossing things in a pan, but I promise you, the best meals I’ve ever made weren’t the ones that followed a strict set of instructions. They were the ones where I trusted my instincts and adjusted as I went. Don’t be afraid to make a mistake—even a “failed” dish is just a lesson in what not to do next time. So, grab a pan, turn up the heat, and just start experimenting. You’ve got this, and I guarantee you’ll feel a massive sense of pride the first time you whip up something delicious entirely on your own terms.

Frequently Asked Questions

What do I do if I realize halfway through cooking that I've totally messed up the balance of flavors?

Don’t panic—I’ve been there, usually standing over a pot of something that tastes like a salt lick. First, stop adding ingredients and take a breath. If it’s too salty, add an acid like lemon juice or a splash of vinegar to cut through it, or throw in a potato to soak up some excess. If it’s bland, you likely need fat or salt. Just keep tweaking in small increments until it clicks.

Is there a specific way to figure out how much of a certain spice to use without accidentally ruining the whole dish?

Look, I’ve definitely nuked a pot of chili by going overboard with the cumin before. My rule of thumb? Start small. Think of spices like adding screws to a project—you can always add more, but you can’t take them out once they’re in. Add a pinch, stir it well, and actually taste it. If it’s still a bit flat, add another. It’s much easier to build flavor up than to fix a disaster.

How do I know when a dish is actually "done" if I'm not following the timing instructions in a cookbook?

Look, forget the timer on your stove; it’s more of a suggestion than a rule. To know if something is actually done, you’ve got to use your senses. Use a thermometer for meat—it’s the only way to be sure. For veggies, look for that “fork-tender” feel where they give way without turning into mush. Most importantly, taste it. If the texture feels right and the flavors have finally married, you’re good to go.
Delicious easy vegetarian recipes for meat lovers.

Easy Vegetarian Recipes Even Meat-lovers Enjoy

I’ll be the first to admit it: for a long time, I thought “going vegetarian” meant I’d be stuck eating nothing but sad, unseasoned salads or expensive, processed meat substitutes that taste like cardboard. If you’re staring at a fridge full of veggies and feeling totally overwhelmed, I get it. It’s easy to feel like you need a culinary degree just to make a plant-based meal that actually satisfies a hungry stomach. But honestly, finding easy vegetarian recipes shouldn’t feel like a second job or a massive chore. Most of the time, the barrier isn’t the cooking itself; it’s just not having a solid, no-nonsense game plan for how to combine flavors without spending three hours over a stove.

That’s exactly why I’ve put this list together for you. I’ve rounded up five of my absolute favorite go-to meals that are perfect for those busy weeknights when you just want something delicious without the drama. We’re going to skip the complicated techniques and focus on real-world cooking that anyone can master. By the time you finish reading, you’ll have five foolproof ideas that prove you can eat well, save some cash, and actually enjoy the process of making meatless meals from scratch.

Table of Contents

One-Pan Black Bean Quesadillas

One-Pan Black Bean Quesadillas in a skillet.

Look, I know what you’re thinking—you’re tired and you don’t want to spend an hour scrubbing pots and pans. This is my go-to when I’ve had a long day of tinkering in the garage and just want something filling and fast. All you need is a large skillet, some flour tortillas, a can of black beans, and whatever shredded cheese you’ve got sitting in the fridge. I like to rinse the beans first to keep things clean, then smash them a little bit so they don’t roll out of the tortilla when you take a bite.

The "Everything in the Pantry" Chickpea Salad

The "Everything in the Pantry" Chickpea Salad.

If you’re like me, you probably have a cupboard full of cans that you haven’t touched in months. This chickpea salad is basically a way to audit your pantry while making a decent lunch. Grab a can of chickpeas, drain them, and toss them in a bowl with whatever crunchy veggies are looking sad in your crisper drawer—think cucumbers, bell peppers, or even some red onion. I usually toss in a handful of feta cheese if I’m feeling fancy, but don’t sweat it if you don’t.

Sheet Pan Roasted Veggies and Gnocchi

Sheet Pan Roasted Veggies and Gnocchi.

I used to think gnocchi was something you had to boil in a pot of water, but I was wrong. If you buy the shelf-stable or refrigerated kind, you can actually toss them straight onto a baking sheet with some veggies. I love using a mix of broccoli florets, halved cherry tomatoes, and bell peppers. Throw them all on a pan with a generous glug of olive oil and some dried oregano, and let the oven do the heavy lifting while you relax for twenty minutes.

Red Lentil "Lazy" Stew

Lentils are the unsung heroes of the vegetarian world, especially red ones. Unlike green lentils that take forever to soften, red lentils basically dissolve into a thick, comforting base that feels like a warm hug. I start by sautéing some onions and garlic in a pot, then I dump in a cup of lentils and a can of crushed tomatoes. It’s a set-it-and-forget-it kind of situation that smells incredible while it simmers.

Pesto Pasta with Frozen Peas

Sometimes, you just need a win, and this is the easiest win in my book. This isn’t a gourmet recipe meant to impress a food critic; it’s a survival meal that tastes great every single time. Boil your favorite pasta shape, and about two minutes before it’s done, throw a cup of frozen peas right into the boiling water with the noodles. It saves you from cleaning an extra pot and ensures the peas are perfectly bright and snappy.

The Bottom Line on Easy Veggie Cooking

Don’t get hung up on perfection; the goal is just to get some decent, filling food on your plate without spending two hours at the stove.

Keep a few pantry staples like canned beans, rice, and spices on hand so you can whip these meals up even when your fridge looks a little bare.

Start small with these recipes, and once you feel comfortable, start swapping in whatever veggies you actually have on hand to make them your own.

My Philosophy on Meatless Meals

“You don’t need a culinary degree or a pantry full of expensive superfoods to make vegetarian cooking work; you just need a few solid staples and the confidence to know that a hearty, satisfying meal is way more figure-out-able than the fancy cookbooks make it seem.”

Nathan Cole

You’ve Got This

At the end of the day, getting into vegetarian cooking doesn’t require a culinary degree or a pantry full of expensive, hard-to-find specialty items. We’ve looked at how you can lean on hearty staples like beans and lentils, use seasonal veggies to keep costs down, and rely on simple seasonings to make everything pop. Whether you’re whipping up a quick one-pan stir fry or a comforting pasta dish, the goal is to keep things simple and repeatable. You don’t need to master a hundred different techniques; you just need a few reliable recipes that you can cook on autopilot when you’re tired after a long day.

I know that changing up your eating habits can feel a little daunting at first, but I promise you that it is much more figure-out-able than it seems. Don’t stress if your first attempt isn’t a five-star masterpiece—even I mess up a sauce or overcook my chickpeas every once in a while. Just keep experimenting, keep it practical, and remember that every meal is just another chance to learn something new. You’re doing great, and honestly, there is nothing quite like the feeling of sitting down to a meal you built from scratch. Now, go grab your apron and get to it!

Frequently Asked Questions

I'm worried about protein—how do I make sure these meals actually keep me full until my next meal?

Look, I get it. I used to think a bowl of pasta was a meal, only to be starving twenty minutes later. The trick is to stop thinking about “vegetables” and start thinking about “building blocks.” You’ve got to lean hard on beans, lentils, tofu, or even some Greek yogurt. If you pair a hearty grain like quinoa with a solid legume, you’re getting that protein punch that actually keeps your stomach from growling mid-afternoon.

Is it going to cost me way more at the grocery store to buy all these specialty meat substitutes?

Look, I’ll be straight with you: if you’re constantly grabbing those expensive, branded “fake meats” that bleed like real beef, your grocery bill is going to take a hit. I’ve been there. But here’s the secret—the real money-savers are the basics. Beans, lentils, eggs, and seasonal veggies are dirt cheap. If you lean on those instead of the specialty aisle, you’ll actually probably spend less than you did buying meat.

Can I prep these recipes ahead of time on a Sunday, or do they get soggy if they sit in the fridge?

You can definitely prep these on a Sunday, but you’ve got to be a little strategic about it. For the grain bowls or hearty stews, go for it—they actually taste better after a day in the fridge. But if you’re doing anything with fresh greens or crunchy veggies, keep those separate until you’re ready to eat. If you mix everything in one big container too early, yeah, you’re going to end up with a soggy mess.

Quick and easy healthy breakfast ideas.

Healthy Breakfast Ideas You Can Make in Minutes

Look, I get it. Most mornings feel like a race against the clock, and by the time you’ve actually found your keys, you’re already running on fumes. I used to think that eating well meant spending an hour hovering over a stove or buying those overpriced, pre-packaged wellness bars that taste like flavored cardboard. But honestly? Most of those fancy routines are just too much work for a Tuesday morning. If you’re tired of hitting that snooze button only to settle for a sugary doughnut or, even worse, nothing at all, you need some reliable healthy breakfast ideas that actually fit into a real, busy life.

I’ve spent plenty of time tinkering in my kitchen, testing out what actually sticks and what just creates more dishes to wash. In this guide, I’m breaking down five of my go-to options that are quick, budget-friendly, and—most importantly—actually taste good. I promise these aren’t some complicated gourmet recipes; they are simple, foolproof ways to fuel your body so you aren’t crashing by 10:00 AM. Let’s get into it and get you fueled up.

Table of Contents

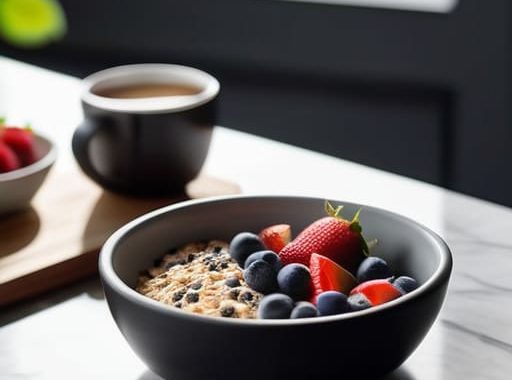
Overnight Oats That Actually Taste Good

Overnight Oats That Actually Taste Good.

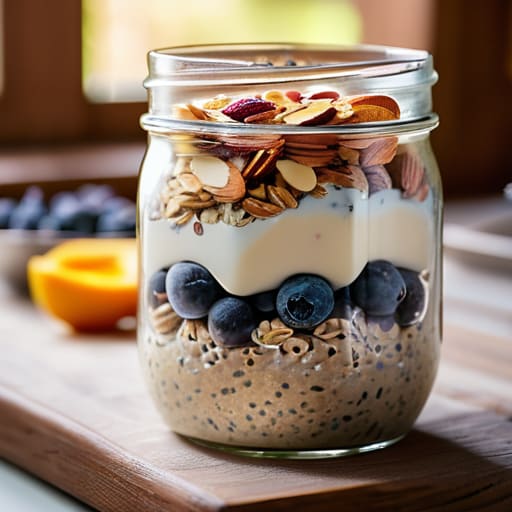
If you’re like me and usually rushing out the door with nothing but a lukewarm coffee, this is your new best friend. You just grab a jar, toss in some rolled oats, milk (or a dairy-free version), and a spoonful of chia seeds, then let it sit in the fridge overnight. By morning, the oats have soaked up all that liquid and turned into a creamy, pudding-like texture that doesn’t feel like you’re eating cardboard.

The One-Pan Egg Scramble

The One-Pan Egg Scramble with vegetables.

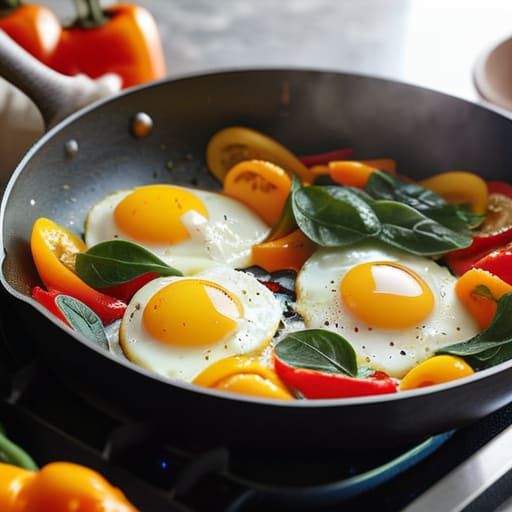
There’s nothing quite like the smell of eggs hitting a hot pan to make you feel like you actually have your life together. I like to keep it simple: crack two or three eggs into a skillet with whatever veggies are looking a little sad in your crisper drawer—spinach, peppers, or even some leftover onions. It’s the ultimate low-effort, high-reward way to get some protein in your system without a mountain of dishes to wash later.

Avocado Toast with a Protein Kick

Avocado Toast with a Protein Kick.

Now, I know avocado toast can sometimes feel like a fancy brunch cliché, but when you make it at home, it’s just a smart, practical meal. Smashing half an avocado onto a thick slice of toasted whole-grain bread gives you those healthy fats that keep you feeling full. I always make sure to use a decent quality bread—the kind that has a bit of a sturdy crunch to it—so it doesn’t get soggy under the weight of the toppings.

Greek Yogurt Power Bowls

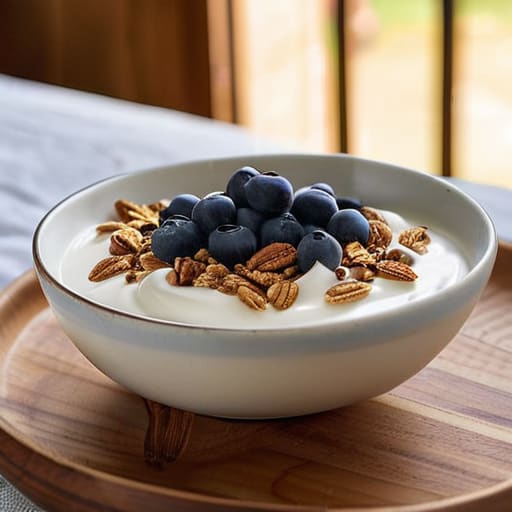
Sometimes you don’t want to turn on the stove at all, and that’s where a Greek yogurt bowl comes in handy. I keep a big tub of plain, unsweetened Greek yogurt in the fridge because it’s packed with protein and it’s incredibly versatile. Avoid the pre-flavored cups that are basically just liquid sugar in disguise; instead, add your own sweetness with a little bit of honey or some fresh fruit.

Nut Butter and Banana Toast

When I’m running even shorter on time than usual, I go for the old reliable: nut butter and banana. It’s a classic for a reason. Spreading some almond or peanut butter on toasted rye or sourdough provides a great base, and the banana adds just enough natural sweetness to satisfy a craving. It’s a balanced combo of fats, carbs, and a little bit of fiber that hits the spot every time.

The Bottom Line on Easy Mornings

Don’t aim for perfection on day one; just pick one recipe that fits your schedule and stick to it until it becomes a habit.

Prep work is your best friend—if you spend ten minutes the night before, you’ll save twenty minutes of chaos in the morning.

Keeping the basics like oats, eggs, and frozen fruit on hand means you’ll never be forced to grab expensive, sugary junk when you’re in a rush.

## My Take on Morning Fuel

“Look, you don’t need a gourmet chef or a massive grocery budget to win the morning; you just need a plan that’s easier to follow than the snooze button.”

Nathan Cole

Getting Started Without the Stress

Look, I know that trying to overhaul your entire morning routine feels like a massive project, but you don’t need to be a gourmet chef to eat well. Whether you’re leaning into the speed of overnight oats, grabbing something protein-packed like Greek yogurt, or just tossing some eggs in a pan, the goal is the same: fueling your body so you aren’t crashing by 10:00 AM. You don’t need a pantry full of expensive superfoods or a kitchen that looks like a magazine spread. Just pick one of these options that fits your schedule and keep it simple. If you can make a sandwich or boil an egg, you can definitely master these breakfast hacks.

At the end of the day, the most important thing isn’t perfection—it’s just showing up for yourself. I used to think that if I didn’t have a perfectly balanced, organic meal prepared, I had already failed the day. But I’ve learned that even a small, smart choice is a huge win for your energy and your mood. Don’t let the fear of a messy kitchen or a tight morning stop you from trying something new. You’ve got this, and I promise that once you start seeing how much better you feel, it becomes second nature. Now, go grab some oats or crack an egg and get after it!

Frequently Asked Questions

I'm always on the move—can I prep these ahead of time on a Sunday to save time during the week?

You bet you can. In fact, if you’re anything like me, Sunday prep is the only way you’re actually going to eat well when Tuesday morning hits and you’re running late. I usually spend about forty minutes on a Sunday chopping fruit, boiling a batch of eggs, or portioning out my oats into jars. It’s a little extra work upfront, but it saves you from the “grab a sugary granola bar” panic later.

Do I really need to spend extra money on "superfoods," or can I make these work with whatever is already in my pantry?

Look, I’ll give it to you straight: you can absolutely skip the expensive “superfood” labels. I’ve learned that a lot of those fancy powders are just marketing in a shiny bag. If you’ve got oats, peanut butter, or frozen berries in your pantry, you’re already winning. It’s not about the price tag on the box; it’s about the fuel you’re actually putting in your body. Keep it simple, keep it cheap, and just get it done.

What are some good ways to add more protein to these ideas if I'm feeling hungry again by mid-morning?

Look, I get it. I’ve been there—stomach growling by 10:00 AM because my breakfast didn’t quite hit the mark. If you’re feeling the mid-morning slump, you just need more staying power. Try stirring a scoop of Greek yogurt into your oats, tossing a handful of hemp seeds or chia seeds onto your fruit, or even adding a hard-boiled egg on the side of your toast. It’s a quick fix that keeps you full longer.

Guide on how to bake bread at home.

How to Bake Bread at Home (no Fancy Equipment)

I still remember the first time I tried to tackle a sourdough starter. I spent three weeks hovering over a jar of flour and water like it was a science experiment, only to end up with a sticky, sour mess that looked more like drywall compound than food. Most of the fancy tutorials online make it seem like you need a degree in chemistry and a hundred-dollar proofing basket just to get a decent crust. Honestly, it’s a total myth that you need all that gear to learn how to bake bread at home. You don’t need a specialized kitchen or a decade of training; you just need to stop overthinking the process and start trusting the basics.

I’m not here to sell you on some complicated, twelve-step artisan ritual that takes up your entire weekend. My goal is to strip away the fluff and show you that bread making is actually pretty figure-out-able with just a few pantry staples and a little patience. I’m going to walk you through a straightforward, no-nonsense method that works, even if your kitchen is small and your equipment is basic. By the time we’re done, you’ll be pulling warm, crusty loaves out of your own oven without all the stress.

Table of Contents

Choosing the Right Flour Types for Bread Success

Choosing the Right Flour Types for Bread Success

Before you even touch a bowl, you’ve got to talk about the foundation: your flour. I know, it sounds boring, but picking the wrong bag is the fastest way to end up with a dense, brick-like loaf that’ll break a tooth. If you’re just starting out with bread making for beginners, my best advice is to stick to the basics. You’re looking for flour with high protein content, because that protein is what creates the gluten structure needed to trap those lovely gases during the yeast fermentation process.

Most folks head straight for All-Purpose, which works fine in a pinch, but if you want that professional, chewy texture, you really want to grab some Bread Flour. It’s got a higher protein punch that gives your dough more “strength” to rise. If you’re feeling adventurous and want to try a rustic sourdough, you might experiment with Whole Wheat, but just a heads-up: it’s heavier and absorbs more water, so it can be a bit trickier to handle. Just pick one reliable type to start with, and don’t overthink it.

Essential Baking Equipment That Wont Break the Bank

Look, I get it. You walk into a kitchen supply store and suddenly you’re staring at a $500 professional mixer and a dozen different specialized bowls, wondering if you even need any of it. Here’s the truth: you don’t. When it comes to bread making for beginners, the goal is to get some flour and water into an oven, not to build a laboratory. You really just need a decent mixing bowl, a sturdy spoon, and a kitchen scale. Seriously, skip the measuring cups if you can; weighing your ingredients is the single best way to ensure your dough turns out consistent every single time.

Beyond the basics, you’ll want a simple baking sheet or a Dutch oven if you have one tucked away in a cupboard. A heavy pot helps trap steam, which is one of those pro proofing bread tips that makes your crust crackle just right. You don’t need fancy gadgets to master essential baking equipment; you just need the right tools to support the process. If you’ve got a bowl, a scale, and a way to bake it, you’re already halfway there.

Five Pro Tips to Keep Your Kitchen From Turning Into a Flour War Zone

Five Pro Tips to Keep Your Kitchen From Turning Into a Flour War Zone
  • Don’t rush the rise. I know it’s tempting to turn the oven on the second you finish kneading, but dough works on its own schedule. If your kitchen is chilly, your bread will take longer to puff up—just be patient and let the yeast do its thing.
  • Get a digital scale if you can. I used to eyeball everything with measuring cups, but flour is sneaky; you can pack way too much into a cup and end up with a loaf that’s basically a brick. Weighing your ingredients in grams is the easiest way to get consistent results every single time.
  • Watch the dough, not the clock. Every house has different humidity and temperature, so a recipe might say “let rise for one hour,” but your dough might need ninety minutes. Look for it to roughly double in size rather than staring at your watch.
  • Master the “Windowpane Test.” Before you stop kneading, grab a small piece of dough and stretch it thin. If it stretches until it’s translucent without tearing, you’ve built enough gluten to hold all those lovely air bubbles. If it snaps immediately, keep working that dough.
  • Give it room to breathe after baking. This is the hardest part for me, but resist the urge to slice into that loaf the second it comes out of the oven. The bread is actually still cooking inside while it cools; cutting it too early lets the steam escape and can leave you with a gummy texture.

Quick Wins for Your First Loaf

Don’t sweat the expensive gear; you really only need a few basic tools to get a great crust and crumb.

Get your flour right from the start, because using the wrong type is the easiest way to end up with a brick instead of a loaf.

Remember that baking is a process of trial and error, so keep things simple and don’t be afraid to make a mess.

## My Take on the Whole Process

“Look, you don’t need a professional kitchen or a fancy degree to make a killer loaf. At the end of the day, bread is just flour, water, salt, and a little bit of patience—and once you nail that first batch, there’s nothing quite like the feeling of knowing you built something real with your own two hands.”

Nathan Cole

You've Got This

Baking bread basics: You've Got This.

So, let’s look at the big picture before you get your hands messy. We’ve covered how to pick out the right flour so your loaf actually has some structure, and we talked about grabbing the basic gear without spending a fortune at a specialty kitchen shop. Remember, you don’t need a professional-grade stone oven or a fancy French mill to get started; you just need the right ingredients and a little bit of patience. Once you’ve got your flour and basic tools sorted, the rest is really just about getting comfortable with the rhythm of the dough. It might feel a bit clunky the first few times, but that’s just part of the process of learning the craft.

At the end of the day, don’t sweat the small stuff. If your first loaf comes out a little dense or looks more like a brick than a baguette, don’t throw in the towel. I’ve definitely had my fair share of “bread bricks” in my own kitchen, and honestly, they still taste great with enough butter. The real magic isn’t in a perfect crust; it’s in the fact that you made something from scratch using nothing but flour, water, and salt. So, preheat that oven, get stuck in, and embrace the mess. I promise you, that first warm slice is going to feel incredibly rewarding.

Frequently Asked Questions

I tried making a loaf and it came out like a brick—what am I doing wrong with my kneading?

Man, I’ve been there. There is nothing quite as soul-crushing as pulling a literal brick out of your oven after all that work. Usually, when a loaf is that dense, it means you didn’t develop enough gluten through kneading. You’ve gotta work that dough until it’s smooth and elastic, not just “mixed.” Try the “windowpane test”—stretch a small piece of dough; if it pulls thin enough to see light through without tearing, you’re golden.

Do I really need to buy a kitchen scale, or can I just use measuring cups like everyone else?

Look, I get it. Measuring cups are right there in the drawer, and they’re easy. But if you want to stop guessing and start actually baking, get a scale. Measuring flour by volume is a trap; one person scoops a light handful, while another packs it down like they’re tamping concrete. That’s the difference between a fluffy loaf and a brick. It’s a cheap upgrade that’ll save you a ton of frustration.

How do I know if my yeast is actually alive or if I'm just wasting flour?

There is nothing more frustrating than getting all your ingredients ready only to realize your yeast is dead. Don’t guess—test it! Grab a small glass, add a half-cup of warm water (not hot, or you’ll kill it!), and stir in a teaspoon of sugar. Drop in your yeast and wait about ten minutes. If it gets foamy and smells like beer, you’re golden. If it just sits there looking sad, toss it and grab a new packet.