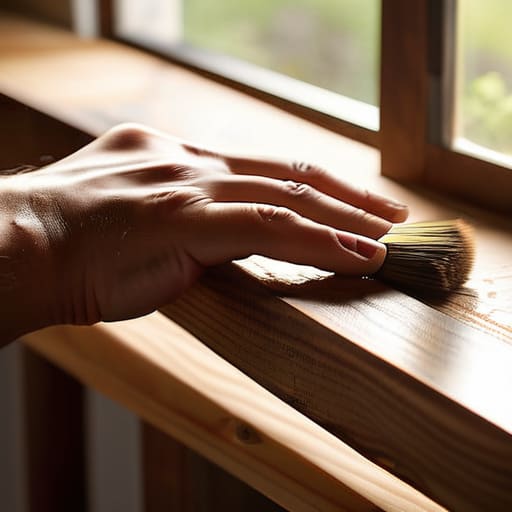
How to fix scratched wood furniture.

How to Fix Scratches on Wood Furniture

I was mid-way through making a sandwich last Tuesday when I saw it—that deep, ugly gouge right across my favorite oak dining table, courtesy of a misplaced kitchen knife. My first instinct was to panic and think I’d need to call in a professional or, even worse, sand the whole thing down to nothing. But here’s the thing: most people think you need a full workshop of expensive tools to handle surface damage, but that’s a total myth. Learning how to fix scratched wood doesn’t require a degree in carpentry or a massive budget; usually, it just takes a little patience and the right approach to match the finish.

I’ve spent years tinkering with old furniture and fixing up my own place, and I promise you, most of these marks are way more figure-out-able than they look. In this guide, I’m going to skip the technical jargon and show you exactly how to tackle everything from light scuffs to those annoying deep scratches. I’ll walk you through the simple, no-nonsense methods I use in my own shop so you can restore that smooth finish and feel that win of a job well done.

Table of Contents

Guide Overview

Total Time: 1-3 hours
Estimated Cost: $20-50
Difficulty: Beginner

Tools & Supplies

  • Sandpaper (various grits for smoothing)
  • Microfiber cloth (for cleaning dust)
  • Wood filler or wax sticks (small container)
  • Wood stain or touch-up marker (1 pen/bottle)
  • Furniture polish (1 small bottle)

Step-by-Step Instructions

  • 1. First things first, you need to grab a clean rag and some mild soap to give the area a good wipe-down. I know it sounds basic, but if there’s any lingering furniture polish, wax, or even just kitchen grease sitting in those scratches, your fix isn’t going to stick. Just make sure it’s completely dry before you move on to the next step.
  • 2. Once it’s clean, take a close look at the damage to see what we’re actually dealing with. If it’s just a light surface scuff, you might be able to get away with a little bit of elbow grease and a walnut or a specialized wood marker. If the scratch is deep enough that you can feel it with your fingernail, we’re going to need to get a bit more hands-on with some sandpaper.
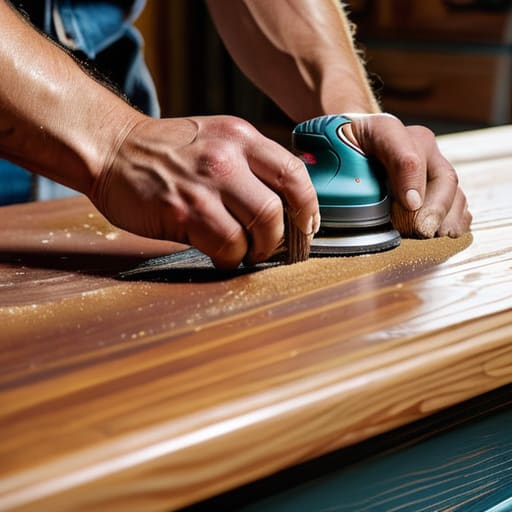
  • 3. If the scratch is deeper, grab some fine-grit sandpaper—I usually reach for 220-grit or even 320-grit for this. You want to sand very gently in the direction of the wood grain. Whatever you do, don’t go in circles or sand like you’re trying to level a floor, or you’ll end up with a divot that’s way harder to fix than the original scratch.
  • 4. After you’ve smoothed out the edges of the scratch, it’s time to fill the gap. You can pick up a small tub of wood filler at any hardware store (and trust me, you’ll find yourself there more often than you think). Use a small putty knife to press the filler into the scratch, making sure it’s packed in tight so there are no air pockets left behind.
  • 5. Let that filler dry completely—check the label on the tub, but I usually give it at least an hour to set. Once it’s firm, take that same fine-grit sandpaper from earlier and lightly sand the filler until it sits perfectly flush with the rest of the wood surface. You shouldn’t be able to feel where the filler starts and the wood ends.
  • 6. Now comes the part that makes everything look professional: matching the color. If you used a filler, it might look a little pale, so grab some stain markers or a tiny bit of wood stain to blend it in. Start with a light touch; you can always add more color, but it’s a total pain to strip it back if you go too dark.
  • 7. Finally, you’ve gotta protect your hard work. Wipe away any excess stain and then apply a thin coat of furniture wax or polish over the spot. This doesn’t just give it a nice sheen, it also helps seal the repair so it stays looking great while you’re actually using the piece.

Matching Wood Stain Colors Without the Guesswork

Matching Wood Stain Colors Without the Guesswork

Now, here’s where most people get a little nervous: picking the right color. I’ve definitely been there, standing in the middle of a hardware aisle staring at fifty different shades of “Oak” and feeling completely lost. When you’re matching wood stain colors, the biggest mistake you can make is trying to pick a shade based on the bottle alone. Lighting in a store is totally different from the light in your living room, and wood is a living thing—it absorbs color differently depending on the grain.

My best piece of advice? Always grab a few small tester cans if you can. Find an inconspicuous spot on the underside of the furniture or even inside a cabinet door to test your match. Once you apply it, let it dry completely before you decide if it’s a winner. If you’re restoring wood finish on an older piece, remember that the original stain has likely faded or darkened over the years. You aren’t just matching the wood; you’re matching the history of that piece. Take your time with this part—it’s much easier to add more color than it is to scrub it off!

Removing Surface Scratches From Timber With Ease

Removing surface scratches from timber with ease.

Before you jump straight into the heavy-duty stuff, I always tell people to check just how deep that scratch actually goes. If it’s just a light scuff on the surface, you might not even need to reach for the sandpaper. Sometimes, removing surface scratches from timber is as simple as using a bit of fine-grit sandpaper or even a specialized polishing cloth to smooth things over. I’ve found that if you catch these early, you can save yourself a massive headache later on.

If the scratch is a bit more stubborn, you’ll want to focus on buffing out wood imperfections to level the playing field. Grab a high-grit sanding sponge—something around 320 or 400—and work in the direction of the grain. Whatever you do, don’t go against the grain, or you’ll end up with swirl marks that are even harder to hide than the original scratch. It’s all about patience here; take your time to smooth out the area until it feels even under your fingertips. Once that’s done, you’re in a much better spot to tackle the color work.

A Few Pro-Tips to Keep in Your Back Pocket

  • Test everything on a hidden spot first. I know it’s tempting to dive right in, but grab a scrap piece of wood or a tiny, out-of-sight corner of the furniture to make sure your stain or filler actually looks the way you want it to.
  • Don’t go too heavy on the sandpaper. It’s easy to get overzealous, but if you sand too much, you’ll end up stripping away the finish entirely, and then you’re looking at a much bigger project than just a few scratches.
  • Work with the grain, always. Whether you’re scrubbing with a bit of wood filler or sanding down a rough patch, always move your tool in the same direction as the natural lines in the wood. Going against the grain is a quick way to leave permanent marks.
  • Patience is your best tool. If you’re using a liquid stain or a wood filler, let it dry completely before you try to sand it or add another layer. If you rush it, you’ll just end up with a gummy mess that’s a headache to clean up.
  • Clean the area before you start. I’ve learned the hard way that if you try to fix a scratch while there’s still dust or furniture polish sitting in the groove, your repair won’t bond right. Give it a good wipe with a tack cloth or a slightly damp rag first.

Quick Lessons for Your Next Project

Start small—always test your stain or repair method on a hidden spot first to make sure the color actually matches.

Don’t overthink the damage; most surface scratches can be buffed out with a little patience and the right grit of sandpaper.

The goal isn’t perfection, it’s progress. Even a “good enough” fix beats letting a scratch drive you crazy every time you walk past it.

## A Quick Bit of Advice

“Don’t let a few surface scuffs make you think your furniture is headed for the curb; most of the time, a little patience and the right touch are all it takes to bring that wood back to life.”

Nathan Cole

Wrapping It All Up

Wrapping It All Up: Furniture repair guide.

At the end of the day, fixing those scratches isn’t about achieving some impossible, factory-perfect finish; it’s about making your furniture look like it’s actually lived a life with you. We’ve covered a lot of ground here, from the gentle touch needed for light surface scuffs to the more involved process of matching stains and carefully sanding down deeper gouges. Remember, whether you’re using a simple furniture marker or diving into a full refinishing project, the secret is always in the prep work and patience. Take your time, don’t rush the drying process, and always test your color on a hidden spot first. If you follow these steps, those eyesores will be nothing more than a distant memory.

I know it can feel a little intimidating when you’re staring at a damaged heirloom or a favorite coffee table, but I promise you—you’ve got this. There is a specific kind of satisfaction that comes from taking something that looked broken and making it whole again with your own two hands. Don’t let a few marks on a tabletop make you feel like you need to call in a professional or, worse, throw the piece away. Most things in this life are just a few simple steps away from being fixed. So, grab your supplies, clear off the workbench, and go give that wood the second chance it deserves.

Frequently Asked Questions

What if I accidentally make the scratch look worse while I'm trying to fix it?

Look, we’ve all been there. You’re halfway through a project, you slip up, and suddenly you’re staring at a mess that looks way worse than the original scratch. Take a breath—it happens to the best of us. Usually, you just need to pivot. If you over-sanded, you might need a bit more stain; if you over-stained, grab a cloth with some mineral spirits to lighten it up. Don’t panic; it’s still fixable.

Can I use these same tricks on my expensive hardwood floors, or is that too risky?

Look, I get the hesitation. When you’re looking at expensive hardwood, the “measure twice, cut once” rule applies big time. For light surface scuffs, these tricks usually work great. But if you’re dealing with deep gouges or a high-end finish, I’d suggest testing a tiny, hidden spot first—like inside a closet. If it looks funky, stop. If it looks good, go for it. When in doubt, call a pro.

How long do I actually need to wait before I can start using the furniture again?

I know the feeling—you’ve put in the work, and you just want to get back to using your favorite table or chair. If you used a quick wax or a filler, you might be okay in an hour or two. But if you applied a real stain or a fresh coat of polyurethane, patience is your best friend. I usually wait at least 24 hours before light use, but for heavy stuff, give it a full 48 to 72 hours. Let it cure!

Guide on how to paint kitchen cabinets.

How to Paint Kitchen Cabinets for a Whole New Look

I was standing in my kitchen three years ago, staring at these heavy, dark oak cabinets that made my whole apartment feel like a cave, thinking there was absolutely no way I could fix them without spending five grand on a contractor. I actually thought that learning how to paint kitchen cabinets was some kind of professional-grade magic trick reserved for people with expensive spray booths and years of training. But after a few failed attempts with cheap brushes and a lot of wasted weekend afternoons, I finally figured out the real secret: it’s not about having the fanciest tools, it’s just about the prep work and having a little bit of patience.

I’m not here to sell you on some complicated, high-tech system that requires a workshop full of gear. Instead, I’m going to walk you through my tried-and-true, no-nonsense method for getting a smooth, factory-like finish on a budget. We’re going to break this down into manageable chunks—from the initial degreasing to that final, satisfying coat—so you can transform your space without losing your mind in the process. Let’s get to work and make those cabinets look brand new.

Table of Contents

Guide Overview

Total Time: 3-5 days (including drying time)
Estimated Cost: $150-300
Difficulty: Intermediate

Tools & Supplies

  • Sandpaper (various grits for smoothing surfaces)
  • Paint roller (small foam or microfiber for smooth finish)
  • Angled brush (for cutting in corners and details)
  • Screwdriver (to remove hardware and doors)
  • Painter's tape (to protect edges and countertops)
  • Cabinet paint (2-3 quarts depending on size)
  • Primer (1-2 quarts, high-adhesion formula)
  • Degreaser/TSP (1 bottle to clean surfaces)
  • Tack cloth (1 pack to remove dust before painting)

Step-by-Step Instructions

  • 1. First things first, you’ve gotta get everything out of those cabinets. I know, it sounds like a massive headache, but trying to paint around your cereal boxes and heavy cast iron pans is a recipe for a mess. Take your time clearing the counters and moving the doors to a safe spot. If you can, label everything with some painter’s tape so you know exactly which door belongs to which cabinet when you’re putting it all back together.
  • 2. Next up is the part most people try to skip, but trust me, don’t skip the cleaning. Kitchen cabinets are basically magnets for grease and cooking oils, and if you try to paint right over that film, your new finish is going to peel off faster than a cheap sticker. Grab a good degreaser—something like TSP (trisodium phosphate) if you can find it—and scrub every inch of the wood. You want those surfaces to be completely bone-dry and spotless before we move on.
  • 3. Now we get into the real work: sanding. You aren’t trying to sand the wood down to nothing; you just want to scuff up the surface so the paint has something to grab onto. Use a medium-grit sandpaper to take the shine off the existing finish. It’s a bit dusty and a little tedious, but if you don’t create that “tooth” in the wood, your hard work will eventually flake away. Just grab a vacuum or a damp cloth to wipe away all that dust once you’re done.
  • 4. Before the paint even touches the wood, you need to apply a high-quality primer. I can’t stress this enough—don’t go for the cheapest gallon on the bottom shelf. A good primer acts as the bridge between your old cabinet and your new color. It seals the wood and prevents any old stains from bleeding through your fresh paint. I usually find that two thin coats work much better than one thick, gloppy one.
  • 5. Now comes the fun part—the actual painting! When you’re ready, grab a high-quality brush or a small foam roller to get a smooth finish. I like to work in small sections, following the natural grain of the wood. The secret here is to work quickly but steadily to avoid those annoying brush marks. Remember, it’s much better to do multiple thin layers than to try and cover everything in one heavy, dripping pass.
  • 6. Once you’ve finished your last coat, you have to be incredibly patient with the drying time. This is where most DIYers trip up. It might feel dry to the touch in an hour, but that doesn’t mean it’s cured. If you try to hang the doors back up too soon, they might stick to the frame or leave permanent marks. Give it at least 24 to 48 hours of downtime before you start putting the heavy plates back in.
  • 7. Finally, it’s time for the victory lap: installing your hardware. While you’re at it, this is the perfect time to swap out those old, dated handles for something fresh and modern. It’s like putting new shoes on a great outfit—it just makes the whole kitchen pop in a whole new way. Once the screws are tight and the doors are level, take a step back and enjoy the fact that you just saved yourself a small fortune.

Mastering the Prep How to Prep Cabinets for Painting

Mastering the Prep How to Prep Cabinets for Painting

Look, I’ll be the first to admit it: I used to be the guy who wanted to skip straight to the fun part—the actual painting. But after a few DIY disasters where the finish started peeling off like a bad sunburn, I learned my lesson. If you want this project to actually last, you have to obsess over how to prep cabinets for painting. It’s not just about a quick wipe-down; it’s about stripping away every bit of grease, old wax, and dust that’s hiding in the grooves. If you leave even a tiny bit of kitchen grease behind, your new coat won’t stick, and you’ll be back at square one in six months.

Before you even crack open a can of primer, go ahead and double-check your cabinet painting supplies list. Make sure you’ve got a good degreaser, some high-grit sandpaper, and plenty of tack cloths. I personally like to spend a little extra time sanding the edges and corners because that’s where most people get lazy. It might feel like you’re doing more work than necessary, but trust me on this one—a smooth, clean surface is the only way to ensure your finish looks professional rather than homemade.

Choosing Your Gear a Simple Cabinet Painting Supplies List

Choosing Your Gear a Simple Cabinet Painting Supplies List

Before you dive in, let’s talk about what you actually need to grab from the hardware store. I’ve learned the hard way that showing up with a cheap, flimsy brush is a one-way ticket to a headache. For a successful cabinet painting supplies list, don’t skimp on the basics. You’ll want high-quality painter’s tape, a good degreaser, sandpaper (start with a medium grit and move to fine), and a few high-density foam rollers. If you’re feeling brave and want that factory-smooth look, you might consider looking into spray vs brush painting cabinets, but for most of us working in a standard kitchen, a good roller and a high-quality brush will get the job done just fine.

The real secret, though, is the liquid in the can. You aren’t just looking for any old wall paint; you need something that can stand up to grease, spills, and a lot of scrubbing. When you’re hunting for the best paint for kitchen cabinets, look for specialized cabinet enamels or waterborne alkyds. These are designed to dry much harder than standard latex, giving you those durable cabinet paint finishes that won’t chip the first time you bump a pot against them.

Five Pro Tips to Keep You From Losing Your Mind (and Your Finish)

  • Don’t rush the drying time between coats. I know it’s tempting to grab that second coat because you want to be done, but if you paint over a layer that isn’t fully cured, you’re going to end up with a sticky, gummy mess that never quite hardens. Grab a coffee, take a breather, and let it dry.
  • Work in a dust-free zone if you can. Even if you think you’ve cleaned everything, a tiny speck of sawdust or a stray hair can ruin a smooth finish. I always try to do a final wipe-down with a tack cloth right before the brush hits the wood to catch those last little rebels.
  • Keep your edges wet. If you’re painting one door and then moving to the next, try to stay consistent. If the edge of the first door dries completely before you get back to it, you might see a visible “lap mark” where the new paint meets the old. It’s all about keeping that flow steady.
  • Use a high-quality primer, not the cheap stuff. This is one area where I really learned the hard way that saving ten bucks on a gallon of primer isn’t worth it. A good primer acts like the glue between your prep work and your paint; if the foundation is solid, the color will look professional.
  • Test your color on a scrap piece first. Lighting in a kitchen changes like crazy from morning to night. I always grab a piece of leftover wood or even a heavy piece of cardboard, paint a test patch, and move it around the room at different times of day so I don’t end up with a color I hate by dinner time.

The Bottom Line: Keep It Simple and Stick to the Plan

Don’t rush the prep work—I know it’s tempting to jump straight to the fun part, but a clean, smooth surface is the only way to make sure your hard work actually lasts.

Invest in decent tools rather than the cheapest stuff you can find; a good brush or roller makes a massive difference in how much sanding you have to do later.

Be patient with the drying times, because trying to rush a second coat is the quickest way to end up with a sticky, ruined mess.

## The Secret to a Professional Finish

“Look, you can buy the fanciest spray gun in the world, but it won’t save you if you skip the sanding. A great paint job isn’t actually about the paint—it’s about how much love you put into the prep work before the brush even touches the wood.”

Nathan Cole

You’ve Got This: Final Thoughts Before You Start

You’ve Got This: Final Thoughts Before You Start

Look, I know looking at a pile of hardware, sandpaper, and half-empty paint cans can feel a bit overwhelming, but remember why we started this. It really all comes down to the details. If you don’t skimp on the thorough cleaning and the sanding, you’re going to regret it when the finish starts peeling in six months. Take your time with the prep work, choose a quality brush that won’t leave streaks, and don’t be afraid to apply thin layers rather than trying to cover everything in one go. If you stick to the process we talked about, you’re going to end up with a kitchen that looks like a million bucks without the million-dollar price tag.

At the end of the day, the goal isn’t just to have pretty cabinets; it’s about that feeling you get when you step back, wipe the dust off your hands, and realize you actually did this yourself. There’s a certain kind of pride that comes from tackling a project that felt “too big” and realizing it was just a series of small, manageable tasks. So, grab your gear, clear off the counters, and just dive in. You might get a little messy, and you might need to fix a drip or two, but I promise you—the satisfaction of a job well done is worth every bit of the effort.

Frequently Asked Questions

How long do I actually have to wait before I can start using my kitchen again without ruining the finish?

This is the question I get asked most, and honestly, it’s the hardest part: being patient. You’ll see the cabinets feeling dry to the touch in a few hours, but don’t let that fool you. I usually tell people to wait at least 48 to 72 hours before doing any heavy lifting or slamming doors. If you can, give it a full week before you start scrubbing them. Let that finish cure properly so it doesn’t peel!

What’s the best way to deal with those annoying little nicks or deep scratches in the wood before I start painting?

Those little nicks are a total pain, but don’t sweat it—they’re easy to fix if you catch them during prep. For tiny scratches, a little bit of wood filler or even some spackle works wonders. If the gouge is deeper, grab some wood putty that matches your cabinet type. Just smear it in, let it dry completely, and sand it flush. Once it’s smooth, it’ll disappear under the paint like it was never there.

Can I just use regular wall paint, or am I really going to regret not buying the expensive stuff?

Look, I get it—wall paint is cheap and you probably already have a bucket of it in the garage. But honestly? Save yourself the heartache and skip it. Wall paint is designed to sit on a vertical surface and stay there. Cabinets get touched, bumped, and wiped down constantly. If you use wall paint, it’ll likely peel or feel tacky within a few months. Grab a dedicated cabinet enamel; it’s worth the extra few bucks to avoid doing this twice.

Guide on how to paint a room.

How to Paint a Room Like a Professional

I was standing in the middle of my first apartment last year, staring at a wall the color of old oatmeal, holding a cheap roller and feeling completely defeated. I had watched a dozen professional tutorials, but nothing prepared me for the sheer mess of tape that wouldn’t stick or the streaks that made my “new” wall look like a badly applied sunburn. Most people think you need a professional crew and a massive budget to get a smooth finish, but that’s just not true. Learning how to paint a room isn’t about having expensive equipment; it’s about mastering a few basic techniques and knowing when to slow down.

I’m not here to sell you on some fancy, high-end designer lifestyle. I just want to help you get the job done right without losing your mind or your security deposit. In this guide, I’m breaking down the process into manageable chunks—from prepping your surfaces so the paint actually sticks, to choosing the right finish that won’t show every single bump. We’re going to tackle this step-by-step so you can walk away from that project feeling like a total pro.

Table of Contents

Guide Overview

Total Time: 1-2 days
Estimated Cost: $75-150
Difficulty: Beginner

Tools & Supplies

  • Paint roller and tray for large surfaces
  • Angled brush for edges and corners
  • Painter's tape for clean lines
  • Drop cloths to protect floors
  • Interior paint (1-2 gallons)
  • Painter's tape (1-2 rolls)
  • Sandpaper (medium grit)
  • Spackle (small container for holes)

Step-by-Step Instructions

  • 1. First things first, we’ve got to clear the deck. You don’t need to move every single piece of furniture out of the room, but you definitely need to get the big stuff toward the center and cover it up with some old sheets or plastic drop cloths. I always grab a roll of painter’s tape too; you’ll want to run that along the baseboards and around the edges of the window frames. It might feel tedious, but trust me, skipping the prep is the fastest way to end up with a messy room that looks like a toddler did it.
  • 2. Next, let’s talk about the walls themselves. You can’t just slap paint over dust and cobwebs and expect it to stick. Grab a damp sponge and give the walls a quick wipe-down to get rid of any grit or oils. If you’ve got any small holes from old picture nails, grab a little tub of spackle and a putty knife to fill them in. Once that’s dry, give those spots a light sand with some fine-grit sandpaper until they’re smooth to the touch.
  • 3. Now, it’s time to get the paint ready. Before you even open the can, give it a good stir with a wooden stick. I know it sounds simple, but the pigments tend to settle at the bottom, and you want a consistent color from the first stroke to the last. If you’re using a primer—and if your walls are going from a dark color to a light one, you definitely should—apply that now and let it dry completely.
  • 4. We’re going to start with what I call “cutting in.” This is just a fancy way of saying you’re going to paint the edges where a big roller can’t reach. Grab a 2-inch angled brush and carefully paint a border around the ceiling, the baseboards, and in the corners. Don’t try to do the whole room at once; just work in small sections so the paint stays wet enough to blend seamlessly when you bring the roller in.
  • 5. Once your edges are looking good, it’s time to bring out the heavy hitter: the roller. Don’t drown the roller in paint; you want it saturated but not dripping. Start in one corner and work in a “W” or “M” pattern on the wall. This helps distribute the paint evenly across the surface instead of leaving thick clumps in one spot. Keep overlapping your strokes so you don’t leave any missed patches behind.
  • 6. For the best results, you’re almost certainly going to need a second coat. I know, I know—it’s tempting to just call it a day after the first pass, but that’s how you end up with streaks. Wait for the first coat to be completely dry to the touch before you go back in. The second coat is what really gives the color that deep, professional look that makes you feel like you actually know what you’re doing.
  • 7. Finally, once the paint is dry (but maybe not fully cured), peel off that painter’s tape. If the paint feels a little tacky, grab a utility knife and score the edge of the tape very lightly before pulling it. This prevents the tape from ripping the fresh paint right off the wall. Clean up your brushes, toss your trash, and take a second to admire your work—you earned it!

Checking Your Toolkit an Essential Painting Supplies List

Checking Your Toolkit an Essential Painting Supplies List

Before you even crack open a can of color, you’ve got to make sure you aren’t going to be halfway through a wall and realize you’re missing a crucial tool. There is nothing more frustrating than having wet paint dripping off a roller because you forgot a tray. My personal essential painting supplies list always starts with the basics: a good quality angled brush, a sturdy roller frame, and some high-quality painter’s tape. I’ve learned the hard way that cheap brushes tend to shed bristles right into your fresh coat, which is a total headache to fix. If you want smooth results, invest a little extra in the best paint brushes for walls you can find; they’ll save you way more time in the long run.

You also can’t overlook the “mess prevention” side of things. I always tell people that protecting furniture while painting is just as important as the painting itself. Grab some heavy-duty drop cloths—the canvas ones are great because they don’t slide around like the thin plastic ones—and clear a path so you aren’t tripping over clutter. Once your workspace is set, you’re actually ready to get to work.

The Secret to Success How to Prep Walls for Painting

The Secret to Success How to Prep Walls for Painting

Look, I’ll be the first to admit it: I used to rush straight to the fun part—the actual painting—only to realize halfway through that my new color looked patchy and terrible. The truth is, most of the heavy lifting happens before you even crack open a can. If you want a professional finish, you have to master how to prep walls for painting by treating the surface like a canvas. Start by cleaning those walls down with a damp sponge and a little mild soap. If there’s dust, grease, or cobwebs hiding in the corners, your new coat of paint is basically just going to stick to the dirt instead of the drywall.

Once the walls are clean, it’s time to handle the small stuff that makes a big difference. Grab some painter’s tape to define your lines, and don’t skip the step of protecting furniture while painting with some old drop cloths or plastic sheeting. I always tell people that a little extra time spent patching small nail holes with spackle and sanding them smooth will save you hours of frustration later. If the surface isn’t smooth, your paint will just highlight every single imperfection.

Pro Tips to Save You from a Paint-Induced Headache

  • Don’t skimp on the tape. I know those cheap, papery rolls look fine on the shelf, but they’ll tear your wall paper right off when you try to peel them. Grab the blue or green painter’s tape—it’s worth the extra couple of bucks to avoid a massive headache later.
  • Test your colors on a real piece of the wall, not just a tiny swatch in the store. Lighting changes everything. What looks like a soft beige under the fluorescent lights at Home Depot might look like a bright, sickly yellow once it’s sitting in your living room under your evening lamps.
  • Work in small sections to keep your edges sharp. Instead of trying to rush through a whole wall, work in about three-foot chunks. This keeps the “wet edge” intact, which is the secret to preventing those annoying lines where one section dried before you could overlap it with the next.
  • Keep a damp rag in your back pocket at all times. You will drip, and you will splatter. If you catch a drip while the paint is still tacky, you can wipe it away in seconds. If you wait until it dries, you’re looking at a full-blown sanding job.
  • Always stir your paint—a lot. I’ve seen so many people skip this, only to end up with weird streaks or clumps halfway through the job. Give that can a good, thorough stir every time you dip your roller to make sure the pigment is evenly distributed.

Three Things to Keep in Mind Before You Start

Don’t skimp on the prep work; I know it’s the part nobody wants to do, but a clean, smooth wall is the difference between a pro finish and a mess you’ll regret later.

Invest in decent tools rather than the cheapest ones you can find—a good brush and a solid roller won’t just make the job faster, they’ll make it look a whole lot better.

Take your time and don’t rush the drying stages; it’s tempting to slap on a second coat immediately, but patience is what keeps those finish lines looking sharp.

The Golden Rule of DIY

“Look, the paint itself is the easy part. If you spend the time doing the boring stuff—the taping, the cleaning, the patching—the actual painting will feel like a victory lap instead of a chore.”

Nathan Cole

You’ve Got This: The Finish Line

You’ve Got This: The Finish Line.

Now that you’ve tackled the heavy lifting, take a second to look back at what you’ve actually accomplished. You didn’t just slap some color on a wall; you cleared the clutter, prepped the surfaces until they were smooth, and carefully applied those coats to get a professional finish. It’s easy to get overwhelmed by the sheer amount of gear and the messy reality of paint trays, but by breaking it down into those smaller, manageable chunks, you managed to master the process. Remember, the difference between a DIY job that looks “okay” and one that looks amazing is almost always found in that prep work and patience we talked about earlier.

I know there might be a few stray drips on the floor or a bit of paint under your fingernails, but honestly? That’s just the mark of a job well done. There is a specific kind of satisfaction that comes from sitting in a room that you transformed with your own two hands. It changes how you feel about your space and, more importantly, how you feel about your ability to tackle the next project on your list. So, step back, grab a cold drink, and really soak in that feeling of accomplishment. You didn’t just paint a room; you proved to yourself that you can handle whatever home project comes your way next.

Frequently Asked Questions

How many coats of paint do I actually need before it looks finished?

The short answer? Most of the time, you’re looking at two coats. I’ve learned the hard way that trying to squeeze it all into one thick layer usually leads to streaks and an uneven finish. If you’re going from a super dark color to something light, or if you’re painting over a patch job, you might even need a third. Just take your time, let the first coat dry completely, and you’ll be golden.

Is it better to buy cheap paint and do more coats, or splurge on the expensive stuff?

Look, I get the temptation to save a few bucks at the big-box store, but trust me on this one: splurge on the good stuff. I’ve spent way too many Saturday afternoons trying to patch up thin, cheap paint with a third or fourth coat, and it’s a total headache. High-quality paint has better coverage and lasts longer. You’ll actually spend less time working and more time enjoying the finished product. Buy once, cry once!

How do I get rid of those annoying paint drips on the floor or trim after I'm done?

Don’t sweat the small stuff—we’ve all been there. If the paint is still wet, grab a damp rag and wipe it away immediately. But if it’s already dried, don’t panic. For trim, a plastic putty knife or even an old credit card works wonders for gently scraping it off. If it’s on a hard floor, try a little bit of rubbing alcohol on a cotton ball. Just take it slow so you don’t scuff the finish!

Guide on how to hang a picture.

How to Hang a Picture Perfectly Every Time

I used to think that if I didn’t own a professional laser level and a complete set of heavy-duty masonry tools, I was doomed to live in a house with crooked, lopsided frames. I spent one entire Saturday trying to get a single landscape photo centered over my sofa, only to end up with a dozen tiny holes in my drywall and a framed disaster that looked like it was sliding off the wall. But here’s the truth: you don’t need a contractor’s toolkit to master how to hang a picture perfectly. Most of the time, you just need to stop overthinking the math and start using a few simple tricks that actually work in a real home.

In this guide, I’m going to walk you through the exact, no-nonsense way I tackle every single frame that comes my way. We aren’t going to get bogged down in complicated geometry or expensive gadgets; instead, I’ll show you how to pick the right hardware, find your studs, and avoid that dreaded “one hole to the left” mistake. By the time we’re done, you’ll be able to transform those empty, boring walls into a gallery you’re actually proud of without any of the usual stress.

Table of Contents

Guide Overview

Total Time: 30-60 minutes
Estimated Cost: $10-30
Difficulty: Beginner

Tools & Supplies

  • Hammer for driving nails or hooks
  • Measuring tape for spacing and height
  • Pencil for marking wall locations
  • Level to ensure the picture is straight
  • Picture frame or artwork (1 unit)
  • Hanging hardware such as nails or picture hooks (1 pack)
  • Wall anchors if hanging on drywall without studs (1 pack)

Step-by-Step Instructions

  • 1. First things first, grab your gear. You don’t need a massive toolbox, but you’ll want a hammer, a level (or a leveling app on your phone if you’re feeling techy), a pencil, and some measuring tape. Most importantly, check the back of your frame to see what kind of hardware it has. Is it a wire, a sawtooth hanger, or just a single D-ring? Knowing this before you start drilling holes is going to save you a massive headache later.
  • 2. Now, let’s figure out where this thing actually lives. Don’t just eyeball it and hope for the best—that’s how you end up with crooked art that haunts your dreams. Use your measuring tape to find the center point of your wall space, then measure down from the ceiling or a nearby piece of furniture to find your eye-level sweet spot. A good rule of thumb I always use is to aim for the center of the picture being about 57 to 60 inches from the floor.
  • 3. Here is my favorite little trick to avoid “Swiss cheese walls.” Instead of guessing where the nail goes, take a piece of painter’s tape and stick it to the back of the frame, right over the hanging hardware. Use your pencil to mark exactly where the nail or screw needs to hit that tape. Once you peel the tape off and stick it on the wall, you’ll have perfectly placed marks without having to do any heavy math.
  • 4. Time to make some marks. Take that piece of tape (or just your pencil) and mark your spot on the wall. If you’re hanging something heavy, like a big wooden mirror or a chunky framed print, don’t just use a tiny nail. This is the time to pull out a drywall anchor or find a stud. If you try to hang a heavy piece on a plain nail, you’re going to end up with a hole in your wall and a broken picture on the floor.
  • 5. Go ahead and drive that nail or screw in. If you’re using an anchor, just take your time and don’t rush the process. Once the hardware is secure, hold the picture up to the wall. This is the moment of truth. Don’t pull it all the way off yet; just hold it there and check it with your level. If it’s leaning even a tiny bit to the left, adjust your hardware before you commit to the final placement.
  • 6. Once it’s level and sitting pretty, give it a little nudge to make sure it’s seated firmly against the wall. If the picture feels a bit “wobbly” or keeps tilting, you might need to add a little adhesive felt bumper to the bottom corners of the frame. It keeps the art from shifting every time someone walks past and protects your paint from getting scuffed up.
  • 7. Step back, take a breath, and admire the work. You didn’t have to call a handyman or spend a fortune to get it done. If it’s not 100% perfect, don’t sweat it—the goal was to get it up there, and you did it yourself. Now, go grab a coffee and enjoy your newly decorated space.

A Simple Picture Hanging Hardware Guide for Every Frame

A Simple Picture Hanging Hardware Guide for Every Frame

Look, I’ve spent way too many Saturday afternoons staring at a box of random screws and nails, wondering which one won’t pull a chunk of plaster right out of my wall. If you want to avoid a disaster, you need a basic picture hanging hardware guide in your back pocket. For those light, breezy frames—think a small botanical print or a polaroid—a simple finishing nail or a small command strip works wonders. But if you’re tackling the big stuff, like a heavy mirror or a thick wooden frame, don’t just wing it with a tiny nail. You’ll want to look into hanging heavy frames on drywall using something sturdier, like a toggle bolt or a specialized heavy-duty hook, to make sure it stays put.

The real secret to making your house look professional, though, isn’t just the hardware; it’s the prep. I always tell people to grab a spirit level before they start driving anything into the wall. Even if you think you’ve got a steady hand, using a level for art is the only way to ensure your favorite landscape isn’t tilting five degrees to the left. It takes an extra thirty seconds, but it saves you from that annoying feeling that something is “off” every time you walk into the room.

Measuring Distance for Picture Placement Without the Guesswork

Measuring Distance for Picture Placement Without the Guesswork

Look, we’ve all been there: you nail the first piece of art, step back, and realize it’s either way too high or looks like it’s sliding off the wall. To stop that “oops” moment before it happens, I always recommend the eye-level rule. A good baseline is to aim for the center of the frame to be about 57 to 60 inches from the floor. But if you’re working with a massive piece or a gallery wall, don’t just wing it. Grab a pencil and actually mark your spots on the wall first. It’s much easier to erase a tiny lead mark than it is to patch a hole.

When you’re measuring distance for picture placement, don’t forget to account for the wire or the bracket on the back. I like to hold the frame up against the wall, mark the top edge with a pencil, and then measure down from that mark to find exactly where the hardware sits. This little trick is a lifesaver for avoiding wall damage when hanging art because it prevents those “test holes” that end up cluttering your drywall. Just take a second to measure twice; your future self will thank you.

A few pro tricks to keep your walls looking sharp

  • Eye level is your best friend. A common mistake I see is hanging art way too high. Aim for the center of the picture to be about 57 to 60 inches from the floor—that’s standard gallery height and it feels much more natural to the eye.
  • Don’t forget the “weight” check. If you’re hanging a massive, heavy mirror or a chunky reclaimed wood frame, don’t trust a tiny finishing nail. Grab some heavy-duty picture hangers or even screw directly into a stud if you can find one.
  • Use a little painter’s tape to plan. If you’re nervous about making holes in the wrong spot, stick a piece of blue tape on the wall where you think the corners should go. It lets you step back and see the layout without the permanent commitment.
  • Level it out as you go. Even if you think your hands are steady, things tend to tilt once they’re actually on the wall. Keep a small bubble level handy—or even a leveling app on your phone—to make sure your masterpiece isn’t leaning to one side.
  • Mind the glare. Before you hammer that last nail, stand back and look at how the light hits the frame. If you’ve got a window right opposite the art, you might end up with a giant reflection that hides the whole picture. Adjust the position slightly to catch the light better.

Two cents to remember before you start

Don’t overthink the hardware; just pick the right nail or screw for the weight of your frame so you aren’t staring at a hole in the wall later.

Use a pencil to mark your spots first—it’s way easier to erase a little lead than it is to patch up drywall.

Take your time with the measuring part; getting the height right the first time saves you from the “oops, it’s too low” headache.

## A little bit of perspective

“Look, you’re probably going to end up with a tiny nail hole in the wall, and that’s okay. Don’t let the fear of a little bit of drywall damage stop you from actually making your house feel like a home. Just grab the hammer, take a breath, and give it a shot.”

Nathan Cole

You're All Set to Level Up Your Walls

You're All Set to Level Up Your Walls.

Look, I know it can feel like a lot when you’re standing there with a hammer in one hand and a level in the other, but you’ve actually done the hard part. We’ve covered how to pick the right hardware so your heavy mirrors don’t end up on the floor, how to measure those distances without losing your mind, and how to find that perfect eye-level sweet spot. Just remember: grab the right nail for the job, double-check your marks with a pencil, and don’t be afraid to move things around a bit if they look wonky. Once you get that first piece up, the rest of the room is going to start feeling like a home instead of just a collection of furniture.

At the end of the day, don’t let a little bit of dust or a crooked frame stop you from making your space yours. Perfection is overrated; what matters is that you took the time to do it yourself. There is a specific kind of satisfaction that comes from stepping back, looking at a wall you actually decorated, and knowing you didn’t have to call a professional to get it done. So, grab that level, trust your gut, and get those pictures up. You’ve totally got this.

Frequently Asked Questions

What do I do if I'm trying to hang something on a wall that's just plain drywall and doesn't have a stud?

Don’t sweat it—you don’t need a stud for every single thing you hang. If you’re just putting up a lightweight frame, a simple nail or a small screw will bite into the drywall just fine. But if you’re tackling something heavier, grab some drywall anchors. They’re cheap, easy to find at the hardware store, and they expand inside the wall to give you that extra grip. Just match the anchor size to your screw!

How can I make sure my picture stays level and doesn't end up crooked a week later?

There’s nothing worse than thinking you nailed it, only to see your art tilting a few degrees a week later. To stop the “slow tilt,” skip the cheap adhesive strips and go with a solid nail or screw. Once it’s up, don’t just eyeball it—grab a level. If you don’t have one, download a free leveling app on your phone. It works surprisingly well for a quick double-check before you commit.

Is there a way to hang heavy mirrors or big frames without accidentally putting a giant hole in my wall?

I hear you—there is nothing worse than seeing a huge, ugly hole in your drywall because a heavy mirror decided to give up the ghost. If you’re dealing with something beefy, skip the tiny nails and grab some heavy-duty picture hooks or, even better, wall anchors. If you’re feeling brave, a couple of sturdy screws into the studs is the gold standard. It’s all about spreading that weight out so your wall can handle it.

Professional guide on how to caulk.

How to Caulk Like a Pro (without the Mess)

I remember standing in my first apartment, staring at a jagged, moldy mess around the bathtub, feeling like I was staring at a professional-grade disaster. I honestly thought that learning how to caulk required some kind of secret, steady-handed wizardry that I just didn’t possess. I spent an hour at the hardware store—which, let’s be real, is my happy place—just trying to figure out why every tube of silicone looked exactly the same. But here’s the truth I learned the hard way: it’s not about having a surgeon’s hands; it’s about having the right setup and a little bit of patience.

If you’ve ever ended up with a wobbly, uneven bead of goo that looks more like a slug than a seal, don’t sweat it. I’m going to walk you through my personal, no-nonsense method for getting a clean, professional line without the headache. We’ll cover everything from picking the right stuff at the store to that final, satisfying smoothing step. By the time we’re done, you’ll realize that mastering how to caulk is actually totally figure-out-able, and your bathroom will look a whole lot better for it.

Table of Contents

Guide Overview

Total Time: 1-2 hours
Estimated Cost: $20-40
Difficulty: Beginner

Tools & Supplies

  • Caulking gun to apply the sealant
  • Caulk removal tool or utility knife to scrape old material
  • Small bucket or container for cleaning
  • Caulk tube (Silicone or Acrylic depending on surface)
  • Painter's tape for clean lines
  • Cleaning solution or rubbing alcohol to prep surface

Step-by-Step Instructions

  • 1. First things first, you’ve gotta get that surface ready. If you’re working over old, crusty caulk, don’t even try to layer new stuff on top of it—it’ll just peel off in a week. Grab a utility knife and carefully scrape away the old stuff until you’re down to the bare surface. Once that’s done, grab a damp rag and wipe it down with a bit of rubbing alcohol to make sure there’s no grease or dust left behind. If the surface isn’t bone dry before you start, nothing is going to stick.
  • 2. Next, you need to prep your caulk tube. Most people just jam the nozzle into the gun and go, but I’ve learned that’s a recipe for a mess. Cut the tip of the tube at a 45-degree angle, and keep the cut small to start. You want a tiny opening so you can control the flow. If the hole is too big right out of the gate, you’ll end up with a giant glob that’s a pain to clean up.
  • 3. Now, grab your caulk gun and load it up. Position the nozzle so it’s resting right against the corner or the gap you’re trying to fill. As you squeeze the trigger, move the gun at a steady, even pace along the line. Think of it like drawing a line with a pen; if you go too fast, the bead will be thin and won’t fill the gap, and if you go too slow, you’ll get a huge bulge. It’s all about that consistent pressure.
  • 4. Once you’ve laid down a bead, it’s time for the “magic” part: smoothing it out. Don’t just stare at it—get to work while it’s still wet. I like to use a small container of water or a spray bottle with a little bit of dish soap in it. Dip your finger in the soapy water and lightly run it along the bead to flatten it out. The soap is the secret sauce here because it prevents the caulk from sticking to your skin, which keeps the line looking sharp instead of messy.
  • 5. Don’t overdo the smoothing, though. If you go back and forth too many times, you’ll actually pull the caulk out of the gap you just filled. Just one or two smooth, decisive passes is usually all you need to get that professional look. If you see a little drip or a bump, don’t panic; just wet your finger and try to blend it in one more time.
  • 6. Finally, just step back and let it do its thing. Most silicone-based caulks need at least 24 hours to fully cure before you should get them wet or put any stress on them. I know it’s tempting to go back and check it every hour, but patience is your best friend here. Cover it with a piece of painter’s tape if you’re worried about dust landing in it while it dries.

First Clear the Way by Removing Old Caulk

First Clear the Way by Removing Old Caulk.

Look, I know it sounds like the most tedious part of the job, but you cannot skip this. If you try to lay new sealant right on top of the old stuff, it’s going to peel off faster than a cheap sticker. You’re essentially building a house on sand if you don’t start with a clean slate. I usually grab a sharp utility knife or a specialized caulk removal tool to get the bulk of it out. When I’m removing old caulk from around a sink or window, I try to be careful not to gouge the surrounding surface, but you’ve gotta be thorough.

Once the heavy lifting is done, don’t just call it a day. You’ll likely find tiny, stubborn bits of residue stuck in the corners. I like to use a stiff nylon brush or even a little bit of rubbing alcohol on a rag to really scrub that gap clean. This is especially huge when you’re caulking bathtub seams, because any leftover grime or soap scum will prevent a watertight seal. If that surface isn’t bone-dry and spotless, your new bead won’t stick, and you’ll be right back where you started.

Choosing Your Weapon Silicone vs Acrylic Caulk

Choosing Your Weapon Silicone vs Acrylic Caulk

Before you head to the hardware store, you’ve got to make a choice. Walking down that aisle, you’ll see a dozen different tubes, but it usually boils down to the classic debate of silicone vs acrylic caulk. If you’re working on something that’s constantly getting soaked, like caulking bathtub seams or kitchen backsplash areas, you want silicone. It’s waterproof, flexible, and stays looking good even when the house shifts a little. It’s your best bet for preventing water damage in those high-moisture zones.

Now, acrylic is a different beast. It’s much easier to work with because you can wipe away mistakes with a damp rag before it sets, making it a solid choice for baseboards or window frames where water isn’t a constant threat. The trade-off? It’s not as flexible or water-resistant as silicone. My rule of thumb is simple: if it’s going to get wet, go silicone; if it’s just for looks and trim, acrylic is your friend. Just make sure you grab the right one for the job so you don’t have to do this all over again next year.

Pro Moves to Keep Your Caulking From Looking Like a Mess

  • Don’t skip the masking tape. If you’re worried about your steady hand, run two strips of painter’s tape along both sides of the gap first. It keeps your lines razor-sharp, and you just peel them off when you’re done.
  • Keep a wet rag handy. No matter how careful you are, a little bit of caulk is bound to end up where it shouldn’t. Having a damp cloth ready to wipe away the excess immediately saves you a massive headache later.
  • Use a caulking tool or your finger, but don’t overdo it. I usually dip my finger in a little bit of soapy water before smoothing the bead. It helps the caulk glide instead of sticking to your skin and making a mess.
  • Watch your pressure. If you’re using a caulk gun, try to keep a steady, even squeeze. If you pump it too fast, you’ll get huge blobs; too slow, and you’ll end up with gaps that look like Swiss cheese.
  • Give it time to breathe. It’s tempting to run the shower or hit the sink right away, but resist that urge. Let it cure for the full time recommended on the tube so you don’t end up washing away all your hard work.

Quick Wins for a Clean Finish

Don’t rush the prep work; if you leave old, crusty caulk behind, your new bead is going to look a mess no matter how good your technique is.

Pick the right tool for the job, whether it’s silicone for that wet bathroom environment or acrylic for your indoor trim, so you aren’t fighting the material later.

Remember that it’s okay to mess up a bead—just wipe it away while it’s wet and try again. It’s all part of the learning process.

My Golden Rule for a Clean Finish

“Look, nobody’s going to win a beauty pageant for the neatest bead of caulk, but if you take the time to prep the surface and don’t rush the smoothing, you’ll end up with a seal that actually works instead of just looking like a mess.”

Nathan Cole

Finishing Strong

Applying sealant while finishing strong.

Once you’ve scraped away that old, crusty residue and picked the right tube for the job, the hard part is actually behind you. Just remember that a little patience goes a long way; don’t rush the application or skip the smoothing step with your finger or a tool. Whether you went with the heavy-duty silicone for your shower or a quicker acrylic for some baseboards, the goal is a clean, consistent bead that keeps the water out and the mess at bay. If you end up with a little extra mess on the edges, don’t sweat it—just wipe it away while it’s still wet and try again on the next section.

I know that looking at a messy gap can feel a bit intimidating at first, but honestly, it’s one of those small wins that makes a massive difference in how your home feels. There is something incredibly satisfying about looking at a freshly sealed sink or bathtub and knowing you didn’t have to call a pro to get it done. It’s not about being a master craftsman; it’s just about taking care of your space one step at a time. So, grab your caulk gun, take a deep breath, and get to it. You’ve totally got this!

Frequently Asked Questions

How long do I actually have to wait before I can get the area wet again?

The short answer? Don’t touch it with water for at least 24 hours. I know, waiting feels like forever when you just want your shower back, but patience is your best tool here. If you’re using silicone, it might feel “dry” to the touch in an hour, but it hasn’t actually cured deep down yet. Give it a full day to set properly so you aren’t dealing with a peeling mess next week.

Is there a trick to getting a smooth bead without making a huge mess on my tiles?

Honestly, I used to make a total disaster of this until I learned the finger trick. Here’s the secret: keep a small spray bottle of soapy water handy. Once you lay down your bead, lightly mist it with the soapy water. Then, dip your finger in that same mix and run it along the line. The soap prevents the caulk from sticking to your skin, letting you glide through for a smooth finish without the mess.

What do I do if I mess up the first pass and the line looks totally wonky?

Don’t sweat it—we’ve all been there. I once tried to caulk a backsplash and it looked like a jagged mountain range. If the line looks wonky, don’t try to just smear it more; you’ll just make a bigger mess. Grab a damp rag or a finger dipped in soapy water and smooth it out immediately. If it’s really bad, just wipe it all away with a putty knife and start that section over.

Creative wood pallet project ideas for beginners.

Wood Pallet Projects Anyone Can Build

If you’ve ever driven past a construction site or a local warehouse and seen those stacks of weathered wood sitting there, you’ve probably felt that itch to grab a crowbar and get to work. It’s easy to look at a pile of reclaimed wood and see nothing but a mess, but I see a goldmine of potential. Most people walk right past these because they think they need a master carpenter’s degree to do something with them, but honestly, finding the right pallet project ideas is more about having a plan than having expensive tools. You don’t need a shop full of heavy machinery; you just need a bit of grit and the right approach to turn that “trash” into something actually useful for your home.

In this guide, I’m skipping the overly complicated stuff that leaves you frustrated and covered in splinters. Instead, I’ve rounded up five solid, beginner-friendly projects that I know you can tackle in a single afternoon. We’re going to walk through everything from simple garden upgrades to some pretty cool indoor decor, breaking each one down into manageable steps. By the time we’re done, you’ll have a clear roadmap to transform those scraps into something you’re genuinely proud to show off.

Table of Contents

A vertical herb garden for your balcony

A vertical herb garden for your balcony.

If you’re living in a spot with zero yard space like I was for years, you don’t have to give up on growing your own food. A simple vertical herb garden is probably the easiest entry point for anyone looking to get their hands dirty without a massive commitment. You basically just lean a sturdy pallet against a sunny wall, line the slats with some landscape fabric, and fill those little pockets with soil.

The ultimate rustic entryway shoe rack

The ultimate rustic entryway shoe rack.

We’ve all been there—tripping over a mountain of sneakers and boots the second we walk through the front door. Instead of buying one of those flimsy plastic organizers that breaks after a month, you can use a pallet to build something that actually looks like it belongs in your home. It’s all about taking those heavy-duty slats and mounting them securely to your wall or even just standing them up in a corner.

A backyard cocktail or snack station

A backyard cocktail or snack station.

When the weather gets nice, I love hanging out on the deck, but I hate having to run back inside every five minutes for a refill. You can build a pretty killer outdoor bar by repurposing a couple of pallets into a standing table or a tiered serving station. It’s basically just a matter of stacking them and securing them with some heavy-duty screws so they don’t wobble when you’re setting down a heavy pitcher of lemonade.

Wall-mounted tool organizer for the garage

My garage used to be a total disaster zone until I realized I had a stack of free pallets sitting behind the local grocery store. If you’re like me and you have a million different screwdrivers, wrenches, and hammers scattered around, a pallet wall organizer is a total game-changer. You can mount the pallet vertically on your workbench wall and use the gaps to slide in your hand tools or even hang smaller items with some simple hooks.

A cozy outdoor lounge bench

If you have a larger pallet or two, you can actually build a bench that’s sturdy enough for a couple of grown adults to sit on. This is a slightly more advanced project because you’ll want to focus on the structural integrity, but I promise it’s well worth the effort once you’re sitting there with a cold drink. You essentially use the pallet as the base and then build up the seat using more slats to create a smooth surface.

A few things to remember before you start

Don’t rush into the build; spend a little extra time prepping your wood and making sure those pallets are actually safe to use around the house.

Start with something small that you can actually finish in a weekend so you don’t end up with a half-done pile of wood taking up space in your garage.

You don’t need a professional workshop to make this work—just a few basic tools and a bit of patience will get the job done.

## My take on working with wood

“At the end of the day, a pallet isn’t just a piece of junk sitting in a parking lot; it’s a head start on something great. You don’t need a master carpenter’s workshop to make it work—you just need a little patience, a decent saw, and the guts to start cutting.”

Nathan Cole

Getting Your Hands Dirty

Whether you decided to tackle a vertical herb garden for your kitchen, a rugged outdoor bench for the patio, or one of those custom wine racks, you’ve officially moved past the “just looking” phase. We’ve covered everything from basic structural builds to those smaller, more detailed decor pieces that really make a room pop. The main thing to remember is that every project, no matter how big or small, relies on the same fundamentals: a good sander, the right screws, and a little bit of patience with the wood. Don’t worry if your first attempt isn’t museum-quality; the goal here is to build something useful with your own two hands rather than buying something mass-produced that won’t last a season.

At the end of the day, these pallets aren’t just scraps of wood sitting in an alleyway or behind a grocery store; they are raw potential waiting for you to step in. I know that staring at a pile of rough-cut timber can feel a bit overwhelming at first, but I promise you that the feeling of sitting on a bench you actually built is worth every splinter. So, grab your safety glasses, clear off your workbench, and just start somewhere. You’ve got this, and I can’t wait to see what you end up creating.

Frequently Asked Questions

How do I know if a pallet is safe to use for indoor furniture or garden projects?

Look, before you start hauling those pallets into your living room, you’ve gotta check the stamps. It’s a total dealbreaker. Look for “HT”—that means Heat Treated, which is safe. If you see “MB,” put it back; that’s Methyl Bromide, a nasty pesticide you definitely don’t want near your kids or your garden soil. If there are no stamps at all, I’d play it safe and skip it. Better to be cautious than toxic.

What’s the best way to get all those stubborn nails out without splitting the wood?

Look, I’ve split more than a few good boards trying to rush this, so take it slow. First, grab a pry bar and a small scrap of thick wood to use as a fulcrum. Place the scrap against the pallet so you aren’t putting direct pressure on the surface. This distributes the force and keeps the wood from cracking. If the nail is really stubborn, give the head a quick tap with a hammer first to loosen it up.

Do I really need to sand these down, or can I just slap some stain on them and call it a day?

Look, I get it—you want to get to the fun part, not spend three hours fighting a sander. But if you just slap stain on raw pallet wood, it’s going to look blotchy and feel like a splinter waiting to happen. At the very least, hit them with a medium grit to smooth out the fuzz and open up the grain. It’s a little extra sweat now, but it saves you a massive headache later.

Guide on how to install a shelf.

How to Install a Shelf That Won’t Fall Down

I was standing in my hallway last Saturday, staring at a pile of heavy cookbooks and a box of hardware, feeling that familiar knot of dread in my stomach. I had spent forty minutes trying to eyeball a level, only to realize my “straight” line was actually a disaster waiting to happen. Most people think you need a degree in carpentry or a massive toolbox to get things mounted correctly, but that’s just not true. Learning how to install a shelf doesn’t require a professional contractor or a magic touch; it just takes a little bit of patience and the right approach to finding those studs.

I’m not here to give you a lecture or sell you a fancy, overpriced power tool kit you’ll only use once. Instead, I’m going to walk you through the real-world way to get this done, from picking the right anchors to making sure your stuff doesn’t end up in a heap on the floor. We’ll break down the tools you actually need, how to avoid the most common measuring mistakes, and how to make sure everything stays solid and secure. Let’s get to work.

Table of Contents

Guide Overview

Total Time: 30-60 minutes
Estimated Cost: $20-50
Difficulty: Beginner

Tools & Supplies

  • Drill/Driver for making holes and driving screws
  • Level to ensure the shelf is straight
  • Pencil for marking drill points
  • Measuring tape for accurate spacing
  • Shelf and brackets 1 set
  • Wall anchors and screws 1 pack
  • Wall screws 1 pack

Step-by-Step Instructions

  • 1. First things first, grab your gear. You’re going to need a drill, a level (this is non-negotiable if you don’t want your books sliding off), a pencil, some wall anchors, and your screws. I always like to lay everything out on the floor before I start so I’m not scrambling halfway through a hole I just drilled.
  • 2. Now, we need to find the sweet spot. Hold your shelf up against the wall where you want it to live and use your pencil to mark exactly where the bracket holes are. Before you go wild with the drill, I highly recommend using a stud finder if you can. If you hit a stud, you’re golden and can screw directly into the wood; if not, don’t panic, we’ll just use those anchors I mentioned earlier.
  • 3. Once your marks are set, it’s time to prep the holes. If you’re using anchors because you missed a stud, drill a pilot hole that matches the size of the anchor. You want it snug but not a struggle to get the anchor in. If you try to force it too hard, you might crack the drywall, and nobody wants to spend their Saturday patching holes.
  • 4. Let’s get those anchors in. Tap them into your pilot holes with a hammer until they are flush against the wall. If they’re sticking out too far, they’ll make the shelf sit wonky, so give them a few extra taps to make sure they’re seated properly.
  • 5. Line up your shelf brackets with the anchors or studs you’ve prepared. This is where that level comes in handy. Place the level on top of the bracket and adjust it until the bubble is perfectly centered. Trust the level, not your eyes—eyeballing it is how you end up with a crooked shelf that drives you crazy every time you walk past it.
  • 6. Grab your drill and start driving the screws through the brackets and into the wall. Go slow! You don’t want to strip the screw head or spin it right out of the drywall. Once the screws are tight and the brackets feel rock solid, give the whole setup a little experimental shake to make sure nothing is wiggling.
  • 7. Finally, set your shelf on top of the brackets and secure it. Most kits come with tiny screws to attach the actual wood or metal shelf to the brackets themselves. Once those are in, wipe down the dust, admire your handiwork, and start loading it up with your gear. You did it!

Essential Tools for Shelf Mounting and Choosing Bracket Types

Essential Tools for Shelf Mounting and Choosing Bracket Types.

Before you even pick up a screwdriver, you’ve got to grab the right gear. I always tell people that half the battle is just having the right kit ready to go so you don’t end up halfway through a job and realize you’re missing a crucial piece. For this project, your essential tools for shelf mounting should include a sturdy drill, a level (don’t eyeball it!), a tape measure, and a pencil. Most importantly, you’ll want a solid stud finder. I’ve learned the hard way that trying to guess where the wood is behind your wall is a recipe for a very expensive mistake.

Once you’ve got your tools, you need to decide on your hardware. There are several different shelf bracket types out there, ranging from those chunky, industrial metal pieces that look great in a loft, to those sleek, hidden supports for a more modern vibe. Just keep in mind that the style you pick will dictate how much weight you can actually put on it. If you’re planning on stacking heavy cookbooks, you’ll want to prioritize drilling into drywall vs studs—aiming for those studs is going to be your best bet for a shelf that stays put.

Drilling Into Drywall vs Studs the Secret to Success

Drilling Into Drywall vs Studs the Secret to Success

Here’s the real deal: if you want that shelf to stay put when you pile your books or kitchen gear on it, you’ve got to know what’s hiding behind that paint. I’ve seen too many people just wing it, only to have their project come crashing down an hour later. When it comes to drilling into drywall vs studs, the stud is always your best friend. A stud is a solid piece of wood framing that provides the backbone for your wall, and hitting one means your shelf is going to be rock solid.

If you can’t hit a stud, don’t panic—you can still use drywall anchors, but you need to be smart about it. This is where your shelf weight capacity tips come into play. If you’re mounting something heavy, like a collection of cast iron pans, you absolutely must find a stud. If you’re just hanging a light photo frame or a small succulent, anchors will do the trick. I always recommend grabbing a decent tool from a wall stud finder guide to help you locate those wooden beams before you even touch a drill to the wall. It saves a massive headache later.

Pro Tips to Keep Your Shelf from Becoming a Floor Decoration

  • Double-check your weight limits before you get excited. I’ve seen plenty of people buy a beautiful piece of reclaimed wood only to realize it can’t actually hold a row of heavy cookbooks without bowing or snapping. Know what you’re putting on it before you drill.
  • Use a level—and I mean a real one, not just “eyeballing it.” Trust me, even a tiny tilt looks massive once you actually hang your stuff on it. If you don’t have a level, there are free apps for your phone that do a decent enough job to get you started.
  • Don’t forget the “test run” with a pencil. Before you go hammering away, mark your holes lightly with a pencil first. Step back, look at it from across the room, and make sure it doesn’t look wonky or sit awkwardly next to your other decor. It’s much easier to erase a pencil mark than it is to patch a hole in your drywall.
  • Mind your cord management if you’re putting tech on the shelf. If you’re planning to set up a small smart speaker or a lamp, plan where those wires are going to go before you mount the bracket. There’s nothing more annoying than a perfectly installed shelf with a messy nest of cables dangling off the side.
  • Keep a little extra hardware on hand. I always keep a handful of spare drywall anchors and different-sized screws in my junk drawer. Sometimes you realize mid-project that the screw that came in the box is just a hair too short, and having a spare saves you a frustrating trip back to the hardware store.

The Quick Cheat Sheet for a Solid Shelf

Always aim for the studs if you can—it’s the difference between a shelf that holds your books and one that ends up on the floor.

Don’t skimp on the right tools; having a decent level and the right drill bit makes the whole job way less frustrating.

Take your time with the measurements; a little extra checking now saves you from having to patch up holes in your drywall later.

My Golden Rule for DIY

“Look, I’ve seen plenty of people try to save a few bucks by skipping the stud finder, only to end up with a pile of broken ceramic and a hole in their wall. My advice? Don’t rush the prep. If you take ten minutes to make sure your foundation is solid, the actual hanging part is a breeze and you won’t be fixing your mistakes next weekend.”

Nathan Cole

You’ve Got This: Final Thoughts Before You Hang

You’ve Got This: Final Thoughts Before You Hang.

Look, I know it can feel a little intimidating when you’re staring at a blank wall and a handful of hardware, but you’ve already done the heavy lifting. We’ve covered the essentials: picking the right brackets, making sure you have the right tools, and—most importantly—knowing the difference between drilling into a stud and relying on drywall anchors. If you took the time to double-check your measurements and make sure your level was actually straight, you’re already ahead of most people. Just remember to take your time during that drilling phase; there’s no prize for rushing, and a little patience goes a long way in making sure that shelf stays exactly where you put it.

At the end of the day, a shelf is more than just a piece of wood and some metal; it’s about making your space feel like yours. There is a specific kind of satisfaction that comes from looking up at a finished project and knowing you didn’t have to call a professional to get it done. It might have felt like a headache ten minutes ago, but once you clear off that clutter and see everything organized, you’re going to feel like a total pro. So, grab your level, trust your hands, and get to work—you’ve totally got this.

Frequently Asked Questions

What should I do if I can't find a stud exactly where I want my shelf to go?

Don’t sweat it—this happens more often than you’d think. If your perfect shelf spot is a stud-less zone, don’t just wing it with regular nails. Grab some heavy-duty drywall anchors instead. I usually swear by the screw-in zinc anchors or those little plastic toggles; they bite into the drywall and give you the grip you need. Just make sure you check the weight rating on the package so your stuff doesn’t end up on the floor!

How much weight can these brackets actually hold before they start to sag or pull out of the wall?

That’s the million-dollar question, isn’t it? Here’s the straight talk: if you hit a stud, you’re golden—most brackets and screws can handle 50 to 100+ pounds easily. But if you’re relying on drywall anchors, you’ve gotta be careful. Those plastic toggles usually tap out around 20–30 pounds. My rule of thumb? Always check the bracket packaging, but if you’re planning on stacking heavy cookbooks, skip the anchors and find a stud.

Is there a trick to making sure my shelf stays perfectly level without constantly checking a bubble level?

Honestly, I used to spend half my time squinting at a bubble level, too. Here’s my favorite shortcut: grab a piece of painter’s tape. Mark your drill holes on the tape first, then peel it off and stick it where you want the shelf to go. You can slide that tape around easily until it looks right, and once you’re happy, just drill right through the marks. It saves a ton of headache.

Guide on how to make a compost bin.

How to Make a Compost Bin You’ll Actually Use

I used to think that if I wanted to start composting, I’d need to drop two hundred bucks on some fancy, high-tech rotating drum from a garden center. I spent weeks staring at my kitchen scraps, feeling guilty about every coffee ground and banana peel hitting the trash, thinking I just didn’t have the right equipment to do it properly. But after a weekend of tinkering in my backyard with some leftover cedar scraps and a few old wire mesh rolls, I realized that learning how to make a compost bin is actually way easier than the experts make it sound. You don’t need a degree in biology or a massive budget; you just need a little bit of grit and some basic materials.

In this guide, I’m going to skip the scientific jargon and show you exactly how to make a compost bin that actually works without turning your yard into a smelly mess. I’ll walk you through the best ways to build one using stuff you probably already have in your garage or can grab for a few bucks at the hardware store. My goal is to get you from a pile of kitchen waste to a heap of garden gold using simple, no-stress steps that anyone can follow.

Table of Contents

Guide Overview

Total Time: 1-2 hours
Estimated Cost: $20-50
Difficulty: Beginner

Tools & Supplies

  • Drill with spade bit for aeration holes
  • Handsaw or utility knife for cutting materials
  • Measuring tape for precision
  • Plastic storage bin (18-30 gallon) 1 unit
  • Drill bits (1/2 inch) 1 set
  • Hardware cloth or wire mesh 1 small roll
  • Potting soil or finished compost 1 handful

Step-by-Step Instructions

  • 1. First things first, you need to pick your spot. I always say, don’t just throw this in a random corner of the yard. You want somewhere that’s partially shaded but also has good drainage so your bin doesn’t turn into a swampy mess after a heavy rain. Find a flat patch of ground that’s easy to get to, because trust me, you’re going to be walking back and forth to this bin all summer long.
  • 2. Next, let’s talk about the build. For a simple, budget-friendly version, I like using old wooden pallets—you can usually find them for free behind hardware stores or warehouses. Grab four pallets of roughly the same size and stand them up to form a square. Use some heavy-duty zip ties or a few long screws to secure the corners together. This creates a sturdy frame without needing a whole workshop full of power tools.
  • 3. Now, we need to make sure your compost can actually breathe. Compost needs oxygen to break down, otherwise, it starts smelling like a dumpster. I like to leave small gaps between the slats of the pallets, or if you’re using a plastic bin, drill a few ventilation holes around the sides. If air can’t get in, the whole process will stall out, and nobody wants that.
  • 4. Time to start layering. Think of this like making a lasagna. You don’t want to just throw a pile of food scraps in there and call it a day. Start with a thick layer of “browns”—things like dried leaves, shredded cardboard, or straw—at the very bottom. This helps with airflow and moisture control. Once you have that base, you can start adding your “greens,” which are your nitrogen-rich kitchen scraps like fruit peels and coffee grounds.
  • 5. Keep the balance right. This is the part where most people get tripped up, but it’s actually pretty simple. You want a ratio that’s roughly three parts brown to one part green. If your pile starts smelling a bit funky, you probably have too many greens; just toss in some more dried leaves or extra cardboard to balance it out. If it looks too dry and isn’t doing anything, give it a little splash of water.
  • 6. Every couple of weeks, grab a pitchfork or even just a sturdy stick and give the pile a good turn. You’re basically mixing things up to get oxygen into the center of the heap. This speeds up the decomposition process significantly. It might look like a messy pile of junk right now, but with a little regular turning, it’ll start transforming into that rich, dark soil you’re looking for.

Your Essential Compost Bin Materials List

Your Essential Compost Bin Materials List guide.

Before you head out to the hardware store or start digging through your garage, you need a solid game plan. I’ve learned the hard way that grabbing random scraps without a plan can lead to a smelly, soggy mess in your backyard. When you’re putting together your compost bin materials list, don’t just think about the container itself. You need to consider things like a sturdy base to keep it off the bare dirt and a way to manage moisture. If you’re working with a tiny patio, look specifically for a compost bin design for small spaces, like a slim plastic tumbler or a tiered bin system, so you aren’t tripping over it every morning.

One thing most people overlook is the importance of airflow. If you don’t build in some way to allow for proper aeration for compost bins, your pile will basically turn into a swampy, stinky heap. I always recommend adding some perforated PVC pipes or even just drilling a few extra holes in the sides of your bin. It makes the whole process much smoother and ensures you’re actually helping the natural breakdown of organic matter rather than fighting against it.

Small Space Designs for Easy Garden Waste Management

Small Space Designs for Easy Garden Waste Management

If you’re living in an apartment or have a tiny patio, don’t let the lack of a massive backyard stop you. You don’t need a huge wooden crate to start practicing good garden waste management. One of my favorite hacks for tight spots is a simple DIY worm bin. This vermicomposting setup uses red wiggler worms to break down your scraps right under the kitchen sink or in a corner of the balcony. It’s compact, smells way less than a traditional pile, and produces some of the richest fertilizer you’ll ever use.

Another great option for small footprints is the “tumble” method. You can repurpose a heavy-duty plastic storage bin with a few drilled holes to create a rolling drum. Because it’s elevated or contained, it keeps things tidy and makes aeration for compost bins a total breeze—just give it a quick roll every few days. Whether you go with worms or a small tumbler, the goal is the same: keep it contained, keep it moving, and keep that waste out of the landfill.

Five Pro-Tips to Keep Your Compost from Turning Into a Mess

  • Don’t forget the “Browns” and “Greens” balance. Think of it like a recipe: you need plenty of carbon-rich stuff like dried leaves or shredded cardboard (the browns) mixed with your nitrogen-heavy food scraps (the greens). If it gets too slimy or smelly, you’ve probably got too many greens. Just toss in some more dry leaves and you’ll be back on track.
  • Give it some air. Compost needs oxygen to break down properly, just like we do. If you build a solid bin, make sure you drill some ventilation holes in the sides or use hardware cloth to let the breeze through. If the pile gets packed too tight, it’ll start to smell like a swamp, and nobody wants that in their backyard.
  • Keep it moist, but not soaked. You’re aiming for the consistency of a wrung-out sponge. If it looks bone dry, the microbes can’t do their job; if it’s dripping wet, it’ll get stinky. A quick spray with the garden hose every once in a while is usually all you need.
  • Chop it up a little. I know, it’s an extra step, but if you take thirty seconds to chop up larger vegetable scraps or crush those eggshells, they’ll break down way faster. The more surface area you give those tiny decomposers to work with, the quicker you’ll get that “black gold” for your garden.
  • Avoid the “No-Go” foods. This is a big one for beginners. Keep meat, dairy, and oily foods out of your bin. They don’t break down the way your veggie scraps do, and they’re a magnet for pests like rats or raccoons. Stick to the plant stuff, coffee grounds, and paper, and you’ll stay in the clear.

Quick Wins for Your New Compost Setup

Don’t overthink the build—whether you’re using a fancy cedar crate or just a repurposed plastic bin, the goal is airflow and accessibility, not perfection.

Keep your “recipe” balanced by mixing greens (like kitchen scraps) with browns (like dried leaves) to prevent smells and keep the decomposition moving.

Start small and stay consistent; it’s much easier to manage a tiny bin you actually use than a massive pile that becomes a weekend chore you avoid.

## A Little Dirt Goes a Long Way

“At the end of the day, a compost bin isn’t some high-tech science experiment; it’s just a way to stop throwing away potential and start building something useful. Don’t get hung up on making it look pretty—just get it built, get it working, and let nature do the heavy lifting.”

Nathan Cole

You’re Ready to Get Digging

You’re Ready to Get Digging compost bins.

At the end of the day, building your own compost bin doesn’t require a master’s degree in biology or a massive backyard. Whether you went with a heavy-duty wooden bin for the garden or a compact, tumbler-style setup for a small balcony, you’ve already done the hardest part by just getting started. Just remember to keep an eye on your balance of greens and browns, give it a little air every now and then, and don’t sweat the small stuff if it looks a bit messy at first. Once you get that rhythm down, you’ll realize that managing your waste is actually a simple, rewarding cycle that keeps your garden thriving without costing you a dime in fertilizer.

I know that looking at a pile of scraps and a pile of lumber can feel a little overwhelming when you first stand there in the driveway. But trust me, there is a special kind of satisfaction that comes from seeing something you built with your own two hands turn kitchen leftovers into black gold for your plants. It’s one of those small wins that makes you realize you really can handle whatever project life throws at you. So, grab your gloves, head out to the yard, and start building something great—you’ve totally got this.
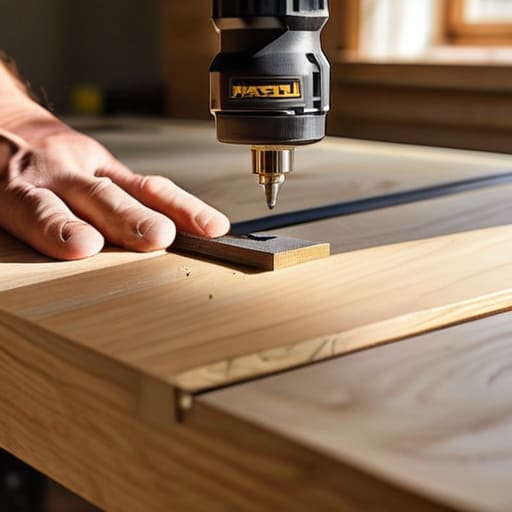
Frequently Asked Questions

How do I know if my compost pile is actually working or if it's just sitting there rotting?

That’s the million-dollar question. If it just smells like a trash can and looks like a pile of wet sludge, something’s gone wrong. But if it’s working, you’ll notice a bit of heat when you turn it, and it’ll start smelling like fresh, earthy woods—not rot. The real giveaway? The texture. Once those scraps start breaking down into dark, crumbly “black gold,” you know you’ve nailed it. Keep turning it to keep the oxygen flowing!

Is there a way to keep the smell down so my neighbors (or my spouse) don't complain?

Look, I get it. Nobody wants their backyard—or their kitchen—to smell like a landfill. If things are getting stinky, it’s usually just a sign that your compost is out of balance. The golden rule is to keep a healthy mix of “greens” (food scraps) and “browns” (dried leaves or cardboard). If it smells bad, add more browns and give it a good stir to get some air in there.

What exactly should I be throwing in there, and what's going to ruin the whole batch?

Think of your compost bin like a recipe: you need the right balance to keep it from getting gross. Aim for a mix of “greens” (nitrogen-rich stuff like veggie scraps and coffee grounds) and “browns” (carbon-rich stuff like dried leaves or shredded cardboard). Whatever you do, steer clear of meat, dairy, or oily foods. They’ll just attract pests and make your bin smell like a dumpster. Keep it simple, and you’ll be fine!

Essential tools for DIY beginner projects.

The Essential Tools Every Diy Beginner Needs

I still remember the first time I tried to fix a loose cabinet hinge in my first apartment. I’d spent way too much money on a massive, shiny tool kit I bought from a late-night infomercial, thinking it would make me a pro overnight. Half an hour later, I was sitting on the floor, surrounded by expensive gadgets I didn’t know how to use, staring at a stripped screw and a mounting sense of regret. The truth is, most of those “all-in-one” starter sets are a total rip-off. You don’t need a garage full of heavy machinery to tackle most home projects; you just need the right essential tools for diy that actually do what they’re supposed to do.

Look, I’m not here to sell you on some overpriced, professional-grade power tool that you’ll only use once a year. My goal is to cut through the noise and give you a straightforward list of the gear that actually matters. I’ve spent years breaking things and putting them back together, so I know exactly what’s worth your hard-earned cash and what’s just clutter. I promise to give you a no-nonsense guide to building a kit that works, so you can stop stressing and start fixing.

Table of Contents

Building Your First Home Improvement Starter Kit

Building Your First Home Improvement Starter Kit.

Look, I get it. Walking into a massive hardware store can feel like being dropped into a foreign country where you don’t speak the language. You see aisles upon aisles of shiny stuff, and suddenly you’re wondering if you need a $500 specialized driver just to hang a picture frame. You don’t. When you’re putting together your first home improvement starter kit, the goal isn’t to own everything; it’s to own the right things. I always tell people to start with a solid set of hand tools for beginners—think a reliable hammer, a multi-bit screwdriver, a tape measure that actually stays straight, and a good pair of pliers. These are your bread and butter.

Once you’ve got the basics down, you can start looking at the bigger stuff. You don’t need a garage full of heavy machinery to be a capable DIYer. In fact, I’d suggest picking up just one or two pieces of power tools for home maintenance to get the ball rolling, like a decent cordless drill. That one tool alone will tackle about 70% of the projects you’ll run into. Keep it simple and keep it functional.

Hand Tools for Beginners That Solve Real Problems

Hand Tools for Beginners That Solve Real Problems

Once you’ve got your basic kit together, it’s time to talk about the stuff you’ll actually be holding in your hands. When I first started out, I thought I needed a massive chest of expensive gear, but I quickly learned that a few solid hand tools for beginners can solve about 90% of the headaches you’ll run into. I’m talking about a decent set of screwdrivers with different heads, a multi-bit driver, and a solid hammer that doesn’t feel like it’s going to snap in half. You don’t need a professional-grade arsenal; you just need stuff that actually works when you’re halfway through a project and realize you’re missing a Phillips head.

Don’t overlook the smaller stuff, either. A high-quality tape measure and a sturdy utility knife are absolute lifesavers. I’ve lost count of how many times I’ve had to measure a space twice—or three times—before finally cutting a piece of trim or a shelf. If you’re building a diy project tool checklist, make sure these are at the top. They aren’t flashy, but they are the backbone of every successful fix.

Five Pro-Tips to Save You Time (and a Trip Back to the Hardware Store)

  • Don’t buy the “everything” kits. Those massive, cheap toolsets usually come with twenty mediocre wrenches and zero things you actually need. I’ve learned it’s way better to buy one high-quality hammer or screwdriver than a bucket of junk that breaks the first time you hit a stubborn nail.
  • Shop your own house first. Before you head out to the store, check your junk drawer or that random box in the garage. You might already have a tape measure or a pair of pliers hiding in there, and that’s money you can put toward something better later.
  • Invest in a decent measuring tape. Seriously. I once tried to eyeball a shelf project and ended up with a piece of wood that was an inch too short. It was a total headache. A solid, locking tape measure is one of those things you’ll use every single week.
  • Learn the difference between “cheap” and “value.” A $5 screwdriver is fine for a one-off task, but if you’re going to be doing DIY regularly, spend the extra few bucks for a brand that feels solid in your hand. Your knuckles will thank you when you aren’t fighting a stripped screw.
  • Always keep a small “project bin” ready. I keep a little plastic organizer with extra screws, some electrical tape, and a few washers. There is nothing more frustrating than being halfway through a fix only to realize you’re missing one tiny, two-cent piece of hardware.

The Bottom Line: Start Small and Keep Moving

Don’t go out and buy the entire aisle at the hardware store on day one; just grab what you need for the specific job in front of you, and your toolkit will grow naturally as you do.

Quality beats quantity every single time—I’d much rather own one solid, reliable hammer that won’t break in my hand than a cheap, flimsy set of twenty that makes the job harder.

Most importantly, don’t let the fear of making a mistake stop you from starting; even if you mess up a measurement, you’ve learned more than you ever would have by just reading about it.

The Real Secret to DIY

“You don’t need a garage full of expensive, shiny gadgets to get the job done; you just need a handful of reliable tools that actually work and the confidence to know that if you mess up, you can always try again.”

Nathan Cole

Getting Out There and Doing It

Getting Out There and Doing It.

Look, I know it feels like you need a garage full of heavy-duty machinery to actually get anything done, but that’s just not true. We’ve covered the basics—from that reliable hammer and a solid set of screwdrivers to the power tools that actually make life easier. You don’t need to go out and drop a thousand dollars at the hardware store today. The goal isn’t to own every gadget on the shelf; it’s about having the right foundation so that when something breaks, you aren’t staring at it helplessly. Start with the essentials we talked about, and I promise you’ll find that most small repairs are way more manageable once you have the right tool in your hand.

At the end of the day, the most important tool in your kit isn’t something you buy at a shop—it’s your own willingness to try. There’s going to be a moment where you strip a screw or hit a nail a little crooked, and honestly? That’s part of the process. I’ve spent plenty of afternoons swearing at a stubborn bolt, but that feeling of satisfaction when you finally tighten it down is unbeatable. Don’t let the fear of making a mistake keep you from starting. Just grab your gear, take it one step at a time, and trust yourself to figure it out. You’ve got this.

Frequently Asked Questions

Do I really need to buy the expensive professional brands right away, or can I get by with the cheaper stuff from a big-box store?

Look, I get it. Those professional-grade tools look shiny and impressive, but your wallet doesn’t need to take a hit just yet. For most of the stuff you’ll be doing—hanging shelves or tightening a loose cabinet handle—the big-box store brands work just fine. My rule of thumb? Buy the cheaper stuff for things you’ll use once in a while, but when you find a tool you actually love using, that’s when you invest in the pro version.

If I'm tight on cash, which one tool should I prioritize buying first to make sure I can actually tackle my first project?

If you’re staring at a tight budget and wondering where to drop your first twenty or thirty bucks, go with a decent cordless drill. I know, it sounds basic, but a drill is a total game-changer. It’s not just for making holes; it’s for driving screws into furniture, hanging shelves, or fixing a loose deck board. Most DIY projects stall because you can’t get things fastened securely, and a drill solves that instantly.

Is it better to invest in a cordless drill set now, or should I stick to manual tools until I know what kind of projects I'm actually going to be doing?

Look, I get the hesitation. You don’t want to drop a hundred bucks on a drill that just sits in the garage gathering dust. But honestly? If you’ve got even one project on the horizon—hanging a shelf, assembling flat-pack furniture, or fixing a loose deck board—get the cordless drill. Manual screwdrivers are great, but they’re a massive pain for anything more than a few screws. Save your wrists and your time; just grab a decent mid-range kit.

Guide on how to use a drill.

How to Use a Drill: a Beginner’s Guide

I still remember the first time I tried to hang a heavy floating shelf in my first apartment; I was so intimidated by that heavy, black plastic tool sitting on the floor that I actually ended up just using command strips and hoping for the best. Looking back, I was terrified of the noise and the idea of accidentally drilling straight through my drywall and into the neighbor’s living room. But here’s the truth: most people think you need a degree in engineering to master power tools, when really, learning how to use a drill is just about understanding a few basic mechanics and having the right bit in your hand.

I’m not here to give you a technical manual that reads like a textbook. Instead, I’m going to walk you through the actual, hands-on stuff—the kind of lessons I learned the hard way while fixing up old houses and tinkering in my garage. We’ll cover everything from holding it steady so you don’t slip, to picking the right speed for the job. By the time we’re done, you’ll stop eyeing that tool with suspicion and start feeling like you can actually tackle your next weekend project with confidence.

Table of Contents

Guide Overview

Total Time: 30-60 minutes
Estimated Cost: $0 (assuming tools are owned)
Difficulty: Beginner

Tools & Supplies

  • Power Drill (Cordless or corded drill)
  • Drill Bits (Set of various sizes for drilling and driving)
  • Workpiece (Wood, metal, or plastic)
  • Safety Gear (Safety glasses and gloves)

Step-by-Step Instructions

  • 1. First things first, you’ve got to pick your bit. Don’t just grab the first thing you see in the plastic organizer; if you’re drilling into wood, you want a wood bit, and if you’re hitting metal, you need something sturdier. I always tell myself to double-check the tip before I even touch the drill, because using the wrong bit is the fastest way to ruin a project (and your mood).
  • 2. Once you have your bit, it’s time to load it into the chuck. That’s the part at the very front that looks like a little claw. You’ll twist it to open the jaws, slide your bit in there, and then tighten it back up. Most modern drills are “keyless,” so you can just tighten it by hand, but make sure it’s snug so the bit doesn’t wobble around when you start working.
  • 3. Now, let’s talk about setting your speed and torque. On the top of the drill, you’ll usually see a dial or a switch. For most DIY stuff, you’ll want to keep it on the lower setting for more control, especially if you’re driving a screw. I like to think of it like shifting gears in a car; you don’t want to go full throttle right out of the gate if you’re just trying to do some delicate work.
  • 4. Before you pull the trigger, mark your spot. I never, ever just start drilling blindly. Take a pencil or a nail and make a tiny little dent where you want the hole to go. This is a total lifesaver because it gives the bit a place to sit so it doesn’t skitter across your wood or wall the second you start spinning.
  • 5. Get into position and apply steady pressure. Hold the drill firmly with both hands if you can—one on the handle and one on the back to keep it steady. When you start the motor, don’t push like you’re trying to break through a floor; just lean into it gently. Let the tool do the heavy lifting, and if it starts to feel like it’s struggling, back off a little and try again.
  • 6. Finally, once you’ve reached the depth you want, slowly release the trigger. Don’t just yank the drill out of the hole while it’s still spinning at max speed, or you’ll end up with a messy, jagged hole. Bring the speed down, pull the bit out clean, and take a second to admire your handiwork. You did it!

Mastering the Basics Proper Drill Grip Technique and Safety

Mastering the Basics Proper Drill Grip Technique and Safety

Before you even pull the trigger, let’s talk about how you actually hold the thing. I learned the hard way that if you’re holding a drill like a delicate tea cup, you’re going to lose control the second the bit catches. You want to use a proper drill grip technique where your dominant hand holds the handle firmly, while your other hand wraps around the back of the tool to provide counter-pressure. This keeps the bit from “walking” across your workpiece and helps you stay steady. Think of it as being part of the machine rather than just holding it.

Safety isn’t just about wearing goggles—though you definitely should—it’s about staying in command of the tool. One of the most important cordless drill safety precautions is making sure your workpiece is clamped down tight; if the bit snags and your wood starts spinning, you’re going to have a bad time. Also, don’t forget to keep your fingers clear of the chuck and always double-check that you aren’t drilling into a wire or a pipe hidden behind the wall. Stay focused, stay steady, and you’ll do just fine.

The Right Tool for the Job Drill Bit Types and Uses

The Right Tool for the Job Drill Bit Types and Uses

Look, I’ve been there—standing in the middle of an aisle at the hardware store, staring at a wall of shiny metal bits, wondering which one won’t snap the second it touches my project. It’s easy to get overwhelmed, but once you understand the basic drill bit types and uses, everything gets a lot easier. For most of your standard wood projects, a twist bit is your best friend. If you’re working with metal, you’ll want something a bit tougher, like a HSS (high-speed steel) bit. But if you’re trying to figure out how to drill into masonry—like a brick patio or a concrete foundation—standard bits will just die on you. You’ll need a masonry bit, which has that distinct, blunt carbide tip designed to hammer through stone.

One pro tip I learned the hard way: always start by drilling pilot holes. If you try to drive a large screw into a piece of hardwood without a tiny starter hole, you’re either going to split the wood or burn out your motor. It’s a small extra step that saves a massive amount of headache.

Pro Moves to Keep Your Project from Going Sideways

  • Mark your spot with a tiny pilot hole first. If you just start driving a big bit into wood, it’s liable to wander off and ruin your alignment, leaving you with a crooked hole and a headache.
  • Don’t go full throttle right away. Start slow with a light squeeze on the trigger to get the bit seated, then ramp up the speed once you know you’re on track. It keeps things steady and prevents slipping.
  • Watch your pressure, but don’t lean your whole body weight into it. Let the tool do the heavy lifting. If you’re pushing too hard, you’re more likely to snap a bit or strip out the screw head.
  • Keep an eye on the “walking.” If you feel the drill starting to tilt or skid, stop immediately, reset your stance, and try again. It’s much easier to fix a small slip than a massive gouge in your material.
  • Listen to what the motor is telling you. If it starts sounding strained or high-pitched, you’re probably pushing too hard or using a bit that’s too dull. Back off a second, let it breathe, and adjust your approach.

Quick Wins to Keep You Moving

Don’t rush the process; take a second to double-check your bit and your grip before you pull the trigger so you aren’t fighting the tool halfway through.

Match your bit to your material every single time—using a wood bit on metal is a fast way to ruin a good tool and a frustrating afternoon.

Keep your eyes on the work and your body steady, and remember that if it feels like you’re losing control, just let go and reset.

## My Golden Rule for the Workshop

“A drill isn’t a weapon and it isn’t a magic wand; it’s just a tool. If you stop trying to muscle it into submission and start listening to how it feels in your hands, you’ll realize you’re in control, not the other way around.”

Nathan Cole

You've Got This

Using a power drill: You've Got This.

Look, I know that first time you pull the trigger and that motor whirs to life, it can feel a little overwhelming. But just remember what we talked about: keep your grip firm, pick the right bit for the material you’re working with, and always, always prioritize your safety gear. Once you stop overthinking the mechanics and start focusing on the steady pressure and the right speed, you’ll realize that using a drill isn’t some mysterious black art. It’s just about matching the right tool to the task and staying patient while you work. If you get a crooked hole or a stripped screw, don’t sweat it—even I mess up more often than I’d like to admit.

At the end of the day, a drill is more than just a piece of plastic and metal sitting in your toolbox; it’s your ticket to actually getting things done around the house. There is a specific kind of satisfaction that comes from looking at a shelf you hung or a project you finished and knowing you didn’t have to call a professional to do it for you. So, grab your safety glasses, head out to the garage, and start building something. You might be surprised at just how much you can accomplish once you stop being afraid of the noise.

Frequently Asked Questions

Is it okay to use a regular drill bit on metal, or am I going to ruin the bit?

Short answer? Don’t do it. If you try to use a standard wood or multipurpose bit on metal, you’re going to have a bad time. You’ll likely overheat the bit, dull the tip instantly, and end up frustrated with a piece of scrap metal that won’t budge. Grab yourself a dedicated HSS (High-Speed Steel) bit instead. They’re designed to handle that heat, and they’ll make the job feel smooth rather than a struggle.

How do I stop the drill from slipping when I'm trying to start a hole in something smooth?

I’ve been there—nothing’s more frustrating than watching your drill bit skate across a surface like it’s on ice. To stop that slip, start with a center punch or even a sharp nail. Give the spot a quick, firm tap with a hammer to create a tiny divot. That little notch gives your bit a place to sit so it stays put once you pull the trigger. It makes a world of difference.

What’s the deal with the torque settings—do I really need to mess with those, or can I just leave it on the highest setting?

Look, I get it—the temptation to just crank it to the max is real. But honestly? Leaving it on the highest setting is a quick way to strip a screw head or crack your workpiece. Think of torque like seasoning: too much of a good thing ruins the dish. If you’re driving small screws into soft wood, dial it down. Use the higher settings for heavy-duty drilling. It’s all about control, not just raw power.