Cable management diy to organize cords.

Diy Cable Management to Tame the Cord Chaos

I was sitting on my floor last Tuesday, trying to reach a charger behind my desk, when I realized I wasn’t just looking at wires—I was looking at a literal nest of black spaghetti that had somehow claimed my entire office corner. It’s one of those things we all ignore until we actually have to move a piece of equipment or clean under the desk, and then suddenly, it’s a total disaster. Most people think you need to spend a fortune on fancy, high-end organizers to fix it, but that’s a total myth. Real cable management diy isn’t about buying the most expensive plastic trays on the market; it’s about using some basic logic and a few cheap tools to get that chaos under control.

I’m not here to give you a lecture on professional interior design or suggest anything that costs more than a trip to the local hardware store. Instead, I’m going to show you how to tame the madness using simple, hands-on methods that actually stick. We’ll walk through grouping your cords, hiding the excess, and labeling things so you never have to play “guess the plug” ever again. Let’s get to work and turn that mess into something you can actually live with.

Table of Contents

Guide Overview

Total Time: 1-2 hours
Estimated Cost: $20-50
Difficulty: Beginner

Tools & Supplies

  • Scissors or wire cutters for trimming ties
  • Label maker or masking tape for identification
  • Velcro cable ties (1 pack)
  • Cable management sleeves or raceways (2-3 units)
  • Adhesive cable clips (1 pack)
  • Power strip/surge protector (1 unit)

Step-by-Step Instructions

  • 1. First things first, you’ve gotta unplug everything. I know, it sounds like a pain, but trying to organize a “live” nest of wires is a recipe for a headache (and maybe a static shock). Pull every single cord out of the power strip and lay them out on the floor or a large table. This gives you a clean slate to see exactly what you’re working with, from the chunky monitor cables to those tiny, annoying charger cords.
  • 2. Next, grab a handful of velcro cable ties. I’m a huge fan of these over the plastic zip ties because they’re reusable. If you decide to move your desk six inches to the left next month, you aren’t stuck cutting through plastic and risking a snip to your finger. Group your cables together by how they travel—like all the wires heading from your desk down to the floor—and wrap them up loosely so they stay together but aren’t crushed.
  • 3. Now, let’s tackle the “under-desk” chaos by installing a cable management tray. You can pick up a simple metal mesh tray at any hardware store for pretty cheap. Screw it into the underside of your desk or use heavy-duty mounting tape if you’re renting and don’t want to leave holes in the wood. This tray acts like a shelf for your power strip and all those bulky “bricks” that the power adapters use, keeping them off the floor and out of your feet.
  • 4. Once the tray is in place, it’s time to start routing the wires. Feed your bundled cables into the tray, making sure you leave a little bit of “slack” or wiggle room. You don’t want the wires pulled tight like a guitar string; if you move your monitor or chair, you want enough length so nothing gets yanked out of the socket. Aim to have the cables follow the edges of your desk or the legs of your furniture to keep things looking clean and intentional.
  • 5. For those pesky little cables that pop up on top of your desk—like your phone charger or mouse—I highly recommend using some adhesive cable clips. These little guys stick right to the edge of your desk and hold the cord in place so it doesn’t slide off onto the floor every time you unplug your phone. It’s a small tweak, but it makes a massive difference in how organized your workspace actually feels during the day.
  • 6. Finally, do a quick labeling session. I know, it sounds a bit “Type A,” but trust me on this one. Use a piece of masking tape or a cheap label maker to mark both ends of your most important cords (like “Monitor,” “PC,” or “Printer”). There is nothing more frustrating than being under a desk in a dark corner, trying to guess which black cord belongs to which device. Once everything is labeled and tucked away, take a step back and enjoy the view.

Simple Diy Cable Organizer Hacks to Reclaim Your Space

Simple Diy Cable Organizer Hacks to Reclaim Your Space

If you aren’t quite ready to commit to a full-blown overhaul, don’t sweat it. Sometimes the best way to tackle a mess is with some quick diy cable organizer hacks you can grab at any local hardware store. One of my favorite low-cost tricks is using binder clips. Just clip them to the edge of your desk and thread your charging cables through the metal loops; it keeps them from sliding onto the floor every time you unplug your phone. It’s a tiny change, but it makes a massive difference in how your workspace feels.

For those of you dealing with a real “spaghetti monster” situation under your table, I highly recommend looking into under desk cable management solutions like adhesive cable trays or even simple command hooks. If you’re tired of seeing a tangle of black cords peeking out from behind your monitor, try using velcro straps for cables instead of those annoying plastic zip ties. Zip ties are permanent and a pain to cut if you change your mind, but velcro lets you add or remove gear whenever you want without the headache.

Smart Cord Management for Home Office Peace of Mind

Smart Cord Management for Home Office Peace of Mind

Once you’ve got the basics down, the real secret to long-term sanity is thinking about how you actually use your space. I’ve learned the hard way that if a setup is too difficult to change, you’ll eventually just give up and let the wires pile up again. That’s why I’m a huge advocate for using velcro straps for cables instead of those plastic zip ties. Zip ties are great for a permanent fix, but they’re a nightmare if you suddenly need to swap out a monitor or add a new desk lamp. Velcro allows you to bundle cords together loosely, making it easy to add or remove things as your tech evolves.

Another pro move is focusing on under desk cable management solutions to get the heavy lifting out of sight. If you can tuck your power strips and bulky adapters into a tray or a mounting bracket underneath the tabletop, you’ll instantly clear up your floor space and stop that “spaghetti mess” from collecting dust. It’s all about creating a system that works with your workflow rather than against it. Once those wires are tucked away, you’ll find it much easier to actually sit down and focus.

Five quick wins to keep your wires from turning into a disaster

  • Label both ends of every cord with a piece of masking tape or a wrap-around tag; there’s nothing more frustrating than unplugging the wrong thing when you’re just trying to reset your router.
  • Grab some heavy-duty Velcro strips instead of those cheap plastic zip ties, because if you ever need to add a new gadget to your setup, you won’t have to go hunting for scissors to cut yourself free.
  • Use binder clips from your desk drawer to create makeshift cord holders on the edge of your table, which keeps your phone charger from sliding onto the floor every time you unplug it.
  • Mount a power strip to the underside of your desk using command strips or mounting tape to get all those bulky plugs off the floor and out of your way for good.
  • Group your cables together using spiral wrap or even just some old bread ties to turn a dozen individual wires into one neat, manageable bundle that’s easy to tuck behind a desk leg.

The bottom line on taming your wire jungle

You don’t need to spend a fortune on fancy gadgets; a few cheap clips, some velcro ties, or even a bit of DIY ingenuity can do the heavy lifting.

Tackle the mess in stages—start with the biggest “spaghetti nests” first so you don’t get overwhelmed and give up halfway through.

Remember that cable management isn’t just about looks; it’s about making your gear easier to reach and keeping your workspace safe and dust-free.

Why it actually matters

“A tangled nest of wires isn’t just an eyesore; it’s mental clutter that makes you want to avoid your desk entirely. Once you take twenty minutes to tuck those cords away, you aren’t just cleaning up a mess—you’re reclaiming your focus and making your space feel like it’s actually under your control.”

Nathan Cole

Taming the Chaos for Good

Taming the Chaos for Good: organized desk.

At the end of the day, getting your cables under control isn’t about achieving some perfect, museum-quality setup; it’s about making your space actually work for you. We’ve gone through everything from using simple binder clips as makeshift cord holders to implementing those smart, long-term office organization strategies. Whether you decided to go the route of heavy-duty cable trays or just spent twenty minutes untangling a “spaghetti nest” under your desk, you’ve already done the hard part. The goal was to move from a workspace that feels cluttered and stressful to one that feels organized and intentional, and by following these steps, you’ve officially reclaimed your desk from the wires.

I know that looking at a pile of tangled black cords can feel a bit overwhelming at first, but I promise you, it’s one of those things that is much more figure-out-able than it looks. Once you clear that visual noise away, you’ll notice you can actually focus better on the work in front of you instead of the mess at your feet. So, grab those zip ties, find some velcro strips, and take it one cord at a time. You’ve got this, and honestly, the feeling of satisfaction you get when you finally plug everything in and see a clean surface is totally worth the effort.

Frequently Asked Questions

Are there any specific types of cables I should avoid bundling together to prevent overheating or interference?

Yeah, this is a great question. You definitely don’t want to bundle high-voltage power cables right next to your sensitive data lines, like Ethernet or audio cables. Mixing them can cause “noise” or interference, making your internet laggy or your speakers buzz. Also, keep an eye on those heavy-duty power bricks; don’t bury them under a mountain of other cords. They need a little breathing room so they don’t cook your other gear.

What’s the best way to handle cable management if I’m renting and can't drill holes into the walls?

I get it—landlords can be pretty strict about those little drill holes. The good news? You don’t need a power drill to fix a wire mess. I usually lean on heavy-duty command hooks or adhesive cable clips; they grip tight but peel off clean when you move. You can also grab a cheap cable management tray that clamps right onto the edge of your desk. No holes, no damage, and your security deposit stays safe.

How often should I actually go back and tidy these up to make sure dust isn't building up in the mess?

Honestly, I try to give my setup a quick “dusting check” about once a month. It doesn’t have to be a deep clean, just a quick pass with a microfiber cloth or a can of compressed air to make sure nothing is nesting in those cable bundles. If you’ve got pets or a dusty house, maybe bump that up to every two weeks. A little maintenance now saves you from a massive, sticky headache later.

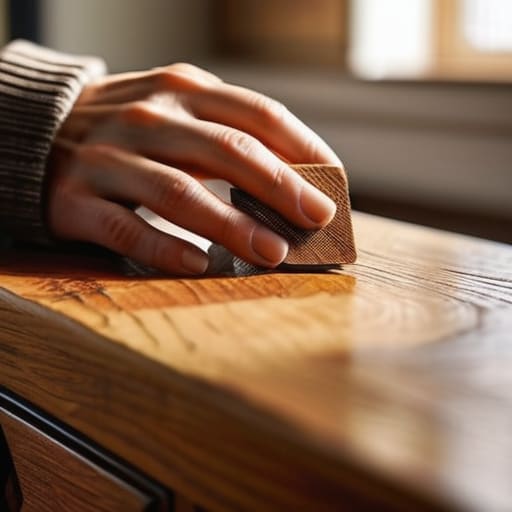
Guide on how to refinish furniture.

How to Refinish Old Furniture and Make It New

I was standing in the middle of a thrift store last Saturday, staring at this gorgeous, solid oak nightstand that looked like it had been through a war zone. The finish was peeling, the color was a muddy, outdated orange, and most people were walking right past it like it was junk. But I saw something else. I knew that if I sat down and figured out how to refinish furniture properly, that piece could be the centerpiece of a room instead of something hiding in a garage. Most people think you need a professional workshop or a massive budget to save a piece like that, but honestly? That is a total myth.

I’m not here to sell you on some complicated, high-end industrial process that requires a degree in woodworking. Instead, I’m going to show you the real-world, grit-under-your-fingernails way to do it. We’re going to break this down into a few manageable stages—from stripping that old, crusty gunk to applying a finish that actually lasts. My goal is to give you a no-nonsense roadmap so you can stop overpaying for “distressed” boutique pieces and start making your own.

Table of Contents

Guide Overview

Total Time: 1-2 days
Estimated Cost: $40-80
Difficulty: Beginner

Tools & Supplies

  • Sandpaper (various grits for smoothing)
  • Screwdriver (for removing hardware)
  • Paintbrush or Foam roller (for applying finish)
  • Tack cloth (for removing dust)
  • Wood stripper or Sandpaper (1 pack)
  • Primer (1 quart)
  • Furniture paint or stain (1 quart)
  • Clear topcoat/sealant (1 can)

Step-by-Step Instructions

  • 1. First things first, you’ve gotta clear some space. You don’t need a professional workshop, but you do need a flat surface—like a sturdy table or a clean spot on your garage floor—where you won’t be interrupted. Grab some old newspapers or a drop cloth to protect your flooring, because trust me, sanding dust gets everywhere. Once you’ve got your workspace set up, strip off any hardware like handles, knobs, or hinges. It’s much easier to work on a “naked” piece of furniture than trying to navigate around hardware you’re just going to have to clean later anyway.
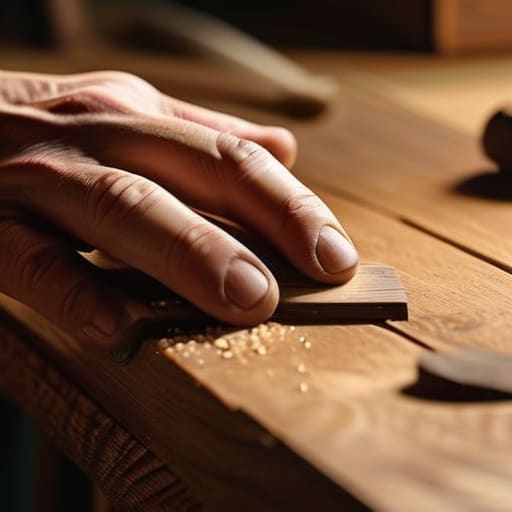
  • 2. Now we get to the dirty part: stripping and sanding. If the piece has a thick, old varnish or paint, you might want to use a chemical stripper first to take the bulk of it off. If it’s just a bit worn, you can jump straight to sanding. Start with a coarser grit sandpaper—I usually go with something around 80 or 100 grit—to get rid of the old finish and any deep scratches. The goal here isn’t to sand it down to nothing, but to create a smooth, even surface that’s ready to take on something new.
  • 3. Once you’ve knocked down the heavy stuff, it’s time to smooth things out. Switch to a finer grit, like 150 or 220. You want to sand in the direction of the wood grain, not across it, otherwise you’ll end up with these annoying little scratches that show up once you apply the stain. I like to take my time here because patience pays off when you’re looking for that professional feel. If you rush this part, the final product will look a little wonky.
  • 4. This is the step most people skip, but it’s the most important: cleaning. After all that sanding, your furniture is going to be covered in a fine layer of dust. Take a vacuum with a brush attachment or a tack cloth (those sticky little cloths you find in the hardware aisle) and get every single speck off the surface. If there’s any dust left behind, your new finish will feel gritty and uneven instead of smooth as silk.
  • 5. Now comes the fun part—choosing and applying your color. If you’re using a stain, apply it with a lint-free rag or a foam brush following the grain of the wood. If you want a solid color, a good quality furniture paint is the way to go. Don’t try to do it all in one thick, heavy coat; instead, apply thin, even layers. It’s much better to do two or three light coats than to try and hide your mistakes with one giant, gloopy layer that takes forever to dry.
  • 6. While you’re waiting for the paint or stain to dry, resist the urge to touch it! I know it’s tempting, but even a tiny fingerprint can ruin the finish. Once it’s completely dry to the touch, you’ll want to add a protective topcoat like a polyurethane or a wax. This is what gives the piece its durability and protects it from spills or scratches during everyday use. Just like with the stain, keep your brush strokes light and follow the grain to avoid any streaks.
  • 7. Finally, once the topcoat has cured (and give it at least 24 hours, if not longer), you can screw those handles and knobs back on. Take a second to wipe down the hardware so it’s shiny and clean, and then place your freshly revived piece exactly where you want it. You just took something destined for the landfill and turned it into a functional piece of decor, and honestly, that’s a pretty great feeling.

Gathering Your Essential Furniture Refinishing Tools

Gathering Your Essential Furniture Refinishing Tools.

Before you dive in, you’ve got to get your workspace ready. I’ve learned the hard way that nothing kills the momentum of a project like having to stop halfway through because you realized you’re missing a crucial piece of gear. When I’m prepping for a weekend project, I start by rounding up my essential furniture refinishing tools: a good set of sandpaper, some tack cloths, a sturdy brush, and a couple of drop cloths to protect your floors. Trust me, you don’t want to spend your Saturday afternoon running back and forth to the hardware store.

If you’re working on something more complex, like restoring antique wood furniture, you might need to step up your game. You’ll want to grab a high-quality chemical stripper if the old finish is stubborn, or perhaps a random orbital sander to save your arms some grief. I always tell people to keep a small container of mineral spirits handy for cleaning surfaces between steps. It’s all about having the right stuff on hand so you can focus on the fun part—actually seeing that beautiful wood grain come back to life.

Choosing the Right Wood Stripping Techniques

Choosing the Right Wood Stripping Techniques.

Once you’ve got your tools laid out, you need to decide how you’re actually going to get that old finish off. When it comes to wood stripping techniques, you really have two main paths: chemical strippers or heavy-duty sanding. If you’re working on something delicate, like restoring antique wood furniture, I usually recommend a chemical stripper. It’s a bit messy and you’ll need to wear gloves, but it eats through old varnish without gouging the wood grain. It’s much gentler on those intricate carvings that a power sander would just obliterate.

On the other hand, if the piece is a sturdy dining table or a simple bookshelf, you might just want to dive straight into sanding. This is faster, but you have to be careful. You’ll want to follow a proper furniture sanding grits guide, starting with something coarse to level things out and moving to a finer grit to smooth it down. If you skip steps or go too fast, you’ll end up with swirl marks that show up like a sore thumb once you start applying your finish. Take your time—it’s better to do it right once than to redo it twice.

Five Pro Tips to Keep Your Project from Turning Into a Headache

  • Don’t skip the prep work. I know it’s tempting to jump straight to the fun part—the staining—but if you don’t spend enough time cleaning and sanding, your finish is going to look blotchy and uneven.
  • Test your stain on a hidden spot first. Every piece of wood reacts differently to pigment, so grab a scrap piece or use the back of a drawer to see how the color actually looks before you commit to the whole thing.
  • Work in small, manageable sections. If you try to tackle a massive dining table all at once, the stain might dry unevenly. I like to work one tabletop or one drawer at a time to keep things consistent.
  • Watch your lighting. It sounds simple, but if you’re working in a dark corner, you’re going to miss drips, bubbles, or missed spots. Grab a good work lamp so you can actually see what you’re doing.
  • Be patient with the drying times. It’s so easy to think, “Oh, it looks dry, I’ll add another coat,” but if you rush it, you’ll end up with a sticky, gummy mess that takes weeks to fix. Just let it sit.

Three Things to Remember Before You Start

Don’t rush the stripping process; if you try to force the old finish off too fast, you’ll end up gouging the wood and creating more work for yourself.

Invest in decent sandpaper and quality tools—it might cost a few extra bucks at the hardware store now, but it’ll save you a massive headache (and a lot of elbow grease) later.

Remember that refinishing is a marathon, not a sprint, so take your time with each layer to make sure the final result actually looks professional.

## The Big Picture

“Look, you don’t need a professional workshop or a degree in fine arts to do this right. You just need a little patience, the right basic tools, and the willingness to get your hands a bit dirty. Most of the time, that old piece of furniture isn’t ‘trash’—it’s just waiting for you to uncover the good stuff underneath.”

Nathan Cole

The Finish Line

A smooth wood project reaches The Finish Line.

Now that you’ve navigated the messy parts—from picking out the right sandpaper grit to carefully stripping away that old, peeling varnish—you’re finally at the home stretch. Remember, the secret to a professional-looking piece isn’t some expensive industrial machine; it’s really just about patience and preparation. If you took the time to sand smooth and applied your stain or paint in even layers, you’ve already done the hard work. Don’t rush that final topcoat, either. Giving it enough time to truly cure is what separates a project that looks okay today from one that stays beautiful for the next decade.

I know there were probably moments halfway through when you were covered in dust, staring at a piece of wood that looked more ruined than rescued, but look at what you did. You didn’t just fix a piece of furniture; you proved to yourself that you can take something old and forgotten and turn it into something meaningful. That’s the real magic of DIY. Every scratch and dent tells a story, and now, you’re the one writing the next chapter. So, take a step back, grab a coffee, and really admire your handiwork. You earned it, and I bet it looks absolutely incredible.

Frequently Asked Questions

How do I know if a piece of furniture is actually worth the effort of refinishing?

Look, I’ve definitely spent a Saturday sweating over a thrift store find only to realize halfway through that it was just cheap particle board. Not every piece is a winner. Before you grab the sandpaper, check the weight and the joinery. If it’s solid wood and has real dovetail joints, it’s usually worth the sweat. If it feels light as a feather or the “wood” looks like a sticker, save your energy for something better.

Is it safe to use chemical strippers indoors, or should I take this project out to the garage?

Honestly, if you can get it out to the garage, do it. Most chemical strippers have a pretty intense smell and can kick up some nasty fumes that you definitely don’t want hanging around your living room. If you’re stuck working indoors, just make sure you crack every window open, keep a fan running, and wear a decent respirator. Better safe than sorry—I’ve learned that the hard way more than once.

What should I do if I hit a patch of wood that looks damaged or has deep scratches after I strip the old finish?

Don’t sweat it—this happens to the best of us. Once that old finish is gone, the “scars” always seem more obvious. If you’re looking at deep scratches or gouges, grab some wood filler that matches your wood type. For smaller stuff, you can just sand it smooth with high-grit sandpaper. If it’s a real battle wound, fill it, let it dry, and sand it flush. It’s just another little hurdle to clear!

Guide on how to sharpen tools.

How to Sharpen Your Tools and Keep Them Working

I was halfway through trying to trim some cedar siding last summer when my chisel finally gave up the ghost, leaving me with nothing but a jagged, splintered mess and a whole lot of frustration. It’s one of those moments where you realize your gear isn’t actually working for you, it’s working against you. Most people think you need a fancy, expensive motorized grinder or a degree in metallurgy to fix the problem, but that’s just not true. Learning how to sharpen tools doesn’t require a massive investment or a workshop full of high-tech gadgets; it really just comes down to understanding a few basic principles and having a little bit of patience.

I’ve spent years tinkering with everything from old hand planes to kitchen knives, and I’ve learned that the best results usually come from the simplest methods. In this guide, I’m going to strip away all the technical jargon and show you the straightforward way to get your edges back. We’ll walk through the essential gear you actually need, the steady hand techniques that make a difference, and a few common mistakes I made when I was first starting out. By the time we’re done, you’ll be able to take those dull, frustrating blades and make them cut like new again.

Table of Contents

Guide Overview

Total Time: 30-60 minutes per tool
Estimated Cost: $30-80
Difficulty: Beginner

Tools & Supplies

  • Chisel (flat edge metal tool)
  • Utility Knife (retractable or fixed blade)
  • Combination Whetstone (1 dual-grit stone)
  • Honing Oil or Water (1 small bottle)
  • Leather Strop (1 piece)
  • Micro-abrasive Compound (1 small jar)

Step-by-Step Instructions

  • 1. First things first, you’ve gotta gather your gear. You don’t need a fancy professional setup, but you can’t exactly sharpen a chisel with a piece of sidewalk. Grab a whetstone (a dual-grit one is your best friend here), a small container of water or honing oil depending on what your stone calls for, and a soft cloth to wipe everything down. I always keep a cheap microfiber towel nearby because things tend to get messy fast.
  • 2. Next, you need to prep your stone. If you’re using a water stone, soak it in a shallow bowl of water for about ten to fifteen minutes. You’ll know it’s ready when the air bubbles stop rising to the surface. If you’re using an oil stone, just apply a thin, even layer of honing oil across the surface. You want to make sure there’s a consistent film so the metal doesn’t drag or skip on the grit.
  • 3. Now, let’s talk about finding that angle. This is where most people get nervous, but I promise it’s not as scary as it looks. Hold your tool—let’s say it’s a kitchen knife or a garden spade—at about a 20-degree angle relative to the stone. A good trick I learned from my old man is to use the width of a couple of stacked quarters as a visual guide. Once you find that sweet spot, hold it steady with both hands to avoid wobbling.
  • 4. Time to get to work with some steady strokes. Start with the coarser side of the stone and push the edge across the surface in a smooth, sweeping motion. Think of it like you’re trying to shave a tiny layer off the top of the stone. Don’t rush this part; it’s all about consistent pressure and rhythm. You’ll eventually feel a tiny “burr” forming on the opposite side of the edge—that’s actually a great sign that you’re doing it right.
  • 5. Once you’ve felt that burr, it’s time to switch to the finer grit stone to refine the edge. This step is what takes a tool from “functional” to “razor-sharp.” Use lighter pressure here and repeat those same sweeping motions. This is the part where you polish out the scratches left by the heavy lifting you did in the previous step, smoothing everything out until the metal looks clean and bright.
  • 6. Finally, you’ve got to remove that burr and clean up. Take your cloth and gently wipe the edge of the tool from the spine toward the cutting side. If there’s still a little bit of metal snagging, do a few very light, single strokes on the fine grit stone to knock it off. Once you’re done, give the whole tool a good wipe-down to remove any leftover grit or oil. Now, go ahead and test it out on a piece of paper—if it slices through like butter, you’ve nailed it.

Picking the Best Sharpening Tools for Beginners

Picking the Best Sharpening Tools for Beginners

Look, I’ve made the mistake of walking into a hardware store and buying the first shiny gadget I saw, thinking it would do all the work for me. Trust me, you don’t need a massive, expensive kit to get started. If you’re just dipping your toes in, the best sharpening tools for beginners are usually something simple like a diamond plate or a basic dual-grit whetstone. A whetstone gives you way more control over the angle of blade for optimal sharpness, which is the secret sauce to a clean cut. It might take a little more practice than a motorized gadget, but you’ll actually learn how the metal responds.

Now, don’t get confused between different tools you’ll see on the shelf. A common question I get is about honing steel vs sharpening stone. Think of it this way: a honing steel is great for realigning an edge while you’re cooking, but if your knife is actually dull, you need a stone to remove metal and create a new edge. Once you master that, you can even move on to sharpening garden shears and loppers to keep your yard looking sharp. Just take it one tool at a time.

Mastering Whetstone Sharpening Techniques for a Pro Edge

Mastering Whetstone Sharpening Techniques for a Pro Edge

Once you’ve got your stones laid out, the real magic happens in how you actually move the metal. I used to struggle with this, thinking I needed a machine, but mastering a few basic whetstone sharpening techniques is what really changes the game. The biggest secret is consistency. You aren’t just scrubbing the metal; you’re looking for that perfect angle of blade for optimal sharpness. I usually aim for about 15 to 20 degrees, which is roughly the height of a matchbook held against the stone. If you wobble, you lose that edge immediately, so take it slow and focus on steady, even strokes.

Don’t forget that a sharp tool isn’t just about the initial grind; it’s about how you treat it afterward. A lot of guys ask me about honing steel vs sharpening stone, and here’s the deal: the stone actually removes metal to fix a dull edge, while a honing rod just realigns it. If you want to focus on maintaining blade edge longevity, make sure you finish with a very fine grit stone to polish away those tiny burrs. It takes a little more patience, but it makes a massive difference in how long that edge stays biting.

A Few Pro Tips to Keep You from Making a Mess of It

  • Don’t rush the process. I know it’s tempting to just scrub away at that blade to get it done, but sharpening is all about patience. If you force it, you’re going to end up with an uneven edge that’s more frustrating than a dull one.
  • Keep things wet. If you’re using a whetstone, make sure you’ve got a good layer of water or honing oil going. A dry stone is a recipe for a ruined tool and a messy workspace, and it won’t give you that smooth, polished finish you’re after.
  • Listen to the metal. There’s actually a specific sound a blade makes when it’s hitting the right angle against the stone. It’s a consistent, rhythmic “shing” sound. If it sounds scratchy or uneven, you probably need to adjust your angle.
  • Test the edge safely. Instead of grabbing a piece of paper and praying, try the “thumb test”—but be careful! Gently run your thumb across the edge (not along it!) to feel for any nicks or smoothness. It’s the quickest way to tell if you’re actually getting somewhere.
  • Clean your tools immediately after. Once you’ve got that edge looking sharp, wipe down the metal to get rid of any grit or oil residue. I’ve learned the hard way that leaving metal dirty after sharpening is just asking for rust to move in.

Quick Reminders Before You Get to Work

Don’t rush the process; sharpening is more about patience and finding that consistent angle than it is about raw strength.

Always keep your tools clean and your stones lubricated—it’s much easier to fix a dull blade than it is to fix a scratched one.

Invest in a few decent basics rather than a fancy professional kit, and you’ll find that most jobs are totally manageable.

## A Little Wisdom for the Workbench

“A sharp tool isn’t just about making the job easier; it’s about having the confidence to actually start it. There’s nothing more frustrating than fighting a dull blade, but once you get that edge right, you stop working against your gear and start working with it.”

Nathan Cole

Don't Stop at the First Edge

Don't Stop at the First Edge sharpening.

At the end of the day, sharpening isn’t just about making a blade look pretty; it’s about having gear you can actually rely on when a project gets tough. We’ve covered a lot, from picking out the right beginner kits to really getting the hang of those whetstone techniques that make all the difference. Remember, you don’t need a massive industrial setup to get professional results. Whether you’re using a simple file or a multi-grit stone, the secret is all in the consistency of your angle and a little bit of patience. If you take the time to do it right now, you’ll save yourself a massive headache—and a lot of wasted material—down the road.

I know it can feel a bit intimidating the first few times you try this, especially when you’re worried about ruining a good tool. But trust me, even I had a few botched attempts when I was first starting out in my dad’s garage. The more you do it, the more you’ll develop that “feel” for the metal. Don’t be afraid to make mistakes; they’re just part of the learning process. Just grab your tools, clear off a steady workspace, and give it a shot. Once you feel that first clean, effortless cut, I promise you’ll feel like a total pro. You’ve got this!

Frequently Asked Questions

How often should I actually be sharpening my tools to keep them in good shape?

Honestly, there isn’t a magic number on a calendar, but I’ve learned to listen to the tool instead. If you’re working through a project and notice you’re having to push harder, or if the material is tearing instead of slicing, that’s your signal. For tools I use every weekend, I usually give them a quick touch-up every few months. Just don’t wait until they’re blunt—it’s much easier to maintain an edge than to fix a dull one.

Is it okay to use a cheap electric sharpener, or am I going to ruin my good blades?

Look, I get the temptation. When you’re staring at a dull chisel, those cheap electric sharpeners look like a lifesaver. But honestly? I’d be careful. Most of those budget models use aggressive grinding wheels that can eat away your metal way too fast, stripping away the temper and leaving you with a blade that won’t hold an edge. If it’s just a cheap kitchen knife, go for it. But for your good stuff? Stick to manual.

What should I do if I accidentally slip and nick the metal while I'm sharpening?

Look, don’t panic—it happens to the best of us. I’ve definitely felt that heart-sink moment when a slip leaves a visible scratch or a tiny notch in the metal. If it’s just a minor nick, don’t toss the tool. You can usually “work around” it by slightly adjusting your angle or using a finer grit stone to smooth out the burr. If it’s deep, you might need to grind a bit more metal away to even it out.

How to unclog a drain naturally.

How to Unclog a Drain Without Harsh Chemicals

There I was, standing in my kitchen at 7:00 AM, staring at a sink full of gray, lukewarm water that just wouldn’t budge. I had a pan of eggs ready to go, but instead, I was stuck staring at a literal swamp in my own house. Most people think that once the water starts rising, you’re stuck calling an expensive plumber or dumping a gallon of caustic chemicals down the pipe that’ll probably eat your plumbing. But let me tell you, that’s a total myth. Learning how to unclog a drain isn’t about having a degree in engineering; it’s usually just about having the right mindset and a few basic tools you likely already have in your junk drawer.

I’m not here to sell you some magic liquid or a complicated gadget you’ll use once and lose. My goal is to give you the straightforward, no-nonsense truth on getting things moving again. I’m going to walk you through a few different methods—from the simple stuff to the slightly more “get your hands dirty” techniques—so you can tackle the problem yourself. We’ll go from easy fixes to the heavy hitters, ensuring you can get back to your day without breaking the bank or losing your mind.

Table of Contents

Guide Overview

Total Time: 15-45 minutes
Estimated Cost: $0-20
Difficulty: Beginner

Tools & Supplies

  • Plunger [Cup or flange style for creating suction]
  • Drain snake [Manual auger to reach deep clogs]
  • Baking soda [1/2 cup for natural cleaning]
  • White vinegar [1/2 cup for chemical reaction]
  • Hot water [1 kettleful to flush the drain]

Step-by-Step Instructions

  • 1. First things first, let’s try the easiest method before we go breaking out the heavy machinery: the plunger. Grab a standard cup plunger (the kind with the flat bottom, not the flange kind meant for toilets) and make sure there is enough water in the sink to cover the bell of the plunger. You want to create a tight seal over the drain, push down slowly to get the air out, and then give it some really vigorous up-and-down strokes to create that suction we need.
  • 2. If the plunger didn’t do the trick, it’s time to go after the “gunk” manually. I’ve learned the hard way that most sink clogs are just a nasty buildup of hair and soap scum sitting right near the surface. Grab a cheap zip tool—you know, those long plastic strips with the little barbs on the side—and slide it down into the drain. You’ll likely pull up a disgusting clump of hair, but trust me, seeing that mess come out is the best feeling in the world.
  • 3. Now, if the clog is deeper down, we need to get under the sink and look at the P-trap. That U-shaped pipe is designed to hold water and catch heavy debris, which makes it the most likely culprit for a backup. Place a bucket underneath the pipe to catch any water that spills out, then unscrew the slip nuts by hand or with a pair of channel locks. Once that pipe is off, take it to another sink or outside and give it a good scrub to clear out whatever is stuck inside.
  • 4. If you’ve cleared the trap and the water still isn’t moving, the blockage is likely further back in the wall pipes. This is where you bring out the heavy hitter: the drain snake (or an auger). Feed the cable into the pipe coming out of the wall, cranking the handle as you go until you feel some resistance. That resistance is your clog; keep turning the snake to hook into it, then slowly pull the cable back out to drag the obstruction toward you.
  • 5. Once you’ve tackled the physical blockage, you need to flush the system to make sure everything is running smooth. I usually skip the harsh chemical cleaners because they can eat away at your pipes over time, and I’d rather not deal with a splash of acid on my skin. Instead, pour a healthy amount of baking soda down the drain, followed by a cup of white vinegar. Let it fizz and work its magic for about fifteen minutes, then flush it all through with a big pot of boiling water.
  • 6. Finally, once the water is flowing freely again, do a quick test run. Turn the faucet on full blast and let it run for a few minutes to ensure there are no slow leaks around the connections you tightened earlier. If everything looks dry and the drainage is snappy, you’re officially done. Take a second to pat yourself on the back—you just saved yourself a massive plumbing bill.

Mastering Natural Drain Cleaner Remedies and Baking Soda Tricks

Mastering Natural Drain Cleaner Remedies and Baking Soda Tricks

Now, if you aren’t ready to break out the heavy-duty tools just yet, you might want to try some natural drain cleaner remedies first. I’ve found that a lot of times, a nasty buildup is just a collection of soap scum or grease that hasn’t quite solidified. My go-to move is unclogging a kitchen sink with baking soda and vinegar. It sounds like a middle school science experiment, but the fizzing action actually helps loosen up the gunk clinging to the pipe walls. Just pour in a half-cup of baking soda, follow it with some white vinegar, let it sit for about fifteen minutes, and then flush it all down with a kettle of boiling water.

The real secret, though, is being proactive about preventing future drain clogs before they even start. I always tell my friends to keep a small mesh strainer over the sink to catch hair or food scraps. It’s a tiny habit, but it saves you from the headache of a backup later on. If you do notice things slowing down slightly, don’t wait until the water is standing still; a quick monthly flush with hot water and some salt can keep things moving smoothly.

Using a Plunger Effectively and Plumbing Snake Usage Made Simple

Using a Plunger Effectively and Plumbing Snake Usage Made Simple

If the baking soda trick didn’t quite do the job, don’t panic—it’s time to bring out the heavy hitters. When it comes to using a plunger effectively, most people make the mistake of just splashing around aimlessly. If you’re tackling a sink, make sure you block the overflow hole with a damp rag first; otherwise, you’re just venting the pressure instead of forcing it against the clog. You want to create a tight seal and use firm, rhythmic plunges to really build up that suction. It’s all about that pressure differential to break the blockage loose.

Now, if the plunger is just bouncing off a stubborn obstruction, you’ll likely need to move on to plumbing snake usage. I know, a drain auger looks a bit intimidating, but it’s basically just a long, flexible spring that goes where your hands can’t. Feed the cable into the pipe until you feel resistance, then give it a little crank. You aren’t trying to smash the clog; you’re trying to hook onto it so you can pull the gunk back out. Once it’s clear, run some hot water to flush everything through.

Pro Tips to Keep the Clogs from Coming Back

  • Stop the hair at the source. I learned the hard way that a $5 mesh hair catcher in the shower pays for itself in about two weeks by saving you from a massive headache later.
  • Watch what you pour down the kitchen sink. I know it’s tempting to rinse a greasy pan right in the basin, but that fat cools down and turns into literal cement in your pipes. Scrape it into the trash first.
  • Give your drains a monthly “maintenance flush.” Once a month, just pour a kettle of boiling water down there. It’s a simple way to melt away any minor buildup before it turns into a full-blown disaster.
  • Don’t go overboard with harsh chemicals. I know those heavy-duty liquid cleaners promise magic, but they can actually eat away at your pipes over time. Stick to the natural stuff or mechanical tools whenever you can.
  • Listen to your sink. If you notice the water draining a little slower than usual, don’t ignore it. That’s your sign to grab the plunger or the baking soda now, rather than waiting until you’re staring at a sink full of gray water.

Quick Tips to Keep Your Drains Flowing

Start small and gentle; always try the natural stuff like baking soda and vinegar before you reach for the heavy-duty chemicals or a big snake.

Don’t be afraid of a little elbow grease; a plunger only works if you get a good seal and some real pressure behind it.

Prevention is way easier than a repair; catching hair or grease buildup early with a simple strainer or a hot water flush will save you a massive headache down the road.

A Quick Reality Check

“Look, a clogged drain feels like a disaster when you’re staring at a sink full of dirty water, but it’s usually just a minor hurdle. Don’t call the plumber and drop a hundred bucks just yet—most of the time, it’s just a matter of getting a little hands-on and working through it step by step.”

Nathan Cole

You’ve Got This

DIY plumbing maintenance: You've Got This.

Look, I know it’s not exactly how you wanted to spend your afternoon, but you’ve already done the heavy lifting. We’ve gone from trying out those simple baking soda and vinegar tricks to getting our hands dirty with a plunger or a plumbing snake. Whether it was a slow sink caused by hair buildup or a stubborn clog that needed a bit more muscle, you didn’t just call a plumber and throw money at the problem. You took a second to actually understand what was going on under the sink, and that’s the most important part. Just remember to keep an eye on those drains moving forward—a little preventative maintenance goes a long way in keeping things flowing smooth.

At the end of the day, my goal is to show you that these little household headaches don’t have to be intimidating. A clogged drain can feel like a huge setback when you’re busy, but it’s really just a puzzle waiting to be solved. Every time you tackle a repair like this yourself, you’re building a toolbox of confidence that stays with you for the next project. So, take a breath, enjoy the sound of that water finally rushing down the drain, and give yourself some credit. You fixed it, you did it on your own terms, and I promise you’re more capable than you think.

Frequently Asked Questions

Is it safe to use store-bought chemical cleaners if the baking soda and vinegar trick doesn't work?

Look, I get the temptation to just pour some heavy-duty chemicals down there and call it a day, but I’d suggest being real careful. Those store-bought cleaners are incredibly harsh; they can eat away at older pipes or even cause a nasty splashback if they don’t clear the clog. If the baking soda trick failed, try a plunger one more time or grab a cheap hand snake before you reach for the liquid acid.

How do I know if the clog is just in the sink or if it's a bigger problem deeper in the main pipes?

That’s the million-dollar question. Here’s the easiest way to tell: check your other fixtures. If it’s just the kitchen sink acting up, you’ve likely got a localized clog in the P-trap or the immediate branch line—totally doable for us. But if you flush the toilet and see bubbles in the sink, or if the shower starts draining slowly when you run the laundry, you’re looking at a main line issue. That’s when it’s time to call in the pros.

Are there any specific tools I should grab if I'm dealing with a stubborn clog in a bathtub versus a kitchen sink?

Yeah, there’s definitely a difference. For a kitchen sink, you’re usually fighting grease or food scraps, so a heavy-duty plunger and a decent drain snake are your best bets. But in the bathtub? It’s almost always hair. I always grab a cheap plastic “zip tool”—it’s basically a flexible strip with barbs that pulls hair clumps right out. It’s a total lifesaver and way easier than tearing into the plumbing.

Beginner guide for diy jewelry making.

Diy Jewelry Making: a Beginner’s Starter Guide

I remember sitting at my kitchen table three years ago, surrounded by a mountain of tangled wire, tiny beads that had rolled into the floor cracks, and a sense of pure frustration. I had bought a “beginner kit” online, but all I ended up with was a headache and a necklace that looked more like a bird’s nest than something I’d actually want to wear. Most people think diy jewelry making requires some sort of innate, artistic genius or a studio full of expensive, professional-grade tools, but honestly? That’s just not true. It’s not about being a master sculptor; it’s really just about learning the right mechanics and having a little bit of patience.

In this guide, I’m going to strip away all the fluff and the intimidating jargon you see on those fancy craft blogs. I’ll walk you through the basic tools you actually need—and more importantly, the ones you can skip—along with the simple techniques to get your first pieces looking clean and professional. We’re going to take it one bead at a time so you can stop feeling overwhelmed and start making things you’re actually proud to wear.

Table of Contents

Guide Overview

Total Time: 1-3 hours
Estimated Cost: $30-60
Difficulty: Beginner

Tools & Supplies

  • Needle-nose pliers for gripping and bending wire
  • Wire cutters for trimming excess material
  • Beading mat to prevent rolling
  • Assorted beads (various colors and sizes)
  • Jewelry wire or cord (1 roll)
  • Lobster clasps and jump rings (1 pack)

Step-by-Step Instructions

  • 1. First things first, you’ve got to clear off a workspace. I’m talking a flat table or even a large cutting board so your beads don’t go rolling under the fridge. Grab a small tray or even a shallow bowl to hold your components; this keeps everything organized and prevents that dreaded “lost bead” scavenger hunt halfway through the project.
  • 2. Next, let’s talk tools. You don’t need a professional workshop, but you definitely need the “big three”: needle-nose pliers, wire cutters, and a crimping tool. Think of these like your basic screwdriver and hammer set—you can’t really get the job done without them. I always suggest getting a cheap starter kit from a local craft store rather than buying everything separately; it’ll save you a headache and a few bucks.
  • 3. Now, pick your “spine.” This is the string, wire, or cord that holds your design together. If you’re making a necklace with heavier beads, go with a sturdier beading wire. If you’re just making a simple friendship bracelet, some waxed cotton cord works like a charm. Just make sure whatever you choose is strong enough to handle the weight of the beads you’ve picked out.
  • 4. Start stringing your beads, but here is my pro tip: lay it all out first. Don’t just start threading. Lay your beads out on the table in the pattern you want so you can see the finished product before you commit. It’s a lot easier to swap a blue bead for a red one now than it is after you’ve already tied a knot in it.
  • 5. Once your pattern looks killer, it’s time to secure the ends. This is where most people get nervous, but don’t sweat it. If you’re using wire, you’ll use a “crimp bead”—it’s a tiny metal tube that you squeeze shut with your pliers to lock the wire in place. It might feel a bit fiddly at first, but once you get the rhythm down, it’s as easy as tightening a screw.
  • 6. For the final touch, add your clasps or jump rings. If you’re making a bracelet, a lobster claw clasp is usually the way to go because it’s sturdy and easy to use. Just use your pliers to gently open the loop of the jump ring, slide it onto the wire, and then squeeze it shut so there are no gaps.
  • 7. Finally, give your piece a “stress test.” Grab the jewelry and give it a very gentle tug. You want to make sure those crimps are tight and nothing is loose. If it holds up, you’re officially in the jewelry-making game! If something feels wobbly, just undo that section and try it one more time—that’s how I learned, and it’s how you’ll learn too.

The Jewelry Making Kit Essentials You Actually Need

The Jewelry Making Kit Essentials You Actually Need

Look, I’ve been to plenty of craft stores where they try to sell you a massive, overpriced set that includes everything from professional-grade torches to specialized gemstone cutters. Trust me, you don’t need all that junk. When you’re starting out, the goal is to get the jewelry making tools for beginners that actually do the job without breaking the bank. Start with a decent pair of needle-nose pliers, some wire cutters, and a round-nose plier for making loops. If you have those three, you can tackle about 80% of the projects you’ll find online.

Once you’ve got your pliers, it’s time to talk about your essential bead supplies. Don’t feel like you have to buy a thousand-piece assortment of glass beads right away. I usually recommend grabbing a few decent variety packs—maybe some seed beads, some larger focal beads, and a spool of decent-quality nylon cord or jewelry wire. It’s much better to have a small stash of stuff you actually like looking at than a mountain of cheap plastic that makes your finished piece look like a middle school art project. Keep it simple, keep it quality, and you’ll be ready to go.

Simple Jewelry Design Ideas for Beginners to Try First

Simple Jewelry Design Ideas for Beginners to Try First

Look, I know it’s tempting to look at those high-end, intricate pieces in a boutique window and think, “Yeah, I’ll never do that.” But trust me, you don’t need to be a master goldsmith to make something that actually looks good. Start with something low-stakes, like a simple single-strand beaded necklace. It’s one of the best ways to practice how to make beaded necklaces without the stress of complex patterns. Just grab some high-quality cord, pick a color palette that doesn’t clash, and let the beads do the heavy lifting.

If you’re feeling a bit more adventurous, try playing around with some basic wire wrapping techniques. You don’t need a massive studio setup for this; just a few stones or even cool pebbles you found on a hike and some copper wire. It’s a bit like tinkering with a gadget—you’re just learning how the components fit together. Even if your first few attempts look a little wonky, don’t sweat it. The goal isn’t perfection; it’s just about getting your hands dirty and seeing what sticks.

Pro Tips to Keep You From Tossing Your Tools in Frustration

  • Don’t go overboard on the fancy stuff right away. I’ve seen so many people drop a hundred bucks on a professional jeweler’s bench only to realize they just needed a decent pair of pliers and a steady hand. Stick to the basics until you know what you actually enjoy making.
  • Lighting is your best friend. Seriously, don’t try to work on tiny jump rings under a dim living room lamp. You’ll end up squinting and getting a headache before you even finish your first bracelet. Grab a bright desk lamp or sit near a window so you can actually see what you’re doing.
  • Get a little tray or a heavy ceramic plate to work on. If you’re working on a hardwood table, those tiny beads and wire clippings are going to vanish into the cracks like they never existed. A tray keeps everything contained so you aren’t hunting for a lost earring back under the sofa for an hour.
  • Practice your “finishing” moves. A piece of jewelry can look amazing, but if the clasp is wonky or the wire ends are scratchy, nobody’s going to wear it. Take an extra minute to smooth out your edges and make sure everything feels solid. It’s the difference between something that looks homemade and something that looks professional.
  • Embrace the “oops” moments. You’re going to snap a wire, or you’re going to mess up a bead pattern, and that is totally fine. I treat it like any other DIY project—if a piece of wood splits, you pivot; if a necklace fails, you untangle it and try again. It’s all part of the learning curve.

Quick Wins to Keep You Moving

Start small and don’t go overboard on gear; you really only need a handful of basic tools to make something awesome.

Don’t sweat the perfection—the goal is to get your hands moving and learn how the materials actually behave.

Keep experimenting with simple designs first so you build up that confidence before tackling the really complex stuff.

## The Real Secret to Getting Started

“Look, you don’t need a professional studio or a mountain of expensive gemstones to make something cool. You just need a little patience and the willingness to mess up a few links until you get it right. That’s where the real fun starts.”

Nathan Cole

You've Got This

Jewelry making tools: You've Got This.

Look, I know it can feel a bit overwhelming when you’re staring at a pile of pliers, mismatched beads, and tangled wire, but you’ve already done the hard part by just getting started. We’ve walked through the essential gear you need to keep in your kit, tackled the basic assembly steps, and even brainstormed a few designs that won’t leave you feeling frustrated. Remember, you don’t need a professional studio or a massive budget to make something beautiful; you just need the right tools and a little bit of patience. Once you get the hang of those simple connections and patterns, you’ll realize that jewelry making isn’t about perfection—it’s about mastering the fundamentals one bead at a time.

At the end of the day, the best part of DIY isn’t just having a new necklace or a pair of earrings to wear; it’s that awesome feeling of looking at something and saying, “I actually made that myself.” Don’t get discouraged if your first few attempts look a little wonky or if the clasp gives you some grief. Even I have days where my projects don’t go quite according to plan. Just keep tinkering, keep experimenting, and don’t be afraid to mess up. Every mistake is just a lesson that makes you a better maker. Now, grab those pliers and go create something killer!

Frequently Asked Questions

How do I stop myself from getting frustrated when I can't get the tiny jump rings to close properly?

Look, I’ve been there. I once spent forty minutes wrestling with a single bracelet until I wanted to throw my pliers across the room. When those jump rings start winning, just step away. Seriously. Grab a coffee, walk around the block, and come back when your hands aren’t shaking. When you do dive back in, make sure you’re using two pairs of pliers—one to hold the ring and one to twist. It’s all about leverage, not force.

Do I really need to spend a fortune on high-quality metal, or can I start with cheaper stuff to practice?

Look, I’m going to give it to you straight: please do not drop a paycheck on precious metals right now. I’ve made that mistake before, and trust me, it’s a quick way to feel stressed about every little bend or cut. Start with some decent copper, brass, or even high-quality craft wire. It’s cheap enough that you won’t sweat a mistake, but good enough to help you learn the ropes. Get your hands dirty first!

What’s the best way to organize all these tiny beads and wires so they don't end up in a giant mess on my table?

Trust me, I’ve learned the hard way that if you don’t have a system, your workspace will turn into a bead-covered disaster zone in minutes. The best move is to grab some clear plastic organizer boxes—the kind with little dividers you see at the hardware store. They’re cheap and let you see exactly what you’ve got. For wires, use a pegboard or even just some old pill organizers to keep things from tangling.

Steps on how to reupholster a chair.

How to Reupholster a Chair for a Fresh New Look

I was staring at this mid-century armchair in the corner of my living room last weekend, thinking there was absolutely no way I could save it. The fabric was worn thin in all the wrong places, and honestly, it looked like something you’d find in a dumpster. But here’s the thing most people won’t tell you: you don’t need a fancy upholstery studio or a degree in design to fix it. Learning how to reupholster a chair isn’t some mystical art reserved for the pros; it’s really just a series of small, manageable tasks that anyone with a staple gun and a bit of patience can tackle.

I’m not going to give you any of that high-end, “professional-grade” fluff that requires a thousand-dollar toolkit. Instead, I’m going to show you how to strip it down, prep the frame, and pull that new fabric tight enough to look factory-fresh. We’re going to walk through this step-by-step, from picking the right material to making those final, clean tucks. By the time we’re done, you’ll have a piece of furniture that looks like a million bucks without you having to break the bank.

Table of Contents

Guide Overview

Total Time: 4-6 hours
Estimated Cost: $40-120
Difficulty: Intermediate

Tools & Supplies

  • Staple gun and staples for securing fabric
  • Needle-nose pliers for pulling old staples
  • Fabric shears for precision cutting
  • Upholstery tack lifter for removing old materials
  • Measuring tape for fabric dimensions
  • Upholstery fabric (2-3 yards depending on chair size)
  • High-density foam padding (1-2 inch thickness)
  • Batting/Dacron wrap to smooth edges
  • Replacement staples or upholstery tacks

Step-by-Step Instructions

  • 1. Before you even touch a pair of scissors, you need to strip the chair down to its bare bones. Grab a staple remover or a flathead screwdriver and start pulling out all the old fabric, the foam, and those crusty old staples. Don’t worry about being delicate here; you’re basically performing surgery to see what you’re working with. Once the frame is naked, take a second to check for any loose wood or wobbly joints. If it feels a bit shaky, now is the time to hit it with some wood glue and a clamp before we move on to the pretty stuff.
  • 2. Now, let’s talk about the “pattern.” Instead of just guessing where the fabric goes, use the old fabric you just pulled off as your DIY template. Lay your old pieces out on your new fabric and trace around them with a piece of chalk or a marker. I always recommend leaving an extra inch or two of “wiggle room” around your lines. Trust me, it is much easier to trim excess fabric later than it is to realize you’re two inches short when you’re halfway through a staple.
  • 3. Get your new foam or batting ready. If the old cushion feels like a pancake, this is your chance to make it feel like a cloud again. Lay your batting down over the seat first, then place your new foam on top. You want to smooth out any lumps or air pockets before you even think about the fabric. If you skip this part, you’ll end up with weird bumps in your finished chair that’ll drive you crazy every time you sit down.
  • 4. This is where the real work happens: the stapling. Start by pulling your fabric tight over the center of the seat and placing one staple on each of the four sides. This creates your anchor points. Once those are set, work your way from the center out toward the corners, pulling the fabric taut as you go. Think of it like tightening a drum skin—you want it firm but not distorted. If you see the fabric bunching up, stop, pull it tighter, and try again.
  • 5. Tackling the corners is the part that usually makes people want to throw in the towel, but it’s actually just a bit of geometry. You’ll need to fold the fabric neatly, almost like you’re wrapping a gift, to tuck the excess into the corners. Try to keep the folds flat and crisp so they don’t create a bulky mess under the seat. Once you’ve got those corners looking tidy, go ahead and finish off the edges with a steady stream of staples.
  • 6. The final step is all about the clean-up. Take a pair of sharp fabric scissors and trim away any loose threads or jagged edges that are hanging off the bottom. If you’re using a dust cover (that thin black fabric on the bottom), staple that on last to hide all your hard work and any messy staple lines. Take a look at what you’ve done and give yourself a pat on the back—you just saved a piece of furniture from the landfill!

Gathering Your Upholstery Tools and Supplies Without Breaking the Bank

Gathering Your Upholstery Tools and Supplies Without Breaking the Bank.

Before you go running to the big-box home improvement store and dropping a paycheck on specialized equipment, let’s take a breath. You don’t need a professional workshop to get this done. For most of us, a decent manual staple gun and a sturdy pair of heavy-duty scissors will get you through 90% of the job. If you’re working on a chair that’s seen better days, you’ll also need a flat-head screwdriver or a pair of pliers for removing old chair fabric and pulling out those crusty, ancient staples. I usually scavenge through my junk drawer first to see what I can repurpose before buying anything new.

When it comes to the actual materials, this is where you can really save some cash. Instead of getting overwhelmed by choosing upholstery fabric types at a high-end boutique, check out local fabric remnants or even heavy-duty canvas from a discount bin. If the seat feels a bit flat, don’t feel like you have to buy a massive roll of expensive foam; a small piece of high-density foam from a craft store works wonders for adding foam padding to seats. Just keep it simple, buy only what you need, and keep your eyes peeled for sales.

Removing Old Chair Fabric to See What Youre Working With

Removing Old Chair Fabric to See What Youre Working With

Before you start pulling, take a breath. I know it looks like a mess of fabric and staples, but think of this stage as an autopsy—you’re looking to see how the chair was originally built. As you start removing old chair fabric, don’t just rip it off like you’re tearing a poster off a wall. Use a pair of pliers or a small flathead screwdriver to carefully pry up those old staples. I always recommend saving a small scrap of the original material if you can; it helps you understand how the tension was set and where the fabric was tucked.

While the fabric is coming off, keep a sharp eye on the skeleton of the chair. This is your chance to inspect the upholstery webbing and springs to make sure everything is still tight and functional. If the webbing is sagging or the springs feel loose, now is the time to fix them before you even think about the new look. You don’t want to go through the whole process only to realize the seat feels like a pancake once you sit down. Check the frame for any wobbles or loose screws while you’re in there; it’s much easier to reinforce the structure now than it is later.

Five Pro Tips to Keep Your Project from Turning into a Disaster

  • Save your old fabric like it’s gold. Before you rip anything off, lay the old material flat and use a marker to trace the outlines of the cushions and the frame. It’s basically a free template that’ll save you a massive headache when you’re trying to figure out where the seams go later.
  • Don’t skimp on the staples. I’ve learned the hard way that using those cheap, flimsy staples from a craft kit is a recipe for frustration. Grab a decent heavy-duty staple gun from the hardware store; your hands (and your sanity) will thank you when you aren’t fighting the trigger every five seconds.
  • Work from the center outward. When you’re pulling that new fabric tight, start by stapling the middle of each side first. Then, work your way toward the corners. If you start at the edges, you’re going to end up with a bunch of awkward wrinkles that no amount of tugging can fix.
  • Master the corner tuck. This is where most beginners get stuck, but it’s all about the fold. Think of it like wrapping a present: pull the fabric tight, fold the excess neatly into the corner, and staple it down flat. It takes a little practice, but once you nail it, your chair will look professional.
  • Always leave yourself some “wiggle room.” It’s tempting to cut your fabric close to the size of the cushion, but trust me, you want an extra couple of inches on every side. You can always trim off the excess once it’s secured, but you can’t magically add fabric back once you’ve cut it too short.

Quick Tips Before You Start Stapling

Don’t rush the prep work—taking the time to strip the chair down to the frame and save your old fabric as a template will save you a massive headache later.

You don’t need a professional workshop to get this done; a decent staple gun and some patience are way more important than expensive industrial tools.

Always remember that mistakes are just part of the process, so if a corner looks wonky, just pull it up and try again until it sits right.

## The Secret to a Good Finish

“Look, you don’t need a professional workshop to get this right; you just need a little patience and the willingness to pull that fabric tight until it feels solid. It’s not about being perfect on the first staple, it’s about seeing that old piece of furniture come back to life under your own hands.”

Nathan Cole

You Did It!

Upholstered furniture transformation: You Did It!

Once you’ve got that new fabric pulled tight and those staples driven home, take a second to step back and look at what you’ve actually accomplished. We went from a stripped-down frame and a pile of old, dusty foam to a piece of furniture that actually looks like it belongs in your living room. It wasn’t just about picking out a cool pattern or finding the right staple gun; it was about the process of stripping it down to the basics and rebuilding it with your own two hands. By taking the time to prep the padding and carefully align your seams, you’ve turned a piece of junk into a functional piece of art that’s built to last another decade.

I know there were probably a few moments where you stared at that chair and wondered if you’d just made a massive mess of things, but that’s part of the fun. Every DIY project comes with a bit of a learning curve, and honestly, the “perfect” chair is usually the one that has a little character built into it. Don’t let a crooked staple or a slightly uneven corner stop you from trying the next project. The more you do this, the more you’ll realize that nothing is truly broken beyond repair. So, grab a drink, sit in your new masterpiece, and enjoy that well-earned feeling of total DIY victory.

Frequently Asked Questions

Do I really need a professional staple gun, or can I just use the one I have in my junk drawer?

Look, I get it—we all have that one staple gun in the junk drawer that’s seen better days. If it’s a heavy-duty manual one that actually fires straight, give it a shot. But if it’s one of those tiny, flimsy ones meant for thin craft paper, save yourself the headache and skip it. For upholstery, you need something that can drive staples deep into the frame without jamming every three seconds.

What should I do if the foam underneath looks crumbly or old when I pull the fabric off?

If you pull that fabric back and the foam looks like it’s turning into orange dust, don’t panic—it happens more often than you’d think. That’s just old foam breaking down. You can’t really “fix” crumbly foam, so the best move is to replace it. Grab a sheet of high-density upholstery foam from the hardware store, trim it to fit your seat, and lay it right over the old stuff. It’ll make the chair feel brand new again.

How much extra fabric should I actually buy so I don't run out halfway through the job?

Look, I’ve definitely learned the hard way that “just enough” is a recipe for a headache. Always aim for about 20% more than you think you need. If you’re working with a pattern—especially one that has a direction or a repeat—grab an extra yard. It’s much better to have a little scrap left over for a matching throw pillow than to be staring at a half-finished chair because you ran out of fabric.

Creative DIY headboard ideas for every style.

Diy Headboard Ideas for Every Style and Budget

I remember moving into my first real apartment and staring at this massive, blank wall behind my bed. It felt so cold and unfinished, like a hotel room that hadn’t quite found its soul yet. I wanted something that had character, but every time I looked at high-end furniture stores, my bank account practically screamed at me to turn around. That’s when it hit me: I didn’t need to drop a month’s rent on a designer piece when I could just build something better myself. Exploring different diy headboard ideas became my new weekend obsession, and honestly, it’s one of the most rewarding ways to make a bedroom feel like actually yours.

In this guide, I’m breaking down five of my favorite projects that range from “I have a drill and an hour” to “I might need a trip to the lumber yard.” Whether you’re working with a tight budget or just want to flex those creative muscles, these ideas are all about being smart with your materials and keeping things simple. By the end of this list, you’ll have a clear roadmap to transform that empty wall into a stunning focal point without breaking the bank.

Table of Contents

The Classic Plywood & Fabric Combo

The Classic Plywood & Fabric Combo DIY.

If you’re looking for that high-end upholstered look without the high-end price tag, this is my go-to move. You just need a decent sheet of birch plywood, some high-density foam, and whatever fabric catches your eye at the craft store. I like to use a staple gun to pull the fabric tight over the foam and then onto the wood, making sure there are no wrinkles in sight before you pull that trigger.

Rustic Pallet Wood Charm

Rustic Pallet Wood Charm farmhouse decor.

For those of you who like a bit of a rugged, farmhouse vibe, nothing beats the character of reclaimed wood. I’ve spent plenty of weekends scavenging old pallets, but my best advice is to make sure you find “heat-treated” ones so you aren’t bringing weird chemicals into your bedroom. Once you’ve got your wood, give it a good scrub and a light sanding so you don’t end up with a splinter in your back while you’re reading in bed.

The Floating Slat Wall

Vertical wood The Floating Slat Wall.

If you want something that feels a bit more architectural and “designer,” I highly suggest going with vertical wood slats. You can buy inexpensive pine strips from the lumber aisle, cut them to length, and mount them directly to the wall behind your bed. It creates this incredible sense of height in a room, making even a small bedroom feel a lot more open and airy.

The Sophisticated Cane Webbing Hack

Cane webbing is having a huge moment right now, and for good reason—it looks expensive and feels incredibly light. You don’t need to be a master carpenter to pull this off; you can actually buy pre-made cane webbing rolls that are quite easy to work with. All you really need is a simple wooden frame, which you can build from some basic 1×4 pine boards, and a bit of patience while you weave or staple the material in.

The Easy-Peasy Hanging Tapestry

Sometimes, you don’t want to deal with saws, drills, or even a single screw, and that is totally fine. If you’re in a rental or just want a change of scenery without the heavy lifting, a large-scale textile or a heavy woven tapestry can act as a “soft” headboard. It adds an instant layer of warmth and coziness to the room that hard wood just can’t replicate.

The Bottom Line on Your DIY Headboard

Don’t let the “pro” look intimidate you; most of these projects are just about picking a solid design and taking it one measurement at a time.

Always prioritize your tools and safety first, because a project isn’t a win if you end up with a busted thumb or a crooked frame.

Start with the project that fits your current skill level and budget, and remember that the best part of DIY is that you can always tweak it as you go.

## The Real Value of DIY

“At the end of the day, a headboard isn’t just about making your bed look better; it’s about that feeling of pride when you lay your head down at night knowing you actually built the thing yourself.”

Nathan Cole

Making It Your Own

Whether you decided to go with the rustic charm of reclaimed wood, the cozy feel of a padded fabric design, or a sleek modern look using simple slats, you’ve officially moved past the “just looking” phase. Each of these projects proves that you don’t need a professional workshop or a massive budget to transform your bedroom. From the heavy lifting of a timber build to the more delicate task of upholstery, the key is really just taking it one step at a time. Once you have your materials gathered and your workspace cleared, you’ll realize that a custom headboard isn’t just a piece of furniture—it’s a massive upgrade to your space that you built with your own two hands.

I know that staring at a pile of lumber or a roll of fabric can feel a little daunting at first, but trust me, the feeling of leaning back against something you created is unbeatable. Don’t sweat the small imperfections; those little quirks are what give a handmade piece its character and soul. The most important part isn’t getting every measurement perfect on the first try, but rather having the courage to start. So, grab your drill, clear off that workbench, and get to it. You’ve totally got this, and I can’t wait for you to see how much better your room feels once the job is done.

Frequently Asked Questions

Do I need special power tools for these projects, or can I get away with just a basic drill and a screwdriver?

Look, I’ll be honest: you don’t need a workshop full of heavy machinery to pull these off. If you’ve got a decent cordless drill and a basic screwdriver set, you’re already halfway there. For most of these, a drill is your best friend for driving screws without stripping them. You might want a sander if you’re going for a super smooth wood finish, but even then, a bit of elbow grease and some sandpaper will get the job done.

How do I make sure the headboard is actually secure and won't tip over or wobble while I'm sleeping?

That is the million-dollar question. There’s nothing worse than waking up to a headboard that’s decided to migrate halfway across the room. To keep it steady, don’t just lean it against the wall. I always use heavy-duty L-brackets to screw the frame directly into the wall studs. If you’re renting and can’t drill, grab some adhesive furniture bumpers or even some heavy-duty Command strips to kill that wobble. Just make sure it’s locked down tight.

What’s the best way to attach a DIY headboard to a bed frame without making a huge mess or damaging the wall?

Look, I’ve definitely made the mistake of drilling way too many holes in a wall just to hang a piece of wood. If you want to avoid the mess, skip the heavy-duty anchors and try using heavy-duty Command strips or even some simple Velcro industrial tape. If your headboard is a bit heavier, I usually just lean it against the wall and use some small, discrete L-brackets to secure it directly to the bed frame instead of the drywall.

Kids learning how to build a birdhouse.

How to Build a Birdhouse With the Kids

I remember standing in my backyard last spring, staring at a pile of scrap cedar and a handful of rusty nails, feeling completely overwhelmed by a “simple” DIY project. I had this idea that learning how to build a birdhouse required a professional-grade workshop and a master carpenter’s precision, but honestly? That’s just a myth that keeps people from ever picking up a hammer. I spent way too much time worrying about whether my joints were perfectly seamless, only to realize that the birds don’t care about perfection—they just want a sturdy place to nap.

In this guide, I’m stripping away all the fancy jargon and complicated blueprints that make woodworking feel intimidating. I’ll walk you through exactly how to grab your tools, cut your wood, and assemble a home that actually lasts through a rainy season. We’re going to focus on practical, easy steps that anyone can follow, even if you haven’t touched a saw in years. By the time we’re done, you won’t just have a finished project; you’ll have the confidence to tackle whatever else you decide to build next.

Table of Contents

Guide Overview

Total Time: 1-2 hours
Estimated Cost: $15-30
Difficulty: Beginner

Tools & Supplies

  • Hand saw or miter saw for cutting wood
  • Hammer for assembling pieces
  • Drill with small bits for pilot holes and entrance
  • Untreated cedar or pine board (1" x 6" x 4')
  • Galvanized nails or exterior screws (small box)
  • Wood glue (waterproof)

Step-by-Step Instructions

  • 1. First things first, you’ve got to grab your materials. I usually head to the local hardware store and pick up a single cedar board—about a one-by-six—because cedar is naturally rot-resistant and holds up great against the weather. You’ll also need some exterior-grade wood screws (or galvanized nails if you prefer), a drill, a saw, and a tape measure. Don’t worry about getting the fanciest tools in the shop; as long as you can make a straight cut, you’re already halfway there.
  • 2. Now, let’s get to the measuring and cutting. Grab your tape measure and mark out your pieces: a floor, a roof, a front, a back, and two sides. I like to make the back piece a little longer than the rest so you have some extra wood at the top and bottom to screw it onto a tree or a post later. When you’re cutting, just take your time; a slightly crooked line won’t kill the bird, but it’ll definitely make your life harder if you rush it.
  • 3. Once you have your pieces laid out, it’s time to tackle the entrance hole. This is the most important part because different birds like different sized “front doors.” For a standard bluebird, you’ll want a hole about 1.5 inches wide. Use a drill with a spade bit to cut the hole into your front panel, about two-thirds of the way up. I always tell people: measure twice, drill once, because you don’t want to end up with a hole that’s way too low or off-center.
  • 4. Time to start putting the pieces together. I like to start by attaching the sides to the back piece using your drill and screws. If you’re using screws, I highly recommend pre-drilling small pilot holes first. This prevents the wood from splitting, which is a rookie mistake I definitely made a lot when I was starting out. Once the sides are steady, go ahead and screw in the floor and the front panel.
  • 5. Let’s get that roof on. You want the roof to have a bit of an overhang—kind of like a porch—to keep the rain from splashing directly into the entrance hole. Line up your roof piece so it sits flush against the back, but extends out over the front. Secure it firmly with your screws, and just make sure there aren’t any huge gaps where water could seep in and make the whole thing a soggy mess for the birds.
  • 6. Before you hang this thing up, I like to do a quick “safety check.” Take a piece of sandpaper and smooth out any rough edges around the entrance hole so the birds don’t snag a feather on a splinter. Also, make sure you haven’t left any screw heads sticking out. Finally, if you want to add a little character, you can leave the wood natural or use a non-toxic outdoor stain, but keep it simple—birds generally prefer a house that looks like it belongs in nature.

Picking the Best Wood for Birdhouses and Simple Tools

Picking the Best Wood for Birdhouses and Simple Tools

Before you head out to the lumber aisle, let’s talk about what you’re actually working with. You don’t need anything fancy or expensive, but you do want something that can stand up to the elements. In my experience, the best wood for birdhouses is usually cedar, redwood, or pine. These woods are naturally durable, and since we want to keep things safe for the birds, I always recommend avoiding pressure-treated lumber, which can have nasty chemicals. If you’re using pine, just make sure you have a plan for protecting birdhouses from weather by using a non-toxic sealant on the exterior only.

As for the gear, don’t feel like you need a professional workshop to get this done. Most of the essential woodworking tools for birdhouses are things you probably already have in your garage or can grab at a local hardware store: a handsaw, a hammer, a drill, and some galvanized nails. If you’re feeling a bit more advanced, a cordless drill makes life a lot easier when you’re attaching the birdhouse roof or drilling those precise entrance holes. Just keep it simple, stay steady, and you’ll be fine.

Getting the Dimensions Right for Your Local Bird Species

Getting the Dimensions Right for Your Local Bird Species

Now, before you start cutting, you’ve got to think about who your new neighbors are going to be. I’ve learned the hard way that a birdhouse isn’t a “one size fits all” kind of project. If you make the entrance hole too big, you might end up inviting a bully like a blue jay or even a squirrel into the nest. You really want to nail down the safe birdhouse entrance hole size based on the specific birds in your neck of the woods—like bluebirds, wrens, or chickadees. Each one has its own “goldilocks” zone for height and width.

I always tell folks to do a quick bit of backyard scouting first. See who’s hanging around your trees, then look up the specific birdhouse dimensions for different species online. A house built for a tiny wren is going to be way too cramped for a larger bird, and vice versa. It’s a little extra legwork upfront, but it makes all the difference. Getting these measurements right ensures you aren’t just building a pretty wooden box, but a real, functional home where birds actually feel safe raising their families.

Five Pro-Tips to Make Sure Your Birdhouse Actually Works

  • Skip the paint on the inside. I know, a bright red birdhouse looks cool in a catalog, but you want to keep the interior natural. Chemicals in paint or stains can be nasty for the birds, so just stick to raw wood or a very light, non-toxic exterior finish if you really want to dress it up.
  • Don’t go overboard with the “fancy” entrance. It’s tempting to carve a cool design around the hole, but keep it simple. If the hole is too big, predators like squirrels or larger birds can get in and make a mess of things. Stick to the size you planned for your specific bird.
  • Give them some breathing room. You don’t want your feathered friends sitting in a sauna. Make sure you drill a couple of small holes in the bottom for drainage and a few near the top for ventilation. It keeps the nest dry and the air moving.
  • Forget the perch. This is a big one that a lot of people get wrong. Most people think birds need a little stick to land on before they go inside, but actually, those perches just make it easier for predators to hang onto while they try to get to the nest. Real birds are great at landing on the edge of the hole without any help.
  • Mount it smart. Don’t just slap it on a tree and hope for the best. Try to mount it in a spot that’s stable and away from where cats or other neighborhood bullies can easily reach it. A little bit of height and a clear line of sight goes a long way in making them feel safe.

Quick Tips to Keep You on Track

Don’t sweat the perfection; birds care way more about a sturdy, dry home than they do about whether your saw lines are laser-straight.

Always pick a wood that can handle the weather, like cedar or pine, so you aren’t rebuilding the whole thing after the first big rainstorm.

Double-check your hole size before you start drilling, because getting that measurement right is the difference between a happy local bird and a visitor that just can’t get in.

## A Little Perspective on the Project

“At the end of the day, don’t sweat the tiny imperfections or the slightly crooked nail; a bird isn’t going to care if your craftsmanship is museum-quality, they just want a sturdy place to call home that you built with your own two hands.”

Nathan Cole

Finishing Your Project

Finishing Your Project: Assembling a birdhouse.

Once you’ve got your wood selected and those dimensions dialed in for your local birds, you’re basically home free. Just remember that it doesn’t have to be a masterpiece straight out of a high-end woodworking magazine. As long as you’ve used the right species of wood, kept the entrance hole sized correctly, and made sure your assembly is sturdy enough to withstand a summer storm, you’ve done the heavy lifting. Take a second to double-check that there aren’t any sharp edges or protruding nails that might catch a bird’s wing, and then you are officially ready to mount that thing and let nature do its thing.

I know that starting a project like this can feel a little daunting when you’re staring at a pile of lumber and a handful of tools, but look at what you just did. You took an idea and actually turned it into something real and useful. That’s the best part of DIY—that feeling of looking at something you built with your own two hands and knowing it’s going to serve a purpose in the world. So, get that birdhouse up in a good spot, grab a cold drink, and wait for your first feathered tenants to move in. You earned it.

Frequently Asked Questions

Do I need to paint or stain the outside of the birdhouse to make it last longer?

Here’s the thing: you definitely want to protect the wood, but you’ve got to be careful about how you do it. I usually suggest a light coat of water-based exterior stain on the outside only. It helps the wood stand up to the rain and sun. Just whatever you do, never paint or stain the inside. You don’t want any fumes or chemicals drifting near the birds or their nestlings. Keep it natural in there!

How do I stop squirrels or other predators from getting into the birdhouse?

Look, I’ve been there—you spend all weekend building this perfect little sanctuary only to have a squirrel try to turn it into a snack bar. To keep the uninvited guests out, your best bet is a predator guard. You can buy metal baffles that slide onto your pole, or even DIY a simple metal shroud. Also, keep that entrance hole small; if it’s too wide, larger predators will squeeze right in.

Where is the best spot in my yard to actually hang or mount the finished birdhouse?

Now that your birdhouse is looking sharp, don’t just toss it anywhere. You want a spot that’s safe and quiet. I usually aim for somewhere about five to ten feet off the ground—high enough to keep cats at bay, but low enough that you can actually enjoy watching the birds. Try to find a location that gets some morning sun but stays shaded during the heat of the afternoon. A sturdy post or a tree trunk in a calm corner of the yard is your best bet.

Simple guide to resin crafts for beginners.

Resin Crafts for Beginners: a Simple Starting Guide

I was standing in my garage last Tuesday, staring at a puddle of half-cured, sticky disaster that was supposed to be a custom coaster, wondering why I ever thought I could do this. Most people will tell you that resin art is this high-end, untouchable hobby that requires a professional studio and a chemistry degree, but that is a total myth. The truth is, resin crafts for beginners don’t need to be expensive or complicated to look incredible; you just need to understand how the stuff actually behaves before you pour it. I learned the hard way so you don’t have to, and I promise it’s much more figure-out-able than those polished Instagram videos make it seem.

In this guide, I’m stripping away all the fluff and getting straight to the grit. I’ll walk you through the essential gear you actually need—and more importantly, the stuff you can skip—plus the simple techniques to avoid those annoying air bubbles that ruin everything. We’re going to tackle the basics of mixing, pouring, and curing so you can start making your own projects without the massive headache. Let’s get to work.

Table of Contents

Guide Overview

Total Time: 24-48 hours (including curing)
Estimated Cost: $50-80
Difficulty: Beginner

Tools & Supplies

  • Silicone molds for shaping the resin
  • Mixing cups for combining components
  • Wooden stir sticks for blending
  • Digital scale for precise measurements
  • Heat gun or lighter to remove bubbles
  • Epoxy resin kit (2-part resin and hardener)
  • Silicone molds (assorted shapes)
  • Liquid pigments or mica powders for color
  • Nitrile gloves for hand protection
  • Safety mask for respiratory protection

Step-by-Step Instructions

  • 1. First things first, you’ve gotta set up your workspace. Resin isn’t something you want to be cleaning out of your carpet later, so grab a silicone mat or some cheap parchment paper to lay down. Make sure you’re in a room with plenty of airflow—open a window or crack a door—because you really don’t want to be breathing in those fumes all afternoon.
  • 2. Once your area is prepped, it’s time to suit up. I can’t stress this enough: don’t skip the safety gear. Grab a pair of nitrile gloves and some eye protection. Even if you’re just making a small keychain, a single accidental splash can ruin your day (and your skin), so treat it like you’re working with something serious.
  • 3. Now, let’s talk mixing, which is where most people trip up. Check your resin bottle for the ratio—usually, it’s a 1:1 mix of resin and hardener—and grab some sturdy plastic cups. Pour them out slowly and, this is the big one, stir like your life depends on it. You want to scrape the sides and the bottom of the cup constantly for at least three minutes until the liquid looks perfectly clear and has no “streaks” in it.
  • 4. If you want to add some flair, this is the fun part. Grab your pigments, mica powders, or even some dried flowers you’ve found outside. Add them to your mixed resin in small amounts. I’ve learned the hard way that less is more when it comes to color, so start with a tiny bit and build up until it looks just right.
  • 5. Time to pour. Take your molds—silicone molds are the easiest way to start—and slowly pour your mixture into the cavities. If you see tiny bubbles rising to the surface, don’t panic. You can use a toothpick to pop them or just give the mold a gentle tap on the table to help those bubbles float to the top and escape.
  • 6. Now comes the hardest part for me: waiting. You need to find a level surface and leave your project completely alone. Depending on the brand you bought, this could take anywhere from 24 to 48 hours. If you try to touch it too early, you’ll end up with permanent fingerprints in your masterpiece, and that’s a bummer you can’t undo.
  • 7. Once everything feels hard and doesn’t feel tacky to the touch, pop your creations out of the molds. If the edges look a little sharp or uneven, you can use a fine-grit sandpaper to smooth them down. Give it a quick wipe with a microfiber cloth, and boom—you’ve just made something awesome from scratch.

Gathering Your Essential Resin Art Supplies Without Breaking the Bank

Gathering Your Essential Resin Art Supplies Without Breaking the Bank

Now, before you go running out to the craft store and emptying your wallet, let’s talk strategy. I’ve learned the hard way that you don’t need a professional studio to get started. When you’re hunting for your essential resin art supplies, start with the basics: a decent two-part epoxy, some silicone molds, and a few stir sticks. You don’t need the fancy, high-end pigments right away; even a little bit of mica powder or even some old acrylic paint from your junk drawer can work wonders. My best advice? Check local marketplaces or even thrift stores for unique items you can cast, rather than buying expensive pre-made kits.

One thing I can’t stress enough—and this is where I wish my dad had warned me sooner—is that you have to prioritize your health. Don’t skimp on the safety precautions for working with epoxy. A good pair of nitrile gloves and a well-ventilated workspace aren’t optional; they’re non-negotiable. It’s much better to spend an extra ten bucks on a respirator now than to deal with a headache or lung irritation later. Think of it like wearing safety goggles when you’re using a circular saw; it’s just part of the job.

Mastering Resin Mixing Ratios Explained So You Get It Right

Mastering Resin Mixing Ratios Explained So You Get It Right.

This is where most people hit a snag, so listen close: getting your measurements wrong is the fastest way to end up with a sticky, half-hardened mess that’s basically useless. Most epoxy kits use a specific ratio—usually 1:1 or 2:1—by volume. This means you aren’t just guessing; you’re following a chemical recipe. I always tell people to use graduated mixing cups rather than just eyeballing it with a standard measuring spoon. If the math is off even slightly, the resin might never fully harden, leaving you with a permanent headache instead of a cool piece of art.

Once you’ve got your measurements dialed in, the real trick is the stir. Don’t just swirl it around like you’re making coffee; you need to scrape the sides and the bottom of the cup thoroughly. If you rush this part, you’ll end up with “soft spots” in your project. A pro tip I learned the hard way: slow, steady strokes are your best friend if you want to how to prevent resin bubbles from ruining your work. Take your time, stay patient, and remember that precision is your superpower here.

Five things I wish I knew before my first pour

  • Give your workspace a serious makeover before you start. Resin is basically permanent liquid chaos if it spills, so lay down some cheap silicone mats or even just some heavy-duty plastic sheeting. It’s way easier to wipe up a spill on a mat than it is to scrape dried resin off your kitchen table.
  • Temperature is your best friend or your worst enemy. If your room is too cold, the resin gets thick and stubborn, making it a nightmare to mix. Try to work in a space that’s comfortably warm—around 75°F is the sweet spot—to keep everything flowing smoothly and help those bubbles pop.
  • Don’t rush the bubbles. After you mix your resin, give it a few minutes to sit. I used to think I had to start pouring immediately, but letting it rest for a bit allows most of those tiny air bubbles to rise to the surface and pop on their own. It saves you a ton of headache later.
  • Invest in a decent heat gun or a butane torch. You can try to blow bubbles out with your breath, but trust me, it doesn’t work well. A quick pass with a heat gun over the surface of your pour will melt those annoying bubbles away instantly, leaving you with a crystal-clear finish.
  • Safety isn’t optional, even if you’re just making a small coaster. Resin fumes can be sneaky, so always work in a well-ventilated area—crack a window or run a fan. And please, wear gloves. Getting resin stuck to your skin is a sticky, uncomfortable mess that you definitely don’t want to deal with.

Quick tips to keep your first project on track

Don’t wing it with the measurements—getting your mixing ratios spot on is the difference between a beautiful piece and a sticky, half-cured mess.

Protect your workspace and your lungs; resin isn’t something you want to breathe in or get on your favorite rug, so use drop cloths and a good mask.

Patience is your best tool here, so resist the urge to touch or move your piece until it’s actually set according to the instructions.

## My Golden Rule for Resin

“Look, resin can be a bit finicky if you treat it like a science experiment you’re rushing through, but if you treat it like a slow-cooked meal—respect the measurements and give it the time it needs to set—you’ll end up with something killer every single time.”

Nathan Cole

You've Got This: Final Thoughts on Your Resin Journey

You've Got This: Final Thoughts on Your Resin Journey

Look, I know it feels like a lot to juggle right now. Between getting your ratios exactly right so your piece doesn’t stay a sticky mess, picking out the right supplies that won’t drain your wallet, and setting up a safe workspace, there is a lot of mental heavy lifting involved. But remember: you’ve already done the hardest part by just deciding to start. Once you master those mixing steps and get a feel for how the liquid moves, everything else starts to click. It’s all about that steady hand and a little patience while you wait for those layers to cure.

My best advice? Don’t sweat the small stuff. Your first few projects might have a stray bubble or a slightly uneven edge, but that’s just part of the process. I’ve definitely ruined more than a few “easy” DIY projects in my time, and honestly, that’s usually where the best learning happens. Treat every mistake as a lesson in disguise rather than a failure. Grab your gear, clear off your workbench, and just dive in. I promise that once you see that first clear, glossy finish catch the light, you’re going to feel like a total pro. Now, go make something awesome!

Frequently Asked Questions

Is it safe to do resin projects inside my house, or do I absolutely need a garage or workshop?

Look, I get it—you don’t want to turn your living room into a toxic zone. You can do resin indoors, but please, don’t just set it on the coffee table and call it a day. You need a dedicated space with great airflow, like a spare room with a window cracked open. If you can swing it, the garage is king, but if you’re staying inside, invest in a good respirator. Safety first, always.

What should I do if I see those annoying little bubbles popping up in my piece while it's drying?

Don’t sweat it—bubbles are basically a rite of passage in resin crafting. If you see them popping up while things are setting, grab a handheld butane torch or even a long-neck lighter. Just quickly pass the flame over the surface; the heat pops those bubbles instantly. If they’re deep inside, your best bet is to wait for it to cure, sand it down, and pour a thin “flood coat” on top to smooth it out.

How can I tell if my resin is actually cured or if it's still going to stay sticky?

Nothing kills the excitement of a new project faster than touching your piece and realizing it’s still a tacky mess. To check if it’s truly cured, use the “fingernail test”—lightly press a nail into an inconspicuous area. If it leaves an indent or feels gummy, it’s not there yet. If it’s hard and smooth, you’re golden. If it stays sticky, you likely had a mixing error or the room was too cold.

Easy kids craft ideas for rainy days.

Easy Kids’ Craft Ideas for a Rainy Day

Look, I get it. You want to do something creative with the kids, but the moment you open that drawer of half-used glue sticks and random construction paper, you feel a wave of dread. You’re staring at a mountain of potential mess and wondering if these kids craft ideas are actually going to keep them occupied for more than five minutes, or if you’re just setting yourself up for a massive cleanup headache. We’ve all been there—standing in the middle of the living room, surrounded by glitter, wishing we had a plan that actually worked without turning the house into a disaster zone.

But here’s the good news: you don’t need a degree in fine arts or a dedicated craft room to make this happen. I’ve narrowed it down to five super simple, low-stress projects that focus on using what you already have lying around the house. I’m going to walk you through these step-by-step so you can skip the frustration and get straight to the fun part. By the end of this list, you’ll have a handful of foolproof wins that will keep the little ones busy and actually make you feel like a DIY pro.

Table of Contents

Cardboard Box Forts and Castles

Building Cardboard Box Forts and Castles.

Look, I know what you’re thinking—it’s just a pile of recycling. But in my house, a sturdy cardboard box isn’t trash; it’s the foundation of a masterpiece. If you’ve got some delivery boxes lying around, you’re halfway to a weekend of entertainment. I usually grab a utility knife (keep that one away from the kids, obviously) and some heavy-duty duct tape to start shaping the walls and roof.

The Great Painted Rock Collection

The Great Painted Rock Collection on stones.

This is my absolute favorite “low-effort, high-reward” project. Next time you’re out for a walk, grab a handful of smooth stones from the driveway or a nearby park. You don’t need a fancy art studio for this; just a small set of acrylic paints or even some permanent markers will do the trick. It’s a great way to get the kids outside and moving before they sit down to work.

Homemade Playdough Station

DIY Homemade Playdough Station for kids.

I’ve always preferred making things from scratch rather than buying the pre-packaged stuff. Not only is it cheaper, but it’s also a great way to teach kids a bit of “kitchen chemistry.” All you need are some basic pantry staples like flour, salt, cream of tartar, and oil. I usually whip up a batch while I’m waiting for my coffee to brew, and it takes about five minutes of stirring.

Paper Plate Masks and Characters

If you’ve got a stack of paper plates in the kitchen drawer, you’ve got a craft kit. This is one of those projects that is surprisingly durable if you use the right materials. I usually grab some popsicle sticks and some elastic string to turn a simple plate into something they can actually wear. It’s much more engaging than just drawing a face on a piece of paper.

Mason Jar Galaxy Jars

This one feels a bit more “grown-up,” but kids absolutely lose their minds when they see the result. You just need an old glass jar—I usually repurpose some empty jam or mason jars—some cotton balls, water, and glitter. It’s basically like capturing a tiny, swirling nebula inside a jar, and it looks stunning on a bedside table.

The Bottom Line on Keeping Kids Crafting

Don’t sweat the perfection; the goal is to get them building and creating, not to end up with a museum-quality masterpiece.

Keep your supplies simple and accessible so you aren’t hunting through a junk drawer every time inspiration strikes.

Focus on the process rather than the mess, because a little bit of glue on the table is a small price to pay for a kid feeling like they actually built something themselves.

The Real Goal of Crafting

“Look, it doesn’t matter if the glue is everywhere or the glitter ends up in the carpet; the point isn’t to make a masterpiece for a museum, it’s about showing your kids that they have the power to take a pile of random junk and turn it into something they’re proud of.”

Nathan Cole

Don't Sweat the Mess

Look, we’ve covered a lot of ground here, from turning old cardboard boxes into forts to getting those hands messy with homemade playdough. The main thing I want you to take away is that you don’t need a massive budget or a dedicated art studio to make this happen. Whether you’re working with recycled scraps or just a handful of basic supplies from the local dollar store, the goal isn’t to create a museum-quality masterpiece. It’s about keeping things simple and finding ways to use what you already have lying around the house. If a project gets a little chaotic or a glue gun gets a bit too much attention, just roll with it; that’s all part of the process.

At the end of the day, these crafts are less about the finished product sitting on a shelf and more about the time spent together. I’ve learned through plenty of my own DIY projects that the real magic happens in the middle of the struggle—the part where you’re figuring out how to make that paper plate mask actually stay on a kid’s face. So, clear off the kitchen table, grab a towel for the inevitable spills, and just dive in. You’ve totally got this, and I promise that once you see that look of pride on their faces, every bit of cleanup will feel completely worth it.

Frequently Asked Questions

How do I keep the mess from taking over my entire living room?

Look, I’ve been there—one minute you’re helping with a glue stick, and the next, your living room looks like a glitter bomb went off. My trick? The “Containment Zone.” Before you even open a single bin of scraps, clear off one specific table or a cheap plastic tray. If the mess moves past that boundary, the project is officially paused. It keeps the chaos localized so you can actually relax on your own couch later.

What are some cheap, everyday household items I can use instead of buying expensive craft kits?

Look, you don’t need to drop fifty bucks at a big-box craft store to keep the kids busy. I always say, check your recycling bin before your wallet. Empty toilet paper rolls make great binoculars, egg cartons are perfect for painting little caterpillars, and those old glass jars? They’re instant treasure chests. Even some leftover pasta shapes and a bit of food coloring can turn a boring Tuesday into an art session. Keep it simple.

My kids have a super short attention span; how do I pick projects that won't end in a meltdown?

Look, I get it. I’ve tried to fix a leaky sink only to end up staring at a pile of washers, feeling like throwing the whole wrench across the room. If your kids are hitting that wall, stop looking for “projects” and start looking for “wins.” Pick tasks with a five-minute turnaround. If they can see the finish line before they even start, they’ll stay engaged. Keep it fast, keep it tactile, and keep it moving.