There is a persistent myth floating around that a dripping sink is a sign you need to call an expensive plumber and prepare for a massive bill. Honestly, that’s just not true. I remember sitting on my bathroom floor three years ago, staring at a steady drip-drip-drip that was driving me absolutely insane, wondering if I should just give in and pay a professional a hundred bucks to show up. But after a quick trip to the hardware store and a little bit of patience, I realized that learning how to fix a leaky faucet is actually one of the easiest wins you can get in home maintenance.
I’m not going to bore you with technical jargon or tell you that you need a specialized workshop to get this done. In this guide, I’m going to walk you through the exact, no-nonsense steps I use to tackle these little annoyances myself. We’ll go over the basic tools you’ll need, how to identify the culprit, and the simple process to get that water flowing exactly when you want it to. You’ve got this, and I promise it’s way more figure-out-able than it looks.
Table of Contents
Guide Overview
Tools & Supplies
- Adjustable wrench for loosening nuts
- Screwdriver for removing handle screws
- Allen wrench for hex-head screws
- Replacement washer or O-ring (set of various sizes)
- Plumber's grease (small tube)
- Thread seal tape (1 roll)
Step-by-Step Instructions
- 1. First things first, you’ve got to shut off the water. Look under the sink for those little oval handles (the shut-off valves) and turn them clockwise until they stop. If you can’t find them or they’re stuck, you might have to head to the main water line for the house, but don’t skip this part or you’re going to end up with a mini indoor swimming pool on your floor.
- 2. Once the water is off, go ahead and drain the lines. Open the faucet handles to let any remaining water trickle out of the spout. This relieves the pressure and makes the rest of the job a lot less messy. While you’re at it, plug the drain with a rag or a stopper so you don’t accidentally drop a tiny screw down the pipes where it’ll be gone forever.
- 3. Now, grab your tools and take the handle apart. Depending on your faucet, you might need to pop off a little decorative cap to reveal a screw, or just use an Allen wrench. Once that screw is out, pull the handle straight up and off. If it feels stuck, give it a gentle wiggle, but don’t go using brute force or you might snap something.
- 4. Next, you’ll need to remove the cartridge or stem. This is usually held in place by a retaining nut. Use an adjustable wrench to loosen that nut, and then you can pull the cartridge straight up. This is the part that actually controls the water flow, and in my experience, this is usually where the culprit lives.
- 5. Inspect the parts you just pulled out for any worn-out O-rings or washers. Look for cracks, mineral buildup, or bits of rubber that look flattened or torn. If you see something that looks beat up, take that specific part with you to the hardware store. I always tell people: bring the actual part with you so you don’t end up buying the wrong size.
- 6. Swap out the old, crusty parts for the brand-new replacements. Slide the new O-rings or the new cartridge into place, making sure everything sits nice and snug. It’s a lot like putting a Lego set together—everything has a specific spot, so just take your time and make sure it’s seated correctly before moving on.
- 7. Finally, it’s time to put it all back together and test your work. Reinstall the nut, the handle, and the screw just like you did when you took it apart. Turn the water valves under the sink back on slowly, then turn the faucet on to flush out any air. If that drip is gone, give yourself a pat on the back—you just saved yourself a hefty plumber’s bill.
Identifying Common Causes of Leaking Taps
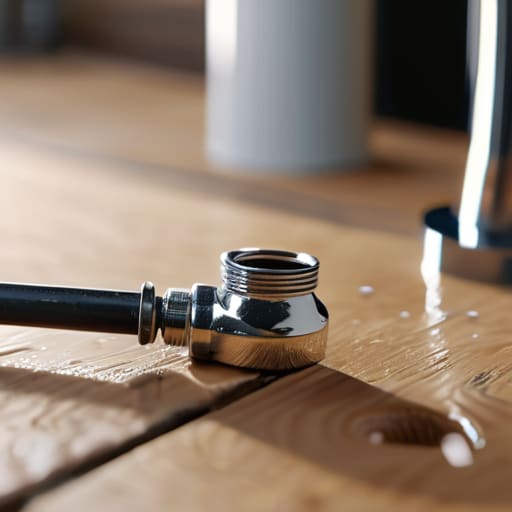
Before you dive in and start unscrewing things, you’ve got to play detective for a second. Not every leak is created equal, and knowing what you’re up against saves you a massive headache (and a wasted trip to the hardware store). Most of the time, you’re looking at one of the common causes of leaking taps: a worn-out washer, a faulty O-ring, or a cracked cartridge. If the water is coming from the handle itself, it’s usually a seal issue; if it’s coming from the spout, the problem is likely deeper in the valve mechanism.
I’ve learned the hard way that trying to guess can lead to a flooded sink. If you have a single-handle setup, you’re likely looking at a cartridge faucet replacement job rather than just swapping a tiny rubber ring. On the other hand, if you’re working with an old-school two-handle model, you’ll probably just need to replace faucet washer components to get things back to normal. Once you spot the culprit, you can grab your specific plumbing tools for faucet repair and tackle the job with confidence.
The Essential Plumbing Tools for Faucet Repair
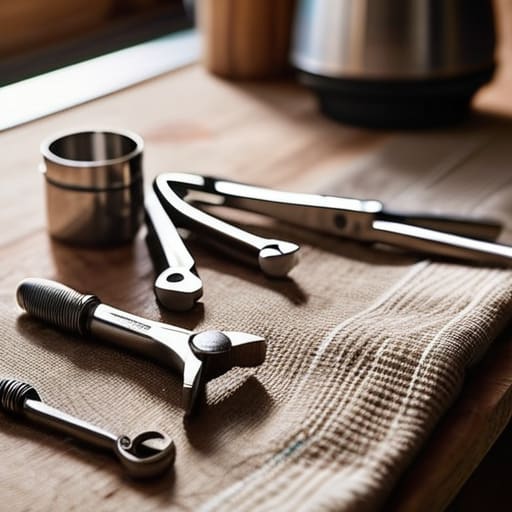
Before you dive in, you’ve got to make sure you aren’t halfway through a job only to realize you’re missing a crucial piece of gear. Trust me, I’ve learned that the hard way. You don’t need a professional-grade kit that costs a fortune, but you definitely need more than just a butter knife. To properly tackle most plumbing tools for faucet repair, I always grab an adjustable wrench, a set of screwdrivers (both Phillips and flathead), and some needle-nose pliers. If you’re dealing with a more modern setup, you might also want a specialized cartridge puller handy.
I also highly recommend picking up a small tub of plumber’s grease and some extra replacement parts before you even start unscrewing anything. If your goal is to replace faucet washer components or swap out a worn-out cartridge, having those bits on hand saves you from making three separate trips to the hardware store. Honestly, there is nothing more frustrating than having a sink taken apart and sitting there waiting on a fifty-cent part. Grab a towel to protect your sink basin from scratches, and you’ll be ready to roll.
Pro Tips to Save You Time (and a Headache)
- Shut off the water before you even touch a wrench. Seriously. I’ve learned the hard way that if you forget to turn those valves under the sink, you aren’t just fixing a leak—you’re hosting an unplanned indoor pool party.
- Take photos of every single piece as you take it apart. When you’re staring at a pile of tiny washers and springs ten minutes later, a quick glance at your phone will save you from a massive headache trying to remember how it all fit together.
- Don’t go cheap on the replacement parts. It’s tempting to grab the absolute cheapest rubber washer at the hardware store, but spending an extra fifty cents on a high-quality part now means you won’t be doing this same job again next month.
- Clean out the gunk while you’re in there. Since you’ve already got the faucet apart, take a second to wipe away any mineral buildup or grit around the valve seat. It’s a tiny extra step that makes a huge difference in getting a tight seal.
- Test it gently at first. Once you’ve put everything back together, don’t just crank the water back on full blast. Turn it on slowly and watch for any signs of moisture so you can catch a mistake before it becomes a real problem.
The Bottom Line on Fixing That Leak
Most faucet leaks are caused by a worn-out washer or O-ring, which are cheap, easy to find, and way easier to replace than calling in a pro.
Take your time and get the right tools—especially a good adjustable wrench—because forcing something that doesn’t want to move is the fastest way to turn a quick fix into a massive headache.
Don’t sweat the small stuff; as long as you shut off the water first and take your time, you’ve totally got this handled.
## A Quick Reality Check
“Look, a leaky faucet isn’t a plumbing emergency that requires a professional’s expensive service call; it’s just a small puzzle waiting for you to find the right piece. Once you stop seeing it as a ‘broken fixture’ and start seeing it as a ten-minute fix, you’ll realize you’ve got this handled.”
Nathan Cole
You’ve Got This
Once you’ve finished tightening those bolts or swapping out that worn-out washer, take a second to actually watch the tap. It might take a minute for the pressure to settle, but seeing that drip finally vanish is the best feeling in the world. We covered everything from grabbing the right wrench to pinpointing whether it was a faulty cartridge or just a loose connection, and honestly, that’s the bulk of the battle right there. Just remember to double-check your seals before you turn the water supply back on full blast; there’s nothing more frustrating than fixing one leak only to find another one hiding under the sink.
If you felt a little nervous when you first pulled out your tools, don’t sweat it—that’s totally normal. I remember the first time I tried to tackle a plumbing issue, my hands were shaking so much I could barely hold the screwdriver. But look at you now. You didn’t call an expensive professional, you didn’t let a small problem turn into a massive headache, and you saved yourself a chunk of change in the process. Most things in this life are just a series of small, manageable tasks, and you just proved that you can master the basics one step at a time. Keep that momentum going!
Frequently Asked Questions
What should I do if I take everything apart and the leak is still coming from the same spot?
Look, I’ve been there. You’ve got the parts spread out on the counter, you’ve replaced the washer, and that drip is still mocking you. Don’t sweat it—it happens. Usually, this means there’s a hairline crack in the valve body or the metal seat is pitted and uneven. If the basics didn’t work, it’s time to check for structural damage or, honestly, just bite the bullet and grab a new cartridge or faucet.
Is it worth trying to fix this myself, or am I just going to end up needing to call a plumber anyway?
Look, I get it. The fear of turning a small drip into a backyard swimming pool is real. But honestly? Most faucet leaks are just a worn-out washer or a loose cartridge—stuff you can swap out in twenty minutes. If it’s a simple part replacement, definitely do it yourself and save that plumber’s service fee. But if you crack a pipe or see water spraying from behind the wall? That’s when you put the wrench down and call in the pro.
How do I know which specific replacement parts to buy at the hardware store so I don't waste a trip?
Look, there is nothing worse than standing in the plumbing aisle staring at a wall of tiny rubber rings, feeling like you’re losing your mind. To avoid that second trip, do this: take the old parts with you. Once you’ve got the faucet apart, grab the cartridge, the stem, or those worn-out O-rings and toss them in a sandwich bag. Match them up side-by-side with the new ones in the store. It’s foolproof.
