Simple guide to resin crafts for beginners.

Resin Crafts for Beginners: a Simple Starting Guide

I was standing in my garage last Tuesday, staring at a puddle of half-cured, sticky disaster that was supposed to be a custom coaster, wondering why I ever thought I could do this. Most people will tell you that resin art is this high-end, untouchable hobby that requires a professional studio and a chemistry degree, but that is a total myth. The truth is, resin crafts for beginners don’t need to be expensive or complicated to look incredible; you just need to understand how the stuff actually behaves before you pour it. I learned the hard way so you don’t have to, and I promise it’s much more figure-out-able than those polished Instagram videos make it seem.

In this guide, I’m stripping away all the fluff and getting straight to the grit. I’ll walk you through the essential gear you actually need—and more importantly, the stuff you can skip—plus the simple techniques to avoid those annoying air bubbles that ruin everything. We’re going to tackle the basics of mixing, pouring, and curing so you can start making your own projects without the massive headache. Let’s get to work.

Table of Contents

Guide Overview

Total Time: 24-48 hours (including curing)
Estimated Cost: $50-80
Difficulty: Beginner

Tools & Supplies

  • Silicone molds for shaping the resin
  • Mixing cups for combining components
  • Wooden stir sticks for blending
  • Digital scale for precise measurements
  • Heat gun or lighter to remove bubbles
  • Epoxy resin kit (2-part resin and hardener)
  • Silicone molds (assorted shapes)
  • Liquid pigments or mica powders for color
  • Nitrile gloves for hand protection
  • Safety mask for respiratory protection

Step-by-Step Instructions

  • 1. First things first, you’ve gotta set up your workspace. Resin isn’t something you want to be cleaning out of your carpet later, so grab a silicone mat or some cheap parchment paper to lay down. Make sure you’re in a room with plenty of airflow—open a window or crack a door—because you really don’t want to be breathing in those fumes all afternoon.
  • 2. Once your area is prepped, it’s time to suit up. I can’t stress this enough: don’t skip the safety gear. Grab a pair of nitrile gloves and some eye protection. Even if you’re just making a small keychain, a single accidental splash can ruin your day (and your skin), so treat it like you’re working with something serious.
  • 3. Now, let’s talk mixing, which is where most people trip up. Check your resin bottle for the ratio—usually, it’s a 1:1 mix of resin and hardener—and grab some sturdy plastic cups. Pour them out slowly and, this is the big one, stir like your life depends on it. You want to scrape the sides and the bottom of the cup constantly for at least three minutes until the liquid looks perfectly clear and has no “streaks” in it.
  • 4. If you want to add some flair, this is the fun part. Grab your pigments, mica powders, or even some dried flowers you’ve found outside. Add them to your mixed resin in small amounts. I’ve learned the hard way that less is more when it comes to color, so start with a tiny bit and build up until it looks just right.
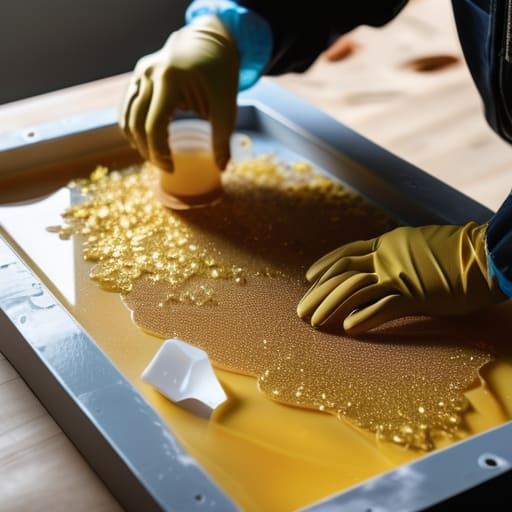
  • 5. Time to pour. Take your molds—silicone molds are the easiest way to start—and slowly pour your mixture into the cavities. If you see tiny bubbles rising to the surface, don’t panic. You can use a toothpick to pop them or just give the mold a gentle tap on the table to help those bubbles float to the top and escape.
  • 6. Now comes the hardest part for me: waiting. You need to find a level surface and leave your project completely alone. Depending on the brand you bought, this could take anywhere from 24 to 48 hours. If you try to touch it too early, you’ll end up with permanent fingerprints in your masterpiece, and that’s a bummer you can’t undo.
  • 7. Once everything feels hard and doesn’t feel tacky to the touch, pop your creations out of the molds. If the edges look a little sharp or uneven, you can use a fine-grit sandpaper to smooth them down. Give it a quick wipe with a microfiber cloth, and boom—you’ve just made something awesome from scratch.

Gathering Your Essential Resin Art Supplies Without Breaking the Bank

Gathering Your Essential Resin Art Supplies Without Breaking the Bank

Now, before you go running out to the craft store and emptying your wallet, let’s talk strategy. I’ve learned the hard way that you don’t need a professional studio to get started. When you’re hunting for your essential resin art supplies, start with the basics: a decent two-part epoxy, some silicone molds, and a few stir sticks. You don’t need the fancy, high-end pigments right away; even a little bit of mica powder or even some old acrylic paint from your junk drawer can work wonders. My best advice? Check local marketplaces or even thrift stores for unique items you can cast, rather than buying expensive pre-made kits.

One thing I can’t stress enough—and this is where I wish my dad had warned me sooner—is that you have to prioritize your health. Don’t skimp on the safety precautions for working with epoxy. A good pair of nitrile gloves and a well-ventilated workspace aren’t optional; they’re non-negotiable. It’s much better to spend an extra ten bucks on a respirator now than to deal with a headache or lung irritation later. Think of it like wearing safety goggles when you’re using a circular saw; it’s just part of the job.

Mastering Resin Mixing Ratios Explained So You Get It Right

Mastering Resin Mixing Ratios Explained So You Get It Right.

This is where most people hit a snag, so listen close: getting your measurements wrong is the fastest way to end up with a sticky, half-hardened mess that’s basically useless. Most epoxy kits use a specific ratio—usually 1:1 or 2:1—by volume. This means you aren’t just guessing; you’re following a chemical recipe. I always tell people to use graduated mixing cups rather than just eyeballing it with a standard measuring spoon. If the math is off even slightly, the resin might never fully harden, leaving you with a permanent headache instead of a cool piece of art.

Once you’ve got your measurements dialed in, the real trick is the stir. Don’t just swirl it around like you’re making coffee; you need to scrape the sides and the bottom of the cup thoroughly. If you rush this part, you’ll end up with “soft spots” in your project. A pro tip I learned the hard way: slow, steady strokes are your best friend if you want to how to prevent resin bubbles from ruining your work. Take your time, stay patient, and remember that precision is your superpower here.

Five things I wish I knew before my first pour

  • Give your workspace a serious makeover before you start. Resin is basically permanent liquid chaos if it spills, so lay down some cheap silicone mats or even just some heavy-duty plastic sheeting. It’s way easier to wipe up a spill on a mat than it is to scrape dried resin off your kitchen table.
  • Temperature is your best friend or your worst enemy. If your room is too cold, the resin gets thick and stubborn, making it a nightmare to mix. Try to work in a space that’s comfortably warm—around 75°F is the sweet spot—to keep everything flowing smoothly and help those bubbles pop.
  • Don’t rush the bubbles. After you mix your resin, give it a few minutes to sit. I used to think I had to start pouring immediately, but letting it rest for a bit allows most of those tiny air bubbles to rise to the surface and pop on their own. It saves you a ton of headache later.
  • Invest in a decent heat gun or a butane torch. You can try to blow bubbles out with your breath, but trust me, it doesn’t work well. A quick pass with a heat gun over the surface of your pour will melt those annoying bubbles away instantly, leaving you with a crystal-clear finish.
  • Safety isn’t optional, even if you’re just making a small coaster. Resin fumes can be sneaky, so always work in a well-ventilated area—crack a window or run a fan. And please, wear gloves. Getting resin stuck to your skin is a sticky, uncomfortable mess that you definitely don’t want to deal with.

Quick tips to keep your first project on track

Don’t wing it with the measurements—getting your mixing ratios spot on is the difference between a beautiful piece and a sticky, half-cured mess.

Protect your workspace and your lungs; resin isn’t something you want to breathe in or get on your favorite rug, so use drop cloths and a good mask.

Patience is your best tool here, so resist the urge to touch or move your piece until it’s actually set according to the instructions.

## My Golden Rule for Resin

“Look, resin can be a bit finicky if you treat it like a science experiment you’re rushing through, but if you treat it like a slow-cooked meal—respect the measurements and give it the time it needs to set—you’ll end up with something killer every single time.”

Nathan Cole

You've Got This: Final Thoughts on Your Resin Journey
You've Got This: Final Thoughts on Your Resin Journey

Look, I know it feels like a lot to juggle right now. Between getting your ratios exactly right so your piece doesn’t stay a sticky mess, picking out the right supplies that won’t drain your wallet, and setting up a safe workspace, there is a lot of mental heavy lifting involved. But remember: you’ve already done the hardest part by just deciding to start. Once you master those mixing steps and get a feel for how the liquid moves, everything else starts to click. It’s all about that steady hand and a little patience while you wait for those layers to cure.

My best advice? Don’t sweat the small stuff. Your first few projects might have a stray bubble or a slightly uneven edge, but that’s just part of the process. I’ve definitely ruined more than a few “easy” DIY projects in my time, and honestly, that’s usually where the best learning happens. Treat every mistake as a lesson in disguise rather than a failure. Grab your gear, clear off your workbench, and just dive in. I promise that once you see that first clear, glossy finish catch the light, you’re going to feel like a total pro. Now, go make something awesome!

Frequently Asked Questions

Is it safe to do resin projects inside my house, or do I absolutely need a garage or workshop?

Look, I get it—you don’t want to turn your living room into a toxic zone. You can do resin indoors, but please, don’t just set it on the coffee table and call it a day. You need a dedicated space with great airflow, like a spare room with a window cracked open. If you can swing it, the garage is king, but if you’re staying inside, invest in a good respirator. Safety first, always.

What should I do if I see those annoying little bubbles popping up in my piece while it's drying?

Don’t sweat it—bubbles are basically a rite of passage in resin crafting. If you see them popping up while things are setting, grab a handheld butane torch or even a long-neck lighter. Just quickly pass the flame over the surface; the heat pops those bubbles instantly. If they’re deep inside, your best bet is to wait for it to cure, sand it down, and pour a thin “flood coat” on top to smooth it out.

How can I tell if my resin is actually cured or if it's still going to stay sticky?

Nothing kills the excitement of a new project faster than touching your piece and realizing it’s still a tacky mess. To check if it’s truly cured, use the “fingernail test”—lightly press a nail into an inconspicuous area. If it leaves an indent or feels gummy, it’s not there yet. If it’s hard and smooth, you’re golden. If it stays sticky, you likely had a mixing error or the room was too cold.
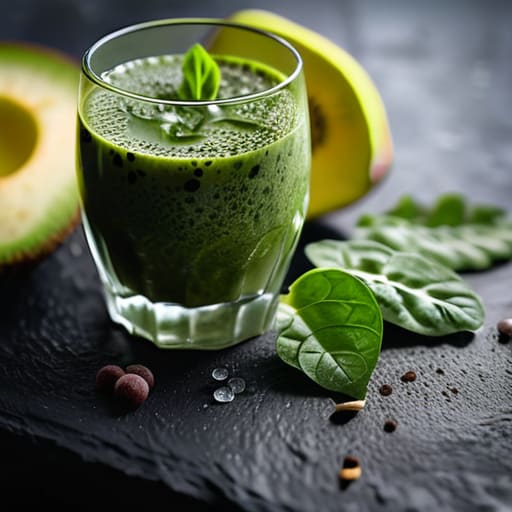

Guide on how to make a smoothie.

How to Make a Smoothie That’s Actually Good for You

Look, I’m going to be real with you: you don’t need a $500 high-speed blender or a cabinet full of expensive, designer superfood powders to get a decent breakfast. I used to think learning how to make a smoothie meant following those ridiculous, thirty-ingredient recipes that look more like a chemistry experiment than actual food. It’s honestly a bit ridiculous how much the wellness industry tries to gatekeep a simple drink by making it seem complicated and pricey.

I’m not here to sell you on any magic powders or fancy gadgets. My goal is to show you that making a killer smoothie is a skill you can master with whatever you’ve already got in your fridge. I’m going to break this down into straightforward, repeatable steps that focus on balance, texture, and—most importantly—flavor. By the time we’re done, you’ll have a reliable system that works for your budget and your busy schedule, making your morning routine actually feel easy.

Table of Contents

Picking the Best Blender for Smoothies Without Breaking the Bank

Picking the Best Blender for Smoothies Without Breaking the Bank

Look, I’ve spent way too much money on gadgets that ended up gathering dust in a kitchen cabinet, so I get the hesitation. When you’re hunting for the best blender for smoothies, you don’t need a professional-grade, thousand-dollar machine that sounds like a jet engine taking off. For most of us, a solid mid-range model with enough horsepower to crush ice is plenty. You want something that can handle the heavy lifting without making your wallet cry.

The real trick is focusing on what actually matters for your daily routine. If you’re a fan of using frozen fruit vs fresh fruit, you’ll want blades that can actually pulverize those icy chunks rather than just spinning them around in a whirlpool. I always tell people to check if the motor is powerful enough to create a smooth consistency; there’s nothing worse than getting a mouthful of unblended kale bits. Aim for a blender with a sturdy jar and easy-to-clean parts. If it’s a pain to wash, you won’t use it, and that’s just money down the drain.

Mastering Your Smoothie Base Ingredients for Instant Success

Once you’ve got your gear ready, it’s time to talk about the foundation. I always tell people that the secret to a drink that doesn’t taste like flavored chalk is getting your smoothie base ingredients right from the jump. You want a mix of something creamy, something liquid, and something for flavor. If you’re looking for that perfect consistency, my biggest smoothie texture tips involve the ratio of solids to liquids. I usually start with a liquid base—like almond milk, coconut water, or even just plain old water—and then build upward.

Now, here is where most people trip up: the great frozen fruit vs fresh fruit debate. If you want a thick, milkshake-like texture without adding a ton of ice (which can water everything down), go with frozen fruit. It acts like a built-in coolant and thickener. To keep things healthy, I try to focus on smoothie nutritional balance by tossing in a handful of spinach or some chia seeds before I even touch the fruit. If you’re using it as a meal replacement, don’t forget about adding protein to smoothies with a scoop of powder or some Greek yogurt to keep you full until lunch.

5 Pro Moves to Stop Making Chunky, Boring Smoothies

5 Pro Moves to Stop Making Chunky, Boring Smoothies
  • Layer your ingredients like you’re building a house—liquids first, then powders, then solids, and save the frozen stuff for the very top. This helps your blender blades catch the liquid immediately so you don’t end up with a dry, stuck motor.
  • Don’t be afraid to freeze your leftovers. If you have half a banana or a handful of spinach that’s about to turn, toss it in a freezer bag. Frozen fruit makes your smoothie thick and frosty without needing to add extra ice, which can water down the flavor.
  • Watch the sugar trap. It’s easy to go overboard with honey or fruit juice, but if you want to avoid a mid-morning energy crash, lean more on creamy fats like Greek yogurt or a bit of nut butter to keep you full.
  • Give it a quick “pulse” before you go full speed. Instead of just hitting the highest setting and hoping for the best, hit the pulse button a few times to break up the big chunks. It saves your blender’s life and ensures a much smoother texture.
  • Clean your gear immediately. I learned this the hard way: if you let smoothie residue dry on the blades, it’s a nightmare to scrub later. Just rinse your blender jar with warm soapy water right after you pour your drink, and you’re good to go.

Quick Wins for Your Next Smoothie

Don’t overthink the gear; you don’t need a professional-grade blender to make a great drink, just something that gets the job done without draining your wallet.

Get your base right from the start by choosing a solid liquid and frozen fruit combo—it’s the secret to a creamy texture that isn’t watery.

Keep it simple and build in layers, starting with your liquids so you don’t end up fighting a stuck motor or a chunky mess.

## The Secret to a Perfect Blend

“Look, you don’t need a thousand-dollar machine or some fancy superfood powder to get a good smoothie. It’s really just about getting the order of operations right and not being afraid to experiment with what’s already in your fridge.”

Nathan Cole

Getting Your Smoothie Groove

Getting Your Smoothie Groove with simple ingredients.

At the end of the day, making a killer smoothie isn’t about having a professional-grade kitchen or a massive grocery budget. It really just comes down to the basics we talked about: picking a blender that actually gets the job done, nailing your liquid base, and layering your ingredients so you don’t end up with a chunky mess. Once you’ve got those fundamentals down, you’re basically just playing with food. You can swap out frozen berries for mango, or trade almond milk for coconut water, and you’ll find your own rhythm. Just remember to start simple and don’t be afraid to experiment with different textures until you find that perfect consistency.

I know that sometimes the idea of “starting a healthy habit” feels like another giant chore on an already overflowing to-do list. But honestly? A smoothie is one of the easiest wins you can grab in the morning. It’s fast, it’s rewarding, and there’s something uniquely satisfying about seeing a pile of random ingredients transform into something delicious right before your eyes. Don’t worry about making it “picture-perfect” for social media; just focus on making something that tastes good and makes you feel fueled. You’ve got this, so go grab your blender and give it a shot!

Frequently Asked Questions

How do I keep my smoothies from turning into a watery mess?

Nothing kills a good morning vibe faster than a smoothie that has the consistency of lukewarm dishwater. To fix this, stop leaning so hard on ice and juice. Instead, use frozen fruit—especially frozen bananas—to get that creamy, milkshake-like texture. I also like adding a spoonful of chia seeds or Greek yogurt; they soak up extra liquid and act like a natural thickener. Keep your liquid low, and you’ll nail that perfect pour every time.

Can I use frozen fruit instead of ice, or will that mess up the texture?

Honestly, using frozen fruit is my go-to move. It’s actually a total pro tip because it makes your smoothie thick and creamy without watering it down like ice does. If you use ice, you often end up with that weird, slushy, separated texture. Just toss in some frozen berries or mango chunks instead, and you’ll get a much smoother, more consistent result every single time. It’s a total game-changer.

Is there a trick to cleaning the blender quickly so I'm not stuck scrubbing it every single morning?

Look, I get it. Nobody wants to spend ten minutes scrubbing a pitcher when they just want to get on with their day. Here’s my go-to trick: as soon as you pour your smoothie, don’t let that gunk dry. Fill the blender halfway with warm water, add a single drop of dish soap, and let it run on high for thirty seconds. Rinse it out, and you’re done. It’s a total game-changer.

Tips on how to prioritize tasks.

How to Prioritize When Everything Feels Urgent

I remember sitting at my kitchen table three years ago, surrounded by half-finished projects, a stack of overdue bills, and a laptop that seemed to be mocking me with its slow loading speed. I had a notebook full of “urgent” notes, but I was paralyzed, staring at the mess and wondering where even to begin. It’s that heavy, sinking feeling in your gut when you realize you’re busy all day but actually accomplishing nothing. Most productivity gurus will tell you that you need a complex digital ecosystem or a $50 planner to fix this, but honestly? That’s just more clutter. Learning how to prioritize tasks isn’t about buying a fancy new app; it’s about getting your head straight and figuring out what actually matters.

I’m not here to sell you on some high-level corporate strategy that sounds great in a boardroom but fails the second real life hits the fan. My goal is to give you the same kind of straight-talk I’d use while helping a buddy fix a leaky sink: keep it simple and make it work. I’m going to show you a few practical, no-nonsense ways to cut through the noise so you can stop spinning your wheels and start making real progress.

Table of Contents

Mastering the Eisenhower Matrix Technique for Clear Wins

Mastering the Eisenhower Matrix Technique for Clear Wins

So, let’s talk about a tool that actually works without needing a PhD to understand: the Eisenhower Matrix technique. I stumbled onto this a few years ago when my “to-do” list looked more like a chaotic junk drawer. The trick is to stop treating every single ping on your phone like a five-alarm fire. Instead, you grab a piece of paper and draw a big plus sign to create four boxes. This helps you separate your urgent vs important tasks so you aren’t just busy, but actually productive.

In the first box, you drop the “do it now” stuff—the deadlines and fires. The second box is where the magic happens: these are the important things that don’t have a ticking clock yet, like planning a project or learning a new skill. If you spend all your time in the “urgent” box, you’ll burn out fast. By using these productivity frameworks, you can start scheduling time for the stuff that actually moves the needle. It’s all about taking control of your day instead of letting your inbox run your life.

Separating Urgent vs Important Tasks With Ease

Separating Urgent vs Important Tasks With Ease

Now, I know what you’re thinking: “Nathan, isn’t that just a fancy way of saying everything is a priority?” I get it. When you’re staring down a mountain of work, everything feels like it’s screaming for your attention. But here’s the secret I learned while juggling odd jobs and home repairs: there is a massive difference between something that is loud and something that actually matters.

The trick to mastering urgent vs important tasks is learning to ignore the “noise.” An urgent task is that pinging Slack notification or a ringing phone—it demands your attention right now, but it might not actually move the needle on your goals. An important task, on the other hand, is the stuff that helps you grow, like finishing that big project or finally organizing your finances.

If you spend your whole day just reacting to the loudest thing in the room, you’re never going to get ahead. You’ll just be tired. Instead, try to carve out time for the important stuff before the emergencies start flying. It’s all about taking control of your schedule rather than letting your inbox run your life.

5 ways to stop the scramble and actually get stuff done

  • Eat the frog first thing. I know, it sounds gross, but it’s basically just tackling that one massive, annoying task you’ve been avoiding all morning. Once that’s out of the way, everything else feels like a breeze.
  • Use the “Two-Minute Rule” for the small stuff. If a task pops up that takes less than two minutes—like answering a quick email or filing a receipt—just do it right then. Don’t let those tiny things clutter up your mental workspace.
  • Group your similar tasks together. I call this “batching.” Instead of jumping from a spreadsheet to a phone call to a grocery list, try to knock out all your emails at once, then all your errands. It keeps your brain from constantly switching gears, which is a total energy killer.
  • Build in some “buffer time.” Life happens. A meeting runs long, or you realize you forgot to pick up a part for a project. If you schedule your day down to the minute, you’re going to feel defeated by noon. Leave some breathing room so one delay doesn’t wreck your whole afternoon.
  • Do a “brain dump” every evening. Before you shut down for the night, grab a notepad and write down everything swirling in your head for tomorrow. Getting it out of your brain and onto paper makes it way easier to actually relax and sleep without your mind racing.

The quick cheat sheet for staying on track

Don’t let “urgent” noise drown out what actually matters; use the distinction between busywork and real progress to protect your time.

Stop trying to do everything at once and start picking the one or two things that actually move the needle for you today.

Keep your system simple—if a productivity method feels like a second job, toss it out and find a way that actually fits your real life.

## The real secret to getting things done

“Look, you’re never going to finish everything on your list, and that’s okay. The trick isn’t working harder; it’s learning how to pick the right tool for the job and tackling the one thing that actually moves the needle before you get buried in the small stuff.”

Nathan Cole

Getting it Done

Prioritizing tasks for getting it done.

Look, I know it feels like you’re trying to juggle too many spinning plates at once, but we’ve covered a lot of ground today. We talked about using the Eisenhower Matrix to sort the noise from the real work, and we looked at how to stop letting those “urgent” little distractions hijack your entire day. The main thing I want you to remember is that prioritization isn’t about doing more stuff; it’s about doing the right stuff. Once you start separating what’s actually important from what’s just loud, you’ll find that the mountain starts looking a lot more like a series of small hills. Just grab your list, pick your top three, and start moving.

At the end of the day, don’t let the fear of a messy schedule keep you stuck on the sidelines. You’re going to have days where your plan goes completely out the window—trust me, I’ve had plenty of those—but that doesn’t mean you failed. It just means you pick up your tools and try again tomorrow. Most of life is just about figuring it out as you go, and getting your tasks in order is just another skill you can build with a little practice. You’ve got this, so stop overthinking it and just take that first step.

Frequently Asked Questions

What do I do when everything on my list feels like a "Priority 1" emergency?

Look, I’ve been there. It’s like looking at a pile of broken pipes and a burnt dinner all at once—everything feels like a crisis. When your whole list screams “emergency,” you have to stop and zoom out. Pick the one thing that, if finished, makes everything else easier or less stressful. Just one. Tackle that, get a quick win under your belt, and let the rest of the chaos wait ten minutes. One thing at a time.

How can I stay on track with my priorities when people keep dropping new tasks on my desk all day?

Look, I’ve been there—it’s like trying to fix a leaky pipe while someone keeps throwing more wrenches at your head. When the “drive-by” requests start piling up, you’ve got to build a buffer. I keep a “parking lot” list on my desk. When someone drops something new, I don’t immediately dive in. I say, “Got it, let me add that to my queue and see where it fits.” It buys you breathing room to stay focused.

Is there a way to prioritize my tasks without feeling like I'm constantly rushing or burning out?

Look, I’ve been there—running on caffeine and sheer panic just to keep my head above water. The secret isn’t working harder; it’s about setting boundaries with your own time. Try “time boxing.” Instead of a never-ending list, pick three specific tasks and give them a set window of time. When the timer hits, you’re done. It stops the frantic race and lets you actually focus on one thing at a time.

Tips on how to overcome overwhelm.

How to Get Unstuck When You Feel Overwhelmed

I remember standing in my kitchen last Tuesday, staring at a sink full of dishes, a laptop screaming with unread emails, and a pile of half-finished DIY projects in the hallway, feeling like I was about to short-circuit. It wasn’t just a busy day; it was that heavy, suffocating feeling where you don’t even know where to put your hands first. Most “productivity gurus” will tell you to buy a $50 planner or download some complex app to fix your life, but honestly? That’s just more clutter on the pile. When you’re looking for how to overcome overwhelm, you don’t need a fancy system; you just need to stop the spinning.

I’m not here to sell you a lifestyle makeover or a complicated five-step ritual that takes three hours to perform. I’ve spent years learning that whether you’re troubleshooting a leaky pipe or a messy schedule, the secret is the same: you have to break it down. In this guide, I’m going to show you my no-nonsense, hands-on approach to tackling the chaos by focusing on small, manageable wins. We’re going to strip away the fluff and get straight to the practical steps that actually work when your brain feels like it has too many tabs open.

Table of Contents

Simple Prioritization Strategies for Busy People

Simple Prioritization Strategies for Busy People.

Look, when I’m staring at a kitchen remodel that’s gone sideways or a mountain of unread emails, my first instinct is to freeze. That’s where most of us hit a wall. To get moving again, I use a trick I call “The Rule of Three.” Instead of looking at a twenty-item to-do list, I pick just three things that actually matter today. This is one of those simple prioritization strategies for busy people that keeps you from spinning your wheels. If you finish those three, awesome—you can pick another. If not, you still won the day.

Another thing that helps me is the “Two-Minute Rule.” If a task takes less than two minutes—like answering a quick text or putting a tool back in its drawer—do it immediately. Letting those tiny tasks pile up is a fast track to managing mental burnout because they create a constant, low-level hum of noise in your head. By knocking out the small stuff right away, you clear the mental clutter and leave more room for the big, important projects that actually move the needle.

Fixing the Productivity and Overwhelm Connection

Fixing the Productivity and Overwhelm Connection.

Here is the thing I’ve learned from years of juggling odd jobs and home renovations: productivity isn’t just about doing more; it’s about how your brain handles the load. There is a massive productivity and overwhelm connection that most people miss. When you try to sprint through a massive to-do list without taking a breath, you aren’t actually being efficient—you’re just spinning your wheels. It’s like trying to run a power saw with a frayed cord; you might get the job done, but you’re risking a total blowout.

If you feel like you’re constantly redlining, you might actually be managing mental burnout without even realizing it. When that happens, your brain starts looking for exits, which is why you suddenly find yourself scrolling through your phone for an hour instead of finishing that one simple task. Instead of fighting against your brain, try incorporating some basic stress management techniques into your workflow. Even something as small as a five-minute reset can clear the mental fog, making it much easier to pick up your tools and get back to work.

5 Ways to Stop the Spiral and Get Moving Again

  • The “Five-Minute Rule.” When a task feels like a giant, heavy boulder you can’t move, tell yourself you’ll only work on it for five minutes. Just five. Usually, the hardest part is just breaking the seal, and once you’ve started, you’ll find you’ve got enough momentum to keep going.
  • Do a “Brain Dump” on actual paper. My digital notes app sometimes feels like just another place to be overwhelmed. Grab a physical notebook or a scrap of paper and write down every single thing rattling around in your head—from “finish the quarterly report” to “buy more dish soap.” Getting it out of your skull and onto the page makes it much more figure-out-able.
  • Triage your environment. If your desk is a disaster zone or your kitchen sink is overflowing, your brain is going to feel just as cluttered. You don’t need to deep-clean the whole house, but clearing off just your immediate workspace can act like a reset button for your focus.
  • Stop multitasking (it’s a lie). I used to think I was a pro at juggling five things at once, but really, I was just doing five things poorly and feeling twice as tired. Pick one thing. One single, solitary task. Finish it. Then, and only then, move to the next one.
  • Build in “Maintenance Breaks.” You wouldn’t run a power tool for eight hours straight without checking the blade or cooling it down, so don’t do it to yourself. Take ten minutes to step outside, grab a coffee, or just stare at a wall. It’s not wasting time; it’s preventing a total system breakdown.

The Bottom Line: Keeping Your Head Above Water

Stop trying to tackle the whole mountain at once; just find the first loose stone, move it, and keep going.

Remember that your productivity isn’t a machine you can just crank up—if you’re feeling fried, the best “fix” is often stepping away to reset.

Keep your tools simple—whether it’s a paper list or a basic app, use whatever helps you clear the mental clutter so you can actually get to work.

## The Golden Rule of Getting Unstuck

“Overwhelm is just a giant, messy pile of tasks that hasn’t been sorted yet. You don’t need a miracle to fix it; you just need to stop looking at the whole pile and start picking up one single piece at a time.”

Nathan Cole

One Step at a Time

Taking it One Step at a Time.

Look, I know it feels like a lot right now. We’ve talked about how to triage that massive to-do list, how to spot the connection between your productivity habits and that heavy feeling in your chest, and how to use simple prioritization to stop the spinning. The main takeaway I want you to hang onto is that you don’t have to fix everything by Tuesday. Whether you’re tackling a cluttered workspace or a cluttered mind, the secret is to stop looking at the whole mountain and just focus on the single, manageable task right in front of you. Once you clear that one small hurdle, the momentum starts to build, and the rest of the mess becomes way more figure-out-able.

At the end of the day, I’ve learned through plenty of failed DIY projects and messy kitchen disasters that perfection is a trap. You’re going to have days where the overwhelm wins, and that’s okay. Don’t beat yourself up; just pick up your tools and try again tomorrow. You have more grit than you give yourself credit for, and I promise that progress is better than perfection. Just keep moving, keep simplifying, and remember that you’ve got this. Now, go tackle that one tiny thing you’ve been putting off.

Frequently Asked Questions

How do I know if I'm actually being productive or just staying busy to avoid the real work?

Look, I’ve been there. I’ll spend three hours organizing my toolbox just to avoid actually fixing the sink. It feels like work, but it’s just procrastination in a clean shirt. To tell the difference, ask yourself: “If I only got one thing done today, would it actually move the needle?” If you’re just clearing out your inbox or tidying your desk, you’re likely just “busy-working.” Real productivity is tackling the one task you’re dreading most.

What do I do when a "tiny step" still feels way too big to even start?

Look, I get it. Sometimes even “open the laptop” feels like trying to climb Everest. When a tiny step still feels too heavy, you have to shrink the step until it feels almost ridiculous. Don’t “write an email”—just “open a blank document.” Don’t “clean the kitchen”—just “move one spoon to the sink.” If it still feels too big, keep shrinking it. Make the goal so small it’s impossible to fail.

Is there a way to deal with the overwhelm when my boss or family keeps adding more to my plate?

Look, I’ve been there. It feels like people are just piling bricks on your back while you’re already struggling to stand. When the “asks” keep coming, you’ve got to stop being a sponge and start being a gatekeeper. I call it the “Reality Check” method. Instead of just saying yes, try saying: “I can definitely do that, but which of these other three things should I move to the back burner to make room?” It turns a confrontation into a practical conversation about capacity.

Effective cover letter tips for hiring managers.

Cover Letter Tips That Make Hiring Managers Keep Reading

I remember sitting at my kitchen table three years ago, staring at a blinking cursor and a blank Google Doc, feeling like I was trying to assemble a piece of IKEA furniture with half the screws missing. I had the skills, but I had no clue how to translate my odd jobs and trade school background into something that wouldn’t get tossed in the digital trash bin. Most of the cover letter tips you find online are just fluff—telling you to “be yourself” or “show passion” without actually telling you how to do it. It’s all high-level nonsense that doesn’t help when you’re just trying to prove you’re worth a paycheck.

Look, I’m not here to give you some corporate-speak lecture or tell you to buy a $50 template. I want to show you that writing a decent letter is a lot like fixing a leaky faucet: it looks intimidating until you break it down into small, manageable parts. I’ve spent a lot of time figuring out what actually catches a hiring manager’s eye, and I’m going to share those straight-shooting tactics with you. We’re going to build you a draft that sounds like a real human being, one step at a time.

Table of Contents

Mastering the Professional Cover Letter Structure

Mastering the Professional Cover Letter Structure guide.

Think of a professional cover letter structure like a blueprint for a house. If you just start nailing boards together without a plan, you’re going to end up with a crooked mess. You don’t want to just repeat your resume; instead, you need to show how your experience actually solves the employer’s problems. The goal is to bridge the gap between your past work and their future needs by matching skills to job requirements in a way that feels natural, not forced.

I like to break it down into four clear zones: the header, the hook, the “meat” of the argument, and the call to action. Start with a solid header so they know who you are, then move into your opening. This is where you avoid those boring, robotic greetings and instead use effective cover letter opening sentences that actually grab someone’s attention. Once you’ve got them reading, use the middle paragraphs to tell a quick story about a win you had at a previous job. Keep it tight, keep it focused, and always make sure you’re tailoring your content to the specific role you’re chasing.

Effective Cover Letter Opening Sentences to Grab Attention

Effective Cover Letter Opening Sentences to Grab Attention

Look, I get it. Staring at a blank cursor is way harder than trying to figure out why a kitchen sink is leaking. You want to stand out, but most people fall into the trap of starting with something incredibly boring like, “I am writing to express my interest in…” Honestly? That’s one of those common cover letter mistakes to avoid if you actually want the hiring manager to keep reading. You’ve already got the professional cover letter structure down; now you just need to hook them before they decide to skim.

Instead of playing it safe with a generic greeting, try leading with a “win.” If you’re applying for a project management role, don’t just say you’re organized—tell them how you managed a $50k budget without breaking a sweat. This is where tailoring cover letters to job descriptions really pays off. By jumping straight into a specific achievement or a genuine connection to the company’s mission, you’re showing them you aren’t just copy-pasting your way through the application. It makes the whole thing feel real and personal right from the jump.

5 Ways to Make Your Cover Letter Actually Stand Out

  • Stop treating it like a summary. I know it’s tempting to just repeat your resume, but your cover letter is for the stuff that doesn’t fit in a bullet point. Use this space to tell a quick story about a time you solved a problem or handled a mess—that’s what actually shows a hiring manager you can do the job.
  • Write like you’re talking to a real person. I see way too many letters that sound like they were written by a robot from 1950. Avoid the “To Whom It May Concern” trap if you can. Do a little digging on LinkedIn or the company site to find a name. Even if you can’t find the exact person, “Dear [Department] Team” feels a lot warmer and more human.
  • Focus on what you can do for them, not just what they can do for you. It’s easy to get caught up in why this job would be great for your career, but the person reading it wants to know how you’re going to make their life easier. Instead of saying “I want to learn X,” try “I can use my experience in Y to help your team achieve Z.”
  • Keep it tight and punchy. Nobody wants to read a three-page manifesto. Think of your cover letter like a good DIY guide: give them the essential info, keep the steps clear, and don’t ramble. Aim for three to four short paragraphs. If it looks like a massive wall of text, they’re probably going to skip over it.
  • Do a final “sanity check” read-aloud. This is my favorite trick for catching mistakes. Read your letter out loud to yourself. If you stumble over a sentence or find yourself running out of breath, the sentence is too long or too clunky. If it sounds weird when you say it, it’ll look weird when they read it.

The Quick Version: What to Remember

Stop trying to be a robot; use your own voice to show them who you actually are.

Structure is your best friend—follow a simple flow so the hiring manager doesn’t get lost.

Every sentence needs to earn its keep by showing how you can actually solve their problems.

## The Real Secret to Getting Noticed

“A cover letter isn’t some formal ritual where you use big words to sound important; it’s just your chance to tell a human being why you’re the right person for the job and that you actually give a damn about the work.”

Nathan Cole

You’ve Got This

Encouraging writer motivation: You’ve Got This.

Look, I know staring at a blank cursor can feel a lot like trying to fix a plumbing leak without a wrench, but we’ve already done the heavy lifting. We’ve walked through how to structure your thoughts so they actually make sense, and we’ve looked at how to kick things off with a hook that doesn’t sound like a robot wrote it. The goal isn’t to write something “perfect”—because, let’s be real, perfection is a myth—the goal is to be clear, concise, and human. Just remember to double-check your formatting and make sure your tone matches the job you’re actually chasing. If you follow these steps, you’re already miles ahead of the people just hitting “Easy Apply” without a second thought.

At the end of the day, a cover letter is just your chance to show a real person that you’re the right fit for the team. Don’t let the fear of a typo or a slightly awkward sentence stop you from hitting send. Most of the time, the hardest part of any project is just getting started and finishing it. You have the skills, you have the experience, and now you have the roadmap to prove it. So, take a deep breath, do one last read-through, and get that application out there. You’re more ready than you think.

Frequently Asked Questions

How long should my cover letter actually be without it looking like a wall of text?

Look, I get it. You want to tell them everything about why you’re awesome, but nobody has time to read a novel. Keep it tight. Aim for three to four short paragraphs, and definitely don’t let it go over one page. If it looks like a massive wall of text, the hiring manager is going to skim right past it. Use white space to your advantage—short paragraphs are your best friend here.

Do I really need to write a new one for every single job application, or can I just tweak a template?

Look, I get it. Writing a fresh letter from scratch every single time feels like trying to sand an entire deck by hand—exhausting and totally unnecessary. You don’t need to reinvent the wheel, but you can’t just copy-paste a template and call it a day, either. Think of it like a modular build: keep your core structure the same, but swap out the specific “parts”—like the company name and key skills—to fit the job.

What should I do if I’m changing careers and don't have direct experience to talk about?

Look, I’ve been there—trying to switch gears when your resume feels like it belongs to a completely different person. Don’t sweat the lack of direct experience. Instead, focus on your “transferable skills.” Think about it like this: if you can manage a chaotic construction site, you can definitely manage a project workflow. Highlight those universal wins—problem-solving, communication, or grit—and show them how those tools apply to this new job. It’s all about the connection.

Guide on how to choose the right phone.

How to Choose the Right Phone Without Overpaying

I remember sitting in a bright, sterile electronics store last year, staring at a wall of glowing screens and feeling like I needed a PhD just to understand the spec sheets. Every salesperson was throwing around terms like “nits,” “refresh rates,” and “nanometer processes” like they were magic spells, trying to convince me that I needed a $1,200 slab of glass just to check my email and scroll through DIY tutorials. It felt like a total racket. The truth is, most of that high-end hype is designed to make you feel like you’re missing out, but when it comes to how to choose the right phone, you really only need to focus on what actually makes your daily life easier.

I’m not here to sell you on the latest shiny gadget or get bogged down in tech jargon that nobody actually uses. My goal is to cut through the noise and give you a straightforward, no-nonsense plan to find a device that fits your budget and your lifestyle. We’re going to break this down into a few simple, practical steps so you can walk into that store—or click that “buy” button—with total confidence that you aren’t getting ripped off.

Table of Contents

Making Sense of the Smartphone Operating System Comparison

Making Sense of the Smartphone Operating System Comparison

Once you’ve decided on a rough budget, you’re going to run straight into the big debate: iOS versus Android. Honestly, this is where most people get stuck, but a smartphone operating system comparison doesn’t have to be a headache. Think of it like choosing between a reliable old truck and a high-tech sedan. Apple’s iOS is like that truck—it’s consistent, everything works together seamlessly, and it’s hard to mess up. If you already own a Mac or an iPad, sticking with iPhone just makes sense.

On the flip side, Android is more like a custom workshop. You’ve got way more freedom to tweak the settings, change the look of your home screen, and pick from a massive variety of hardware. This is where you’ll find the biggest range between budget vs flagship smartphones. If you want something simple and polished, go Apple. If you want more control and more options at different price points, Android is your best bet. Just pick the one that feels most intuitive to you, because once you settle in, you won’t want to switch.

Budget vs Flagship Smartphones Finding Your Sweet Spot

Budget vs Flagship Smartphones Finding Your Sweet Spot

Now, let’s talk money, because this is where most people get stuck. When you’re looking at the budget vs flagship smartphones debate, it’s easy to feel like you’re being pressured to drop a thousand bucks just to get a “good” device. But here’s the truth from someone who’s spent way too much time tinkering with gear: you don’t always need the top-of-the-line model to get a great experience. Flagships are amazing, sure, but you’re often paying a premium for bells and whistles—like titanium frames or professional-grade video tools—that you might never actually use.

If you’re more of a practical user, I’d suggest focusing on the trade-offs. For instance, you’ll likely see a massive jump in camera quality vs price when moving to a flagship, but if you mostly just take snapshots of your dinner or your dog, a mid-range phone is going to serve you just fine. My advice? Figure out your “must-haves” first. If you need a phone that lasts all day through a long shift, prioritize mobile phone battery life importance over having the fastest processor on the market. Find that middle ground where you aren’t overpaying for power you won’t use.

Five Quick Ways to Narrow Down Your Choice

  • Figure out your “must-haves” before you browse. Do you need a massive screen for watching videos, or a small phone that actually fits in your pocket? Write down the three things you use your phone for most—like texting, photography, or gaming—and use that as your North Star so you don’t get distracted by shiny features you won’t actually use.
  • Don’t get blinded by megapixels. A high number on a camera spec sheet doesn’t always mean better photos. If you can, head to a store and take a few test shots with the floor models. Seeing how the colors and clarity actually look in your hands is way more helpful than reading a bunch of technical jargon online.
  • Check the battery life reality. Every manufacturer claims their battery lasts “all day,” but that’s a big variable. Look for reviews from real people, not just tech gurus, to see how the battery holds up after six months of heavy use. If you’re a heavy user, you might want to prioritize a larger battery over a super slim design.
  • Consider the “ecosystem” trap. If you already own a tablet, a smartwatch, or a laptop from a specific brand, sticking with that same brand’s phone makes your life a whole lot easier. Everything just talks to each other better, which saves you a massive headache when you’re trying to sync files or photos.
  • Think about the long game with software updates. A phone is a big investment, so you want it to stay secure and functional for a few years. Before you tap “buy,” check how many years of software and security updates the manufacturer promises. There’s nothing worse than buying a great device only to have it become obsolete in eighteen months.

Quick Tips Before You Buy

Don’t get distracted by flashy features you’ll never use; focus on the OS and the budget that actually fits your daily life.

You don’t need the most expensive flagship on the shelf to get a great experience—find the “sweet spot” where value meets your needs.

Take a second to think about your actual habits, like how much you camera use or how long you need the battery to last, before you swipe your card.

My Golden Rule for Tech

“Don’t get blinded by a shiny spec sheet or a fancy marketing campaign; the best phone isn’t the one with the most bells and whistles, it’s the one that actually fits your life without making you hunt for a charger every three hours.”

Nathan Cole

Making the Final Call

Making the Final Call on smartphones.

Look, I know it feels like there’s a mountain of specs to climb, but we’ve already done the heavy lifting. We’ve looked at whether you actually need the fancy iOS ecosystem or if Android’s freedom fits your style better, and we’ve figured out that a mid-range “sweet spot” phone is usually a smarter move than dropping a grand on a flagship you’ll barely use. At the end of the day, it’s not about having the most powerful processor on the planet; it’s about finding the device that actually fits your daily rhythm without draining your bank account.

If you’re still feeling a little stuck, just remember my own philosophy: most things are more figure-out-able than they look. You don’t need to be a tech genius to own a great phone, and you definitely don’t need to overthink it until your head spins. Grab the one that hits your budget and covers your must-haves, and then just go use it. Once you get it in your hand and start setting it up, everything will click. You’ve got this!

Frequently Asked Questions

Is it actually worth paying extra for a flagship phone, or am I just paying for a fancy logo?

Look, I get it. It feels like you’re just paying a “status tax” sometimes. But here’s the truth: if you’re a power user who takes photos of everything or plays heavy games, that extra cash buys you better processors and cameras that actually hold up. However, if you just want to scroll through Reddit and check emails, a flagship is overkill. Don’t pay for the logo; pay for the specs you’ll actually use.

How much storage do I really need so I don't run out of space for photos in six months?

Look, I’ve been there—staring at that “Storage Full” notification right when I’m trying to snap a photo of a great meal. If you’re mostly just scrolling and texting, 64GB is cutting it close. But if you’re a big photo taker or like downloading movies for trips, aim for at least 128GB. It’s better to have a little extra breathing room than to be playing digital Tetris every six months.

Should I prioritize battery life over having the fastest processor and the best camera?

Look, I’ll be honest: unless you’re a professional mobile gamer or a full-time content creator, you should almost always prioritize battery life. There is nothing more frustrating than having a world-class camera in your pocket but no juice left to actually take the photo. A slightly slower processor is a small price to pay if it means your phone actually lasts through your commute and your evening. Build your setup around reliability first.

Easy kids craft ideas for rainy days.

Easy Kids’ Craft Ideas for a Rainy Day

Look, I get it. You want to do something creative with the kids, but the moment you open that drawer of half-used glue sticks and random construction paper, you feel a wave of dread. You’re staring at a mountain of potential mess and wondering if these kids craft ideas are actually going to keep them occupied for more than five minutes, or if you’re just setting yourself up for a massive cleanup headache. We’ve all been there—standing in the middle of the living room, surrounded by glitter, wishing we had a plan that actually worked without turning the house into a disaster zone.

But here’s the good news: you don’t need a degree in fine arts or a dedicated craft room to make this happen. I’ve narrowed it down to five super simple, low-stress projects that focus on using what you already have lying around the house. I’m going to walk you through these step-by-step so you can skip the frustration and get straight to the fun part. By the end of this list, you’ll have a handful of foolproof wins that will keep the little ones busy and actually make you feel like a DIY pro.

Table of Contents

Cardboard Box Forts and Castles

Building Cardboard Box Forts and Castles.

Look, I know what you’re thinking—it’s just a pile of recycling. But in my house, a sturdy cardboard box isn’t trash; it’s the foundation of a masterpiece. If you’ve got some delivery boxes lying around, you’re halfway to a weekend of entertainment. I usually grab a utility knife (keep that one away from the kids, obviously) and some heavy-duty duct tape to start shaping the walls and roof.

The Great Painted Rock Collection

The Great Painted Rock Collection on stones.

This is my absolute favorite “low-effort, high-reward” project. Next time you’re out for a walk, grab a handful of smooth stones from the driveway or a nearby park. You don’t need a fancy art studio for this; just a small set of acrylic paints or even some permanent markers will do the trick. It’s a great way to get the kids outside and moving before they sit down to work.

Homemade Playdough Station

DIY Homemade Playdough Station for kids.

I’ve always preferred making things from scratch rather than buying the pre-packaged stuff. Not only is it cheaper, but it’s also a great way to teach kids a bit of “kitchen chemistry.” All you need are some basic pantry staples like flour, salt, cream of tartar, and oil. I usually whip up a batch while I’m waiting for my coffee to brew, and it takes about five minutes of stirring.

Paper Plate Masks and Characters

If you’ve got a stack of paper plates in the kitchen drawer, you’ve got a craft kit. This is one of those projects that is surprisingly durable if you use the right materials. I usually grab some popsicle sticks and some elastic string to turn a simple plate into something they can actually wear. It’s much more engaging than just drawing a face on a piece of paper.

Mason Jar Galaxy Jars

This one feels a bit more “grown-up,” but kids absolutely lose their minds when they see the result. You just need an old glass jar—I usually repurpose some empty jam or mason jars—some cotton balls, water, and glitter. It’s basically like capturing a tiny, swirling nebula inside a jar, and it looks stunning on a bedside table.

The Bottom Line on Keeping Kids Crafting

Don’t sweat the perfection; the goal is to get them building and creating, not to end up with a museum-quality masterpiece.

Keep your supplies simple and accessible so you aren’t hunting through a junk drawer every time inspiration strikes.

Focus on the process rather than the mess, because a little bit of glue on the table is a small price to pay for a kid feeling like they actually built something themselves.

The Real Goal of Crafting

“Look, it doesn’t matter if the glue is everywhere or the glitter ends up in the carpet; the point isn’t to make a masterpiece for a museum, it’s about showing your kids that they have the power to take a pile of random junk and turn it into something they’re proud of.”

Nathan Cole

Don't Sweat the Mess

Look, we’ve covered a lot of ground here, from turning old cardboard boxes into forts to getting those hands messy with homemade playdough. The main thing I want you to take away is that you don’t need a massive budget or a dedicated art studio to make this happen. Whether you’re working with recycled scraps or just a handful of basic supplies from the local dollar store, the goal isn’t to create a museum-quality masterpiece. It’s about keeping things simple and finding ways to use what you already have lying around the house. If a project gets a little chaotic or a glue gun gets a bit too much attention, just roll with it; that’s all part of the process.

At the end of the day, these crafts are less about the finished product sitting on a shelf and more about the time spent together. I’ve learned through plenty of my own DIY projects that the real magic happens in the middle of the struggle—the part where you’re figuring out how to make that paper plate mask actually stay on a kid’s face. So, clear off the kitchen table, grab a towel for the inevitable spills, and just dive in. You’ve totally got this, and I promise that once you see that look of pride on their faces, every bit of cleanup will feel completely worth it.

Frequently Asked Questions

How do I keep the mess from taking over my entire living room?

Look, I’ve been there—one minute you’re helping with a glue stick, and the next, your living room looks like a glitter bomb went off. My trick? The “Containment Zone.” Before you even open a single bin of scraps, clear off one specific table or a cheap plastic tray. If the mess moves past that boundary, the project is officially paused. It keeps the chaos localized so you can actually relax on your own couch later.

What are some cheap, everyday household items I can use instead of buying expensive craft kits?

Look, you don’t need to drop fifty bucks at a big-box craft store to keep the kids busy. I always say, check your recycling bin before your wallet. Empty toilet paper rolls make great binoculars, egg cartons are perfect for painting little caterpillars, and those old glass jars? They’re instant treasure chests. Even some leftover pasta shapes and a bit of food coloring can turn a boring Tuesday into an art session. Keep it simple.

My kids have a super short attention span; how do I pick projects that won't end in a meltdown?

Look, I get it. I’ve tried to fix a leaky sink only to end up staring at a pile of washers, feeling like throwing the whole wrench across the room. If your kids are hitting that wall, stop looking for “projects” and start looking for “wins.” Pick tasks with a five-minute turnaround. If they can see the finish line before they even start, they’ll stay engaged. Keep it fast, keep it tactile, and keep it moving.

Batch cooking for beginners meal prep guide.

Batch Cooking for Beginners: Cook Once, Eat All Week

I remember standing in my tiny kitchen back in my early twenties, staring at a pile of wilted spinach and a box of pasta, wondering why I was spending forty minutes every single night just trying to scrape together a decent meal. I used to see these “influencer” recipes online that made meal prep look like a high-end culinary production involving twenty different glass containers and three hours of specialized chopping. Honestly, that kind of approach to batch cooking for beginners is a total myth that just leads to burnout and a sink full of dishes. You don’t need a gourmet kitchen or a massive budget to make this work; you just need a solid game plan that actually fits into a normal, messy life.

I’m not here to sell you on some complicated lifestyle overhaul that you’ll abandon by Wednesday. Instead, I’m going to show you how to use a few simple, repeatable steps to get your food sorted without losing your mind. We’re going to focus on practical wins—like prepping versatile ingredients rather than rigid meals—so you can spend less time hovering over a stove and more time actually enjoying your week.

Table of Contents

Smart Weekly Meal Planning Strategies That Actually Work

Smart Weekly Meal Planning Strategies That Actually Work

Look, I’ve tried those overly complicated planners that require you to color-code your entire life, and honestly? They’re a total waste of time. The best weekly meal planning strategies are the ones that actually stick, which means keeping it flexible. Instead of trying to cook five different recipes on a Sunday, I like to pick two big “base” ingredients—like a massive tray of roasted chicken or a huge pot of seasoned black beans. From there, you can pivot. One night it’s a burrito bowl, the next it’s a salad or a wrap. It’s all about building components rather than rigid meals.

Once you’ve got your bases covered, you need to think about the “future you” who is exhausted on a Wednesday night. This is where time saving kitchen hacks really pay off. I always suggest prepping your veggies right after you chop them so they’re ready to toss into a pan later. Also, don’t forget to invest in a few decent meal prep containers for freezing; if you realize you’ve made way too much chili, you can just portion it out and tuck it in the freezer for a rainy day. It’s much easier than starting from scratch when life gets messy.

Budget Friendly Meal Prepping Without Breaking the Bank

Budget Friendly Meal Prepping Without Breaking the Bank

Look, I get it. When you hear “meal prepping,” you might picture those fancy, color-coded bento boxes and expensive organic ingredients that cost more than a new drill set. But let’s get real: budget friendly meal prepping is mostly about being smart with what’s already on sale. My go-to move is hitting the grocery store with a list built around seasonal produce and bulk proteins. Instead of buying individual snack packs, grab a large bag of rice or a big tub of oats. When you build your meals around these staples, you’re not just saving money; you’re building a foundation that makes every other ingredient go much further.

One thing I learned the hard way is that you don’t need a gourmet kitchen to make this work. You just need a few time saving kitchen hacks to keep things efficient. For example, if you’re roasting veggies, throw two different trays in the oven at once. While those are cooking, you can chop your proteins. Also, don’t sleep on the freezer. If you find a great deal on chicken or beans, grab extra. Just make sure you’re using decent meal prep containers for freezing so nothing gets freezer burn and ends up in the trash. Keeping it simple and smart is how you win.

5 Pro Tips to Keep Your Batch Cooking From Becoming a Chore

  • Don’t try to be a gourmet chef on day one. Start by prepping “building blocks” like a big pot of seasoned rice, roasted veggies, or a batch of shredded chicken. It’s way easier to mix and match those throughout the week than it is to eat the exact same heavy casserole five days in a row.
  • Invest in a few good, airtight containers. I learned this the hard way—using old, flimsy plastic tubs is a recipe for soggy leftovers and a messy fridge. Get some decent glass or heavy-duty BPA-free containers that actually seal tight; your food (and your sanity) will thank you.
  • Use your freezer as your best friend. If you realize you’ve made way more chili or pasta sauce than you can actually eat before it goes bad, don’t force it. Portion it out into individual freezer bags immediately. It’s basically like building your own “emergency meal” library for those nights when you’re too wiped to cook.
  • Clean as you go, seriously. There is nothing more soul-crushing than finishing a massive cooking session only to realize you’re staring at a mountain of crusty pots and pans. Wash your cutting boards and bowls while the stuff in the oven is still roasting. It makes the whole process feel way less like a second job.
  • Leave some room for “the pivot.” Life happens. Maybe you end up grabbing takeout with friends, or you just aren’t feeling the meal you prepped. That’s okay! Don’t let a rigid plan make you feel like you failed. Batch cooking is a tool to make your life easier, not a rulebook to make it harder.

The Bottom Line: Making It Work for You

Don’t try to be a gourmet chef on day one; start by prepping just two or three versatile ingredients—like a big batch of roasted veggies or a pot of grains—to see how much easier your week gets.

Keep your gear simple and your plan flexible, because the best meal prep is the kind that actually fits into your real, messy life instead of a perfect Pinterest board.

Focus on “component cooking” rather than rigid recipes, so you can mix and match what you’ve made throughout the week without getting bored or feeling stuck.

## My Philosophy on Prep

“Batch cooking isn’t about spending your entire Sunday staring at a stove; it’s just about doing a little bit of the heavy lifting early so that when Tuesday rolls around and you’re exhausted, dinner is already a solved problem.”

Nathan Cole

You’ve Got This

Meal prepping notebook: You’ve Got This.

Look, I know it sounds like a lot when you first sit down with a notebook and a grocery list. Between mapping out your weekly strategy, keeping an eye on the budget, and actually spending a few hours in the kitchen, it can feel like another chore on an already long to-do list. But remember, the goal isn’t to become a professional chef overnight; it’s just to make your future self a little bit happier. Once you’ve mastered the basics of choosing versatile ingredients and prepping them in bulk, you’ll realize that you aren’t just making food—you’re buying back your time and cutting down on that mid-week decision fatigue that usually leads to expensive takeout.

My biggest piece of advice? Don’t try to be perfect. If you only prep two things this week instead of five, that is still a massive win. Start small, use the tools you already have, and don’t be afraid to tweak things as you go. Most things in life are just a matter of breaking them down into manageable pieces, and meal prepping is no different. Grab a container, get into a rhythm, and soon enough, you’ll be looking at a fridge full of delicious options and a much calmer headspace. You can totally do this.

Frequently Asked Questions

How do I keep my prepped meals from tasting like mush by Wednesday?

The “Wednesday Mush” is real, and it’s usually because we’re overthinking the storage. First, let the food cool completely before sealing the lids; trapping steam turns everything into a soggy mess. Second, stop mixing your sauces in with the grains or veggies. Keep your dressings and wet ingredients in small separate containers. Finally, keep your “crunchy” stuff—like nuts, seeds, or even toasted breadcrumbs—in a separate bag to add right before you eat.

Do I really need to spend my entire Sunday in the kitchen, or is there a faster way?

Look, I’ll be the first to admit: nobody wants to spend their entire Sunday hunched over a stove like it’s a full-time job. That’s the fastest way to burn out. You don’t need a marathon session; you just need a system. Try “component prepping” instead. Roast a big tray of veggies, boil some grains, and cook one protein. You’re not making full meals, just the building blocks. It takes way less time and keeps things flexible.

What are the best containers to use so my food stays fresh and doesn't leak in my bag?

Look, don’t waste your money on those cheap, flimsy plastic tubs that turn orange from spaghetti sauce and leak in your backpack. If you’re serious about this, go with glass—specifically borosilicate glass. It’s tougher, won’t stain, and you can pop it straight in the microwave or oven. If you need something lighter for a commute, grab high-quality BPA-free containers with silicone seals and locking clips. If it doesn’t click, it’s going to leak.

Easy high protein breakfast ideas for satiety.

Easy High-protein Breakfasts to Keep You Full

Look, I get it. We’ve all had those mornings where we grab a sugary pastry or a piece of toast and wonder why we’re crashing and feeling completely drained by 10:00 AM. I used to be that guy, thinking a quick carb-heavy fix was enough to power me through a shift. But after a few years of trial and error in my own kitchen, I realized that if you want to actually stay full and focused, you need to prioritize protein. Finding reliable high protein breakfast ideas shouldn’t feel like a second job or require a culinary degree, but it’s honestly the single best way to set your day up for success instead of just playing catch-up.

I’m not talking about those complicated, thirty-ingredient recipes you see on fancy cooking shows that take an hour to prep. I’m talking about real, no-nonsense food that you can whip up while you’re half-asleep. In this guide, I’m breaking down five of my absolute favorite go-to meals that are easy to make, budget-friendly, and—most importantly—actually taste good. Whether you’ve got five minutes or twenty, these five options will help you stop the mid-morning slump for good.

Table of Contents

The "Set It and Forget It" Overnight Oats

The "Set It and Forget It" Overnight Oats.

If you’re like me and tend to hit the snooze button one too many times, you need a breakfast that’s basically already done by the time your alarm goes off. Overnight oats are a total lifesaver for those frantic Monday mornings. All you do is grab a jar, toss in some rolled oats, milk of your choice, and a big scoop of Greek yogurt or a scoop of protein powder. I usually add a spoonful of chia seeds too, because they help thicken things up and add a little extra nutritional punch.

The Classic Scrambled Egg Upgrade

The Classic Scrambled Egg Upgrade protein plate.

Look, I’m a big believer in the classics, and nothing beats a plate of eggs. But if you’re just eating plain whites or a single egg, you’re probably going to be starving again by 10:00 AM. To actually make this a high-protein powerhouse, you’ve got to get a little more strategic with your ingredients. I like to use two whole eggs and then add a half-cup of liquid egg whites to the mix. It doubles the protein without making the meal feel heavy or greasy.

Greek Yogurt Power Bowls

Healthy Greek Yogurt Power Bowls with fruit.

This is my go-to when I have absolutely zero desire to turn on the stove. Greek yogurt is basically a cheat code for protein—it’s dense, creamy, and packs a massive punch for very few calories. The key here is to avoid the pre-sweetened stuff in the little fruit cups, which is usually just a disguised sugar bomb. Grab a large tub of plain, non-fat Greek yogurt instead. It tastes a bit sharper, but you have total control over the sweetness.

Savory Cottage Cheese Toast

Most people think of cottage cheese as something you eat with canned pineapple, but honestly, that’s a missed opportunity. If you want to level up your breakfast game, try spreading a thick layer of cottage cheese over a piece of toasted whole-grain bread. It’s incredibly high in protein and has a texture that’s surprisingly satisfying when paired with something crunchy. It’s basically the ultimate budget breakfast because a tub of cottage cheese lasts a long time and costs next to nothing.

The Quick Protein Smoothie Hack

Sometimes, the only way I can get breakfast down is if I can drink it on my way out the door. A smoothie is great, but most people make the mistake of just blending fruit, which leads to a massive sugar crash an hour later. To make this a legitimate meal, you need to focus on the protein-to-carb ratio. I always make sure there’s a solid base of protein powder, Greek yogurt, or even some silken tofu in there to keep things substantial.

The Bottom Line

Don’t aim for perfection; just focus on getting some solid protein in your system early to keep the mid-morning crashes at bay.

Prep what you can the night before—your future, sleep-deprived self will definitely thank you.

Keep it simple and use what you’ve got in the pantry so you actually stick to the habit instead of giving up when things get busy.

## The Bottom Line on Breakfast

“Look, you don’t need a fancy meal prep service or a kitchen full of expensive supplements to get your protein in. It’s really just about picking a few solid staples—like eggs, Greek yogurt, or even some leftover chicken—and getting them on your plate before the morning rush hits. Once you stop overcomplicating it, you’ll realize that fueling up is way easier than you think.”

Nathan Cole

Getting Started Without the Stress

Look, I know that when you’re rushing out the door, the last thing you want to do is play chef or count every single gram of macronutrients. But as we’ve seen, getting that protein in doesn’t have to be a massive production. Whether you’re leaning on the speed of Greek yogurt, the prep-ahead magic of overnight oats, or the classic reliability of scrambled eggs, the goal is the same: fueling your body so you aren’t crashing by 10:00 AM. You don’t need a gourmet kitchen or a mountain of expensive supplements to make this work. Just pick one of these methods, keep it simple, and focus on consistent, easy wins that actually fit into your real-life schedule.

At the end of the day, I really believe that small, repeatable habits are what make the biggest difference in how you feel. You don’t have to overhaul your entire life overnight to see a change in your energy levels. Just start with one better breakfast this week and see how it goes. If you mess up or grab a donut one morning, don’t sweat it—just get back on track the next day. You’ve got this, and honestly, once you find your rhythm, you’ll wonder why you ever made breakfast such a headache in the first place. Now, go grab some eggs and get after it!

Frequently Asked Questions

Can I prep these high-protein breakfasts ahead of time if I'm usually rushing out the door?

Absolutely. In fact, that’s the secret to actually sticking with this stuff. If you’re waiting until you’re halfway out the door to start cracking eggs, you’re going to grab a donut instead. I usually spend about twenty minutes on Sunday night prepping my egg muffins or portioning out my yogurt jars. Grab some airtight containers, get ahead of the rush, and your future self will definitely thank you when you’re running late.

What are some cheap, budget-friendly ways to add more protein without buying expensive supplements?

Look, you don’t need a $60 tub of fancy protein powder to hit your goals. I’ve learned the hard way that the best stuff is usually sitting in the pantry already. Grab some dried lentils, canned tuna, or a carton of eggs—these are absolute lifesavers for the wallet. Even a big bag of peanut butter or some Greek yogurt can go a long way. Stick to the basics, shop the bulk bins, and you’re golden.

Do I really need to eat a huge breakfast, or can I hit my protein goals with smaller portions?

Look, you definitely don’t need to sit down to a massive feast every morning to make this work. I’m the same way—if I try to eat a mountain of eggs at 7:00 AM, I’m useless by noon. The trick is spreading it out. If a big breakfast feels like a chore, just aim for a solid protein hit early on and supplement with a high-protein snack later. It’s all about the total daily numbers.

Festive holiday craft ideas for your home.

Holiday Craft Ideas to Make Your Home Feel Festive

Look, I get it. Every time the holidays roll around, you see these insanely elaborate Pinterest boards filled with decorations that look like they required a degree in fine arts and a massive credit line to pull off. It’s easy to feel like you’re failing at the “festive spirit” just because you don’t have a professional studio in your garage. But honestly? Most of those over-the-top setups are just stress disguised as joy. I’ve spent way too many Decembers staring at a pile of craft supplies feeling overwhelmed, but I’ve learned that the best way to celebrate is to keep things simple and actually enjoy the process of making something with your own two hands.

That’s exactly why I put this list together. I’m skipping the expensive, complicated junk and focusing on holiday craft ideas that won’t leave you with a massive headache or a mountain of wasted materials. I’ve picked out five specific projects that are actually doable, even if your last DIY attempt ended in a trip to the hardware store for more supplies. We’re going to walk through these step-by-step so you can build something meaningful without the burnout. Let’s get to work.

Table of Contents

Upcycled Mason Jar Lanterns

Cozy upcycled mason jar lanterns for lighting.

If you’ve got a few empty jam or pickle jars sitting in your recycling bin, don’t toss them just yet. These make some of the coolest ambient lighting you can find for a holiday dinner or a cozy mantle display. I love these because they cost basically zero dollars to make, and they look way more expensive than they actually are once you get the lighting right.

Rustic Cinnamon Stick Wreaths

Handmade Rustic Cinnamon Stick Wreaths.

I’m a big fan of anything that smells good, and nothing beats the scent of cinnamon during the holidays. Instead of buying one of those plastic, overpriced wreaths from a big-box store, you can whip up a rustic version that actually smells like the season. It’s a great project to do while you’re listening to a podcast or just hanging out on a Sunday afternoon.

Personalized Wooden Ornament Tags

DIY Personalized Wooden Ornament Tags.

One of my favorite things about the holidays is the tradition, and nothing says tradition like personalized decor. If you have some scrap wood from a previous DIY project, or even just some pre-cut wooden shapes from the local hobby shop, you’ve got the perfect base for custom ornaments. These are awesome because they make for meaningful gifts that people will actually want to keep for years.

Easy Dried Citrus Garlands

This is one of those projects that looks like it belongs in a high-end lifestyle magazine, but it’s actually incredibly straightforward. Dried citrus slices add a pop of bright color and a natural, organic vibe to your home that plastic decor just can’t match. Plus, it’s a fun way to use up those lemons, limes, or oranges that are starting to get a little soft in the fridge.

Cozy Pinecone Centerpieces

Whenever I’m walking through the park or just looking around my yard, I’m always eyeing up fallen pinecones. They are nature’s version of free crafting supplies, and they work perfectly for creating a centerpiece that won’t break if a guest bumps the table. It’s all about how you arrange them to create a sense of texture and warmth in the middle of your dining setup.

The Bottom Line on Holiday Crafting

Don’t overthink it—the best decor is the stuff you actually enjoy making, not the stuff that looks like it came out of a high-end catalog.

Keep your supplies simple and your steps small so you don’t end up with a mountain of glitter and a massive headache.

Remember that a little bit of “perfectly imperfect” gives your home character and makes the season feel way more personal.

The Real Goal of Holiday Crafting

“At the end of the day, your holiday decor doesn’t need to look like it came straight out of a high-end catalog; it just needs to look like you made it. The best part isn’t the finished product on the mantle—it’s that feeling of looking at something in your own home and knowing you actually built it yourself.”

Nathan Cole

You’ve Got This

Looking back at everything we covered, it’s pretty wild how much you can actually pull off with just a few basic supplies. Whether you decided to tackle those custom wreaths, whip up some scented soy candles, or go the route of handmade gift tags, the goal wasn’t to create museum-quality art—it was to make something meaningful with your own two hands. We moved from simple paper crafts to more involved projects like personalized ornaments, and the common thread through all of them is that they don’t require a professional workshop or a massive budget. Just take it one step at a time, keep your workspace organized, and don’t sweat the small imperfections.

At the end of the day, the best part of these holiday projects isn’t the finished product sitting on your mantle; it’s the fact that you actually sat down and made it happen. There is a specific kind of satisfaction that comes from looking at a piece of decor and knowing you didn’t just pull a credit card out at a big-box store to buy it. So, grab your glue gun, clear off that kitchen table, and don’t be afraid to make a little bit of a mess. You’ve totally got this, and I promise that once you finish that first project, you’re going to be hooked on the DIY life.

Frequently Asked Questions

I'm on a super tight budget this year—can I still make these look good using stuff I already have in my junk drawer?

Look, I’ve been there. There was a time when my “craft budget” was basically whatever change I found in my couch cushions. The answer is a massive yes. That junk drawer is actually a goldmine if you look at things differently. Old twine, mismatched buttons, or even those leftover tea lights? That’s not trash; that’s decor. Don’t overthink it. If it adds texture or a bit of character, it works. Let’s get creative.

Do I need to invest in a bunch of expensive craft tools, or can I get most of this done with just basic household stuff?

Honestly? Put your credit card away. I’ve learned the hard way that you don’t need a professional studio to make something that looks great. Most of what we’re doing here can be tackled with stuff you probably already have in your junk drawer or kitchen pantry—think scissors, twine, or even old jars. If you do need to grab something specific, keep it simple. A basic glue gun and some heavy-duty tape will get you through 90% of these projects.

What's the best way to organize these projects so I'm not scrambling to finish everything the night before the holiday?

Look, I’ve been there—staring at a pile of unfinished crafts at 11 PM with a glue gun that won’t heat up. To avoid that meltdown, I use the “Batch and Buffer” method. Pick one afternoon to prep all your supplies—cut the twine, grab the jars, whatever. Then, aim to finish one project per week starting now. If you build in a one-week “buffer” before the holiday, you’ll actually have time to relax.