
I was standing in my garage last Tuesday, staring at a puddle of half-cured, sticky disaster that was supposed to be a custom coaster, wondering why I ever thought I could do this. Most people will tell you that resin art is this high-end, untouchable hobby that requires a professional studio and a chemistry degree, but that is a total myth. The truth is, resin crafts for beginners don’t need to be expensive or complicated to look incredible; you just need to understand how the stuff actually behaves before you pour it. I learned the hard way so you don’t have to, and I promise it’s much more figure-out-able than those polished Instagram videos make it seem.
In this guide, I’m stripping away all the fluff and getting straight to the grit. I’ll walk you through the essential gear you actually need—and more importantly, the stuff you can skip—plus the simple techniques to avoid those annoying air bubbles that ruin everything. We’re going to tackle the basics of mixing, pouring, and curing so you can start making your own projects without the massive headache. Let’s get to work.
Table of Contents
- Step-by-Step Instructions
- Gathering Your Essential Resin Art Supplies Without Breaking the Bank
- Mastering Resin Mixing Ratios Explained So You Get It Right
- Five things I wish I knew before my first pour
- Quick tips to keep your first project on track
- ## My Golden Rule for Resin
- You've Got This: Final Thoughts on Your Resin Journey
- Frequently Asked Questions
Guide Overview
Tools & Supplies
- Silicone molds for shaping the resin
- Mixing cups for combining components
- Wooden stir sticks for blending
- Digital scale for precise measurements
- Heat gun or lighter to remove bubbles
- Epoxy resin kit (2-part resin and hardener)
- Silicone molds (assorted shapes)
- Liquid pigments or mica powders for color
- Nitrile gloves for hand protection
- Safety mask for respiratory protection
Step-by-Step Instructions
- 1. First things first, you’ve gotta set up your workspace. Resin isn’t something you want to be cleaning out of your carpet later, so grab a silicone mat or some cheap parchment paper to lay down. Make sure you’re in a room with plenty of airflow—open a window or crack a door—because you really don’t want to be breathing in those fumes all afternoon.
- 2. Once your area is prepped, it’s time to suit up. I can’t stress this enough: don’t skip the safety gear. Grab a pair of nitrile gloves and some eye protection. Even if you’re just making a small keychain, a single accidental splash can ruin your day (and your skin), so treat it like you’re working with something serious.
- 3. Now, let’s talk mixing, which is where most people trip up. Check your resin bottle for the ratio—usually, it’s a 1:1 mix of resin and hardener—and grab some sturdy plastic cups. Pour them out slowly and, this is the big one, stir like your life depends on it. You want to scrape the sides and the bottom of the cup constantly for at least three minutes until the liquid looks perfectly clear and has no “streaks” in it.
- 4. If you want to add some flair, this is the fun part. Grab your pigments, mica powders, or even some dried flowers you’ve found outside. Add them to your mixed resin in small amounts. I’ve learned the hard way that less is more when it comes to color, so start with a tiny bit and build up until it looks just right.
- 5. Time to pour. Take your molds—silicone molds are the easiest way to start—and slowly pour your mixture into the cavities. If you see tiny bubbles rising to the surface, don’t panic. You can use a toothpick to pop them or just give the mold a gentle tap on the table to help those bubbles float to the top and escape.
- 6. Now comes the hardest part for me: waiting. You need to find a level surface and leave your project completely alone. Depending on the brand you bought, this could take anywhere from 24 to 48 hours. If you try to touch it too early, you’ll end up with permanent fingerprints in your masterpiece, and that’s a bummer you can’t undo.
- 7. Once everything feels hard and doesn’t feel tacky to the touch, pop your creations out of the molds. If the edges look a little sharp or uneven, you can use a fine-grit sandpaper to smooth them down. Give it a quick wipe with a microfiber cloth, and boom—you’ve just made something awesome from scratch.
Gathering Your Essential Resin Art Supplies Without Breaking the Bank
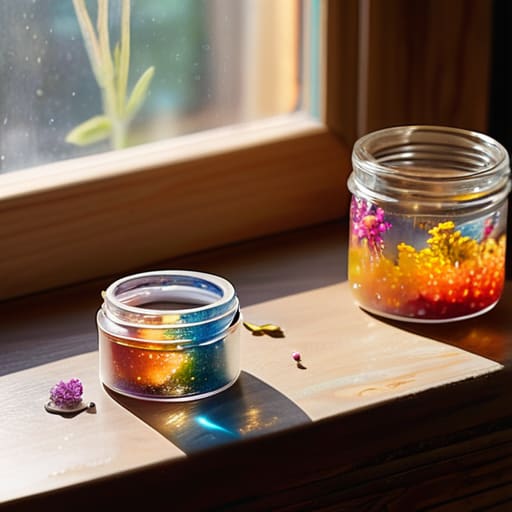
Now, before you go running out to the craft store and emptying your wallet, let’s talk strategy. I’ve learned the hard way that you don’t need a professional studio to get started. When you’re hunting for your essential resin art supplies, start with the basics: a decent two-part epoxy, some silicone molds, and a few stir sticks. You don’t need the fancy, high-end pigments right away; even a little bit of mica powder or even some old acrylic paint from your junk drawer can work wonders. My best advice? Check local marketplaces or even thrift stores for unique items you can cast, rather than buying expensive pre-made kits.
One thing I can’t stress enough—and this is where I wish my dad had warned me sooner—is that you have to prioritize your health. Don’t skimp on the safety precautions for working with epoxy. A good pair of nitrile gloves and a well-ventilated workspace aren’t optional; they’re non-negotiable. It’s much better to spend an extra ten bucks on a respirator now than to deal with a headache or lung irritation later. Think of it like wearing safety goggles when you’re using a circular saw; it’s just part of the job.
Mastering Resin Mixing Ratios Explained So You Get It Right

This is where most people hit a snag, so listen close: getting your measurements wrong is the fastest way to end up with a sticky, half-hardened mess that’s basically useless. Most epoxy kits use a specific ratio—usually 1:1 or 2:1—by volume. This means you aren’t just guessing; you’re following a chemical recipe. I always tell people to use graduated mixing cups rather than just eyeballing it with a standard measuring spoon. If the math is off even slightly, the resin might never fully harden, leaving you with a permanent headache instead of a cool piece of art.
Once you’ve got your measurements dialed in, the real trick is the stir. Don’t just swirl it around like you’re making coffee; you need to scrape the sides and the bottom of the cup thoroughly. If you rush this part, you’ll end up with “soft spots” in your project. A pro tip I learned the hard way: slow, steady strokes are your best friend if you want to how to prevent resin bubbles from ruining your work. Take your time, stay patient, and remember that precision is your superpower here.
Five things I wish I knew before my first pour
- Give your workspace a serious makeover before you start. Resin is basically permanent liquid chaos if it spills, so lay down some cheap silicone mats or even just some heavy-duty plastic sheeting. It’s way easier to wipe up a spill on a mat than it is to scrape dried resin off your kitchen table.
- Temperature is your best friend or your worst enemy. If your room is too cold, the resin gets thick and stubborn, making it a nightmare to mix. Try to work in a space that’s comfortably warm—around 75°F is the sweet spot—to keep everything flowing smoothly and help those bubbles pop.
- Don’t rush the bubbles. After you mix your resin, give it a few minutes to sit. I used to think I had to start pouring immediately, but letting it rest for a bit allows most of those tiny air bubbles to rise to the surface and pop on their own. It saves you a ton of headache later.
- Invest in a decent heat gun or a butane torch. You can try to blow bubbles out with your breath, but trust me, it doesn’t work well. A quick pass with a heat gun over the surface of your pour will melt those annoying bubbles away instantly, leaving you with a crystal-clear finish.
- Safety isn’t optional, even if you’re just making a small coaster. Resin fumes can be sneaky, so always work in a well-ventilated area—crack a window or run a fan. And please, wear gloves. Getting resin stuck to your skin is a sticky, uncomfortable mess that you definitely don’t want to deal with.
Quick tips to keep your first project on track
Don’t wing it with the measurements—getting your mixing ratios spot on is the difference between a beautiful piece and a sticky, half-cured mess.
Protect your workspace and your lungs; resin isn’t something you want to breathe in or get on your favorite rug, so use drop cloths and a good mask.
Patience is your best tool here, so resist the urge to touch or move your piece until it’s actually set according to the instructions.
## My Golden Rule for Resin
“Look, resin can be a bit finicky if you treat it like a science experiment you’re rushing through, but if you treat it like a slow-cooked meal—respect the measurements and give it the time it needs to set—you’ll end up with something killer every single time.”
Nathan Cole
You've Got This: Final Thoughts on Your Resin Journey
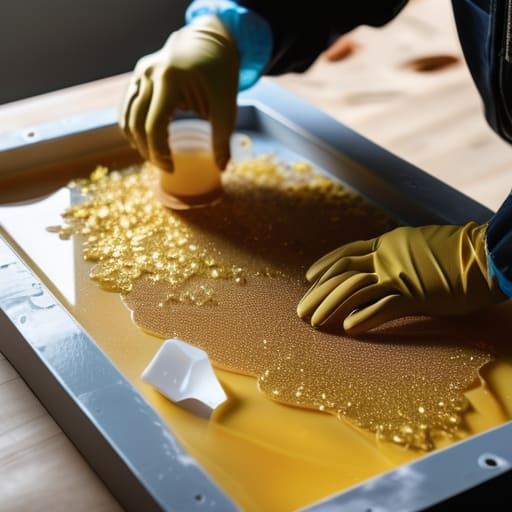
Look, I know it feels like a lot to juggle right now. Between getting your ratios exactly right so your piece doesn’t stay a sticky mess, picking out the right supplies that won’t drain your wallet, and setting up a safe workspace, there is a lot of mental heavy lifting involved. But remember: you’ve already done the hardest part by just deciding to start. Once you master those mixing steps and get a feel for how the liquid moves, everything else starts to click. It’s all about that steady hand and a little patience while you wait for those layers to cure.
My best advice? Don’t sweat the small stuff. Your first few projects might have a stray bubble or a slightly uneven edge, but that’s just part of the process. I’ve definitely ruined more than a few “easy” DIY projects in my time, and honestly, that’s usually where the best learning happens. Treat every mistake as a lesson in disguise rather than a failure. Grab your gear, clear off your workbench, and just dive in. I promise that once you see that first clear, glossy finish catch the light, you’re going to feel like a total pro. Now, go make something awesome!
Frequently Asked Questions
Is it safe to do resin projects inside my house, or do I absolutely need a garage or workshop?
Look, I get it—you don’t want to turn your living room into a toxic zone. You can do resin indoors, but please, don’t just set it on the coffee table and call it a day. You need a dedicated space with great airflow, like a spare room with a window cracked open. If you can swing it, the garage is king, but if you’re staying inside, invest in a good respirator. Safety first, always.
What should I do if I see those annoying little bubbles popping up in my piece while it's drying?
Don’t sweat it—bubbles are basically a rite of passage in resin crafting. If you see them popping up while things are setting, grab a handheld butane torch or even a long-neck lighter. Just quickly pass the flame over the surface; the heat pops those bubbles instantly. If they’re deep inside, your best bet is to wait for it to cure, sand it down, and pour a thin “flood coat” on top to smooth it out.
How can I tell if my resin is actually cured or if it's still going to stay sticky?
Nothing kills the excitement of a new project faster than touching your piece and realizing it’s still a tacky mess. To check if it’s truly cured, use the “fingernail test”—lightly press a nail into an inconspicuous area. If it leaves an indent or feels gummy, it’s not there yet. If it’s hard and smooth, you’re golden. If it stays sticky, you likely had a mixing error or the room was too cold.
