I used to think that if I didn’t own a professional laser level and a complete set of heavy-duty masonry tools, I was doomed to live in a house with crooked, lopsided frames. I spent one entire Saturday trying to get a single landscape photo centered over my sofa, only to end up with a dozen tiny holes in my drywall and a framed disaster that looked like it was sliding off the wall. But here’s the truth: you don’t need a contractor’s toolkit to master how to hang a picture perfectly. Most of the time, you just need to stop overthinking the math and start using a few simple tricks that actually work in a real home.
In this guide, I’m going to walk you through the exact, no-nonsense way I tackle every single frame that comes my way. We aren’t going to get bogged down in complicated geometry or expensive gadgets; instead, I’ll show you how to pick the right hardware, find your studs, and avoid that dreaded “one hole to the left” mistake. By the time we’re done, you’ll be able to transform those empty, boring walls into a gallery you’re actually proud of without any of the usual stress.
Table of Contents
- Step-by-Step Instructions
- A Simple Picture Hanging Hardware Guide for Every Frame
- Measuring Distance for Picture Placement Without the Guesswork
- A few pro tricks to keep your walls looking sharp
- Two cents to remember before you start
- ## A little bit of perspective
- You're All Set to Level Up Your Walls
- Frequently Asked Questions
Guide Overview
Tools & Supplies
- Hammer for driving nails or hooks
- Measuring tape for spacing and height
- Pencil for marking wall locations
- Level to ensure the picture is straight
- Picture frame or artwork (1 unit)
- Hanging hardware such as nails or picture hooks (1 pack)
- Wall anchors if hanging on drywall without studs (1 pack)
Step-by-Step Instructions
- 1. First things first, grab your gear. You don’t need a massive toolbox, but you’ll want a hammer, a level (or a leveling app on your phone if you’re feeling techy), a pencil, and some measuring tape. Most importantly, check the back of your frame to see what kind of hardware it has. Is it a wire, a sawtooth hanger, or just a single D-ring? Knowing this before you start drilling holes is going to save you a massive headache later.
- 2. Now, let’s figure out where this thing actually lives. Don’t just eyeball it and hope for the best—that’s how you end up with crooked art that haunts your dreams. Use your measuring tape to find the center point of your wall space, then measure down from the ceiling or a nearby piece of furniture to find your eye-level sweet spot. A good rule of thumb I always use is to aim for the center of the picture being about 57 to 60 inches from the floor.
- 3. Here is my favorite little trick to avoid “Swiss cheese walls.” Instead of guessing where the nail goes, take a piece of painter’s tape and stick it to the back of the frame, right over the hanging hardware. Use your pencil to mark exactly where the nail or screw needs to hit that tape. Once you peel the tape off and stick it on the wall, you’ll have perfectly placed marks without having to do any heavy math.
- 4. Time to make some marks. Take that piece of tape (or just your pencil) and mark your spot on the wall. If you’re hanging something heavy, like a big wooden mirror or a chunky framed print, don’t just use a tiny nail. This is the time to pull out a drywall anchor or find a stud. If you try to hang a heavy piece on a plain nail, you’re going to end up with a hole in your wall and a broken picture on the floor.
- 5. Go ahead and drive that nail or screw in. If you’re using an anchor, just take your time and don’t rush the process. Once the hardware is secure, hold the picture up to the wall. This is the moment of truth. Don’t pull it all the way off yet; just hold it there and check it with your level. If it’s leaning even a tiny bit to the left, adjust your hardware before you commit to the final placement.
- 6. Once it’s level and sitting pretty, give it a little nudge to make sure it’s seated firmly against the wall. If the picture feels a bit “wobbly” or keeps tilting, you might need to add a little adhesive felt bumper to the bottom corners of the frame. It keeps the art from shifting every time someone walks past and protects your paint from getting scuffed up.
- 7. Step back, take a breath, and admire the work. You didn’t have to call a handyman or spend a fortune to get it done. If it’s not 100% perfect, don’t sweat it—the goal was to get it up there, and you did it yourself. Now, go grab a coffee and enjoy your newly decorated space.
A Simple Picture Hanging Hardware Guide for Every Frame
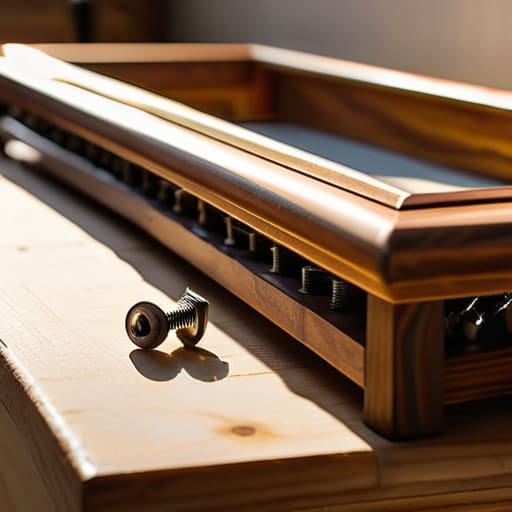
Look, I’ve spent way too many Saturday afternoons staring at a box of random screws and nails, wondering which one won’t pull a chunk of plaster right out of my wall. If you want to avoid a disaster, you need a basic picture hanging hardware guide in your back pocket. For those light, breezy frames—think a small botanical print or a polaroid—a simple finishing nail or a small command strip works wonders. But if you’re tackling the big stuff, like a heavy mirror or a thick wooden frame, don’t just wing it with a tiny nail. You’ll want to look into hanging heavy frames on drywall using something sturdier, like a toggle bolt or a specialized heavy-duty hook, to make sure it stays put.
The real secret to making your house look professional, though, isn’t just the hardware; it’s the prep. I always tell people to grab a spirit level before they start driving anything into the wall. Even if you think you’ve got a steady hand, using a level for art is the only way to ensure your favorite landscape isn’t tilting five degrees to the left. It takes an extra thirty seconds, but it saves you from that annoying feeling that something is “off” every time you walk into the room.
Measuring Distance for Picture Placement Without the Guesswork
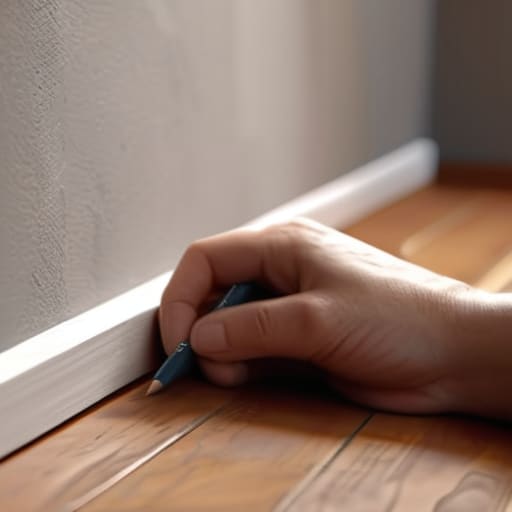
Look, we’ve all been there: you nail the first piece of art, step back, and realize it’s either way too high or looks like it’s sliding off the wall. To stop that “oops” moment before it happens, I always recommend the eye-level rule. A good baseline is to aim for the center of the frame to be about 57 to 60 inches from the floor. But if you’re working with a massive piece or a gallery wall, don’t just wing it. Grab a pencil and actually mark your spots on the wall first. It’s much easier to erase a tiny lead mark than it is to patch a hole.
When you’re measuring distance for picture placement, don’t forget to account for the wire or the bracket on the back. I like to hold the frame up against the wall, mark the top edge with a pencil, and then measure down from that mark to find exactly where the hardware sits. This little trick is a lifesaver for avoiding wall damage when hanging art because it prevents those “test holes” that end up cluttering your drywall. Just take a second to measure twice; your future self will thank you.
A few pro tricks to keep your walls looking sharp
- Eye level is your best friend. A common mistake I see is hanging art way too high. Aim for the center of the picture to be about 57 to 60 inches from the floor—that’s standard gallery height and it feels much more natural to the eye.
- Don’t forget the “weight” check. If you’re hanging a massive, heavy mirror or a chunky reclaimed wood frame, don’t trust a tiny finishing nail. Grab some heavy-duty picture hangers or even screw directly into a stud if you can find one.
- Use a little painter’s tape to plan. If you’re nervous about making holes in the wrong spot, stick a piece of blue tape on the wall where you think the corners should go. It lets you step back and see the layout without the permanent commitment.
- Level it out as you go. Even if you think your hands are steady, things tend to tilt once they’re actually on the wall. Keep a small bubble level handy—or even a leveling app on your phone—to make sure your masterpiece isn’t leaning to one side.
- Mind the glare. Before you hammer that last nail, stand back and look at how the light hits the frame. If you’ve got a window right opposite the art, you might end up with a giant reflection that hides the whole picture. Adjust the position slightly to catch the light better.
Two cents to remember before you start
Don’t overthink the hardware; just pick the right nail or screw for the weight of your frame so you aren’t staring at a hole in the wall later.
Use a pencil to mark your spots first—it’s way easier to erase a little lead than it is to patch up drywall.
Take your time with the measuring part; getting the height right the first time saves you from the “oops, it’s too low” headache.
## A little bit of perspective
“Look, you’re probably going to end up with a tiny nail hole in the wall, and that’s okay. Don’t let the fear of a little bit of drywall damage stop you from actually making your house feel like a home. Just grab the hammer, take a breath, and give it a shot.”
Nathan Cole
You're All Set to Level Up Your Walls
Look, I know it can feel like a lot when you’re standing there with a hammer in one hand and a level in the other, but you’ve actually done the hard part. We’ve covered how to pick the right hardware so your heavy mirrors don’t end up on the floor, how to measure those distances without losing your mind, and how to find that perfect eye-level sweet spot. Just remember: grab the right nail for the job, double-check your marks with a pencil, and don’t be afraid to move things around a bit if they look wonky. Once you get that first piece up, the rest of the room is going to start feeling like a home instead of just a collection of furniture.
At the end of the day, don’t let a little bit of dust or a crooked frame stop you from making your space yours. Perfection is overrated; what matters is that you took the time to do it yourself. There is a specific kind of satisfaction that comes from stepping back, looking at a wall you actually decorated, and knowing you didn’t have to call a professional to get it done. So, grab that level, trust your gut, and get those pictures up. You’ve totally got this.
Frequently Asked Questions
What do I do if I'm trying to hang something on a wall that's just plain drywall and doesn't have a stud?
Don’t sweat it—you don’t need a stud for every single thing you hang. If you’re just putting up a lightweight frame, a simple nail or a small screw will bite into the drywall just fine. But if you’re tackling something heavier, grab some drywall anchors. They’re cheap, easy to find at the hardware store, and they expand inside the wall to give you that extra grip. Just match the anchor size to your screw!
How can I make sure my picture stays level and doesn't end up crooked a week later?
There’s nothing worse than thinking you nailed it, only to see your art tilting a few degrees a week later. To stop the “slow tilt,” skip the cheap adhesive strips and go with a solid nail or screw. Once it’s up, don’t just eyeball it—grab a level. If you don’t have one, download a free leveling app on your phone. It works surprisingly well for a quick double-check before you commit.
Is there a way to hang heavy mirrors or big frames without accidentally putting a giant hole in my wall?
I hear you—there is nothing worse than seeing a huge, ugly hole in your drywall because a heavy mirror decided to give up the ghost. If you’re dealing with something beefy, skip the tiny nails and grab some heavy-duty picture hooks or, even better, wall anchors. If you’re feeling brave, a couple of sturdy screws into the studs is the gold standard. It’s all about spreading that weight out so your wall can handle it.
