Beginner guide for diy jewelry making.

Diy Jewelry Making: a Beginner’s Starter Guide

I remember sitting at my kitchen table three years ago, surrounded by a mountain of tangled wire, tiny beads that had rolled into the floor cracks, and a sense of pure frustration. I had bought a “beginner kit” online, but all I ended up with was a headache and a necklace that looked more like a bird’s nest than something I’d actually want to wear. Most people think diy jewelry making requires some sort of innate, artistic genius or a studio full of expensive, professional-grade tools, but honestly? That’s just not true. It’s not about being a master sculptor; it’s really just about learning the right mechanics and having a little bit of patience.

In this guide, I’m going to strip away all the fluff and the intimidating jargon you see on those fancy craft blogs. I’ll walk you through the basic tools you actually need—and more importantly, the ones you can skip—along with the simple techniques to get your first pieces looking clean and professional. We’re going to take it one bead at a time so you can stop feeling overwhelmed and start making things you’re actually proud to wear.

Table of Contents

Guide Overview

Total Time: 1-3 hours
Estimated Cost: $30-60
Difficulty: Beginner

Tools & Supplies

  • Needle-nose pliers for gripping and bending wire
  • Wire cutters for trimming excess material
  • Beading mat to prevent rolling
  • Assorted beads (various colors and sizes)
  • Jewelry wire or cord (1 roll)
  • Lobster clasps and jump rings (1 pack)

Step-by-Step Instructions

  • 1. First things first, you’ve got to clear off a workspace. I’m talking a flat table or even a large cutting board so your beads don’t go rolling under the fridge. Grab a small tray or even a shallow bowl to hold your components; this keeps everything organized and prevents that dreaded “lost bead” scavenger hunt halfway through the project.
  • 2. Next, let’s talk tools. You don’t need a professional workshop, but you definitely need the “big three”: needle-nose pliers, wire cutters, and a crimping tool. Think of these like your basic screwdriver and hammer set—you can’t really get the job done without them. I always suggest getting a cheap starter kit from a local craft store rather than buying everything separately; it’ll save you a headache and a few bucks.
  • 3. Now, pick your “spine.” This is the string, wire, or cord that holds your design together. If you’re making a necklace with heavier beads, go with a sturdier beading wire. If you’re just making a simple friendship bracelet, some waxed cotton cord works like a charm. Just make sure whatever you choose is strong enough to handle the weight of the beads you’ve picked out.
  • 4. Start stringing your beads, but here is my pro tip: lay it all out first. Don’t just start threading. Lay your beads out on the table in the pattern you want so you can see the finished product before you commit. It’s a lot easier to swap a blue bead for a red one now than it is after you’ve already tied a knot in it.
  • 5. Once your pattern looks killer, it’s time to secure the ends. This is where most people get nervous, but don’t sweat it. If you’re using wire, you’ll use a “crimp bead”—it’s a tiny metal tube that you squeeze shut with your pliers to lock the wire in place. It might feel a bit fiddly at first, but once you get the rhythm down, it’s as easy as tightening a screw.
  • 6. For the final touch, add your clasps or jump rings. If you’re making a bracelet, a lobster claw clasp is usually the way to go because it’s sturdy and easy to use. Just use your pliers to gently open the loop of the jump ring, slide it onto the wire, and then squeeze it shut so there are no gaps.
  • 7. Finally, give your piece a “stress test.” Grab the jewelry and give it a very gentle tug. You want to make sure those crimps are tight and nothing is loose. If it holds up, you’re officially in the jewelry-making game! If something feels wobbly, just undo that section and try it one more time—that’s how I learned, and it’s how you’ll learn too.

The Jewelry Making Kit Essentials You Actually Need
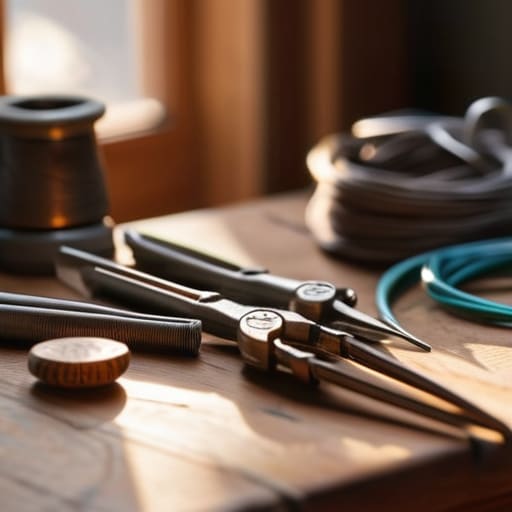
The Jewelry Making Kit Essentials You Actually Need

Look, I’ve been to plenty of craft stores where they try to sell you a massive, overpriced set that includes everything from professional-grade torches to specialized gemstone cutters. Trust me, you don’t need all that junk. When you’re starting out, the goal is to get the jewelry making tools for beginners that actually do the job without breaking the bank. Start with a decent pair of needle-nose pliers, some wire cutters, and a round-nose plier for making loops. If you have those three, you can tackle about 80% of the projects you’ll find online.

Once you’ve got your pliers, it’s time to talk about your essential bead supplies. Don’t feel like you have to buy a thousand-piece assortment of glass beads right away. I usually recommend grabbing a few decent variety packs—maybe some seed beads, some larger focal beads, and a spool of decent-quality nylon cord or jewelry wire. It’s much better to have a small stash of stuff you actually like looking at than a mountain of cheap plastic that makes your finished piece look like a middle school art project. Keep it simple, keep it quality, and you’ll be ready to go.

Simple Jewelry Design Ideas for Beginners to Try First

Simple Jewelry Design Ideas for Beginners to Try First

Look, I know it’s tempting to look at those high-end, intricate pieces in a boutique window and think, “Yeah, I’ll never do that.” But trust me, you don’t need to be a master goldsmith to make something that actually looks good. Start with something low-stakes, like a simple single-strand beaded necklace. It’s one of the best ways to practice how to make beaded necklaces without the stress of complex patterns. Just grab some high-quality cord, pick a color palette that doesn’t clash, and let the beads do the heavy lifting.

If you’re feeling a bit more adventurous, try playing around with some basic wire wrapping techniques. You don’t need a massive studio setup for this; just a few stones or even cool pebbles you found on a hike and some copper wire. It’s a bit like tinkering with a gadget—you’re just learning how the components fit together. Even if your first few attempts look a little wonky, don’t sweat it. The goal isn’t perfection; it’s just about getting your hands dirty and seeing what sticks.

Pro Tips to Keep You From Tossing Your Tools in Frustration

  • Don’t go overboard on the fancy stuff right away. I’ve seen so many people drop a hundred bucks on a professional jeweler’s bench only to realize they just needed a decent pair of pliers and a steady hand. Stick to the basics until you know what you actually enjoy making.
  • Lighting is your best friend. Seriously, don’t try to work on tiny jump rings under a dim living room lamp. You’ll end up squinting and getting a headache before you even finish your first bracelet. Grab a bright desk lamp or sit near a window so you can actually see what you’re doing.
  • Get a little tray or a heavy ceramic plate to work on. If you’re working on a hardwood table, those tiny beads and wire clippings are going to vanish into the cracks like they never existed. A tray keeps everything contained so you aren’t hunting for a lost earring back under the sofa for an hour.
  • Practice your “finishing” moves. A piece of jewelry can look amazing, but if the clasp is wonky or the wire ends are scratchy, nobody’s going to wear it. Take an extra minute to smooth out your edges and make sure everything feels solid. It’s the difference between something that looks homemade and something that looks professional.
  • Embrace the “oops” moments. You’re going to snap a wire, or you’re going to mess up a bead pattern, and that is totally fine. I treat it like any other DIY project—if a piece of wood splits, you pivot; if a necklace fails, you untangle it and try again. It’s all part of the learning curve.

Quick Wins to Keep You Moving

Start small and don’t go overboard on gear; you really only need a handful of basic tools to make something awesome.

Don’t sweat the perfection—the goal is to get your hands moving and learn how the materials actually behave.

Keep experimenting with simple designs first so you build up that confidence before tackling the really complex stuff.

## The Real Secret to Getting Started

“Look, you don’t need a professional studio or a mountain of expensive gemstones to make something cool. You just need a little patience and the willingness to mess up a few links until you get it right. That’s where the real fun starts.”

Nathan Cole

You've Got This

Jewelry making tools: You've Got This.

Look, I know it can feel a bit overwhelming when you’re staring at a pile of pliers, mismatched beads, and tangled wire, but you’ve already done the hard part by just getting started. We’ve walked through the essential gear you need to keep in your kit, tackled the basic assembly steps, and even brainstormed a few designs that won’t leave you feeling frustrated. Remember, you don’t need a professional studio or a massive budget to make something beautiful; you just need the right tools and a little bit of patience. Once you get the hang of those simple connections and patterns, you’ll realize that jewelry making isn’t about perfection—it’s about mastering the fundamentals one bead at a time.

At the end of the day, the best part of DIY isn’t just having a new necklace or a pair of earrings to wear; it’s that awesome feeling of looking at something and saying, “I actually made that myself.” Don’t get discouraged if your first few attempts look a little wonky or if the clasp gives you some grief. Even I have days where my projects don’t go quite according to plan. Just keep tinkering, keep experimenting, and don’t be afraid to mess up. Every mistake is just a lesson that makes you a better maker. Now, grab those pliers and go create something killer!

Frequently Asked Questions

How do I stop myself from getting frustrated when I can't get the tiny jump rings to close properly?

Look, I’ve been there. I once spent forty minutes wrestling with a single bracelet until I wanted to throw my pliers across the room. When those jump rings start winning, just step away. Seriously. Grab a coffee, walk around the block, and come back when your hands aren’t shaking. When you do dive back in, make sure you’re using two pairs of pliers—one to hold the ring and one to twist. It’s all about leverage, not force.

Do I really need to spend a fortune on high-quality metal, or can I start with cheaper stuff to practice?

Look, I’m going to give it to you straight: please do not drop a paycheck on precious metals right now. I’ve made that mistake before, and trust me, it’s a quick way to feel stressed about every little bend or cut. Start with some decent copper, brass, or even high-quality craft wire. It’s cheap enough that you won’t sweat a mistake, but good enough to help you learn the ropes. Get your hands dirty first!

What’s the best way to organize all these tiny beads and wires so they don't end up in a giant mess on my table?

Trust me, I’ve learned the hard way that if you don’t have a system, your workspace will turn into a bead-covered disaster zone in minutes. The best move is to grab some clear plastic organizer boxes—the kind with little dividers you see at the hardware store. They’re cheap and let you see exactly what you’ve got. For wires, use a pegboard or even just some old pill organizers to keep things from tangling.

Top best note taking apps for organization.

The Best Note-taking Apps for Staying Organized

I’ve spent half my life staring at half-finished projects, whether it’s a kitchen remodel that stalled because I lost the measurements or a coding project that died because I forgot my own logic. We’ve all been there—your brain is firing on all cylinders, but you can’t find that one brilliant idea you scribbled down on a napkin three days ago. It’s frustrating, and honestly, it’s a massive waste of mental energy. I realized a while back that finding the best note taking apps isn’t about finding the flashiest software with the most buttons; it’s about finding a digital tool that actually keeps up with the way you think so you can stop searching and start doing.

I’m not here to give you a lecture on complex database management or some high-brow tech jargon. Instead, I’ve narrowed it down to five specific options that I think are actually worth your time. I’m going to walk you through a handful of the best note taking apps based on how they actually feel to use in the real world. Whether you need something dead-simple for grocery lists or a heavy-duty system to organize your entire life, you’re going to find a winner in this list that helps you get your head straight and stay productive.

Table of Contents

The Digital Swiss Army Knife: Notion

The Digital Swiss Army Knife: Notion workspace.

If you’re the kind of person who likes having every tool in one single toolbox, Notion is going to feel like home. I used to jump between three different apps just to manage a project, but Notion lets you build your own system using blocks. You can have a grocery list, a work calendar, and a database for your book collection all sitting in the same digital space. It’s a bit of a learning curve at first, but once you get the hang of it, it’s incredibly powerful.

The Quick and Dirty Winner: Google Keep

The Quick and Dirty Winner: Google Keep

Sometimes you don’t need a massive organizational system; you just need to remember that you ran out of lightbulbs or that you need to call the plumber. That’s where Google Keep comes in. It’s basically the digital version of those neon sticky notes you see stuck to a fridge. It is lightning fast to open, type a thought, and close it again, which is exactly what you need when you’re in the middle of a project.

The Organized Thinker’s Choice: Evernote

The Organized Thinker’s Choice: Evernote digital notebook.

I remember back in the day, I used to keep stacks of paper notebooks everywhere, and half of them would get lost in a move. Evernote is like the ultimate digital filing cabinet for people who collect everything. It’s particularly great if you do a lot of “clipping” from the web. If you see a DIY guide or a recipe you want to save, you can just toss it into a notebook and find it later with ease.

The Minimalist’s Dream: Bear

There are some days when I just want to write without all the bells and whistles getting in my way. Bear is what I call a “distraction-free” zone. It uses something called Markdown, which sounds technical, but it’s really just a simple way to format your text without having to click around a bunch of tiny icons. It’s clean, it’s fast, and it feels incredibly smooth on both your phone and your computer.

The Power User’s Playground: Obsidian

Now, if you’re the type of person who loves to tinker with your tools and see how they work under the hood, you might want to look at Obsidian. It’s a bit different because it stores everything as simple text files on your own computer, rather than hiding them in a company’s cloud. This means you actually own your data, which is a huge win for long-term peace of mind.

The Bottom Line: Pick Your Tool and Start Writing

Don’t get stuck in “app paralysis”—the best note-taking app is the one you actually bother to open every single day.

Match the tool to your brain; if you’re a visual person, go for something with layouts, but if you just want to dump thoughts quickly, stick to something simple and text-based.

Start small and keep it organized from day one so you don’t end up with a digital junk drawer that’s impossible to search later.

The Real Goal of Organizing Your Thoughts

At the end of the day, a note-taking app isn’t about finding the flashiest features or the prettiest interface; it’s about building a tool that gets out of your way so you can actually get things done. If you spend more time tweaking your folders than actually writing ideas down, you’ve just built yourself a new chore instead of a solution.

Nathan Cole

Don't Get Stuck in "Setup Mode"

Look, we’ve walked through a lot of options here, from the heavy-duty powerhouses like Notion to the quick-and-dirty simplicity of Apple Notes or Google Keep. The truth is, there isn’t one “perfect” app that’s going to magically fix your life overnight. If you need a massive digital filing cabinet for big projects, go with something robust; if you just need to jot down a grocery list or a quick thought while you’re walking the dog, keep it dead simple. The goal isn’t to find the most feature-rich software on the market, but to find the one that actually gets out of your way so you can get back to real work.

My biggest piece of advice? Stop scrolling through app store reviews and just pick one. You can always migrate your notes later if it turns out to be a dud, but you’re losing more time by overthinking the tool than you would by just starting to write. Most things in life—including a messy brain—are much more figure-out-able once you start putting pen to paper, or in this case, fingers to keys. Grab an app, write down your first three tasks, and just get moving. You’ve got this.

Frequently Asked Questions

Do I really need a paid subscription, or can I get by with just the free versions?

Look, I’ve spent plenty of time trying to squeeze every cent out of a budget, so I get it. For most of us, the free versions are more than enough to get the job done. If you’re just jotting down grocery lists or meeting notes, don’t throw money at a subscription. But, if you find yourself hitting a wall because you need more storage or fancy syncing, that’s when it’s time to reconsider.

How do I make sure I don't lose all my notes if I decide to switch apps later on?

Look, I’ve been there—spending hours perfecting a digital setup only to realize the app is a total headache. Don’t get locked in. Before you commit, check if the app has a solid “Export” feature. You want to be able to dump your stuff into a simple Markdown or PDF file. I also like to do a monthly “safety dump” to a Google Doc or a local folder. It’s like keeping a backup wrench in the truck; you hope you don’t need it, but you’ll be glad it’s there.

Is it better to go with something simple like a digital notepad or a heavy-duty system with all the bells and whistles?

Look, I’ve learned from fixing old engines and messy kitchens that you shouldn’t buy a tool more complex than the job you’re actually doing. If you just need to jot down a grocery list or a quick thought, a heavy-duty system is just going to get in your way. Start simple. Get a digital notepad that feels natural, and only upgrade to the “bells and whistles” once you actually feel like you’re outgrowing it.

Tips for productivity working from home.

How to Actually Be Productive Working From Home

I remember sitting at my kitchen table last Tuesday, staring at a mountain of laundry, a half-eaten piece of toast, and a laptop screen that seemed to be mocking me. I had three different “life hack” apps open, trying to find some magic formula for productivity working from home, but all I really felt was completely overwhelmed. It’s easy to look at those polished influencers on social media and think you need a $500 ergonomic chair and a dedicated meditation room to get things done, but let’s be real: most of that is just expensive noise.

I’m not here to sell you on some complicated system that takes more time to maintain than the actual work you’re doing. Instead, I want to share the straight-talk methods I’ve actually used to stop the bleeding and get my head back in the game. We’re going to break your workday down into small, manageable chunks that actually fit into a real life—one that includes dishes, distractions, and the occasional mid-afternoon slump. No fluff, no hype, just practical steps to help you reclaim your time.

Table of Contents

Minimizing Home Distractions to Quiet the Chaos

Minimizing Home Distractions to Quiet the Chaos

Look, I get it. It’s hard to stay focused when the laundry is staring you down from the hallway or the dog decides that 10:00 AM is the perfect time for a heavy-duty chew session. When I first started working from my kitchen table, I thought I could just “power through” the noise, but I was wrong. You can’t just ignore the chaos; you have to actively work on minimizing home distractions before they derail your entire morning.

My first big lesson was realizing that my “office” needed some actual boundaries. If you’re working from the couch, your brain thinks it’s time to relax, not grind. I found that even just setting up a dedicated corner—even if it’s just a specific chair—helps signal to your mind that it’s time to focus. It’s also a huge help to use deep work techniques for WFH, like putting your phone in another room or using a noise-canceling headset. If you can block out the physical and digital clutter, you’ll find that those big, intimidating tasks suddenly feel a whole lot more figure-out-able.

Using Deep Work Techniques for Wfh Success

Using Deep Work Techniques for Wfh Success.

Now, once you’ve cleared the physical clutter off your desk, we need to talk about how you actually use your brain. I used to think being “productive” just meant sitting in my chair for eight hours straight, but I quickly learned that staring blankly at a screen while my brain wanders to what’s for dinner isn’t actually work. That’s where deep work techniques for WFH come into play. It’s all about carving out specific blocks of time where you go “dark”—no email, no phone, no quick check of the news—and just sink your teeth into one single, difficult task.

I personally swear by the Pomodoro method, but with a twist. Instead of those tiny 25-minute bursts, I try to aim for 90-minute sprints of pure focus. It takes a minute to get into the groove, but once you hit that flow state, you’ll get more done in an hour than you usually do in an entire afternoon. This is a huge part of effective remote work time management; it’s about working smarter, not just longer. If you can master these focus sessions, you’ll find you actually finish your “to-do” list much earlier in the day.

Five Simple Ways to Keep Your Momentum Rolling

  • Set a “Hard Start” and “Hard Stop” time. When you work where you live, the lines get blurry fast. I used to find myself answering emails at 9 PM just because my laptop was sitting there on the kitchen table. Pick a time to clock in and, more importantly, a time to shut it all down. Once that clock hits, the workday is dead to you.
  • Prep your “Work Station” the night before. Think of this like setting out your tools before a big project. Clear the coffee mugs off your desk, plug in your charger, and maybe even lay out your notebook. It sounds small, but it stops that morning “where is my stuff?” panic that kills your focus before you even start.
  • Use the “One Big Thing” rule. My brain used to get fried trying to tackle a massive to-do list. Now, I pick one major task that has to happen today. If I get that done, the day is a win. Everything else is just a bonus. It keeps you from feeling like you’re drowning in a sea of tiny, unimportant tasks.
  • Batch your “Life Admin.” Don’t let a sudden urge to start a load of laundry or check the mail break your flow. Group those little chores together. Tell yourself, “I’ll handle the housework during my lunch break or at 3 PM.” Keep the domestic stuff in its own lane so it doesn’t bleed into your work time.
  • Get some actual sunlight. I know, I know—it sounds like something a wellness influencer would say—but sitting in a dim room all day makes you feel like a zombie. Even if it’s just five minutes on the porch or opening the blinds wide, that hit of natural light tells your brain it’s time to be awake and alert.

The Bottom Line: Making it Work for You

Don’t try to overhaul your entire life overnight; just pick one small way to quiet the noise or focus your brain and see if it sticks.

Your environment dictates your output, so if your desk is a disaster, your head probably is too—clean the space to clear the mind.

Productivity isn’t about working more hours, it’s about making the hours you actually work count so you can clock out and actually enjoy your life.

The Real Secret to Getting Stuff Done

“Look, productivity isn’t about some fancy, high-tech app or a perfectly curated desk; it’s just about setting up your space and your schedule so you aren’t constantly fighting against your own house just to get through a single task.”

Nathan Cole

Getting Your Groove Back

Strategies for Getting Your Groove Back.

Look, I know that trying to stay productive while your laundry is staring you down or the neighbor starts mowing their lawn feels like an uphill battle. But we’ve covered a lot of ground today. We talked about how to quiet the noise by setting up a dedicated workspace and how to use those deep work blocks to actually move the needle on your big projects. It isn’t about being a perfect, unshakeable robot; it’s about building a few simple systems—like minimizing distractions and protecting your focus—so that you aren’t constantly playing catch-up. Once you get these basics down, you’ll find that the chaos starts to settle into something much more manageable.

At the end of the day, don’t beat yourself up if you have a day where nothing goes according to plan. I’ve had plenty of those, where I spend more time staring at a blank screen than actually working. The trick is to remember that productivity is a skill you can build, just like learning to rewire a socket or master a new recipe. It takes a little trial and error, and you might need to tweak your setup a few times before it sticks. Just take it one step at a time, stay consistent, and before you know it, you’ll have your schedule—and your sanity—back under control.

Frequently Asked Questions

What do I do if my family or roommates just won't respect my "do not disturb" boundaries?

Look, I’ve been there. You put the headphones on, and suddenly someone’s asking where the extra paper towels are. If the “do not disturb” sign isn’t working, you need a physical signal. I started using a specific lamp on my desk; if it’s on, I’m in the zone and can’t talk. It sounds simple, but it works better than any app. Also, sit them down for a quick, no-stress chat about your schedule.

How do I stop feeling like I'm "always on" and actually shut my brain off when the workday ends?

Building a wall between “work you” and “home you” is just like setting boundaries with a noisy neighbor—you’ve gotta be intentional. I started using a “shutdown ritual.” When the clock hits five, I physically close my laptop, clear my desk, and write down the first three things I need to do tomorrow. It tricks my brain into knowing the job is “parked” so I can actually enjoy my dinner without thinking about spreadsheets.

I've tried the fancy apps, but they just feel like more work—are there any low-tech ways to stay on track?

Look, I get it. I’ve spent way too many hours trying to “optimize” my life with apps that end up feeling like a second job. Honestly? Sometimes the best tech is no tech at all. Grab a physical notebook and a decent pen. There’s something about the tactile feel of crossing a task off a list that hits different. Try the “Rule of Three”: write down just three big wins for the day. That’s it. Keep it simple.

Steps on how to reupholster a chair.

How to Reupholster a Chair for a Fresh New Look

I was staring at this mid-century armchair in the corner of my living room last weekend, thinking there was absolutely no way I could save it. The fabric was worn thin in all the wrong places, and honestly, it looked like something you’d find in a dumpster. But here’s the thing most people won’t tell you: you don’t need a fancy upholstery studio or a degree in design to fix it. Learning how to reupholster a chair isn’t some mystical art reserved for the pros; it’s really just a series of small, manageable tasks that anyone with a staple gun and a bit of patience can tackle.

I’m not going to give you any of that high-end, “professional-grade” fluff that requires a thousand-dollar toolkit. Instead, I’m going to show you how to strip it down, prep the frame, and pull that new fabric tight enough to look factory-fresh. We’re going to walk through this step-by-step, from picking the right material to making those final, clean tucks. By the time we’re done, you’ll have a piece of furniture that looks like a million bucks without you having to break the bank.

Table of Contents

Guide Overview

Total Time: 4-6 hours
Estimated Cost: $40-120
Difficulty: Intermediate

Tools & Supplies

  • Staple gun and staples for securing fabric
  • Needle-nose pliers for pulling old staples
  • Fabric shears for precision cutting
  • Upholstery tack lifter for removing old materials
  • Measuring tape for fabric dimensions
  • Upholstery fabric (2-3 yards depending on chair size)
  • High-density foam padding (1-2 inch thickness)
  • Batting/Dacron wrap to smooth edges
  • Replacement staples or upholstery tacks

Step-by-Step Instructions

  • 1. Before you even touch a pair of scissors, you need to strip the chair down to its bare bones. Grab a staple remover or a flathead screwdriver and start pulling out all the old fabric, the foam, and those crusty old staples. Don’t worry about being delicate here; you’re basically performing surgery to see what you’re working with. Once the frame is naked, take a second to check for any loose wood or wobbly joints. If it feels a bit shaky, now is the time to hit it with some wood glue and a clamp before we move on to the pretty stuff.
  • 2. Now, let’s talk about the “pattern.” Instead of just guessing where the fabric goes, use the old fabric you just pulled off as your DIY template. Lay your old pieces out on your new fabric and trace around them with a piece of chalk or a marker. I always recommend leaving an extra inch or two of “wiggle room” around your lines. Trust me, it is much easier to trim excess fabric later than it is to realize you’re two inches short when you’re halfway through a staple.
  • 3. Get your new foam or batting ready. If the old cushion feels like a pancake, this is your chance to make it feel like a cloud again. Lay your batting down over the seat first, then place your new foam on top. You want to smooth out any lumps or air pockets before you even think about the fabric. If you skip this part, you’ll end up with weird bumps in your finished chair that’ll drive you crazy every time you sit down.
  • 4. This is where the real work happens: the stapling. Start by pulling your fabric tight over the center of the seat and placing one staple on each of the four sides. This creates your anchor points. Once those are set, work your way from the center out toward the corners, pulling the fabric taut as you go. Think of it like tightening a drum skin—you want it firm but not distorted. If you see the fabric bunching up, stop, pull it tighter, and try again.

  • 5. Tackling the corners is the part that usually makes people want to throw in the towel, but it’s actually just a bit of geometry. You’ll need to fold the fabric neatly, almost like you’re wrapping a gift, to tuck the excess into the corners. Try to keep the folds flat and crisp so they don’t create a bulky mess under the seat. Once you’ve got those corners looking tidy, go ahead and finish off the edges with a steady stream of staples.
  • 6. The final step is all about the clean-up. Take a pair of sharp fabric scissors and trim away any loose threads or jagged edges that are hanging off the bottom. If you’re using a dust cover (that thin black fabric on the bottom), staple that on last to hide all your hard work and any messy staple lines. Take a look at what you’ve done and give yourself a pat on the back—you just saved a piece of furniture from the landfill!

Gathering Your Upholstery Tools and Supplies Without Breaking the Bank

Gathering Your Upholstery Tools and Supplies Without Breaking the Bank.

Before you go running to the big-box home improvement store and dropping a paycheck on specialized equipment, let’s take a breath. You don’t need a professional workshop to get this done. For most of us, a decent manual staple gun and a sturdy pair of heavy-duty scissors will get you through 90% of the job. If you’re working on a chair that’s seen better days, you’ll also need a flat-head screwdriver or a pair of pliers for removing old chair fabric and pulling out those crusty, ancient staples. I usually scavenge through my junk drawer first to see what I can repurpose before buying anything new.

When it comes to the actual materials, this is where you can really save some cash. Instead of getting overwhelmed by choosing upholstery fabric types at a high-end boutique, check out local fabric remnants or even heavy-duty canvas from a discount bin. If the seat feels a bit flat, don’t feel like you have to buy a massive roll of expensive foam; a small piece of high-density foam from a craft store works wonders for adding foam padding to seats. Just keep it simple, buy only what you need, and keep your eyes peeled for sales.

Removing Old Chair Fabric to See What Youre Working With

Removing Old Chair Fabric to See What Youre Working With

Before you start pulling, take a breath. I know it looks like a mess of fabric and staples, but think of this stage as an autopsy—you’re looking to see how the chair was originally built. As you start removing old chair fabric, don’t just rip it off like you’re tearing a poster off a wall. Use a pair of pliers or a small flathead screwdriver to carefully pry up those old staples. I always recommend saving a small scrap of the original material if you can; it helps you understand how the tension was set and where the fabric was tucked.

While the fabric is coming off, keep a sharp eye on the skeleton of the chair. This is your chance to inspect the upholstery webbing and springs to make sure everything is still tight and functional. If the webbing is sagging or the springs feel loose, now is the time to fix them before you even think about the new look. You don’t want to go through the whole process only to realize the seat feels like a pancake once you sit down. Check the frame for any wobbles or loose screws while you’re in there; it’s much easier to reinforce the structure now than it is later.

Five Pro Tips to Keep Your Project from Turning into a Disaster

  • Save your old fabric like it’s gold. Before you rip anything off, lay the old material flat and use a marker to trace the outlines of the cushions and the frame. It’s basically a free template that’ll save you a massive headache when you’re trying to figure out where the seams go later.
  • Don’t skimp on the staples. I’ve learned the hard way that using those cheap, flimsy staples from a craft kit is a recipe for frustration. Grab a decent heavy-duty staple gun from the hardware store; your hands (and your sanity) will thank you when you aren’t fighting the trigger every five seconds.
  • Work from the center outward. When you’re pulling that new fabric tight, start by stapling the middle of each side first. Then, work your way toward the corners. If you start at the edges, you’re going to end up with a bunch of awkward wrinkles that no amount of tugging can fix.
  • Master the corner tuck. This is where most beginners get stuck, but it’s all about the fold. Think of it like wrapping a present: pull the fabric tight, fold the excess neatly into the corner, and staple it down flat. It takes a little practice, but once you nail it, your chair will look professional.
  • Always leave yourself some “wiggle room.” It’s tempting to cut your fabric close to the size of the cushion, but trust me, you want an extra couple of inches on every side. You can always trim off the excess once it’s secured, but you can’t magically add fabric back once you’ve cut it too short.

Quick Tips Before You Start Stapling

Don’t rush the prep work—taking the time to strip the chair down to the frame and save your old fabric as a template will save you a massive headache later.

You don’t need a professional workshop to get this done; a decent staple gun and some patience are way more important than expensive industrial tools.

Always remember that mistakes are just part of the process, so if a corner looks wonky, just pull it up and try again until it sits right.

## The Secret to a Good Finish

“Look, you don’t need a professional workshop to get this right; you just need a little patience and the willingness to pull that fabric tight until it feels solid. It’s not about being perfect on the first staple, it’s about seeing that old piece of furniture come back to life under your own hands.”

Nathan Cole

You Did It!

Upholstered furniture transformation: You Did It!

Once you’ve got that new fabric pulled tight and those staples driven home, take a second to step back and look at what you’ve actually accomplished. We went from a stripped-down frame and a pile of old, dusty foam to a piece of furniture that actually looks like it belongs in your living room. It wasn’t just about picking out a cool pattern or finding the right staple gun; it was about the process of stripping it down to the basics and rebuilding it with your own two hands. By taking the time to prep the padding and carefully align your seams, you’ve turned a piece of junk into a functional piece of art that’s built to last another decade.

I know there were probably a few moments where you stared at that chair and wondered if you’d just made a massive mess of things, but that’s part of the fun. Every DIY project comes with a bit of a learning curve, and honestly, the “perfect” chair is usually the one that has a little character built into it. Don’t let a crooked staple or a slightly uneven corner stop you from trying the next project. The more you do this, the more you’ll realize that nothing is truly broken beyond repair. So, grab a drink, sit in your new masterpiece, and enjoy that well-earned feeling of total DIY victory.

Frequently Asked Questions

Do I really need a professional staple gun, or can I just use the one I have in my junk drawer?

Look, I get it—we all have that one staple gun in the junk drawer that’s seen better days. If it’s a heavy-duty manual one that actually fires straight, give it a shot. But if it’s one of those tiny, flimsy ones meant for thin craft paper, save yourself the headache and skip it. For upholstery, you need something that can drive staples deep into the frame without jamming every three seconds.

What should I do if the foam underneath looks crumbly or old when I pull the fabric off?

If you pull that fabric back and the foam looks like it’s turning into orange dust, don’t panic—it happens more often than you’d think. That’s just old foam breaking down. You can’t really “fix” crumbly foam, so the best move is to replace it. Grab a sheet of high-density upholstery foam from the hardware store, trim it to fit your seat, and lay it right over the old stuff. It’ll make the chair feel brand new again.

How much extra fabric should I actually buy so I don't run out halfway through the job?

Look, I’ve definitely learned the hard way that “just enough” is a recipe for a headache. Always aim for about 20% more than you think you need. If you’re working with a pattern—especially one that has a direction or a repeat—grab an extra yard. It’s much better to have a little scrap left over for a matching throw pillow than to be staring at a half-finished chair because you ran out of fabric.

Quick and easy dessert recipes for cravings.

Easy Dessert Recipes for When a Craving Hits

Look, I get it. You’ve just finished a long day, the kitchen is a mess, and the last thing you want to do is spend three hours hovering over a stove or wrestling with a temperamental stand mixer. We’ve all been there—staring at a cookbook filled with ingredients you can’t pronounce and techniques that feel more like rocket science than cooking. Most people think that making something sweet from scratch requires a culinary degree, but honestly? That’s just not true. You don’t need a pastry chef’s toolkit to satisfy a sweet tooth; you just need a few easy dessert recipes that actually work without making your life complicated.

In this guide, I’m stripping away the fluff and giving you five of my absolute favorite go-to treats. I’ve tested these myself on lazy weeknights when I wanted something impressive but only had the energy for minimal effort. I’m going to show you exactly how to whip up delicious, crowd-pleasing desserts using basic pantry staples and simple methods. By the time we’re done, you’ll have a handful of foolproof options that will make you feel like a total pro in your own kitchen.

Table of Contents

The "No-Fail" Chocolate Mug Cake

The "No-Fail" Chocolate Mug Cake in mug.

Look, I’ve had plenty of nights where I just wanted something sweet without cleaning a dozen bowls and waiting forty minutes for the oven to preheat. That’s where the mug cake comes in. It’s basically the ultimate kitchen hack for when a sugar craving hits you hard and you don’t want to make a whole production out of it. All you need is a standard coffee mug, some flour, cocoa powder, sugar, and a splash of milk.

Five-Minute Berry Parfait

Layered Five-Minute Berry Parfait with Greek yogurt.

If you’re feeling like you need something a little lighter—or if you’re trying to keep things a bit healthier after a heavy dinner—this is my go-to. You don’t even need to turn on a stove for this one. I just grab some Greek yogurt, a handful of whatever berries are on sale, and a bit of granola. It’s all about the layering technique here to make it look like something you’d pay ten bucks for at a cafe.

Sheet Pan Cinnamon Apples

Baked Sheet Pan Cinnamon Apples.

Whenever the house is feeling a little cold or I’ve got some extra apples sitting in the crisper drawer, I throw these on a sheet pan. This is one of those recipes where the minimal effort really pays off. You just slice up your apples, toss them with a little bit of melted butter, cinnamon, and a sprinkle of sugar, and let the oven do the heavy lifting.

Classic Peanut Butter No-Bake Cookies

These are a staple in my house, especially on those days when I’m too tired to even think about an oven. They remind me of the stuff my dad used to whip up when we were kids. You basically just melt some butter, cocoa, and sugar in a saucepan, stir in your peanut butter and oats, and let it cool just enough to scoop onto wax paper. It’s a one-pot wonder that stays in my rotation because it’s so reliable.

The Lazy Person's Affogato

Sometimes, you don’t want to “cook” at all—you just want a sophisticated way to end a meal. That’s when I reach for the espresso machine (or even just some strong brewed coffee) and a pint of high-quality vanilla bean ice cream. An affogato is essentially just pouring hot coffee over cold ice cream, but it feels like a total luxury when you’re sitting on the couch at the end of a long day.

The bottom line on easy desserts

You don’t need a professional pastry kit to make something great; most of these recipes rely on stuff you probably already have in your pantry.

Don’t sweat the small stuff—if a cookie comes out a little wonky or a cake isn’t perfectly level, it’ll still taste awesome.

The best part about these simple treats is that they take the stress out of hosting, so you can actually enjoy the party instead of being stuck in the kitchen.

## My Philosophy on Sweets

“Look, you don’t need a degree in pastry arts or a kitchen full of expensive gadgets to make something that tastes amazing. Most of the time, a little bit of patience and a simple recipe are all you really need to turn a bad day around with something sweet.”

Nathan Cole

Sweet Success

Look, I know that when you see a recipe calling for a dozen different tools or a mountain of specialty ingredients, your first instinct might be to just grab a tub of store-bought ice cream and call it a day. But as we just saw, you don’t need a culinary degree to make something impressive. Whether you’re whipping up a quick fruit crumble or leaning on the simplicity of a classic chocolate mug cake, the secret is that minimal effort can still yield massive flavor. You don’t need to master French pastry techniques to satisfy a sweet tooth; you just need to follow the steps, keep your workspace clean, and not overthink the process.

At the end of the day, cooking—and especially baking—should be about enjoying the process, not stressing over perfection. If your crumble looks a little messy or your cake isn’t shaped like a professional’s, guess what? It’s still going to taste great, and more importantly, you made it yourself. That’s a win in my book. So, go ahead and grab those ingredients, get a little flour on your hands, and give it a shot. I promise that once you take that first bite of something you built from scratch, you’ll realize that most things are totally figure-out-able.

Frequently Asked Questions

Can I swap out the heavy cream for something lighter, like coconut milk, if I'm trying to keep things a bit healthier?

You absolutely can, but here’s the deal: coconut milk is a great swap, but it’s going to change the vibe of your dessert. It adds a subtle tropical flavor, so if you’re making something like chocolate mousse, it’ll taste a bit more “exotic.” For the best results, use the canned, full-fat stuff rather than the carton kind you pour over cereal. It’ll give you that creamy texture you’re after without the heavy dairy.

I'm running low on some of the specific ingredients—are there any easy substitutions I can use without ruining the whole thing?

Look, I’ve been there. I once tried to make brownies with expired cocoa and ended up using instant coffee instead—it actually worked! Generally, if you’re out of butter, softened cream cheese or even coconut oil can save the day. Running low on milk? A splash of heavy cream or even some almond milk usually does the trick. Just don’t go swapping salt for sugar unless you’re looking for a disaster. You’ve got this!

What's the best way to store these if I make them ahead of time so they don't get soggy or lose their texture?

Look, I’ve learned the hard way that a great dessert can turn into a soggy mess if you just toss it in a Tupperware and call it a day. If you’re making these ahead, my rule of thumb is to let them cool completely first—never trap steam in a container! For anything crunchy, stick to an airtight glass jar. If it’s something creamy, keep it in the fridge, but keep it tucked away from strong smells.

Tips on how to work with difficult coworkers.

How to Work With Difficult Coworkers

I remember sitting in a cramped, windowless breakroom during my first real contracting job, staring at a lukewarm cup of coffee and listening to my lead foreman tear into a guy just for asking a question. The tension in the room was so thick you could have cut it with a dull utility knife. It’s that heavy, sinking feeling in your gut—the one that tells you your workday is about to become a total grind because of someone else’s attitude. Most people try to tell you that learning how to work with difficult coworkers requires some high-level psychological degree or a deep dive into corporate HR manuals, but honestly? That’s just a load of nonsense that doesn’t work when you’re actually in the thick of it.

I’m not here to give you any of that polished, textbook fluff. Instead, I want to give you the straight-talk version of how to handle these people without losing your mind or your dignity. We’re going to break this down into a few simple, practical steps that you can actually use the moment you walk through the office doors. My goal is to help you take back control of your day so you can stop stressing about the drama and get back to the work that actually matters.

Table of Contents

Managing Difficult Personalities at Work by Breaking Down the Drama

Managing Difficult Personalities at Work by Breaking Down the Drama

Look, I’ve spent enough time on construction sites and in busy kitchens to know that you can have the best tools and the best ingredients in the world, but if one person is constantly throwing wrenches in the gears, nothing gets done. Managing difficult personalities at work isn’t about winning an argument; it’s about minimizing the friction so you can actually get your job finished. When someone starts acting out, my first move is to stop reacting emotionally and start looking at the situation like a mechanical problem. Is this person actually trying to sabotage you, or are they just stressed and bad at expressing it?

Once you figure that out, you have to start setting some firm professional boundaries in the workplace. If a colleague tries to pull you into a gossip circle or a heated debate that has nothing to do with the task at hand, I’ve learned to politely but firmly steer the conversation back to the project. It’s not about being rude; it’s about protecting your own headspace. By treating these interactions like a technical troubleshooting session rather than a personal battle, you take the heat out of the drama and keep yourself from burning out.

Improving Workplace Communication With Simple Step by Step Fixes

Improving Workplace Communication With Simple Step by Step Fixes

Once you’ve identified the personality type you’re dealing with, it’s time to grab your metaphorical toolbox and start making some repairs. I’ve found that most friction comes down to a breakdown in how we actually exchange information. Instead of letting things fester, I like to approach improving workplace communication like I would a faulty wiring job: you have to trace the source of the problem before you can fix the connection. Start by being incredibly clear and, more importantly, written down. If a conversation feels like it’s going off the rails, follow up with a quick, polite email summarizing what was discussed. It’s not about being passive-aggressive; it’s about creating a paper trail so everyone is on the same page.

Another huge part of the job is setting professional boundaries in the workplace. If a colleague constantly interrupts or vents to you about office drama, you have to draw a line in the sand. You can do this without being a jerk—just a simple, “Hey, I’ve only got five minutes before I have to dive into this report,” usually does the trick. It keeps you focused and prevents you from getting sucked into the chaos.

5 Small Fixes to Keep the Workplace Drama from Breaking You

  • 1. Don’t take the bait. When someone goes low or tries to start a fight, treat it like a faulty wire—don’t touch it while it’s live. Stay calm, stick to the facts, and refuse to get sucked into the emotional back-and-forth. It keeps you in the driver’s seat.
  • 2. Document the “glitches.” If a coworker is consistently missing deadlines or changing their story, start keeping a simple log. You don’t need a fancy spreadsheet; just a quick note in your calendar or a private doc. It’s not about being a snitch; it’s about having a blueprint of what’s actually happening if you ever need to talk to your boss.
  • 3. Set your boundaries early. If someone constantly dumps their work on your desk or interrupts your flow, you’ve got to set a fence. A simple, “I can’t jump on this right now, but I can look at it at 3:00,” works wonders. It’s about being helpful without letting them remodel your schedule.
  • 4. Look for the “why” behind the behavior. Most people aren’t actually villains; they’re usually just stressed, overwhelmed, or lacking the right tools. If you can figure out if they’re acting out because they’re under pressure or just confused about a task, you might find a way to bypass the friction entirely.
  • 5. Pick your battles. Not every annoying habit needs a confrontation. If someone has a loud laugh or a messy desk, let it slide. Save your energy for the big stuff—the things that actually stop you from getting your job done. Focus your “repairs” where they’ll actually make a difference.

The Quick Fix Checklist

Don’t let the drama rent space in your head; focus on the specific behavior that’s causing the friction rather than making it a personal battle.

Small, consistent tweaks to how you communicate—like sticking to facts and keeping things brief—can prevent most workplace blowups before they even start.

Know when to stop tinkering; if you’ve tried the simple fixes and the situation is still broken, it’s time to bring in a manager or a pro to handle the heavy lifting.

## The Bottom Line

“Think of a difficult coworker like a stubborn, rusted bolt on an old project: you don’t try to force it with raw strength and hope for the best, or you’ll just strip the threads. You grab the right tool, apply a little steady pressure, and take it one turn at a time until things finally start moving again.”

Nathan Cole

Keeping Your Cool and Moving Forward

Keeping Your Cool and Moving Forward.

Look, I know that dealing with a difficult coworker can feel like trying to fix a plumbing leak while someone is actively spraying you with a hose. It’s messy, it’s frustrating, and it’s easy to feel like you’re losing your grip. But if we look back at what we’ve covered, it really comes down to a few basic repairs: identifying the specific personality type you’re dealing with, setting some firm but fair boundaries, and tightening up your communication so nothing gets lost in translation. You don’t need to be a therapist or a corporate diplomat; you just need to apply a little bit of practical troubleshooting to the situation so it stops draining your energy.

At the end of the day, you can’t control how other people act, just like you can’t control the weather when you’re out on a job site. The only thing you actually have control over is your own reaction and the way you manage your space. Don’t let one person’s bad attitude ruin your entire career or your peace of mind at home. Take it one small step at a time, keep your head up, and remember that most things are figure-out-able if you stop looking at the big, scary problem and start focusing on the small, fixable pieces. You’ve got this.

Frequently Asked Questions

What do I do if the person I'm having trouble with is actually my boss?

When the person causing the headache is your boss, the rules change because you can’t exactly “fix” them like a leaky sink. You have to play it smarter. First, document everything—keep a private log of specific incidents. Second, try to “manage up” by clarifying expectations in writing. If it’s truly toxic, start prepping your exit strategy. It’s about protecting your peace and your paycheck while you figure out your next move.

How can I tell the difference between someone just having a bad week and someone who is actually toxic?

It’s a tough distinction to make, but think of it like a tool that’s acting up. A bad week is like a drill that’s just running hot because it’s being overworked—it’s temporary, and once the pressure eases, it goes back to normal. A toxic person is more like a stripped screw; no matter how much you try to turn it, it just keeps grinding and making the job harder. If the behavior is a pattern, not a fluke, you’re likely dealing with something deeper than just a rough patch.

At what point should I stop trying to fix the situation myself and go to HR?

Look, I’m all for the DIY approach, but even the best handyman knows when a job is beyond a quick fix. If you’ve tried the direct talks and the step-by-step adjustments, and the situation turns into harassment, bullying, or something that actually threatens your safety or legal rights, stop. That’s when you put down the tools and call in the pros. HR isn’t a failure; it’s the heavy machinery you need for the big stuff.

Tips on how to work faster.

How to Work Faster Without Cutting Corners

I used to think that if I wanted to get ahead, I needed a $500 productivity app or a complex “system” that required three different color-coded calendars just to track my morning coffee. Honestly, most of those “life hack” gurus are just selling you more noise. They make it sound like you need a PhD in time management just to get through a Tuesday, but I’ve learned that the secret to how to work faster isn’t about adding more bells and whistles—it’s about stripping away the junk that’s slowing you down.

I’m not here to give you a lecture on high-level corporate strategy or some fancy software you’ll stop using by next month. Instead, I’m going to share the straight-talk methods I’ve used to clear my own plate, whether I’m tackling a massive renovation project or just trying to crush a mountain of emails. We’re going to focus on simple, manual tweaks that actually stick. My goal is to help you stop spinning your wheels so you can get the job done and actually enjoy your downtime for once.

Table of Contents

Optimizing Daily Workflow Through Simple Doable Steps

Optimizing Daily Workflow Through Simple Doable Steps

Look, I’m not going to give you some high-level corporate seminar on efficiency. When I’m tackling a home renovation or trying to knock out a mountain of paperwork, the secret isn’t working harder—it’s about optimizing daily workflow so you aren’t constantly tripping over your own feet. I like to think of it like prepping for a big meal; if your cutting board is cluttered and your knives are dull, you’re going to spend twice as long in the kitchen. You need to clear the deck before you even start the engine.

Start by identifying your “big rocks”—those heavy-hitting tasks that actually move the needle. Instead of jumping between emails and half-finished projects, try implementing some basic deep work strategies. This means carving out a solid block of time where your phone is face down and your notifications are silenced. By minimizing workplace distractions early in the day, you stop that constant, nagging mental friction that makes a simple task feel like wading through wet cement. It’s all about building a rhythm that works for you, not against you.

Using Time Management Techniques to Unclog Your Schedule

Using Time Management Techniques to Unclog Your Schedule

Now, I know “time management” sounds like one of those corporate buzzwords that makes you want to roll your eyes, but think of it more like organizing a messy toolbox. If you’re constantly digging through piles of junk just to find a screwdriver, you’re wasting half your day. Using a few simple time management techniques is really just about clearing the clutter so you can actually get to the job at hand. I’m a big fan of the Pomodoro method—basically, you set a timer for 25 minutes of solid work, then take a five-minute breather. It keeps your brain from redlining and helps you stay steady instead of burning out by noon.

Another thing that saved my sanity was leaning into deep work strategies. I used to try and answer every single email the second it popped up, which is a recipe for disaster. Now, I carve out specific chunks of time where I go completely dark—no phone, no notifications, just me and the task. By minimizing workplace distractions like that constant pinging from Slack or your inbox, you stop leaking energy and start actually making progress. It’s not about working more hours; it’s about making the hours you do work actually count.

Five Ways to Stop Spinning Your Wheels and Actually Get Stuff Done

  • Kill the constant notifications. I used to think being “always on” meant I was working hard, but really, I was just getting interrupted every thirty seconds by a ping. Turn off those desktop pop-ups and put your phone in another room for an hour. You’ll be shocked at how much faster you move when you aren’t constantly reacting to every little buzz.
  • Tackle your “ugliest” task first. You know the one—that email you’re dreading or that spreadsheet that looks like a nightmare. If you let it sit at the bottom of your pile, it’s going to drain your energy all day. Just knock it out first thing in the morning. Once the hard part is over, everything else feels like a breeze.
  • Stop trying to multitask. It sounds efficient, but it’s actually a trap. It’s like trying to fix a sink while also trying to cook pasta; you’re just going to end up with a wet floor and burnt noodles. Pick one thing, focus on it until it’s done (or until your timer goes off), and then move to the next. It’s much cleaner that way.
  • Set up a “low-friction” workspace. If you have to spend ten minutes digging through drawers just to find a pen or a charger, you’ve already lost your momentum. Keep your most-used tools—whether they’re physical tools or digital files—right where you can grab them. A tidy, organized desk isn’t about being a neat freak; it’s about removing the little hurdles that slow you down.
  • Learn when to call it a day. This sounds counterintuitive, but if you’re staring at a screen for three hours and nothing is happening, you aren’t working—you’re just hovering. Walk away. Go for a quick stroll, grab a coffee, or just stare at a wall for five minutes. Giving your brain a breather is often the fastest way to get back into a rhythm.

The Quick Fix: What to Remember When You’re Feeling Overwhelmed

Stop trying to tackle the whole mountain at once; just pick one small, messy task and clear it out to get your momentum back.

Treat your schedule like a cluttered workbench—if you don’t clear out the junk and block off specific times for real work, you’ll never actually get anything built.

Don’t aim for perfection on your first pass, just aim for progress; you can always fine-tune the details once the heavy lifting is out of the way.

## The Secret to Speed

“Working faster isn’t about moving your hands quicker or drinking more coffee; it’s about clearing the junk off your workbench so you can actually see what you’re doing.”

Nathan Cole

Getting It Done Without the Burnout

Getting It Done Without the Burnout.

Look, we’ve covered a lot of ground here, from cleaning up your digital workspace to actually carving out chunks of time using those management tricks we talked about. At the end of the day, working faster isn’t about turning yourself into some high-speed robot or running on caffeine until your eyes twitch. It’s really just about removing the friction that slows you down. Whether you’re tackling a massive project or just trying to clear out your inbox, the goal is to stop fighting the process and start working with a system that actually supports you instead of working against you.

If you feel a little overwhelmed starting all this at once, just remember my own rule: keep it simple. You don’t have to overhaul your entire life by Monday morning. Just pick one thing—maybe it’s tidying your desktop or trying out a new timer method—and see how it feels. Most of the time, the hardest part is just getting the momentum started. Once you get those small wins under your belt, you’ll realize that you’ve totally got this. So, take a breath, pick a task, and just dive in. You’re more capable than you think.

Frequently Asked Questions

I’ve tried time-blocking before, but I always end up falling behind—how do I handle it when a task takes way longer than I planned?

Look, I’ve been there. You set aside an hour to fix a shelf, and suddenly it’s three hours later and you’re covered in sawdust. When a task runs long, don’t try to “catch up” by rushing—that’s how mistakes happen. Just pivot. Take a breath, look at your remaining blocks, and aggressively prune the low-priority stuff. It’s better to finish one thing well than to do five things halfway. Just reset and go from there.

Is there a way to work faster without feeling like I'm constantly burning myself out or rushing through my work?

Look, I get it. There’s a huge difference between working “fast” and just franticly rushing around like a headless chicken. If you’re redlining your engine all day, you’re going to blow a gasket. The secret isn’t moving your hands faster; it’s about removing the friction. Focus on doing one thing well at a time and setting up your environment so you aren’t fighting yourself. Work smarter, not harder—it’s the only way to stay sane.

What are some quick, low-effort ways to fix my workspace if I feel like my environment is actually slowing me down?

Look, if your desk is a disaster zone, your brain is going to feel like one too. You don’t need a full renovation; just do a “surface sweep.” Toss the old coffee mugs, stack your loose papers, and hide the tangled cords. If you can, move your setup closer to a window—natural light is a total game-changer for focus. Clear the clutter, grab a glass of water, and just start.

Tips on how to look better on video calls.

How to Look and Sound Better on Video Calls

I’ll be the first to tell you: you don’t need to drop three hundred bucks on a professional ring light or a high-end DSLR just to stop looking like a grainy ghost in your weekly meetings. I used to think that learning how to look better on video calls meant buying a whole new setup, but honestly, most of those “pro” gear recommendations are just expensive fluff designed to separate you from your paycheck. I’ve spent way too much time staring at my own face in a dark, blurry rectangle, feeling like I looked like a basement-dwelling gremlin, only to realize the fix wasn’t in my wallet—it was in my environment.

I’m not here to sell you on fancy gadgets or complicated studio setups that take an hour to calibrate. Instead, I’m going to show you how to use what you already have around the house—like a simple desk lamp or a well-placed window—to make a massive difference. We’re going to tackle the small, totally doable tweaks to your lighting, angle, and background that will make you look sharp and professional without the stress. Let’s get to work.

Table of Contents

Improving Webcam Video Quality With Basic Lighting

Improving Webcam Video Quality With Basic Lighting

Look, you don’t need to go out and drop a few hundred bucks on a studio ring light to get a decent image. Most of the time, the problem isn’t your expensive laptop; it’s just that you’re sitting in a dark corner. The biggest mistake I see is people having a bright window behind them, which turns them into a dark, mysterious silhouette. Instead, try to face that window. Natural light is your best friend for improving webcam video quality without spending a dime.

If it’s nighttime or you’re in a basement office, grab a desk lamp. Don’t point it directly at your face—that just makes you look like you’re being interrogated by the police. Instead, aim it at the wall behind your monitor or use a piece of white paper to soften the glow. This simple trick creates a much more even, natural look. It’s the easiest way to build a professional video call lighting setup using stuff you already have in your junk drawer.

Finding the Best Camera Angles for Remote Meetings

Finding the Best Camera Angles for Remote Meetings

Once you’ve got your lighting sorted, the next thing that usually trips people up is the “nose view.” We’ve all been there—staring down at a laptop sitting on a desk, which basically turns your webcam into a camera pointed straight up your nostrils. It’s not exactly the look we’re going for. To find the best camera angles for remote meetings, you need to get that lens closer to eye level. I usually just grab a couple of thick hardcover books or a sturdy laptop stand to prop my gear up. It might look a little silly while you’re setting it up, but it makes a massive difference in how you carry yourself.

When you’re adjusting your setup, try to aim for a slight angle rather than looking perfectly flat at the screen. You want the camera to feel like a person sitting across from you, not a security camera mounted on a wall. I also recommend checking your frame to make sure you aren’t cutting off the top of your head or leaving too much empty space above you. A little bit of trial and error goes a long way here, so take a second to peek at your preview window before the meeting actually starts.

Five Quick Fixes for a Polished Look

  • Clean your lens. I know it sounds silly, but we touch our laptops and tablets all day, leaving a thin film of finger grease on the camera. Grab a microfiber cloth—or even a clean cotton t-shirt if you’re in a pinch—and give that little glass circle a quick wipe. You’ll be surprised how much sharper you look instantly.
  • Watch your background clutter. You don’t need a fancy home office, but try to avoid having a pile of laundry or a messy bookshelf right behind your head. If your room is a disaster, don’t sweat it; just use the “blur background” setting in Zoom or Teams. It’s a lifesaver for keeping the focus on you.
  • Dress for the job, even if you’re at home. You don’t need a suit, but swapping your old college hoodie for a clean polo or a decent sweater makes a huge difference in how people perceive your professionalism. Just avoid super busy patterns or tiny stripes, as they can sometimes “vibrate” or look weird on camera.
  • Mind your eye contact. It feels unnatural at first, but try to look at the little camera hole instead of your own face on the screen. When you look at the lens, it feels like you’re actually looking the other person in the eye, which makes the whole conversation feel way more personal and engaging.
  • Check your audio levels. You can have the best lighting in the world, but if you sound like you’re underwater, nobody’s going to care how good you look. If you have a decent pair of earbuds with a mic, use them. It cuts out the room echo and makes you sound much more clear and confident.

The Quick Fix Checklist

Stop fighting your grainy webcam and start playing with your light—just move a lamp closer or face a window, and you’re halfway there.

Get that camera off the desk and up to eye level; a quick stack of books can stop you from looking like you’re staring down at your coworkers.

Don’t overthink the tech; most of these tweaks take less than five minutes and make you look way more professional without spending a dime.

## The Big Picture

“At the end of the day, you don’t need a studio-grade setup to look professional; you just need to stop fighting your environment and start working with what you’ve already got in your living room.”

Nathan Cole

You’ve Got This

Professional video call setup, You’ve Got This.

Look, we’ve covered a lot of ground here, but it really boils down to a few simple moves. You don’t need a professional studio setup or a thousand-dollar camera to stop looking like a grainy shadow in a dark room. Just remember to get some decent light on your face, tilt that laptop up so you aren’t staring down into your nostrils, and keep your background from looking like a cluttered garage sale. Once you nail those basics, you’ll notice a massive difference in how you come across to your coworkers and clients. It’s all about making those small, intentional adjustments that make the whole experience feel a lot more polished and professional.

At the end of the day, don’t let the tech stuff get in your head or make you feel self-conscious. I’ve spent plenty of time tinkering with tools and gadgets, and I promise you, the gear is the easy part—it’s the person behind the screen that actually matters. These tweaks are just there to help your personality shine through without the distraction of a bad connection or a weird angle. So, go ahead and give it a shot during your next meeting. You’ll feel more confident, you’ll look better, and you’ll realize that most things are way more figure-out-able than they first appear.

Frequently Asked Questions

I don't have a fancy ring light—can I just use a desk lamp or a window without it looking weird?

Look, you definitely don’t need a fancy ring light to look decent. I’ve used a desk lamp more times than I can count. Just aim it at the wall behind your monitor instead of directly at your face—it softens the light so you don’t look like you’re being interrogated. If you’re using a window, try to face it. Natural light is your best friend, just avoid having that bright sun right behind you.

My laptop's built-in mic sounds like I'm underwater; is there a cheap way to fix my audio without buying a pro headset?

The “underwater” sound is usually just your laptop’s mic picking up the internal fan or echoing off your desk. Before you drop cash on a headset, try this: grab your smartphone and use it as your mic. You can plug your phone into your computer via USB or use an app like WO Mic. It’s way more sensitive than a laptop mic, and since you already own it, it’s a total zero-dollar fix.

What should I do about a messy background if I don't have a dedicated home office?

The “Background Shuffle”: How to Fix a Messy Room Without a Home Office

Tips to stay productive without burnout.

How to Be Productive Without Burning Out

I remember sitting at my kitchen table last November, surrounded by three half-finished projects, a cold cup of coffee, and a laptop that felt like it was running through wet cement. I had spent the last twelve hours trying to “grind” my way through a massive to-do list, but instead of getting ahead, I just felt like a broken engine idling in a driveway. We’ve all been sold this lie that being productive without burnout means waking up at 4:00 AM and squeezing every single drop of juice out of your brain until you’re running on fumes. Honestly? That’s not a strategy; it’s a recipe for a total meltdown, and I’m completely over it.

I’m not here to sell you some fancy, expensive productivity app or a “hustle harder” seminar that leaves you feeling more exhausted than when you started. What I want to do is show you how to treat your energy like a well-maintained tool—something you use smartly so it doesn’t snap when you need it most. I’m going to break down some simple, realistic shifts you can make to your daily routine so you can actually get your work done and still have enough left in the tank to enjoy your evening.

Table of Contents

Spotting the Signs of Mental Exhaustion Before They Break You

Spotting the Signs of Mental Exhaustion Before They Break You.

Look, I’ve been there. You’re staring at a screen, you’ve had three coffees, and yet you can’t seem to type a single coherent sentence. It’s not just being “tired”—it’s that heavy, foggy feeling where even deciding what to have for dinner feels like a massive chore. One of the biggest signs of mental exhaustion is when the things you usually enjoy, like tinkering with a project or cooking a new recipe, suddenly feel like more work you just don’t have the bandwidth for.

I used to think I could just power through it, but that’s how you end up hitting a wall so hard you can’t get back up for a week. You might notice you’re getting snappy with your partner, or maybe you’re scrolling through your phone for hours because your brain is too fried to actually do anything. This is your body’s way of telling you that you’ve stopped managing your energy and started just surviving. If you start feeling like you’re constantly running on fumes, it’s time to stop and listen before you reach the point of no return.

Energy Management vs Time Management the Real Fix

Energy Management vs Time Management the Real Fix

Here’s the thing about those fancy planners and color-coded calendars: they’re great, but they’re often trying to solve the wrong problem. You can schedule every single minute of your day from 9 to 5, but if you’re running on fumes, that schedule is just a list of ways to fail. We’ve all been there—staring at a screen for an hour, moving a single icon around, while our brain feels like wet cardboard. That’s because we’re focusing on the clock instead of our actual fuel.

The real secret is shifting your focus toward energy management vs time management. Think of it like a battery; it doesn’t matter how much “time” you have scheduled for a task if your internal battery is sitting at 2%. Instead of just trying to squeeze more hours out of the day, we need to start looking at when we have the mental juice to actually do the heavy lifting. By matching your toughest tasks to your peak energy windows and using smaller gaps for low-effort chores, you’re not just managing a clock—you’re actually preventing occupational burnout before it even starts.

5 Simple Ways to Reclaim Your Day (Without Losing Your Mind)

  • 1. Stop treating your to-do list like a grocery list that never ends. Pick your “Big Three”—the three things that actually matter today—and ignore the rest until those are done. It’s way better to finish three important tasks than to half-ass ten.
  • 2. Use the “Pomodoro” trick, but make it your own. Set a timer for 25 minutes of focused work, then actually get up and walk away for five. Don’t just switch from your laptop to your phone; go grab a glass of water or stare out the window. Your brain needs the reset.
  • 3. Build in “buffer zones.” I used to schedule meetings back-to-back like I was trying to win a race, and I ended up frazzled by noon. Leave fifteen minutes of dead air between tasks. It gives you a chance to breathe, grab a snack, or just decompress so the stress doesn’t pile up.
  • 4. Learn the art of the “Hard No.” You don’t have to say yes to every extra project or social invite that comes your way. If your plate is already full, just say, “I’d love to help, but I don’t have the bandwidth right now.” It feels awkward at first, but your sanity is worth the slight discomfort.
  • 5. Create a “Shutdown Ritual.” When you’re done for the day, actually be done. Close the laptop, tidy your desk, and maybe write down what you need to tackle tomorrow so it’s not looping in your head all night. Once that ritual is done, the workday is officially dead to you.

The Quick Fix Checklist

Stop obsessing over the clock and start watching your battery; if you’re running on empty, no amount of “time blocking” is going to save your productivity.

Learn to catch the small red flags—like losing your patience or staring blankly at a screen—before they turn into a full-blown burnout crash.

Treat your energy like a finite resource, just like wood or budget groceries; spend it on the big, important stuff and don’t waste it on things that don’t actually move the needle.

## The Real Secret to Staying Productive

“Productivity isn’t about squeezing every last drop of juice out of yourself until you’re dry; it’s about managing your battery so you’ve actually got enough charge left to enjoy the life you’re working so hard to build.”

Nathan Cole

Getting Back in the Driver's Seat

Getting Back in the Driver's Seat.

Look, we’ve covered a lot of ground here. We talked about how to spot those early warning signs of burnout before they turn into a full-blown breakdown, and we tackled the big shift from just managing your clock to actually managing your energy. It’s easy to get caught up in the “hustle” mindset, thinking that if you aren’t grinding 24/7, you’re failing. But just like I learned when I was fixing up old engines, you can’t run a machine at redline forever without blowing the gasket. The goal isn’t to do more work; it’s to work smarter by respecting your own limits.

At the end of the day, I want you to remember that productivity isn’t a race to see who can crash first. It’s about building a system that actually works for you, not one that leaves you feeling like a shell of yourself by Friday afternoon. You don’t have to overhaul your entire life by tomorrow morning. Just pick one small thing—maybe it’s a better sleep routine or a stricter “no-email” rule after dinner—and start there. I promise you, once you start treating your energy like a valuable resource instead of an infinite well, everything else starts to fall into place. You’ve got this.

Frequently Asked Questions

How do I tell the difference between just being a little tired from a long day and actually being on the verge of burnout?

Look, there’s a big difference between “I need a nap” and “I can’t do this anymore.” If you’re just tired from a long day, a good night’s sleep or a solid meal usually resets the clock. But burnout? That’s different. That’s when you wake up feeling heavy, even after sleeping, or when things you usually enjoy start feeling like chores. If a weekend off doesn’t fix the dread in your gut, you’re likely hitting burnout territory.

I know I need to manage my energy, but what do I do when my job or my family life makes it feel impossible to take even a small break?

Look, I get it. Sometimes life feels like a relentless conveyor belt and “taking a break” feels like a luxury you can’t afford. When you can’t step away for an hour, look for the “micro-reset.” It’s the sixty seconds you spend breathing deeply while the coffee brews, or the three minutes you spend stretching before jumping back into the chaos. It’s not a vacation, but it’s a way to keep your engine from overheating.

Is it actually possible to stay productive and hit my goals if I start saying "no" to more things?

Look, I’ll give it to you straight: saying “no” isn’t just possible—it’s actually the secret sauce. Think of it like organizing a messy toolbox. If you keep cramming every random gadget in there, you’ll never find the wrench you actually need when a job gets tough. By clearing out the junk, you make room for the tools that actually matter. Saying “no” to the fluff is how you finally say “yes” to your real goals.

Guide on how to update software safely.

How to Update Your Software Without Breaking Anything

I still remember the time I sat staring at my old laptop, heart racing, as a progress bar crawled at a snail’s pace. I was terrified that one wrong click would turn my expensive machine into a very heavy, very useless paperweight. Most tech gurus will try to make you feel like you need a computer science degree just to stay current, but honestly, that’s just noise. Learning how to update software safely shouldn’t feel like defusing a bomb in a dark room. It’s a lot like changing the oil in your truck; if you have the right tools and a bit of patience, it’s actually pretty straightforward.

I’m not here to bore you with technical jargon or sell you some overpriced “security suite” you don’t actually need. My goal is to give you the straight talk on how to handle these updates without the stress. I’ll walk you through my own personal checklist—the same one I use to keep my own gear running smooth—so you can click “install” with total confidence. We’re going to break this down into simple, manageable steps so you can get back to your life without worrying about your digital life falling apart.

Table of Contents

Backing Up Data Before Updating to Keep Your Files Safe

Backing Up Data Before Updating to Keep Your Files Safe

Look, I’ve been there. You click “update,” walk away to grab a coffee, and come back to a screen that looks like a digital crime scene. While it’s rare, things can go sideways during an installation, which is why backing up data before updating is the single most important thing you can do. Think of it like wearing safety goggles when you’re using a circular saw; you hope you don’t need them, but you’ll be glad they’re there if something flies off.

I always suggest a two-pronged approach. First, grab an external hard drive and drag your most important folders—photos, tax docs, that half-finished project—onto it. If you’re more of a “set it and forget it” person, make sure your cloud service (like Google Drive or iCloud) has finished its most recent sync. This simple step is one of those essential cybersecurity best practices for updates that separates the pros from the panicked. If the update hits a snag and your computer decides to take a nap, you won’t be losing your life’s work; you’ll just be restarting with a little bit of patience.

Verifying Software Authenticity So You Avoid Malicious Software Updates

Verifying Software Authenticity So You Avoid Malicious Software Updates

Now, here’s where things can get a little dicey if you aren’t paying attention. We’ve all seen those sketchy pop-ups that scream, “Your system is out of date! Click here to fix it immediately!” Most of the time, those are just digital traps designed to trick you into downloading something nasty. One of the most important parts of verifying software authenticity is making sure you’re actually getting the update from the source that made the program, not some random middleman. If you’re updating a big-name app or your operating system, always go through the official settings menu or the developer’s actual website.

I always tell my friends that if an update prompt looks off—maybe the spelling is weird or the website URL looks like a jumble of random letters—just close the tab and walk away. It’s much better to be a little cautious than to accidentally invite a virus into your home. When it comes to avoiding malicious software updates, sticking to the official channels is your best line of defense. If you’re ever in doubt, do what I do: go straight to the source and hunt down the update yourself.

Five Pro Tips to Keep Your Tech Running Smoothly (Without the Headache)

  • 1. Read the patch notes first. I know, I know—nobody actually wants to read a wall of text, but taking thirty seconds to see what’s actually changing can save you a ton of frustration if a specific feature you rely on gets moved or tweaked.
  • 2. Don’t update on a deadline. If you’ve got a massive presentation due in an hour or a deadline looming, stay away from that “Update Now” button. Wait until you have a bit of breathing room in case something needs a quick reboot or a settings tweak.
  • 3. Keep a steady power source handy. There is nothing worse than a laptop dying halfway through an installation; it’s a recipe for a bricked device. Plug it into the wall and let it do its thing without worrying about the battery hitting zero.
  • 4. Check your internet connection. A flaky Wi-Fi signal can corrupt a download, which is just a headache you don’t need. If you can, try to update while you’re in a spot with a strong, stable connection to make sure everything downloads clean.
  • 5. Give it a little “cooldown” period. Once the update is done, don’t immediately jump into your heaviest tasks. Give the system five or ten minutes to settle in, finish its background processes, and make sure everything feels stable before you go full throttle.

The Quick Cheat Sheet for a Smooth Update

Treat your data like your favorite tool—don’t start any major work without making sure you’ve got a backup copy tucked away somewhere safe.

Always stick to the official source; if an update pops up from a random link or a shady-looking email, just ignore it and go straight to the official app or website.

Take it slow and steady. You don’t need to rush through the process, so just follow the prompts one by one and make sure you’ve got a little extra time set aside so you aren’t racing against a deadline.

## My Golden Rule for Tech

“Think of a software update like working on an old truck engine: you wouldn’t just dive in headfirst without making sure you’ve got your tools laid out and your important parts tucked away safely first. A little bit of prep work goes a long way in making sure a simple upgrade doesn’t turn into a weekend-long headache.”

Nathan Cole

You've Got This

Secure software updates: You've Got This.

At the end of the day, staying on top of your software updates doesn’t have to be a high-stakes gamble. We’ve covered the big stuff: making sure your precious photos and documents are tucked away safely in a backup, and double-checking that those update prompts are actually coming from the real deal and not some sneaky piece of malware. It’s really just about building a little bit of a safety net before you hit that install button. If you take these few extra minutes to verify your sources and secure your data, you’re already ahead of 90% of the people out there. It’s all about being smart and intentional rather than just clicking “OK” because a little box popped up on your screen.

I know that staring at a progress bar while you wonder if your computer is about to turn into a brick can feel a bit nerve-wracking. Trust me, I’ve been there more times than I’d like to admit. But honestly? Once you get into the habit of these simple checks, it becomes second nature—just like checking your oil before a long road trip. Don’t let the tech intimidate you. You have the tools and the knowledge now to take control of your digital life. So, go ahead and run that update with confidence. You’ve done the prep work, and you’ve totally got this!

Frequently Asked Questions

What should I do if my computer freezes or starts acting weird right after an update finishes?

If your computer starts acting glitchy or just freezes up right after an update, take a deep breath—you haven’t broken it. Usually, it’s just a “hiccup” where the system is still settling in. First, give it ten minutes to finish its background tasks. If that doesn’t work, try a hard restart. If things stay weird, we might need to look into “rolling back” the update, but let’s try the easy stuff first.

Do I really need to update everything immediately, or is it okay to wait a few days to see if there are any bugs?

That’s a great question, and honestly, it’s one I ask myself all the time. Here’s my rule of thumb: if it’s a critical security patch, don’t wait—get it done. But if it’s just a fancy new feature update? You can totally afford to hang tight for a few days. I usually let the “early adopters” deal with the initial bugs. If I don’t hear any horror stories on the forums by Thursday, I’ll hit update.

How can I tell if an update notification is actually from my computer or if it's just a sketchy pop-up trying to trick me?

This is a great question, and honestly, it’s one of the smartest things you can ask. Those sketchy pop-ups are getting way too good at looking official. My golden rule? Never click a link inside a random browser window. Real updates usually come through your system settings or a dedicated app—like the App Store or Windows Update. If a website tells you your “drivers are out of date” while you’re just browsing, it’s a trap. Close the tab and go check your settings manually instead.