I was standing in the middle of my first apartment last year, staring at a wall the color of old oatmeal, holding a cheap roller and feeling completely defeated. I had watched a dozen professional tutorials, but nothing prepared me for the sheer mess of tape that wouldn’t stick or the streaks that made my “new” wall look like a badly applied sunburn. Most people think you need a professional crew and a massive budget to get a smooth finish, but that’s just not true. Learning how to paint a room isn’t about having expensive equipment; it’s about mastering a few basic techniques and knowing when to slow down.
I’m not here to sell you on some fancy, high-end designer lifestyle. I just want to help you get the job done right without losing your mind or your security deposit. In this guide, I’m breaking down the process into manageable chunks—from prepping your surfaces so the paint actually sticks, to choosing the right finish that won’t show every single bump. We’re going to tackle this step-by-step so you can walk away from that project feeling like a total pro.
Table of Contents
- Step-by-Step Instructions
- Checking Your Toolkit an Essential Painting Supplies List
- The Secret to Success How to Prep Walls for Painting
- Pro Tips to Save You from a Paint-Induced Headache
- Three Things to Keep in Mind Before You Start
- The Golden Rule of DIY
- You’ve Got This: The Finish Line
- Frequently Asked Questions
Guide Overview
Tools & Supplies
- Paint roller and tray for large surfaces
- Angled brush for edges and corners
- Painter's tape for clean lines
- Drop cloths to protect floors
- Interior paint (1-2 gallons)
- Painter's tape (1-2 rolls)
- Sandpaper (medium grit)
- Spackle (small container for holes)
Step-by-Step Instructions
- 1. First things first, we’ve got to clear the deck. You don’t need to move every single piece of furniture out of the room, but you definitely need to get the big stuff toward the center and cover it up with some old sheets or plastic drop cloths. I always grab a roll of painter’s tape too; you’ll want to run that along the baseboards and around the edges of the window frames. It might feel tedious, but trust me, skipping the prep is the fastest way to end up with a messy room that looks like a toddler did it.
- 2. Next, let’s talk about the walls themselves. You can’t just slap paint over dust and cobwebs and expect it to stick. Grab a damp sponge and give the walls a quick wipe-down to get rid of any grit or oils. If you’ve got any small holes from old picture nails, grab a little tub of spackle and a putty knife to fill them in. Once that’s dry, give those spots a light sand with some fine-grit sandpaper until they’re smooth to the touch.
- 3. Now, it’s time to get the paint ready. Before you even open the can, give it a good stir with a wooden stick. I know it sounds simple, but the pigments tend to settle at the bottom, and you want a consistent color from the first stroke to the last. If you’re using a primer—and if your walls are going from a dark color to a light one, you definitely should—apply that now and let it dry completely.
- 4. We’re going to start with what I call “cutting in.” This is just a fancy way of saying you’re going to paint the edges where a big roller can’t reach. Grab a 2-inch angled brush and carefully paint a border around the ceiling, the baseboards, and in the corners. Don’t try to do the whole room at once; just work in small sections so the paint stays wet enough to blend seamlessly when you bring the roller in.
- 5. Once your edges are looking good, it’s time to bring out the heavy hitter: the roller. Don’t drown the roller in paint; you want it saturated but not dripping. Start in one corner and work in a “W” or “M” pattern on the wall. This helps distribute the paint evenly across the surface instead of leaving thick clumps in one spot. Keep overlapping your strokes so you don’t leave any missed patches behind.
- 6. For the best results, you’re almost certainly going to need a second coat. I know, I know—it’s tempting to just call it a day after the first pass, but that’s how you end up with streaks. Wait for the first coat to be completely dry to the touch before you go back in. The second coat is what really gives the color that deep, professional look that makes you feel like you actually know what you’re doing.
- 7. Finally, once the paint is dry (but maybe not fully cured), peel off that painter’s tape. If the paint feels a little tacky, grab a utility knife and score the edge of the tape very lightly before pulling it. This prevents the tape from ripping the fresh paint right off the wall. Clean up your brushes, toss your trash, and take a second to admire your work—you earned it!
Checking Your Toolkit an Essential Painting Supplies List
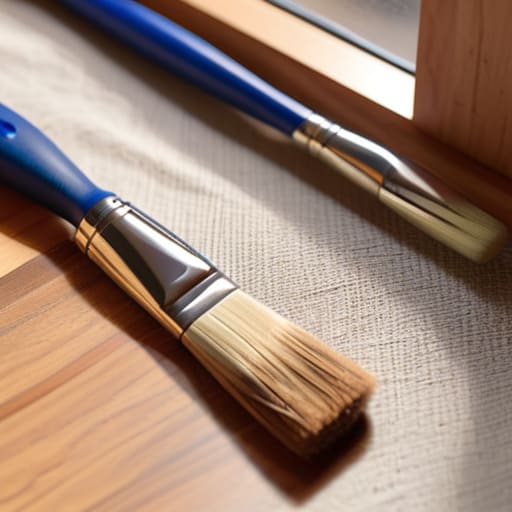
Before you even crack open a can of color, you’ve got to make sure you aren’t going to be halfway through a wall and realize you’re missing a crucial tool. There is nothing more frustrating than having wet paint dripping off a roller because you forgot a tray. My personal essential painting supplies list always starts with the basics: a good quality angled brush, a sturdy roller frame, and some high-quality painter’s tape. I’ve learned the hard way that cheap brushes tend to shed bristles right into your fresh coat, which is a total headache to fix. If you want smooth results, invest a little extra in the best paint brushes for walls you can find; they’ll save you way more time in the long run.
You also can’t overlook the “mess prevention” side of things. I always tell people that protecting furniture while painting is just as important as the painting itself. Grab some heavy-duty drop cloths—the canvas ones are great because they don’t slide around like the thin plastic ones—and clear a path so you aren’t tripping over clutter. Once your workspace is set, you’re actually ready to get to work.
The Secret to Success How to Prep Walls for Painting
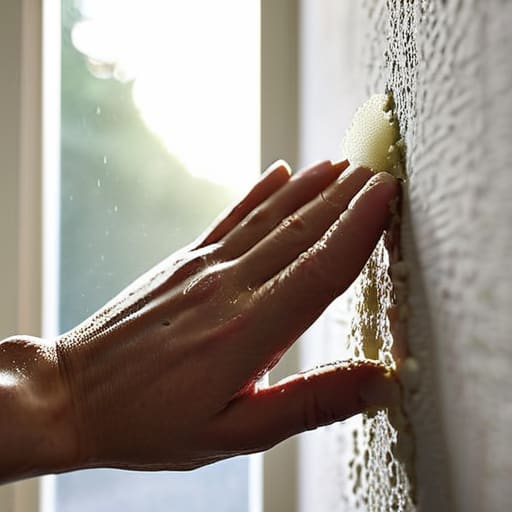
Look, I’ll be the first to admit it: I used to rush straight to the fun part—the actual painting—only to realize halfway through that my new color looked patchy and terrible. The truth is, most of the heavy lifting happens before you even crack open a can. If you want a professional finish, you have to master how to prep walls for painting by treating the surface like a canvas. Start by cleaning those walls down with a damp sponge and a little mild soap. If there’s dust, grease, or cobwebs hiding in the corners, your new coat of paint is basically just going to stick to the dirt instead of the drywall.
Once the walls are clean, it’s time to handle the small stuff that makes a big difference. Grab some painter’s tape to define your lines, and don’t skip the step of protecting furniture while painting with some old drop cloths or plastic sheeting. I always tell people that a little extra time spent patching small nail holes with spackle and sanding them smooth will save you hours of frustration later. If the surface isn’t smooth, your paint will just highlight every single imperfection.
Pro Tips to Save You from a Paint-Induced Headache
- Don’t skimp on the tape. I know those cheap, papery rolls look fine on the shelf, but they’ll tear your wall paper right off when you try to peel them. Grab the blue or green painter’s tape—it’s worth the extra couple of bucks to avoid a massive headache later.
- Test your colors on a real piece of the wall, not just a tiny swatch in the store. Lighting changes everything. What looks like a soft beige under the fluorescent lights at Home Depot might look like a bright, sickly yellow once it’s sitting in your living room under your evening lamps.
- Work in small sections to keep your edges sharp. Instead of trying to rush through a whole wall, work in about three-foot chunks. This keeps the “wet edge” intact, which is the secret to preventing those annoying lines where one section dried before you could overlap it with the next.
- Keep a damp rag in your back pocket at all times. You will drip, and you will splatter. If you catch a drip while the paint is still tacky, you can wipe it away in seconds. If you wait until it dries, you’re looking at a full-blown sanding job.
- Always stir your paint—a lot. I’ve seen so many people skip this, only to end up with weird streaks or clumps halfway through the job. Give that can a good, thorough stir every time you dip your roller to make sure the pigment is evenly distributed.
Three Things to Keep in Mind Before You Start
Don’t skimp on the prep work; I know it’s the part nobody wants to do, but a clean, smooth wall is the difference between a pro finish and a mess you’ll regret later.
Invest in decent tools rather than the cheapest ones you can find—a good brush and a solid roller won’t just make the job faster, they’ll make it look a whole lot better.
Take your time and don’t rush the drying stages; it’s tempting to slap on a second coat immediately, but patience is what keeps those finish lines looking sharp.
The Golden Rule of DIY
“Look, the paint itself is the easy part. If you spend the time doing the boring stuff—the taping, the cleaning, the patching—the actual painting will feel like a victory lap instead of a chore.”
Nathan Cole
You’ve Got This: The Finish Line
Now that you’ve tackled the heavy lifting, take a second to look back at what you’ve actually accomplished. You didn’t just slap some color on a wall; you cleared the clutter, prepped the surfaces until they were smooth, and carefully applied those coats to get a professional finish. It’s easy to get overwhelmed by the sheer amount of gear and the messy reality of paint trays, but by breaking it down into those smaller, manageable chunks, you managed to master the process. Remember, the difference between a DIY job that looks “okay” and one that looks amazing is almost always found in that prep work and patience we talked about earlier.
I know there might be a few stray drips on the floor or a bit of paint under your fingernails, but honestly? That’s just the mark of a job well done. There is a specific kind of satisfaction that comes from sitting in a room that you transformed with your own two hands. It changes how you feel about your space and, more importantly, how you feel about your ability to tackle the next project on your list. So, step back, grab a cold drink, and really soak in that feeling of accomplishment. You didn’t just paint a room; you proved to yourself that you can handle whatever home project comes your way next.
Frequently Asked Questions
How many coats of paint do I actually need before it looks finished?
The short answer? Most of the time, you’re looking at two coats. I’ve learned the hard way that trying to squeeze it all into one thick layer usually leads to streaks and an uneven finish. If you’re going from a super dark color to something light, or if you’re painting over a patch job, you might even need a third. Just take your time, let the first coat dry completely, and you’ll be golden.
Is it better to buy cheap paint and do more coats, or splurge on the expensive stuff?
Look, I get the temptation to save a few bucks at the big-box store, but trust me on this one: splurge on the good stuff. I’ve spent way too many Saturday afternoons trying to patch up thin, cheap paint with a third or fourth coat, and it’s a total headache. High-quality paint has better coverage and lasts longer. You’ll actually spend less time working and more time enjoying the finished product. Buy once, cry once!
How do I get rid of those annoying paint drips on the floor or trim after I'm done?
Don’t sweat the small stuff—we’ve all been there. If the paint is still wet, grab a damp rag and wipe it away immediately. But if it’s already dried, don’t panic. For trim, a plastic putty knife or even an old credit card works wonders for gently scraping it off. If it’s on a hard floor, try a little bit of rubbing alcohol on a cotton ball. Just take it slow so you don’t scuff the finish!
