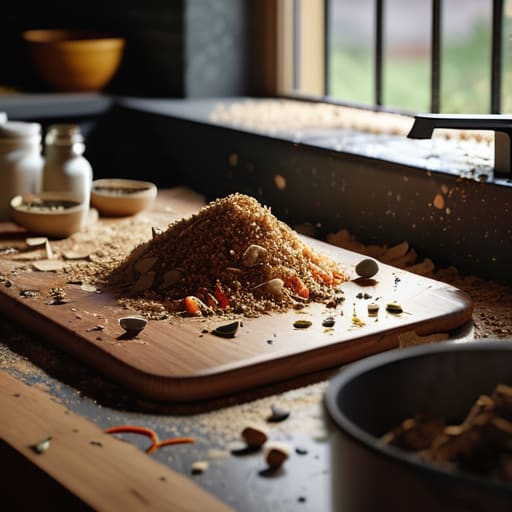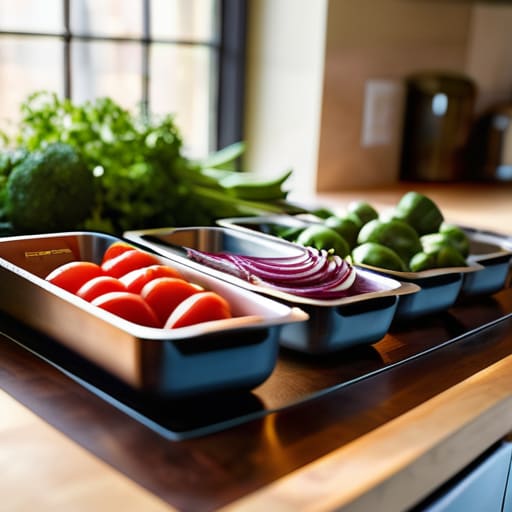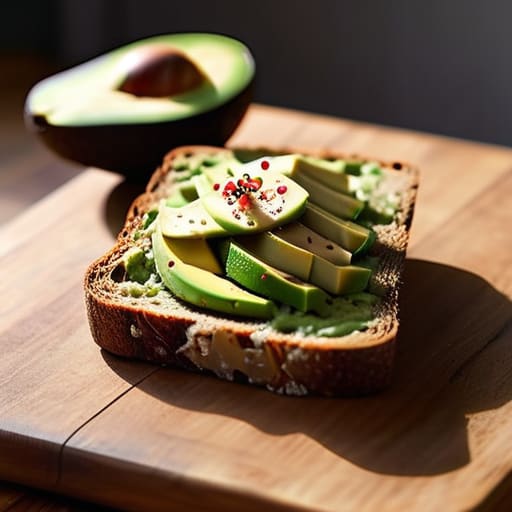
Easy meals for beginners to cook.

Easy Meals Anyone Can Cook (even Beginners)

I remember my first apartment back in my early twenties—I was living on lukewarm takeout and questionable frozen pizzas because the thought of standing over a stove felt like a massive, intimidating chore. I used to think you needed a culinary degree or a kitchen full of fancy gadgets just to make something edible, but let me tell you, that’s a total myth. Most of the time, we overcomplicate things when we really just need a few easy meals for beginners to get our feet under us. Learning to cook isn’t about being a chef; it’s about taking control of your budget and your health without losing your mind in the process.

In this guide, I’ve pulled together five of my absolute favorite go-to recipes that are practically foolproof. I’m talking about real, hearty food that requires minimal cleanup and even less stress. I’ll walk you through exactly how to tackle these dishes so you can stop staring blankly at your pantry and start feeling confident in the kitchen. By the time we’re done, you’ll have a solid rotation of meals that prove cooking can actually be the best part of your day.

Table of Contents

The One-Pan Sheet Pan Roast

The One-Pan Sheet Pan Roast meal.

If you’re like me and hate spending your entire evening scrubbing pots and pans, this is your new best friend. I love a good sheet pan meal because it’s basically set it and forget it in the best way possible. You just grab some chicken thighs or sausages, chop up whatever veggies are looking sad in your fridge—broccoli, bell peppers, or sweet potatoes work great—toss them in some olive oil and salt, and spread them out on a baking sheet.

The "Everything" Quesadilla

The "Everything" Quesadilla with leftover ingredients.

I remember when I was first starting out, I thought “cooking” meant following a strict recipe with twenty different spices. Then I realized that a quesadilla is basically just a safety net for leftovers. It is the ultimate low-effort, high-reward meal. All you need is a tortilla, some cheese that actually melts, and whatever protein or veg you have lying around from yesterday’s dinner.

Classic Pesto Pasta with a Twist

Classic Pesto Pasta with a Twist.

Pasta is the old reliable of the culinary world, but if you just boil noodles and eat them plain, you’re missing out. My go-to move when I’m tired but want something that feels actually fancy is using a high-quality store-bought pesto. It saves me a ton of time and effort, and honestly, most of the good stuff in the jar tastes better than what I can whip up on a Tuesday night anyway.

Hearty Breakfast-for-Dinner Scramble

There is no rule that says eggs are only for the morning. In fact, I think breakfast-for-dinner is one of the smartest hacks in the book. It’s incredibly inexpensive, takes less than ten minutes to cook, and you almost certainly have the ingredients in your kitchen right now. Whether it’s a simple scramble or a quick omelet, it hits the spot every single time.

Loaded Baked Potatoes

Don’t overlook the humble potato; it is arguably the most versatile tool in your kitchen arsenal. A baked potato is basically a blank canvas waiting for your creativity. You can scrub them off, prick them with a fork, and toss them in the oven (or even the microwave if you’re in a serious rush) to create a filling base that can handle just about anything.

The Bottom Line: Keeping It Simple

Don’t sweat the small stuff; if you burn a piece of toast or overcook the pasta, just keep moving. The goal is to get fed, not to win a Michelin star on your first try.

Focus on the “assembly” rather than the “art.” Most great beginner meals are just about combining a few good ingredients in the right order, so don’t feel like you need a culinary degree to make something delicious.

Build your confidence through repetition. Once you master these five basics, you’ll realize you already have the foundation to start tweaking recipes and making them your own.

My Philosophy on the Kitchen

“Look, you don’t need a culinary degree or a kitchen full of fancy gadgets to eat well. Cooking is just another skill, like fixing a leaky sink or wiring a lamp—once you stop overthinking the ‘rules’ and just focus on the steps, you’ll realize you’ve been able to do this all along.”

Nathan Cole

You've Got This

Look, I know that staring at a pile of raw ingredients can feel a lot like looking at a stripped screw—it’s frustrating and you just want to walk away. But if you take what we talked about today and apply it, you’ll see it’s much simpler than it looks. Whether you’re sticking to a single-pan pasta, mastering a basic sheet-pan chicken, or just learning how to not burn the garlic, you’re building a skill set that lasts. The goal isn’t to become a Michelin-star chef by Tuesday; it’s about using simple, repeatable wins to get decent food on the table without draining your bank account or your sanity.

At the end of the day, cooking is just another DIY project, and just like fixing a leaky faucet, the more you do it, the less intimidating it becomes. Don’t sweat the small stuff—if you overcook the noodles or the seasoning is a little off, just tweak it next time and keep moving. I promise you, there is a massive sense of pride that comes from sitting down to a meal you built with your own two hands. So, grab a pan, turn on some music, and just start cooking. You’re more capable than you think.

Frequently Asked Questions

I don't have a ton of fancy kitchen gear; can I still make these recipes with just a basic pan and a spatula?

Absolutely. Honestly, if you’ve got one decent pan and a spatula, you’re already halfway there. I’ve cooked most of my favorite meals over the years with nothing more than a basic skillet and a dream. You don’t need a kitchen full of gadgets to make something that tastes great. Just focus on getting the heat right and don’t be afraid to get a little messy. You’ve got this!

What’s the best way to prep these meals ahead of time so I'm not stuck in the kitchen every single night?

Look, I get it. The whole point of these recipes is to save you time, not turn your kitchen into a second job. My secret? Don’t cook everything at once—that’s how you end up with soggy leftovers. Instead, focus on “component prepping.” Chop all your veggies on Sunday, brown your meat in one big batch, and portion out your grains. When Tuesday rolls around, you’re just assembling, not starting from scratch.

If I'm on a tight budget, are there specific cheap ingredients I should keep on hand to make these even easier?

Look, I’ve spent plenty of weeks staring at a near-empty fridge, so I get it. To keep things cheap and fast, keep a “survival kit” of pantry staples: dried lentils or beans, a bag of rice, canned tomatoes, and some eggs. I also swear by frozen veggies—they’re cheaper than fresh, won’t rot in your crisper drawer, and you can toss them into almost anything. Having these on hand makes those easy meals feel even more effortless.

Guide on how to paint a room.

How to Paint a Room Like a Professional

I was standing in the middle of my first apartment last year, staring at a wall the color of old oatmeal, holding a cheap roller and feeling completely defeated. I had watched a dozen professional tutorials, but nothing prepared me for the sheer mess of tape that wouldn’t stick or the streaks that made my “new” wall look like a badly applied sunburn. Most people think you need a professional crew and a massive budget to get a smooth finish, but that’s just not true. Learning how to paint a room isn’t about having expensive equipment; it’s about mastering a few basic techniques and knowing when to slow down.

I’m not here to sell you on some fancy, high-end designer lifestyle. I just want to help you get the job done right without losing your mind or your security deposit. In this guide, I’m breaking down the process into manageable chunks—from prepping your surfaces so the paint actually sticks, to choosing the right finish that won’t show every single bump. We’re going to tackle this step-by-step so you can walk away from that project feeling like a total pro.

Table of Contents

Guide Overview

Total Time: 1-2 days
Estimated Cost: $75-150
Difficulty: Beginner

Tools & Supplies

  • Paint roller and tray for large surfaces
  • Angled brush for edges and corners
  • Painter's tape for clean lines
  • Drop cloths to protect floors
  • Interior paint (1-2 gallons)
  • Painter's tape (1-2 rolls)
  • Sandpaper (medium grit)
  • Spackle (small container for holes)

Step-by-Step Instructions

  • 1. First things first, we’ve got to clear the deck. You don’t need to move every single piece of furniture out of the room, but you definitely need to get the big stuff toward the center and cover it up with some old sheets or plastic drop cloths. I always grab a roll of painter’s tape too; you’ll want to run that along the baseboards and around the edges of the window frames. It might feel tedious, but trust me, skipping the prep is the fastest way to end up with a messy room that looks like a toddler did it.
  • 2. Next, let’s talk about the walls themselves. You can’t just slap paint over dust and cobwebs and expect it to stick. Grab a damp sponge and give the walls a quick wipe-down to get rid of any grit or oils. If you’ve got any small holes from old picture nails, grab a little tub of spackle and a putty knife to fill them in. Once that’s dry, give those spots a light sand with some fine-grit sandpaper until they’re smooth to the touch.
  • 3. Now, it’s time to get the paint ready. Before you even open the can, give it a good stir with a wooden stick. I know it sounds simple, but the pigments tend to settle at the bottom, and you want a consistent color from the first stroke to the last. If you’re using a primer—and if your walls are going from a dark color to a light one, you definitely should—apply that now and let it dry completely.
  • 4. We’re going to start with what I call “cutting in.” This is just a fancy way of saying you’re going to paint the edges where a big roller can’t reach. Grab a 2-inch angled brush and carefully paint a border around the ceiling, the baseboards, and in the corners. Don’t try to do the whole room at once; just work in small sections so the paint stays wet enough to blend seamlessly when you bring the roller in.
  • 5. Once your edges are looking good, it’s time to bring out the heavy hitter: the roller. Don’t drown the roller in paint; you want it saturated but not dripping. Start in one corner and work in a “W” or “M” pattern on the wall. This helps distribute the paint evenly across the surface instead of leaving thick clumps in one spot. Keep overlapping your strokes so you don’t leave any missed patches behind.
  • 6. For the best results, you’re almost certainly going to need a second coat. I know, I know—it’s tempting to just call it a day after the first pass, but that’s how you end up with streaks. Wait for the first coat to be completely dry to the touch before you go back in. The second coat is what really gives the color that deep, professional look that makes you feel like you actually know what you’re doing.
  • 7. Finally, once the paint is dry (but maybe not fully cured), peel off that painter’s tape. If the paint feels a little tacky, grab a utility knife and score the edge of the tape very lightly before pulling it. This prevents the tape from ripping the fresh paint right off the wall. Clean up your brushes, toss your trash, and take a second to admire your work—you earned it!

Checking Your Toolkit an Essential Painting Supplies List

Checking Your Toolkit an Essential Painting Supplies List

Before you even crack open a can of color, you’ve got to make sure you aren’t going to be halfway through a wall and realize you’re missing a crucial tool. There is nothing more frustrating than having wet paint dripping off a roller because you forgot a tray. My personal essential painting supplies list always starts with the basics: a good quality angled brush, a sturdy roller frame, and some high-quality painter’s tape. I’ve learned the hard way that cheap brushes tend to shed bristles right into your fresh coat, which is a total headache to fix. If you want smooth results, invest a little extra in the best paint brushes for walls you can find; they’ll save you way more time in the long run.

You also can’t overlook the “mess prevention” side of things. I always tell people that protecting furniture while painting is just as important as the painting itself. Grab some heavy-duty drop cloths—the canvas ones are great because they don’t slide around like the thin plastic ones—and clear a path so you aren’t tripping over clutter. Once your workspace is set, you’re actually ready to get to work.

The Secret to Success How to Prep Walls for Painting

The Secret to Success How to Prep Walls for Painting

Look, I’ll be the first to admit it: I used to rush straight to the fun part—the actual painting—only to realize halfway through that my new color looked patchy and terrible. The truth is, most of the heavy lifting happens before you even crack open a can. If you want a professional finish, you have to master how to prep walls for painting by treating the surface like a canvas. Start by cleaning those walls down with a damp sponge and a little mild soap. If there’s dust, grease, or cobwebs hiding in the corners, your new coat of paint is basically just going to stick to the dirt instead of the drywall.

Once the walls are clean, it’s time to handle the small stuff that makes a big difference. Grab some painter’s tape to define your lines, and don’t skip the step of protecting furniture while painting with some old drop cloths or plastic sheeting. I always tell people that a little extra time spent patching small nail holes with spackle and sanding them smooth will save you hours of frustration later. If the surface isn’t smooth, your paint will just highlight every single imperfection.

Pro Tips to Save You from a Paint-Induced Headache

  • Don’t skimp on the tape. I know those cheap, papery rolls look fine on the shelf, but they’ll tear your wall paper right off when you try to peel them. Grab the blue or green painter’s tape—it’s worth the extra couple of bucks to avoid a massive headache later.
  • Test your colors on a real piece of the wall, not just a tiny swatch in the store. Lighting changes everything. What looks like a soft beige under the fluorescent lights at Home Depot might look like a bright, sickly yellow once it’s sitting in your living room under your evening lamps.
  • Work in small sections to keep your edges sharp. Instead of trying to rush through a whole wall, work in about three-foot chunks. This keeps the “wet edge” intact, which is the secret to preventing those annoying lines where one section dried before you could overlap it with the next.
  • Keep a damp rag in your back pocket at all times. You will drip, and you will splatter. If you catch a drip while the paint is still tacky, you can wipe it away in seconds. If you wait until it dries, you’re looking at a full-blown sanding job.
  • Always stir your paint—a lot. I’ve seen so many people skip this, only to end up with weird streaks or clumps halfway through the job. Give that can a good, thorough stir every time you dip your roller to make sure the pigment is evenly distributed.

Three Things to Keep in Mind Before You Start

Don’t skimp on the prep work; I know it’s the part nobody wants to do, but a clean, smooth wall is the difference between a pro finish and a mess you’ll regret later.

Invest in decent tools rather than the cheapest ones you can find—a good brush and a solid roller won’t just make the job faster, they’ll make it look a whole lot better.

Take your time and don’t rush the drying stages; it’s tempting to slap on a second coat immediately, but patience is what keeps those finish lines looking sharp.

The Golden Rule of DIY

“Look, the paint itself is the easy part. If you spend the time doing the boring stuff—the taping, the cleaning, the patching—the actual painting will feel like a victory lap instead of a chore.”

Nathan Cole

You’ve Got This: The Finish Line

You’ve Got This: The Finish Line.

Now that you’ve tackled the heavy lifting, take a second to look back at what you’ve actually accomplished. You didn’t just slap some color on a wall; you cleared the clutter, prepped the surfaces until they were smooth, and carefully applied those coats to get a professional finish. It’s easy to get overwhelmed by the sheer amount of gear and the messy reality of paint trays, but by breaking it down into those smaller, manageable chunks, you managed to master the process. Remember, the difference between a DIY job that looks “okay” and one that looks amazing is almost always found in that prep work and patience we talked about earlier.

I know there might be a few stray drips on the floor or a bit of paint under your fingernails, but honestly? That’s just the mark of a job well done. There is a specific kind of satisfaction that comes from sitting in a room that you transformed with your own two hands. It changes how you feel about your space and, more importantly, how you feel about your ability to tackle the next project on your list. So, step back, grab a cold drink, and really soak in that feeling of accomplishment. You didn’t just paint a room; you proved to yourself that you can handle whatever home project comes your way next.

Frequently Asked Questions

How many coats of paint do I actually need before it looks finished?

The short answer? Most of the time, you’re looking at two coats. I’ve learned the hard way that trying to squeeze it all into one thick layer usually leads to streaks and an uneven finish. If you’re going from a super dark color to something light, or if you’re painting over a patch job, you might even need a third. Just take your time, let the first coat dry completely, and you’ll be golden.

Is it better to buy cheap paint and do more coats, or splurge on the expensive stuff?

Look, I get the temptation to save a few bucks at the big-box store, but trust me on this one: splurge on the good stuff. I’ve spent way too many Saturday afternoons trying to patch up thin, cheap paint with a third or fourth coat, and it’s a total headache. High-quality paint has better coverage and lasts longer. You’ll actually spend less time working and more time enjoying the finished product. Buy once, cry once!

How do I get rid of those annoying paint drips on the floor or trim after I'm done?

Don’t sweat the small stuff—we’ve all been there. If the paint is still wet, grab a damp rag and wipe it away immediately. But if it’s already dried, don’t panic. For trim, a plastic putty knife or even an old credit card works wonders for gently scraping it off. If it’s on a hard floor, try a little bit of rubbing alcohol on a cotton ball. Just take it slow so you don’t scuff the finish!

Tips on how to speed up your phone.

How to Speed Up a Slow Phone

I was elbow-deep in a greasy engine repair last Tuesday when my phone decided to take a nap right in the middle of a quick search for a torque spec. It wasn’t just a little lag; it was that soul-crushing freeze where you stare at a spinning loading icon and wonder if you should just throw the whole thing in the scrap bin. Most people will tell you that the only real way to fix a sluggish device is to drop a thousand bucks on the latest model, but honestly? That’s a total racket. I’ve learned through plenty of trial and error that figuring out how to speed up your phone usually doesn’t require a new bank loan—it just takes a little bit of digital housekeeping.

I’m not going to bore you with technical jargon or suggest expensive “cleaning” apps that are basically just digital junk mail. Instead, I’m going to walk you through the exact, no-nonsense steps I use to get my own devices running smooth again. We’re going to tackle the settings, the storage, and the background clutter that’s actually dragging you down. By the time we’re done, you’ll have a device that feels snappy and reliable again, without spending a dime.

Table of Contents

Clear Phone Cache to Declutter Your Digital Life

Clear Phone Cache to Declutter Your Digital Life

Think of your phone’s cache like the junk drawer in your kitchen. You know the one—it’s filled with old receipts, loose batteries, and random twist ties that you think you might need someday, but really, it’s just taking up space. Over time, your apps collect these little bits of temporary data to help them load faster, but eventually, that “drawer” gets so stuffed that it actually starts slowing everything down. When you clear phone cache files, you aren’t deleting your precious photos or texts; you’re just sweeping out the digital dust that’s clogging up the works.

To get started, head into your settings and look for the “Apps” or “Applications” section. From there, you can pick your most-used culprits—like Chrome, Instagram, or TikTok—and hit that “Clear Cache” button. It’s one of the easiest ways to free up storage space and give your device some much-needed breathing room. I usually do this once a month, and it’s amazing how much snappier my phone feels afterward. It’s a quick win that makes a massive difference in your daily grind.

Free Up Storage Space With a Few Simple Steps

Free Up Storage Space With a Few Simple Steps

If your phone is acting more like a brick than a smartphone, the culprit is often just a lack of breathing room. Think of it like a workbench covered in old scraps and half-finished projects; if you don’t have space to move, you can’t get anything done. When your internal memory is maxed out, your device struggles to juggle even the simplest tasks. To fix this, you need to free up storage space by going on a digital scavenger hunt.

Start by diving into your photo gallery and deleting those blurry screenshots or accidental videos of your pocket. I also recommend checking your downloads folder—we all have those massive PDF manuals or random files we downloaded once and never touched again. If you’re really tight on space, look at your heavy-hitting apps like social media or games. Sometimes, offloading an app you haven’t used in months is the quickest way to give your device some much-needed relief. Once you clear out that digital clutter, you’ll notice things just feel a little snappier.

Five more ways to kick that lag to the curb

  • 1. Hunt down those background apps. I know it feels good to have everything open, but those apps running in the background are like leaving every light in your house on when you aren’t even in the room—they’re just draining your battery and processing power. Swipe them away and only keep what you actually need running.
  • 2. Trim the fat on your home screen. If you’ve got a dozen live widgets constantly updating the weather, your stocks, and your news feed, your phone is working overtime just to look pretty. Stick to static icons for the essentials and save the heavy lifting for when you actually need the info.
  • 3. Give your software a quick tune-up. It sounds technical, but it’s basically just housekeeping. Check your settings for any pending system updates. Manufacturers release these not just for new features, but to patch up bugs that might be making your hardware struggle.
  • 4. Tone down the animations. This is a little “pro tip” I learned from tinkering with my own gear: go into your developer options and scale down the animation speeds. It won’t actually make the processor faster, but it makes the phone feel snappy and instant because the screen isn’t wasting time on fancy transitions.
  • 5. The classic “off and on again.” I can’t stress this enough. A simple restart clears out the temporary digital cobwebs and resets your RAM. It’s the oldest trick in the book for a reason—it actually works.

Quick wins to keep your phone running smooth

Keep your storage from hitting the red zone by regularly clearing out old cache files and deleting apps you haven’t touched in months.

A little digital housekeeping goes a long way; don’t let junk files and unused data slow down your hardware.

Most speed issues aren’t permanent—they’re just signs that your phone needs a quick tune-up to get back in top shape.

## A quick mindset shift

“Think of your phone like an old workbench; if you let sawdust, scrap wood, and junk pile up in the corners, you’re never going to get any real work done. Cleaning it out isn’t just about tidying up—it’s about making room to actually move again.”

Nathan Cole

Wrapping It All Up

Wrapping It All Up: Digital decluttering tips.

We’ve covered a lot of ground here, from clearing out that pesky cache that’s hogging your processing power to digging through your storage to toss out those old videos and apps you haven’t touched in months. It might feel a little overwhelming to look at a cluttered device, but as we’ve seen, it really just comes down to tackling one small task at a time. Once you’ve decluttered the digital junk and given your hardware some breathing room, you’ll likely notice that your phone starts feeling much more responsive. It’s all about removing the digital friction that slows you down during your day.

At the end of the day, I want you to remember that you don’t need to be a tech genius or drop a thousand bucks on a new model just to get things running smoothly again. Most of the time, a little bit of maintenance and some elbow grease are all it takes to get the job done. I’ve learned through plenty of my own DIY projects that things are almost always fixable if you just have the patience to try. So, grab a coffee, go through these steps, and enjoy that feeling of accomplishment when your phone finally starts acting right. You’ve got this!

Frequently Asked Questions

Will clearing my cache or deleting old files actually make a noticeable difference if my phone is several years old?

Honestly, it makes a massive difference. Think of it like an old workbench that’s buried under scrap wood and empty toolboxes—you can’t actually get any work done until you clear the surface. On an older phone, the processor is already working harder just to keep up. By clearing that digital clutter, you’re taking the weight off its shoulders, letting it breathe so it can focus on the apps you actually use.

Is it safe to delete everything in my cache, or am I going to lose important photos and messages?

I totally get the hesitation—the last thing you want to do is accidentally wipe out your precious photos or that text from your mom. The good news is that clearing your cache is safe. Think of it like sweeping the sawdust off a workbench; you’re just cleaning up the temporary mess apps leave behind. It won’t touch your photos, messages, or personal files. You might just have to wait a second longer for an app to reload next time you open it.

If I've tried all these software fixes and it's still crawling, is it time to just bite the bullet and buy a new phone?

Look, I get it. It’s frustrating when you feel like you’ve done everything right and that little device still feels like it’s running through molasses. Before you drop a few hundred bucks on a new model, check your battery health in settings. If it’s tanking, a cheap battery replacement might actually breathe new life into it. But, if the hardware is just ancient and can’t keep up with modern apps? Yeah, it might be time to upgrade.

Tips to overcome decision fatigue.

How to Beat Decision Fatigue and Think Clearer

I was standing in the middle of the grocery aisle last Tuesday, staring at twenty different brands of pasta sauce like my life depended on it. My brain felt like a laptop with too many tabs open, spinning that little loading icon while I couldn’t even decide between marinara or pesto. That’s the real, messy reality of decision fatigue—it isn’t some high-level psychological concept discussed in a boardroom; it’s that exhausting mental fog that hits you when you’ve spent all day solving problems and suddenly can’t even pick a pair of socks.

I’m not here to sell you on some expensive productivity app or a complex “optimization ritual” that takes more work than it saves. I’ve spent enough years tinkering with everything from old engines to messy schedules to know that when your brain hits a wall, you don’t need more theory; you need a practical way out. I’m going to show you a few straightforward, low-effort ways to automate your daily choices and protect your mental energy, so you can stop wasting your best brainpower on the small stuff and actually get things done.

Table of Contents

Spotting the Mental Exhaustion Symptoms Before You Crash

Spotting the Mental Exhaustion Symptoms Before You Crash.

You know that feeling when you’ve been staring at a spreadsheet or a grocery list for twenty minutes and suddenly realize you’ve forgotten how to read? That’s a huge red flag. I usually catch it when I find myself standing in the middle of the hardware store aisle, holding a box of screws, and completely forgetting why I even walked into that section. These mental exhaustion symptoms aren’t just “being tired”; they’re a sign that your brain’s battery is hitting zero.

If you start feeling unusually irritable over small things—like a loud neighbor or a slow webpage—or if you find yourself scrolling mindlessly through your phone because you can’t even pick a movie, pay attention. That’s often a sign of executive function depletion. Your brain is essentially throwing up a “low power mode” warning because it can’t handle one more tiny choice. Instead of pushing through and hoping for the best, I’ve learned it’s better to recognize that haze early. Once you notice that foggy, “I just can’t” feeling creeping in, it’s time to step away before you make a choice you’ll regret later.

Understanding the Psychology of Choice Overload

Understanding the Psychology of Choice Overload concept.

Think of your brain like a smartphone battery. Every single choice you make—from picking a toothpaste brand to deciding which email to answer first—is like running a heavy app in the background. It’s constantly draining your power. When we talk about the psychology of choice overload, we’re really talking about what happens when you have too many “apps” running at once. Instead of feeling empowered by having options, your brain starts to glitch because it simply wasn’t built to weigh fifty different variables every single morning.

As those tiny choices pile up, you start experiencing a real sense of executive function depletion. It’s that heavy, foggy feeling where even a simple question like “what’s for dinner?” feels like a mountain you aren’t prepared to climb. This isn’t because you’re lazy or incapable; it’s a biological limit. Your brain has a finite amount of energy for high-level processing, and when you overspend that energy on trivial stuff, you’re left with nothing for the big, important projects that actually move the needle.

5 Ways to Stop Draining Your Brain Before Lunch

  • Automate your morning routine. I started picking out my clothes and prepping my coffee the night before, and it’s a game changer. If you don’t have to think about what to wear or eat the second you wake up, you’re saving that precious mental energy for the stuff that actually matters.
  • Use the “Rule of Three.” When you’re staring at a massive to-do list and feeling paralyzed, just pick three things. That’s it. Forget the other twenty items for a bit. Once you knock those three out, you’ll feel the momentum, and the rest won’t feel like such a mountain.
  • Shrink your grocery list. Decision fatigue loves a supermarket aisle with fifty types of mustard. Try meal prepping or sticking to a core list of staples. The fewer “what should I have for dinner?” moments you have, the more focus you’ll have left for your actual work.
  • Make the big calls early. If you’ve got a tough project or a hard conversation hanging over your head, tackle it first thing. Don’t let it sit there eating away at your willpower all day. Your brain is freshest in the morning; use that fuel wisely.
  • Build in “no-decision” zones. I try to set aside time where I don’t have to choose anything—no scrolling through Netflix for an hour, no browsing Amazon. Just grab a book or go for a walk. Giving your brain a break from making choices is like letting a tool cool down after a long day of use.

The Quick Fix: 3 Ways to Reclaim Your Brainpower

Automate the small stuff so you don’t have to think about it. Whether it’s picking out your clothes the night before or eating the same breakfast every weekday, saving those tiny decisions keeps your mental battery full for the stuff that actually matters.

Stop treating every choice like a life-or-death situation. Most decisions—like which brand of dish soap to buy or which email to answer first—don’t need a deep dive; learn to embrace “good enough” to keep your momentum going.

Set hard boundaries for your biggest tasks. If you know your brain starts to fizzle out by 3:00 PM, schedule your heavy lifting for the morning and save the mindless admin work for when you’re running on fumes.

The Cost of Constant Choosing

“Think of your brain like a smartphone battery; every tiny choice you make—from what to wear to which email to answer first—is just another app running in the background, draining your power until you’re stuck on 1% right when you actually need to get things done.”

Nathan Cole

Bringing It All Home

Protecting mental bandwidth, Bringing It All Home.

Look, I know it feels like you’re constantly running on empty, but remember that decision fatigue isn’t a permanent character flaw; it’s just a sign that your mental battery is low. We’ve talked about how to spot those early warning signs—like that sudden urge to just order takeout because picking a recipe feels impossible—and why our brains start to glitch when we’re hit with too many options. By setting up some simple guardrails, like automating your morning routine or tackling your hardest tasks before lunch, you aren’t being “lazy.” You’re actually protecting your mental bandwidth so you can save your best energy for the stuff that actually matters.

At the end of the day, my goal isn’t to turn you into a productivity robot, but to help you realize that you have more control over your day than you think. You don’t have to fix everything at once. Start small: pick one tiny habit, like laying out your clothes the night before, and see how much lighter your morning feels. Most of the time, the “big, scary problems” are just a bunch of small, manageable decisions waiting to be organized. You’ve got this, and I promise, once you start simplifying, everything else starts to click.

Frequently Asked Questions

Can I actually train my brain to handle more choices without getting wiped out?

Look, I’ll be straight with you: you can’t exactly “lift weights” for your brain to make it immune to choice overload, but you can definitely build better systems to protect it. Think of it like prepping ingredients before you start cooking—it makes the actual work way smoother. By automating the small stuff, like what you wear or eat, you save your mental energy for the big, important decisions that actually matter.

Is there a way to automate my daily routine so I'm not wasting energy on small stuff like what to wear or eat?

Look, I get it. I used to spend way too much time staring at my closet or the fridge, feeling totally drained before my day even started. The trick is “decision minimalism.” Start small: pick out your clothes the night before, or better yet, create a “uniform” of a few reliable outfits. For food, try meal prepping just one thing—like a big batch of grains or protein—so you aren’t debating lunch every single day.

How do I tell the difference between just being tired and actual decision fatigue?

Here’s the easiest way I’ve found to tell them apart: regular tiredness usually goes away with a good night’s sleep or a nap. But decision fatigue? You can sleep for ten hours and still wake up feeling paralyzed by the thought of choosing what to wear or what to eat for breakfast. If your body feels heavy, you’re tired. If your brain feels like it’s stuck in a loop of “I don’t know, what do you want to do?”, that’s decision fatigue.

Tips on how to handle a performance review.

How to Ace Your Next Performance Review

I remember sitting in a cramped, windowless office five years ago, my palms sweating against my knees while my boss droned on about “synergistic alignment” and “key performance indicators.” It felt less like a conversation about my hard work and more like being interrogated by someone reading a manual they didn’t even understand. Most corporate gurus will tell you that you need a complex, multi-page strategic manifesto to succeed, but honestly? That’s just expensive noise. If you’re trying to figure out how to handle a performance review without losing your mind, you don’t need a fancy consultant; you just need a solid game plan and a little bit of grit.

I’m not here to give you a bunch of HR-approved buzzwords that sound good in a boardroom but mean nothing in the real world. Instead, I’m going to show you how to treat these meetings like a simple DIY project: you assess what’s working, fix what’s broken, and prep your tools before you even walk through the door. I’ll break this down into a few manageable steps so you can stop dreading that calendar invite and start using the meeting to actually get what you deserve.

Table of Contents

Managing Performance Review Anxiety Through Simple Preparation

Managing Performance Review Anxiety Through Simple Preparation

Look, I get it. That pit in your stomach before a big meeting? I’ve been there. Whether it’s a plumbing job gone sideways or a high-stakes meeting at work, that nervous energy usually comes from a feeling of being unprepared. When it comes to managing performance review anxiety, the best cure is a solid game plan. I like to treat it like any other DIY project: you don’t just start swinging a hammer; you gather your tools first.

Start by putting together some simple self-assessment strategies to ground yourself. Instead of walking in hoping for the best, sit down with a notebook and jot down your wins from the last year. When you have your facts straight, you aren’t just guessing—you’re presenting a case. This also makes responding to constructive criticism a lot less personal. If your boss points out a spot where you tripped up, you won’t feel like you’re failing; you’ll just see it as a specific part of the job that needs a little extra grease and attention to get running smooth again.

Winning Self Assessment Strategies to Show Your Real Value

Winning Self Assessment Strategies to Show Your Real Value

Once you’ve managed the nerves, it’s time to get down to the actual work: the self-assessment. I like to think of this like making a punch list for a renovation project. You wouldn’t just walk into a job site and say, “I did some stuff this year,” right? You need specifics. Instead of being vague, grab a notebook and list your wins from the last twelve months. I’m talking about the times you stayed late to fix a glitch, the projects you finished ahead of schedule, or even those small processes you streamlined. Using these self-assessment strategies helps you move away from “I think I did okay” and toward “Here is exactly how I contributed to the team.”

Don’t just focus on the victories, though. A huge part of a solid review is setting professional development goals for the future. This shows your boss that you aren’t just coasting; you’re looking at the long game. If there’s a skill you want to master or a certification you’ve been eyeing, write it down. It turns the conversation from a look backward into a roadmap for where you’re going next.

5 Pro Moves to Keep the Conversation Productive

  • Bring your own “toolbox” of notes. Don’t just show up and hope they remember your big win from six months ago. I always keep a running list of my accomplishments throughout the year so I can pull out specific examples when the conversation gets real.
  • Listen more than you talk. It’s tempting to get defensive if you hear something you didn’t expect, but try to treat feedback like a diagnostic check on a broken engine. You aren’t being attacked; you’re just finding out what needs a little grease or a part replacement to run smoother.
  • Ask for the “how,” not just the “what.” If your boss says you need to improve your communication, don’t just nod and walk away. Ask them, “What would a ‘win’ look like in that area for you?” Getting clear instructions makes the actual work way easier to tackle.
  • Keep your eyes on the future. While it’s important to look back at what happened, the real value is in the roadmap ahead. Use the meeting to talk about where you want to be in six months or a year, and ask what skills you need to pick up to get there.
  • Write down your action items before you leave. There’s nothing worse than walking out of a meeting feeling motivated, only to forget exactly what you were supposed to change by next Tuesday. Jot down three clear goals so you can hit the ground running.

The Bottom Line: How to Walk Out of Your Review Feeling Like a Pro

Don’t wing it—use your notes and a solid self-assessment to turn a nervous conversation into a chance to show off everything you’ve actually accomplished.

Treat feedback like a tool upgrade; even if it’s a bit rough around the edges, it’s just the info you need to sharpen your skills for the next project.

Keep the momentum going by walking away with a clear, simple plan of action so you aren’t just wondering what’s next, but actually building toward it.

## A Shift in Perspective

“Look, a performance review isn’t a deposition or a trap; it’s just a tool check. Think of it like inspecting your gear before a big project—you’re just figuring out what’s working, what’s a little rusty, and what you need to sharpen so you can keep moving forward without any hiccups.”

Nathan Cole

You’ve Got This

Confident professional preparing for reviews: You’ve Got This.

Look, I know a performance review can feel a lot like staring at a complicated plumbing leak or a confusing piece of IKEA furniture—it looks intimidating at first, but once you break it down, it’s totally manageable. We’ve covered how to settle those pre-meeting jitters by doing your homework, and we talked about how to write a self-assessment that actually highlights your wins instead of just listing your chores. By prepping your evidence and walking in with a clear head, you’re shifting the conversation from a scary interrogation to a productive roadmap for your career. You aren’t just sitting there waiting to be judged; you’re actively participating in your own growth.

At the end of the day, remember that these meetings aren’t about perfection—they’re about progress. Even if you get some tough feedback, try to look at it like a tool that needs a little sharpening; it’s just information you can use to get better for next time. Don’t let the corporate jargon get in your head or make you feel like you aren’t capable. You’ve been doing the work all year, so now it’s just time to own your value and show them what you’re made of. Go in there, stay practical, and remember that you are more than capable of handling whatever comes your way.

Frequently Asked Questions

What should I do if my boss gives me feedback that I totally disagree with?

Look, I get it. It feels like someone just told you your perfectly tuned engine is actually a lawnmower. It’s frustrating and, honestly, a little gut-wrenching. But don’t react right away. Take a breath. Instead of getting defensive, try asking for specifics: “Can you help me understand where I missed the mark?” Treat it like a troubleshooting session. Once you have the facts, you can calmly present your side with data, not just feelings.

How do I bring up a raise or a promotion without making things awkward?

Look, I get it—bringing up money feels as awkward as trying to fix a plumbing leak in a house full of guests. But here’s the trick: don’t make it a confrontation, make it a conversation about value. Instead of “I want more money,” try something like, “I’ve been loving the extra responsibility I’ve taken on lately, and I’d love to discuss how my role and compensation can evolve with that impact.” Keep it professional, keep it data-backed, and you’ll be fine.

What if I actually messed up big time this year—how do I handle that conversation?

Look, I’ve been there. I once botched a major renovation project because I skipped a step, and that pit in your stomach is the worst. If you dropped the ball this year, don’t try to hide it or make excuses. Own it. Walk into that room, admit where you tripped up, and—this is the important part—bring a plan for how you’re going to fix it. It turns a mistake into a comeback.

Tips on how to focus better.

How to Focus Better in a World Full of Distractions

I was sitting at my kitchen table last Tuesday, surrounded by half-finished projects and three different open browser tabs, staring at a single sentence I’d been trying to write for forty minutes. My phone buzzed, my neighbor started mowing the lawn, and suddenly, I was deep in a rabbit hole researching the history of cast iron skillets instead of doing my actual work. It’s frustrating as hell because we’re constantly told that the secret to how to focus better is some expensive productivity app or a $500 “smart” desk, but honestly? Most of that stuff is just expensive noise.

I’m not here to sell you on a complicated system that takes more work to maintain than the actual job you’re trying to do. I’ve spent enough time tinkering with broken gadgets and messy schedules to know that real progress comes from stripping away the junk. I’m going to show you a few straightforward, no-nonsense tactics I use to get my head back in the game when things get chaotic. We’re going to break this down into small, manageable steps so you can stop fighting your brain and actually get things done.

Table of Contents

Minimizing Digital Distractions to Clear Your Mental Workspace

Minimizing Digital Distractions to Clear Your Mental Workspace

Look, I get it. I’ve spent more hours than I’d like to admit staring at a screen, only to realize I’ve spent forty minutes scrolling through a thread about vintage power tools instead of actually working. Our phones are basically tiny, glowing distraction machines designed to hijack our attention. If you want to get serious about minimizing digital distractions, you have to treat your workspace like a construction zone: you can’t get anything done if there’s constant noise and people walking through your site every five seconds.

The first thing I do is a total digital sweep. I turn off every single non-human notification on my phone—if it isn’t a text or a call from a real person, I don’t need a buzz in my pocket telling me about a sale or a social media like. I also use a “do not disturb” mode on my laptop during my most important tasks. It’s one of those simple productivity hacks for attention that actually works because it stops that constant, frantic urge to check your inbox. Once you cut out that digital chatter, you’ll notice the brain fog starts to lift almost immediately.

Easy Brain Fog Remedies for a Brighter Mind

Easy Brain Fog Remedies for a Brighter Mind

Look, we’ve all been there—staring at a screen for twenty minutes, reading the same sentence over and over, while your brain feels like it’s stuck in a thick layer of cotton wool. That heavy, sluggish feeling is what most people call brain fog, and honestly, it’s the ultimate productivity killer. When I’m hitting that wall, I’ve learned that trying to power through with more caffeine usually backfires. Instead, I treat it like a clogged drain; you can’t just keep pouring water in, you have to clear the blockage.

One of my favorite brain fog remedies is a quick, low-tech reset. I call it the “sensory shift.” If your head feels cloudy, step away from the desk and do something physical for just five minutes. Whether it’s a quick walk around the block or even just splashing some cold water on your face, you need to signal to your nervous system that it’s time to wake up. These small mental clarity exercises act like a quick reboot for your internal operating system, clearing out the cobwebs so you can actually get back to the task at hand without feeling like you’re wading through mud.

5 Simple Ways to Get Your Brain Back in the Driver's Seat

  • 1. Use the “One-Thing” Rule. We often try to juggle five tasks at once, which is basically like trying to hammer a nail with a screwdriver—it’s just messy. Pick one single task, set a timer for 25 minutes, and tell yourself you aren’t allowed to touch anything else until that timer dings. It’s way easier to commit to a short sprint than a marathon.
  • 2. Clean Your Physical Workspace. I know, I know, you want to get to work, but a desk covered in old coffee mugs and loose receipts is basically visual noise for your brain. Spend five minutes clearing the junk away. A clear surface helps me feel like I actually have a handle on my day.
  • 3. Write Everything Down Immediately. My brain isn’t a hard drive; it’s more like a notepad that’s running out of pages. When a random thought pops up—like “I need to buy lightbulbs”—don’t try to remember it. Jot it on a sticky note and get it out of your head so you can get back to what you were doing.
  • 4. Schedule Your “Deep Work” Around Your Energy. Some of us are morning people, and some of us don’t actually function until the sun goes down. Figure out when you feel the sharpest and guard that time like it’s gold. Don’t waste your best brainpower on answering easy emails; save the heavy lifting for when you’re actually dialed in.
  • 5. Build in “Micro-Breaks” That Actually Work. Scrolling through social media during a break isn’t a break—it’s just more input for your brain to process. Instead, stand up, stretch, or grab a glass of water. Give your eyes a rest from the screen so you can return to your task without feeling like your head is spinning.

The Bottom Line: Keeping Your Focus on Track

Stop trying to fight your brain with willpower alone; instead, change your environment by cutting out the digital noise and clearing your physical workspace.

Treat your brain like any other tool—if it’s feeling sluggish or foggy, you’ve got to give it the right fuel and a bit of a reset to get it working properly again.

Don’t aim for perfection on day one; just pick one small, manageable change you can implement right now to start reclaiming your headspace.

## The Big Picture

“Focus isn’t about having some magical superpower or a brain that never wanders; it’s just about clearing the clutter off your workbench so you can actually see the project in front of you.”

Nathan Cole

Getting Back in the Driver's Seat

Getting Back in the Driver's Seat.

Look, we’ve covered a lot of ground here, from cleaning up your digital workspace to clearing out that annoying brain fog that makes you feel like you’re wading through molasses. It might feel like a lot to juggle at once, but remember: you don’t have to overhaul your entire life by tomorrow morning. Start by just tinkering with one thing—maybe it’s putting your phone in another room or grabbing a glass of water when your head starts to swim. The goal isn’t to be a perfect, unshakeable productivity machine; it’s just about building a better toolkit so you can handle whatever the day throws at you without feeling totally overwhelmed.

At the end of the day, I really want you to know that having a “bad focus day” doesn’t mean you’re broken or incapable. I’ve had plenty of those, where even reading a simple instruction manual feels like climbing Everest. Just treat your focus like any other skill or old tool you’re trying to restore—it takes a little bit of patience, some trial and error, and a whole lot of showing up for yourself. You’ve got this. Take it one small, manageable step at a time, and don’t be too hard on yourself when things get messy. Just pick up the tools and try again tomorrow.

Frequently Asked Questions

What do I do when I've already cleaned up my workspace but my mind still won't stop racing?

Look, I’ve been there. You’ve got the desk cleared and the coffee brewed, but your brain is still running a marathon in the background. When that happens, stop trying to force the focus. Instead, grab a piece of paper and do a “brain dump.” Write down every single nagging thought, task, or worry swirling around. Once it’s on paper, your mind can stop working so hard to remember it all, and you can actually breathe.

Are there any specific tools or apps that actually help with focus, or do they just end up being another distraction?

Look, I’ve fallen into the trap of downloading every “productivity” app on the store, only to spend more time tweaking settings than actually working. It’s a rabbit hole. If you want to use tools, keep them dead simple. I personally swear by a basic Pomodoro timer—even just a kitchen timer—to keep me on track. For digital blocks, something like Freedom is great, but honestly? A physical notebook and a pen usually beat any app.

How can I stay focused when my job or home life is constantly throwing unexpected interruptions my way?

Look, I get it. I’ve tried to fix a leaky sink only to have the dog knock over a bucket or the phone start ringing off the hook. When life keeps throwing curveballs, stop trying to fight the chaos and start building “buffer zones.” Try working in short, intense sprints—maybe 25 minutes—and explicitly tell the people around you, “I’m going dark for a bit.” If an interruption is unavoidable, jot it down immediately and get back to it. Don’t let a detour become a dead end.

Tips on how to free up phone storage.

How to Free Up Storage on Your Phone Without Deleting Photos

Ever get that sinking feeling right when you’re trying to snap a quick photo of something cool, only to have your phone freeze and spit out that dreaded “Storage Full” alert? I’ve been there, standing in the middle of a hardware store aisle, staring at my screen like it had just betrayed my entire family. It’s incredibly frustrating because most of the advice you find online makes it sound like you need to buy a brand-new device or spend hours navigating some complicated, techy menu that makes zero sense. But honestly, figuring out how to free up phone storage isn’t some high-level engineering project; it’s usually just about clearing out the digital junk that’s been piling up in the corners of your device.

I’m not here to sell you on a fancy subscription service or some “magic” cleaning app that just ends up taking up even more space. My goal is to give you the straight talk on how to reclaim your device using simple, manual steps that actually work. I’ve spent plenty of time tinkering with my own gadgets to find the most efficient shortcuts, and I’m going to share those exact methods with you. We’re going to tackle this one step at a time so you can get your phone running smoothly again without the headache.

Table of Contents

Stop the Bloat How to Delete Unused Apps Quickly

Stop the Bloat How to Delete Unused Apps Quickly

First things first, let’s look at your home screen. We’ve all been there—you download a game or a fancy photo editor for a one-time project, and then it just sits there, hogging space like a dusty box in the back of a garage. To get moving, you need to delete unused apps that haven’t been touched in months. Most phones have a setting that actually shows you which apps you rarely use, so lean on that. It’s the fastest way to reclaim a chunk of space without having to guess.

While you’re at it, don’t forget about the “ghost” data hiding inside the apps you do keep. Sometimes, an app isn’t actually huge, but its temporary files are. If you’re on Android, you can go into your settings to clear cache and data for those heavy hitters like social media or web browsers. It’s like cleaning out the sawdust from your workbench—it doesn’t change the tool, but it sure makes the whole workspace feel a lot cleaner and more efficient.

Clear Cache and Data to Find Hidden Breathing Room

Clear Cache and Data to Find Hidden Breathing Room

Once you’ve tackled those apps you haven’t opened since 2022, it’s time to look at the invisible junk hiding under the hood. Every time you browse the web or scroll through social media, your phone saves little bits of information—temporary files meant to help things load faster next time. The problem is, these files eventually pile up like sawdust in a workshop, taking up space without you even realizing it. To fix this, you need to clear cache and data for your most-used apps. It’s a bit like sweeping the floor after a long day of DIY; it doesn’t change the structure of the house, but it sure makes everything feel a lot cleaner.

If you’re on Android, this is pretty straightforward: head into your Settings, find your Apps list, and you’ll see the option to wipe that temporary clutter right there. If you’re an iPhone user, it’s a little more manual, but you can still optimize smartphone memory by offloading apps or clearing your browser history. Just a quick sweep of these hidden files can often claw back several gigabytes of space without you having to delete a single precious memory.

The heavy hitters: 5 more ways to claw back your space

  • Tackle your photo library: We all take way too many screenshots and blurry shots of our lunch. Go through your camera roll and delete the junk, then make sure your photos are backing up to a cloud service like Google Photos or iCloud so you can wipe them off the actual device.
  • Hunt down the “hidden” culprits: Check your messaging apps—especially WhatsApp or Telegram. They love to save every single meme, video, and GIF your friends send you. Go into the app settings and clear out those massive media files that are eating your storage alive.
  • Clean up your downloads folder: If you’re on Android, you’ve probably got a graveyard of PDFs, old resumes, and random files sitting in your downloads folder from months ago. Open your file manager and toss anything you don’t need anymore.
  • Offload, don’t just delete: If you have apps you use occasionally but don’t need every day, use the “offload” feature (on iPhone) or similar settings on Android. It keeps the app’s data but clears out the heavy software, so you can reinstall it quickly when you actually need it.
  • Stream instead of storing: If your phone is bulging because of downloaded movies or Spotify playlists for your commute, try to trim them down. Only download what you’re 100% sure you’ll listen to or watch this week, and rely on streaming for the rest.

The quick version: How to keep your phone running smooth

Don’t let old apps and “ghost” files hog your space; if you haven’t touched it in a month, it’s probably time to let it go.

Regularly clearing out your cache is like sweeping the floor—it keeps the junk from piling up and slowing everything down.

Take five minutes once a week to do a quick digital sweep so you never have to deal with that dreaded “Storage Full” panic again.

## A little maintenance goes a long way

“Think of your phone storage like a junk drawer in your kitchen; it’s not that you don’t have enough space, it’s just that you’ve let too much stuff pile up in there. Once you clear out the clutter you don’t actually use, you’ll be surprised at how much room you actually have to breathe.”

Nathan Cole

You've Got This

Optimizing device storage: You've Got This.

Look, we’ve covered a lot of ground here, but it really comes down to a few simple habits. Between slashing those unused apps that are just sitting there gathering digital dust and clearing out the cache files that act like hidden weight on your device, you should already be seeing some serious breathing room. It’s not about doing a massive, overwhelming deep-clean every single week; it’s just about tackling these small, manageable tasks whenever you see that dreaded storage warning pop up. Once you get into the rhythm of trimming the fat every once in a while, you won’t have to deal with that sluggish performance or the panic of a full memory ever again.

At the end of the day, I want you to remember that technology is supposed to work for you, not the other way around. It can feel incredibly frustrating when your phone starts acting up, but like I always say, most things are way more figure-out-able than they seem at first glance. You don’t need to be a tech genius or a professional coder to take control of your digital space—you just need a little patience and a plan. So, go ahead, clear out that clutter, and enjoy the feeling of a device that actually runs the way it’s supposed to. You earned it!

Frequently Asked Questions

If I delete my app cache, am I going to lose my login info or saved settings?

That’s a great question, and honestly, it’s the one thing that makes most people hesitate. Here’s the deal: if you just clear the cache, you’re totally fine. You’re just tossing out temporary junk files, like images or scripts the app downloaded to load faster. You won’t lose your login or settings. However, if you hit “Clear Data” or “Clear Storage,” that’s a different story—that resets the app to factory settings, and you’ll have to log back in.

Is it actually safe to delete "System Data" or "Other" files to get more space?

Look, I get the temptation. Seeing a massive chunk of “System Data” eating up your space is frustrating, but please—don’t go on a deleting spree in your settings trying to hunt it down. Most of that stuff is actually essential for your phone to run. If you start poking around in files you don’t recognize, you might accidentally brick something. Instead of fighting the system, focus on the big stuff like photos and apps.

Should I back everything up to the cloud before I start a massive cleanup, or will that just take up more room?

That’s a great question, and honestly, it’s one I’ve tripped over myself. Here’s the deal: definitely back up your essentials—like photos and important docs—before you start deleting things. You don’t want to realize too late that a “junk” folder actually had that one video of your dog you can’t live without. Don’t worry about the cloud taking up more room during the process; once you finish the cleanup, you can always trim the cloud storage down too. Safety first!

Guide on how to hang a picture.

How to Hang a Picture Perfectly Every Time

I used to think that if I didn’t own a professional laser level and a complete set of heavy-duty masonry tools, I was doomed to live in a house with crooked, lopsided frames. I spent one entire Saturday trying to get a single landscape photo centered over my sofa, only to end up with a dozen tiny holes in my drywall and a framed disaster that looked like it was sliding off the wall. But here’s the truth: you don’t need a contractor’s toolkit to master how to hang a picture perfectly. Most of the time, you just need to stop overthinking the math and start using a few simple tricks that actually work in a real home.

In this guide, I’m going to walk you through the exact, no-nonsense way I tackle every single frame that comes my way. We aren’t going to get bogged down in complicated geometry or expensive gadgets; instead, I’ll show you how to pick the right hardware, find your studs, and avoid that dreaded “one hole to the left” mistake. By the time we’re done, you’ll be able to transform those empty, boring walls into a gallery you’re actually proud of without any of the usual stress.

Table of Contents

Guide Overview

Total Time: 30-60 minutes
Estimated Cost: $10-30
Difficulty: Beginner

Tools & Supplies

  • Hammer for driving nails or hooks
  • Measuring tape for spacing and height
  • Pencil for marking wall locations
  • Level to ensure the picture is straight
  • Picture frame or artwork (1 unit)
  • Hanging hardware such as nails or picture hooks (1 pack)
  • Wall anchors if hanging on drywall without studs (1 pack)

Step-by-Step Instructions

  • 1. First things first, grab your gear. You don’t need a massive toolbox, but you’ll want a hammer, a level (or a leveling app on your phone if you’re feeling techy), a pencil, and some measuring tape. Most importantly, check the back of your frame to see what kind of hardware it has. Is it a wire, a sawtooth hanger, or just a single D-ring? Knowing this before you start drilling holes is going to save you a massive headache later.
  • 2. Now, let’s figure out where this thing actually lives. Don’t just eyeball it and hope for the best—that’s how you end up with crooked art that haunts your dreams. Use your measuring tape to find the center point of your wall space, then measure down from the ceiling or a nearby piece of furniture to find your eye-level sweet spot. A good rule of thumb I always use is to aim for the center of the picture being about 57 to 60 inches from the floor.
  • 3. Here is my favorite little trick to avoid “Swiss cheese walls.” Instead of guessing where the nail goes, take a piece of painter’s tape and stick it to the back of the frame, right over the hanging hardware. Use your pencil to mark exactly where the nail or screw needs to hit that tape. Once you peel the tape off and stick it on the wall, you’ll have perfectly placed marks without having to do any heavy math.
  • 4. Time to make some marks. Take that piece of tape (or just your pencil) and mark your spot on the wall. If you’re hanging something heavy, like a big wooden mirror or a chunky framed print, don’t just use a tiny nail. This is the time to pull out a drywall anchor or find a stud. If you try to hang a heavy piece on a plain nail, you’re going to end up with a hole in your wall and a broken picture on the floor.
  • 5. Go ahead and drive that nail or screw in. If you’re using an anchor, just take your time and don’t rush the process. Once the hardware is secure, hold the picture up to the wall. This is the moment of truth. Don’t pull it all the way off yet; just hold it there and check it with your level. If it’s leaning even a tiny bit to the left, adjust your hardware before you commit to the final placement.
  • 6. Once it’s level and sitting pretty, give it a little nudge to make sure it’s seated firmly against the wall. If the picture feels a bit “wobbly” or keeps tilting, you might need to add a little adhesive felt bumper to the bottom corners of the frame. It keeps the art from shifting every time someone walks past and protects your paint from getting scuffed up.
  • 7. Step back, take a breath, and admire the work. You didn’t have to call a handyman or spend a fortune to get it done. If it’s not 100% perfect, don’t sweat it—the goal was to get it up there, and you did it yourself. Now, go grab a coffee and enjoy your newly decorated space.

A Simple Picture Hanging Hardware Guide for Every Frame

A Simple Picture Hanging Hardware Guide for Every Frame

Look, I’ve spent way too many Saturday afternoons staring at a box of random screws and nails, wondering which one won’t pull a chunk of plaster right out of my wall. If you want to avoid a disaster, you need a basic picture hanging hardware guide in your back pocket. For those light, breezy frames—think a small botanical print or a polaroid—a simple finishing nail or a small command strip works wonders. But if you’re tackling the big stuff, like a heavy mirror or a thick wooden frame, don’t just wing it with a tiny nail. You’ll want to look into hanging heavy frames on drywall using something sturdier, like a toggle bolt or a specialized heavy-duty hook, to make sure it stays put.

The real secret to making your house look professional, though, isn’t just the hardware; it’s the prep. I always tell people to grab a spirit level before they start driving anything into the wall. Even if you think you’ve got a steady hand, using a level for art is the only way to ensure your favorite landscape isn’t tilting five degrees to the left. It takes an extra thirty seconds, but it saves you from that annoying feeling that something is “off” every time you walk into the room.

Measuring Distance for Picture Placement Without the Guesswork

Measuring Distance for Picture Placement Without the Guesswork

Look, we’ve all been there: you nail the first piece of art, step back, and realize it’s either way too high or looks like it’s sliding off the wall. To stop that “oops” moment before it happens, I always recommend the eye-level rule. A good baseline is to aim for the center of the frame to be about 57 to 60 inches from the floor. But if you’re working with a massive piece or a gallery wall, don’t just wing it. Grab a pencil and actually mark your spots on the wall first. It’s much easier to erase a tiny lead mark than it is to patch a hole.

When you’re measuring distance for picture placement, don’t forget to account for the wire or the bracket on the back. I like to hold the frame up against the wall, mark the top edge with a pencil, and then measure down from that mark to find exactly where the hardware sits. This little trick is a lifesaver for avoiding wall damage when hanging art because it prevents those “test holes” that end up cluttering your drywall. Just take a second to measure twice; your future self will thank you.

A few pro tricks to keep your walls looking sharp

  • Eye level is your best friend. A common mistake I see is hanging art way too high. Aim for the center of the picture to be about 57 to 60 inches from the floor—that’s standard gallery height and it feels much more natural to the eye.
  • Don’t forget the “weight” check. If you’re hanging a massive, heavy mirror or a chunky reclaimed wood frame, don’t trust a tiny finishing nail. Grab some heavy-duty picture hangers or even screw directly into a stud if you can find one.
  • Use a little painter’s tape to plan. If you’re nervous about making holes in the wrong spot, stick a piece of blue tape on the wall where you think the corners should go. It lets you step back and see the layout without the permanent commitment.
  • Level it out as you go. Even if you think your hands are steady, things tend to tilt once they’re actually on the wall. Keep a small bubble level handy—or even a leveling app on your phone—to make sure your masterpiece isn’t leaning to one side.
  • Mind the glare. Before you hammer that last nail, stand back and look at how the light hits the frame. If you’ve got a window right opposite the art, you might end up with a giant reflection that hides the whole picture. Adjust the position slightly to catch the light better.

Two cents to remember before you start

Don’t overthink the hardware; just pick the right nail or screw for the weight of your frame so you aren’t staring at a hole in the wall later.

Use a pencil to mark your spots first—it’s way easier to erase a little lead than it is to patch up drywall.

Take your time with the measuring part; getting the height right the first time saves you from the “oops, it’s too low” headache.

## A little bit of perspective

“Look, you’re probably going to end up with a tiny nail hole in the wall, and that’s okay. Don’t let the fear of a little bit of drywall damage stop you from actually making your house feel like a home. Just grab the hammer, take a breath, and give it a shot.”

Nathan Cole

You're All Set to Level Up Your Walls

You're All Set to Level Up Your Walls.

Look, I know it can feel like a lot when you’re standing there with a hammer in one hand and a level in the other, but you’ve actually done the hard part. We’ve covered how to pick the right hardware so your heavy mirrors don’t end up on the floor, how to measure those distances without losing your mind, and how to find that perfect eye-level sweet spot. Just remember: grab the right nail for the job, double-check your marks with a pencil, and don’t be afraid to move things around a bit if they look wonky. Once you get that first piece up, the rest of the room is going to start feeling like a home instead of just a collection of furniture.

At the end of the day, don’t let a little bit of dust or a crooked frame stop you from making your space yours. Perfection is overrated; what matters is that you took the time to do it yourself. There is a specific kind of satisfaction that comes from stepping back, looking at a wall you actually decorated, and knowing you didn’t have to call a professional to get it done. So, grab that level, trust your gut, and get those pictures up. You’ve totally got this.

Frequently Asked Questions

What do I do if I'm trying to hang something on a wall that's just plain drywall and doesn't have a stud?

Don’t sweat it—you don’t need a stud for every single thing you hang. If you’re just putting up a lightweight frame, a simple nail or a small screw will bite into the drywall just fine. But if you’re tackling something heavier, grab some drywall anchors. They’re cheap, easy to find at the hardware store, and they expand inside the wall to give you that extra grip. Just match the anchor size to your screw!

How can I make sure my picture stays level and doesn't end up crooked a week later?

There’s nothing worse than thinking you nailed it, only to see your art tilting a few degrees a week later. To stop the “slow tilt,” skip the cheap adhesive strips and go with a solid nail or screw. Once it’s up, don’t just eyeball it—grab a level. If you don’t have one, download a free leveling app on your phone. It works surprisingly well for a quick double-check before you commit.

Is there a way to hang heavy mirrors or big frames without accidentally putting a giant hole in my wall?

I hear you—there is nothing worse than seeing a huge, ugly hole in your drywall because a heavy mirror decided to give up the ghost. If you’re dealing with something beefy, skip the tiny nails and grab some heavy-duty picture hooks or, even better, wall anchors. If you’re feeling brave, a couple of sturdy screws into the studs is the gold standard. It’s all about spreading that weight out so your wall can handle it.

Best certifications for your career guide.

Certifications That Are Actually Worth Your Time

I remember sitting at my kitchen table three years ago, staring at a laptop screen that felt more intimidating than a busted electrical panel. I was scrolling through endless lists of “must-have” credentials, feeling like I needed a PhD just to get a decent raise. The internet is full of gurus trying to sell you expensive, shiny courses that promise the world, but let’s be real: most of those lists of the best certifications for your career are just expensive noise designed to drain your bank account. You don’t need a mountain of paper to prove you know your stuff; you just need the right tools for the job.

I’m not here to sell you a dream or push some overpriced seminar. My goal is to cut through the fluff and show you which credentials actually carry weight in the real world. I’ve spent enough time troubleshooting my own path to know that you should focus on utility, not prestige. I’m going to break down the most practical options based on what employers actually look for, so you can stop overthinking and start building something that actually matters.

Table of Contents

Identifying High Paying Professional Credentials Without the Stress

Identifying High Paying Professional Credentials Without the Stress

Look, I get it. You open a job board, see a list of acronyms next to a massive salary, and immediately feel like you’ve missed a memo. It’s easy to get overwhelmed by the sheer volume of options, but you don’t need to chase every shiny new badge that pops up on LinkedIn. My advice? Stop looking at what’s popular and start looking at what’s actually moving the needle in your specific field.

The trick is to focus on the ROI of professional certifications before you spend a single dime on tuition or exam fees. I always tell my friends to look for the “gold standards”—those specific credentials that appear in almost every job description for the roles you actually want. Instead of gambling on a random course, hunt for industry-recognized certification programs that have a proven track record of getting people through the door. It’s a lot like picking out a power tool; you don’t want the flashiest one on the shelf, you want the one that’s built to last and actually gets the job done.

Navigating Industry Recognized Certification Programs Step by Step

Once you’ve narrowed down which path you want to take, it’s time to actually roll up your sleeves and get moving. I know it feels like staring at a massive, confusing blueprint, but you don’t have to build the whole house in one afternoon. Start by looking for industry-recognized certification programs that actually carry weight in your specific field. Don’t just grab the first shiny badge you see on a social media ad; check job postings in your area to see which credentials recruiters are actually asking for. If you see the same acronym popping up in every “Help Wanted” ad, that’s your signal to pay attention.

Next, I want you to look closely at the ROI of professional certifications before you drop a dime. It’s easy to get caught up in the excitement of learning something new, but you’ve got to make sure the cost of the exam and the study materials won’t leave your bank account hurting more than it helps. I always recommend checking if there are top-rated online certificate courses that offer a trial period or a modular way to learn. This lets you test the waters without committing to a massive upfront expense, making the whole process feel a lot more manageable.

Five Ways to Pick Your Certifications Without Losing Your Mind

  • Don’t chase the shiny object. I’ve seen guys spend a fortune on a high-level cert just because it sounds cool, only to realize it doesn’t actually apply to the job they want. Before you open your wallet, make sure the credential actually maps to the daily tasks of the role you’re aiming for.
  • Look for the “Gold Standards.” Every industry has that one certification that recruiters treat like a universal key. Instead of collecting a bunch of niche badges, focus on the heavy hitters—the ones that are widely recognized and actually carry weight on a LinkedIn profile.
  • Check the “Shelf Life.” Some certifications are great for a year, but others stay relevant for a decade. Ask around or do a quick bit of digging to see if the cert requires constant, expensive renewals, or if it’s a solid foundation you can build on for a long time.
  • Use the “Job Description Hack.” Go to a job board, type in your dream job title, and see which certifications keep popping up in the “preferred qualifications” section. That’s your roadmap right there—it’s literally telling you what the market wants to see.
  • Don’t ignore the free stuff first. You don’t always have to jump straight into a $500 exam. Start with some reputable free courses or low-cost modules to see if the subject matter actually sticks. There’s no point in paying for the big exam if you realize halfway through that you hate the topic.

The Quick Version: What You Need to Remember

Don’t try to collect every badge you see; focus on the one or two credentials that actually bridge the gap between where you are and where you want to be.

Do your homework before spending a dime—check job postings in your area to see which certifications are actually being asked for by employers.

Treat certification like a DIY project: break the study material into small, manageable chunks so you don’t burn out before you even hit the exam.

## The Real Value of a Credential

“Look, a certification isn’t a magic wand that’s going to fix your entire career overnight, but it is a solid tool in your belt. Don’t get paralyzed trying to find the ‘perfect’ one; just find the one that actually proves to someone else that you know your stuff and can get the job done.”

Nathan Cole

Don't Get Stuck in the Planning Phase

Don't Get Stuck in the Planning Phase.

Look, I know it feels like a lot. We’ve talked about how to spot the high-paying credentials that actually matter, how to avoid the “fluff” certifications that don’t move the needle, and how to tackle the enrollment process without losing your mind. The main thing I want you to take away is that you don’t need to master everything at once. You don’t need a dozen badges on your LinkedIn profile by next Tuesday. Just focus on finding that one specific credential that aligns with where you want to be in a year, and start building your momentum from there.

At the end of the day, a certification is just a tool in your belt—kind of like a good cordless drill or a sharp chef’s knife. It’s not going to do the work for you, but it sure as heck makes the job a lot easier once you start. Don’t let the fear of failing an exam or the cost of the course keep you on the sidelines. Most of the stuff in life is just a matter of showing up and doing the work. Pick your target, grab your study guides, and just get started. You’ve got this.

Frequently Asked Questions

How do I know if a certification is actually worth the money and time, or if it's just some expensive piece of paper?

Look, I’ve spent enough time buying tools I never use to know when something is just a shiny distraction. Before you drop your hard-earned cash, do two things: First, go to LinkedIn and search for the job title you actually want. See if those certifications show up in the “Skills” or “Licenses” sections of people actually doing the work. Second, ask a mentor if that specific paper actually moves the needle in interviews. If it doesn’t, put your money back in your pocket.

Can I still land a good job if I have the certs but don't have a ton of prior experience in the field?

Look, I’ll be straight with you: it’s an uphill climb, but it’s definitely not a dead end. I’ve seen it plenty of times—people with the right credentials but empty resumes. The trick is to stop treating your certs like a piece of paper and start treating them like proof of work. Build a small project, volunteer, or even just document your learning process. Show them you can actually do the thing, not just pass the test.

Is it better to go for one big, well-known certification or a bunch of smaller, specialized ones?

Look, it’s a bit like choosing tools for a workshop. If you’re just starting out, you don’t need a specialized laser level; you need a solid, reliable hammer. I usually recommend going for one big, well-known certification first. It builds a foundation and proves to employers you’ve got the basics down. Once you’ve got that “anchor” credential, then you can start collecting those smaller, specialized ones to sharpen your specific edge.

How to cook rice perfectly guide.

How to Cook Perfect Rice Every Single Time

I still remember the first time I tried to make a decent meal in my tiny, cramped apartment back in my early twenties. I was trying to impress a girl, but instead of a fluffy side dish, I ended up with a pot of gummy, semi-translucent sludge that looked more like wallpaper paste than food. It was embarrassing, and honestly, it felt like a total failure. I spent way too many nights staring at a steaming pot, wondering why the instructions on the bag never seemed to match what was actually happening in my kitchen. Learning how to cook rice perfectly shouldn’t feel like a high-stakes chemistry experiment or some mysterious ritual you can only master with a $500 smart cooker.

Look, I’m not here to sell you on some fancy, over-engineered gadget or a complicated set of rules that require a kitchen scale. I’ve spent years tinkering with everything from old power tools to stovetop burners, and I’ve learned that the best results usually come from the simplest methods. In this guide, I’m going to strip away the fluff and give you my straightforward, battle-tested approach. I’ll show you exactly how to get that light, airy texture every single time, so you can stop stressing the stove and just enjoy your dinner.

Table of Contents

Mastering the Rice to Water Ratio Without the Stress

Mastering the Rice to Water Ratio Without the Stress

Look, I’ve been there—staring at a pot of gummy, overcooked mush wondering where it all went wrong. Most of the time, the culprit isn’t your skill; it’s just a bad rice to water ratio. If you’re using a standard stovetop rice method, the golden rule for most long-grain white varieties is 1 part rice to 2 parts water. But here’s the thing: I’ve learned that “standard” is a loose term. If you’re using a rice cooker, those machines are pretty smart, but you still want to trust your eyes over the manual sometimes.

One trick I swear by to avoid mushy rice is getting serious about your prep. Don’t just dump the grains in the pot and walk away. Rinsing white rice under cold water until it runs clear is a total game-changer; it washes off that excess surface starch that turns your dinner into a sticky mess. Once you’ve got that starch under control, you’re already halfway to a perfect bowl. It’s a small habit, but it makes a massive difference in the final texture.

Why Rinsing White Rice Changes Everything

Why Rinsing White Rice Changes Everything.

If you’ve ever pulled a pot off the burner only to find a gummy, clumped-up mess, I’ve been there. It’s frustrating, especially when you’ve followed the recipe to a T. Most of the time, the culprit isn’t your heat control or your pot; it’s the surface starch. When you buy a bag of white rice, it’s coated in a fine, powdery starch. If you don’t get rid of that extra layer, it turns into a kind of “glue” during the cooking process, which is the fastest way to end up avoiding mushy rice becomes your new full-time job.

Think of rinsing white rice like washing the dust off a piece of lumber before you start building. You wouldn’t try to glue two pieces of wood together if they were covered in sawdust, right? It’s the same logic here. By running your rice under cold water in a fine-mesh strainer until the water runs clear, you’re stripping away that excess starch. This simple step ensures that each grain stays distinct, light, and fluffy once it hits the plate. It’s a small bit of extra work, but I promise it’s the secret weapon for better texture.

Five Little Tricks to Level Up Your Rice Game

  • Stop the stir. Once you’ve got your rice and water in the pot and it’s reached a simmer, put a lid on it and leave it alone. If you keep lifting the lid to peek, you’re letting all that precious steam escape, and that’s how you end up with unevenly cooked grains.
  • Let it rest before you touch it. This is the hardest part for me, but once the timer goes off, pull the pot off the heat and let it sit, covered, for about 10 minutes. It lets the moisture redistribute so the bottom layer isn’t a swamp while the top is dry.
  • Use the right gear. If you’ve got a heavy-bottomed pot, use it. Thin, cheap pots tend to have hot spots that scorch the rice at the bottom before the rest is even soft. A little extra weight goes a long way in keeping things even.
  • Fluff, don’t mash. When you finally go in with a fork or a rice paddle, be gentle. You want to lift and aerate those grains, not smash them into a paste. A light touch is the difference between fluffy rice and a gummy mess.
  • Watch your heat. High heat doesn’t mean faster rice; it just means burnt rice. Once you hit that simmer, drop it down low. You want a gentle, steady heat that works with the steam, not a rolling boil that’s fighting against it.

The Quick Cheat Sheet for Perfect Rice

Stop eyeballing the liquid; stick to a reliable ratio (like 1:2 for standard white rice) so you aren’t stuck eating mush or crunching on undercooked grains.

Never skip the rinse—washing that extra starch away is the secret to getting fluffy, individual grains instead of one big sticky clump.

Patience is your best tool; once the timer goes off, let the pot sit covered for a few minutes to let the steam finish the job properly.

## The Secret to Not Wasting a Batch

“Look, you don’t need a fancy kitchen or a degree in culinary arts to get great rice; you just need to stop treating it like a ‘set it and forget it’ task and start respecting the rinse and the ratio. Once you nail those two things, you’ll stop throwing away mushy, half-eaten pots and start actually enjoying your dinner.”

Nathan Cole

You've Got This

Perfecting rice cooking: You've Got This.

At the end of the day, nailing the perfect pot of rice really just comes down to a few fundamental habits. Remember to rinse that starch away before the heat ever touches the pot, and don’t go overboard with the water—stick to your ratio so you don’t end up with a gummy mess. Once you get the heat dialed in and let it steam undisturbed, you’re basically a pro. It’s all about respecting the process and giving those grains the time they need to absorb everything properly without being rushed.

I know it might feel a little intimidating the first time you stand over a steaming pot, but I promise you, it gets easier every single time you try. Don’t sweat it if your first batch isn’t a total masterpiece; even the best cooks have dealt with a little extra moisture or a slightly crunchy grain now and then. The goal isn’t perfection on day one; it’s about building your confidence in the kitchen. So, grab your pot, trust your instincts, and get cooking. You’ll be surprised at how much better it tastes when you know you built it from scratch.

Frequently Asked Questions

What if I accidentally add too much water and end up with a gummy mess?

Look, we’ve all been there—you check the pot and it’s looking more like porridge than fluffy rice. Don’t toss it yet! If it’s just a little gummy, spread the rice out thin on a large baking sheet to let the steam escape and dry it out. If it’s a total mush-fest, don’t sweat it. Just lean into it: use that “failed” rice for a quick fried rice or a savory rice pudding.

Do I really need to use a specific kind of pot, or will any old saucepan work?

Look, you don’t need to go out and drop a hundred bucks on some fancy, high-tech rice cooker to get this right. Any old saucepan with a tight-fitting lid will do the trick. The real secret isn’t the brand of the pot; it’s making sure that lid actually stays put. If steam escapes, your water levels get wonky and you’ll end up with crunchy rice. Just find something heavy-bottomed if you can.

Can I use this same method for brown rice, or is that a whole different ballgame?

It’s a different ballgame, but don’t let that throw you. Brown rice is a bit more stubborn because of that outer bran layer, so you can’t just treat it like white rice and expect magic. You’ll need more water and a longer soak or simmer time to get it tender. Think of it like a slow-cook project versus a quick fix—it takes a little more patience, but the results are worth it.