There I was, sitting on my living room floor at 11:00 PM, staring at the bathroom door while that constant, ghostly hissing sound echoed through the whole house. It felt like I was literally flushing money down the drain every single minute. Most people think that once a toilet starts acting up, you’re looking at a massive plumbing bill or a frantic call to an expensive professional, but that is a total myth. Learning how to fix a running toilet is actually one of those “entry-level” DIY wins that you can tackle with nothing more than a pair of steady hands and a little bit of patience.
I’m not going to bore you with technical jargon or tell you to buy a whole new tank assembly when you don’t need to. Instead, I’m going to walk you through the exact, no-nonsense steps I use to get things quiet again. We’ll look at the common culprits—like a finicky flapper or a misaligned float—and I’ll show you how to swap them out without making a mess. My goal is to get you from frustrated homeowner to confident fixer in under twenty minutes, so you can finally enjoy some peace and quiet.
Table of Contents
Guide Overview
Tools & Supplies
- Adjustable wrench for loosening water supply valve
- Screwdriver for securing tank components
- Sponge or cloth for removing excess water
- Replacement flapper (1 unit)
- Replacement fill valve (1 unit)
- Replacement tank lever/handle (1 unit)
Step-by-Step Instructions
- 1. First things first, you’ve gotta see what’s actually going on inside that tank. Go ahead and pop the lid off the toilet tank and set it aside on a towel or something soft so you don’t crack it. Once the lid is off, flush the toilet and watch the water level. You’re looking to see if the water is constantly pouring into the overflow tube (that open pipe in the middle) or if it’s leaking out from the bottom of the tank into the bowl.
- 2. If the water is spilling over the top of that overflow tube, your float is likely the culprit. The float is that ball or cylinder that rises with the water to tell the valve when to shut off. If it’s set too high, the water never stops coming. You can usually fix this by adjusting the screw on the float assembly to lower it, or by simply bending the metal rod down a bit if you’ve got an older style.
- 3. Now, if the water level looks fine but you still hear that constant hissing, it’s probably the flapper. This is that rubber plug at the bottom of the tank that lifts up when you flush. Over time, these things get old, warped, or covered in mineral buildup, and they stop making a tight seal. Reach in there (it’s just water, don’t worry about it) and feel the flapper. If it feels slimy or looks cracked, it’s time for a replacement.
- 4. Before you run to the hardware store, check the chain that connects the flush handle to the flapper. If the chain is too long, it can get caught underneath the flapper, preventing a seal. If it’s too tight, it might be pulling the flapper up constantly. You want just a little bit of slack—enough so the flapper drops down and sits flat every single time.
- 5. If the flapper and the float both look okay, the problem might be the fill valve itself. This is the tall assembly on the side of the tank that brings the water in. If it’s old and crusty, it might just be giving up the ghost. These are pretty cheap and easy to swap out, but you’ll want to turn off the water supply valve (the little knob on the wall behind the toilet) before you start unscrewing anything.
- 6. Once you’ve identified the part that’s acting up, head to your local hardware store—and yes, I mean actually go inside and look around, even if you only need one thing. Grab the exact replacement part, bring your old one with you if you can to match it up, and follow the simple installation instructions. Most of these parts are designed to just twist or clip right into place.
- 7. After you’ve swapped the part or adjusted the settings, turn your water supply back on and give it a few test flushes. Watch the tank fill up and make sure the water stops exactly where it’s supposed to. If the hissing is gone and the water stays put, you did it! Take a second to appreciate that you just saved yourself a plumber’s visit and a chunk of change.
Finding the Culprit Among Common Toilet Tank Leak Causes
Before you go out and buy a whole new tank assembly, you’ve got to play detective for a minute. Most of the time, the issue is one of three common culprits. First, check that rubber flapper sitting at the bottom. If it looks warped, slimy, or feels brittle, it’s likely not sealing correctly. When that happens, you’ll usually just need to replace the toilet flapper to get things back to normal. It’s a cheap part and a five-minute job.
Next, take a look at the water level itself. If the water is constantly spilling into the overflow tube, you’re probably dealing with a toilet fill valve adjustment issue. It’s less about something being “broken” and more about the float being set a little too high. Finally, give the handle a wiggle. If the chain is too tight or tangled in a clogged toilet tank mechanism, it can keep the valve propped open just enough to let water escape. Once you spot which one is acting up, you’re already halfway to the finish line.
A Simple Plan to Replace Toilet Flapper and Parts
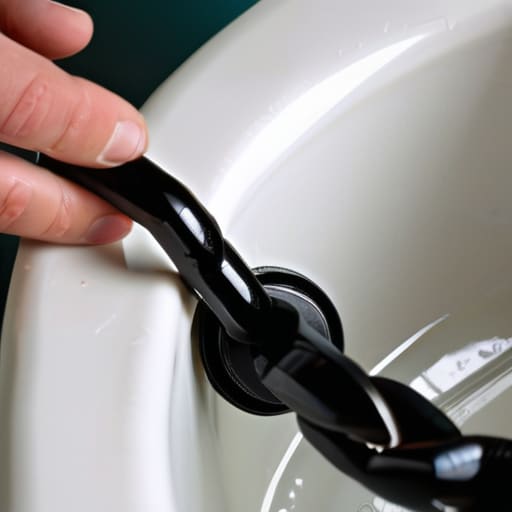
Once you’ve identified the problem, it’s time to roll up your sleeves. If the rubber is looking cracked or feels slimy, you’ll need to replace the toilet flapper to get things back to normal. Before you dive in, I always recommend turning off the water supply valve behind the toilet and flushing once to empty the tank. It makes the job a whole lot cleaner and prevents a mini-flood in your bathroom. Grab a new flapper that matches your model, and when you drop it in, make sure the chain has just a little bit of slack. If it’s too tight, it’ll pull the flapper up prematurely; too loose, and it won’t seal properly.
While you’re in there, don’t ignore the other moving parts. Sometimes the issue isn’t the rubber, but a faulty toilet fill valve adjustment that’s causing the water to constantly overflow into the tube. If your water level is sitting way too high, take a second to tweak that adjustment screw. It’s a quick win that can save you a ton on your water bill.
A Few Pro Tips to Save You Time (and a Trip to the Hardware Store)
- Don’t just buy any flapper; take the old one with you to the store. There are a dozen different sizes and materials out there, and nothing’s more frustrating than getting home only to realize the new one doesn’t fit your specific model.
- Check your water level before you start tearing things apart. If the water in the tank is too high, it’ll constantly spill into the overflow tube, making you think you have a broken part when you actually just need to adjust the float.
- Keep your hands out of the “gunk zone” if you can. If you see a lot of mineral buildup or slime around the seal, give it a quick scrub with an old toothbrush before you install new parts—it’ll help everything seat properly and prevent leaks.
- Avoid the “over-tighten” trap. When you’re putting things back together, especially the tank-to-bowl bolts, tighten them until they’re snug, but don’t go overboard. If you crank them too hard, you’ll crack the porcelain, and then you’re looking at a much bigger, much more expensive problem.
- Test your work immediately. Once you’ve finished the fix, flush the toilet a few times and then just sit and watch it for a minute. You want to make sure that water level stabilizes and that the silence actually stays silent.
The Quick Fix Cheat Sheet
Most running toilets aren’t broken beyond repair; they’re usually just suffering from a worn-out flapper or a misaligned chain that you can swap out in ten minutes.
Always grab a few extra replacement parts—like a new flapper or a different length chain—before you start, so you don’t end up stuck halfway through the job.
Don’t let a little water noise stress you out; once you identify the culprit, you’ll realize it’s a simple fix that saves you money and a headache.
## The Big Picture
“Look, a running toilet isn’t a plumbing emergency; it’s just a tiny machine that’s lost its rhythm. Don’t let the sound drive you crazy—once you pop that tank lid off and see what’s actually going on, you’ll realize it’s way more figure-out-able than it sounds.”
Nathan Cole
You've Got This
At the end of the day, fixing a running toilet really comes down to a little bit of investigation and a few basic parts. Whether it was a worn-out flapper that needed swapping, a misaligned float arm, or a simple adjustment to the fill valve, you’ve successfully tackled one of those annoying little household headaches that tends to drive people crazy. Just remember to double-check that everything is seated correctly and that the water level in the tank is sitting right where it should be before you call it a day. Taking those extra two minutes to ensure the seal is tight can save you from having to revisit the same problem next week.
I know that staring at the guts of a toilet tank can feel a bit intimidating if you aren’t used to it, but I promise you—you did the hard part just by getting your hands dirty. There is a specific kind of satisfaction that comes from hearing that water finally stop running and knowing you were the one who fixed it without calling an expensive plumber. Don’t let the small stuff intimidate you. Every time you knock out a repair like this, you’re building the confidence to take on the next project, no matter how big it might seem. Keep at it, and I’ll see you in the next guide.
Frequently Asked Questions
I replaced the flapper but it’s still running—what else could it be?
Man, I’ve been there. You swap the flapper, feeling all proud, and then—trick, trick, trick—it starts running again. Don’t toss the whole toilet out the window just yet. If the flapper didn’t do it, check your fill valve; if it’s faulty, it won’t shut off properly. Also, take a look at the water level. If it’s too high, it’s likely spilling into the overflow tube. It’s usually just one more tiny tweak.
Do I really need to buy a whole new fill valve kit, or can I just fix the one I have?
Honestly, you probably don’t need to drop money on a whole new kit just yet. If it’s just a little bit of debris or a worn-out seal, a quick cleaning or a cheap replacement part might do the trick. But, if that fill valve is old, crusty, or won’t stop hissing no matter what you do, just bite the bullet and grab a new one. It’s a cheap fix that saves a massive headache later.
How do I know if the leak is coming from the tank or the base of the toilet?
Here’s the trick: grab a piece of dry paper towel and wipe around the bottom of the toilet where it meets the floor. If the towel comes away soaking wet, you’re likely looking at a leak from the base—usually a bad wax ring. But, if the floor stays dry and the water is only inside the tank or trickling down the back, it’s a tank issue. Check the tank first; it’s much easier to fix.
