How to set up parental controls guide.

How to Set Up Parental Controls for Your Kids

Ever feel like you need a PhD in computer science just to keep your kids from stumbling onto the weird side of the internet? I’ve spent years fixing leaky faucets and troubleshooting slow laptops, but nothing quite hit me like the sheer panic of seeing a “restricted” pop-up on my kid’s tablet and realizing I had no idea how to actually manage it. Most tech companies try to make learning how to set up parental controls feel like a high-stakes security mission, pushing expensive subscriptions or burying the settings under ten layers of confusing menus. It’s frustrating, it’s unnecessary, and frankly, it’s a total waste of your time.

Here’s my promise to you: we aren’t going to overcomplicate this. I’m going to show you how to cut through the digital noise and get your devices under control using the tools you already have. We’ll break this down into a few simple, actionable steps that don’t require a tech degree or a massive budget. By the time we’re done, you’ll have a digital safety net in place so you can stop hovering over their shoulders and actually enjoy your evening.

Table of Contents

Simple Digital Parenting Tips for a Calmer Home

Simple Digital Parenting Tips for a Calmer Home

Look, I’ll be the first to admit that I’m not a tech genius, but I’ve learned that you don’t need to be a programmer to keep things running smoothly at home. One of my favorite digital parenting tips is to stop thinking about it as “policing” and start thinking about it as setting boundaries, much like telling a kid they can’t have dessert before dinner. Instead of hovering over their shoulder, try setting app limits on their tablets or phones. It’s a lifesaver because it automates the “no more screen time” argument, letting the device be the bad guy while you stay the cool parent.

Another thing that really helped me lower the stress levels in my house was focusing on internet safety for children by being proactive rather than reactive. It’s not just about blocking sites; it’s about creating a predictable environment. I like to sit down with my family and talk about why certain rules exist. When they understand that we’re just trying to keep the “digital junk” out of their way, they tend to respect the boundaries a lot more. It makes the whole house feel a lot more balanced.

Restricting Inappropriate Content Without the Headache

Restricting Inappropriate Content Without the Headache.

Look, I get it. The idea of scrubbing the entire internet to make sure your kid doesn’t stumble onto something they aren’t ready for feels like trying to plug a dam with your thumb. It’s overwhelming. But you don’t have to be a cybersecurity expert to handle restricting inappropriate content. Instead of trying to police every single click, I like to focus on the “big gates”—the search engines and the app stores. Most major platforms, like Google or YouTube, have built-in “SafeSearch” or “Restricted Mode” settings that do a decent job of filtering out the heavy stuff automatically. It’s not a perfect shield, but it’s a solid first line of defense.

Once you’ve locked down the search engines, the next step is managing device usage through the specific apps they use most. Whether it’s an iPad or an Android tablet, there are tools designed to let you whitelist certain sites while blocking the rest. I’ve found that instead of playing whack-a-mole with every weird website that pops up, it’s much easier to set up a “walled garden” where they can only access the stuff you’ve already vetted. It saves you a massive headache and keeps the digital environment much cleaner.

5 Quick Wins to Get Your Controls Running Smoothly

  • Start with the built-in stuff first. Before you go out and buy some fancy, expensive subscription service, check the settings already baked into your devices. Whether it’s Apple’s Screen Time or Google’s Family Link, these free tools are usually more than enough to handle the basics like time limits and app approvals.
  • Use the “Rule of One” for passwords. Don’t make your kids guess your master password, but don’t use “Password123” either. Set up a unique, strong password for the parental control hub that they can’t easily stumble upon, and maybe even keep a physical copy in a secure spot in your house—just like you would with a spare key.
  • Set up “Tech-Free Zones” rather than just tech-free times. It’s much easier to manage if you decide the dining table and the bedrooms are off-limits for screens entirely. When the rules are tied to a physical space, it feels less like you’re constantly nagging and more like it’s just “how the house works.”
  • Don’t forget the router. Most modern Wi-Fi routers have their own apps that let you pause the internet for specific devices with a single tap. If it’s bedtime and you see someone’s still scrolling in the dark, you can just kill the connection to their tablet right from your phone without even getting out of bed.
  • Talk through the “Why” before you hit “Apply.” I know, I know—it feels like more work—but if you explain that these settings are there to help them sleep better or avoid weird stuff, they’re way less likely to treat the controls like a challenge to be hacked. It’s about building trust, not just building a digital fence.

The Bottom Line: Making Digital Safety Stick

Don’t try to do everything at once; pick one device or one app to secure first so you don’t get overwhelmed and give up.

Remember that tech is just a tool—the real magic happens when you combine these settings with an honest, open conversation with your kids.

Check in on your settings every few months, because as kids grow and apps update, your digital “safety net” needs a little tune-up too.

## My Take on Digital Boundaries

“Look, I’m not saying we need to turn our kids into digital hermits, but setting up these controls isn’t about being the ‘internet police’—it’s just about building a fence around the yard so they can play safely without us constantly hovering over their shoulders.”

Nathan Cole

You've Got This

Parent managing digital safety: You've Got This.

At the end of the day, setting up these controls isn’t about being a digital warden; it’s about building a safety net. We’ve covered how to filter out the junk, how to manage screen time so your kids aren’t glued to a tablet all night, and how to keep the conversation open. It might feel like a lot to juggle between the different apps and device settings, but once you’ve got the initial groundwork laid, the system mostly runs itself. You’ve done the hard part by taking the first step to secure their digital world, and now you can stop worrying about every single click they make.

I know it can feel overwhelming when you’re staring at a dozen different menus and password prompts, but remember: you don’t have to be a tech genius to do this right. Just take it one device at a time. Think of it like fixing a leaky sink or assembling a new bookshelf—it’s just a series of small, manageable tasks. The goal isn’t perfection; it’s about creating a space where your kids can explore the internet safely while you get a little more peace of mind. You’re doing a great job, and honestly, you’ve totally got this.

Frequently Asked Questions

Will these settings slow down my internet or make my devices run like junk?

I get it—the last thing you want is to spend an hour setting up safety nets only to have your kid complaining that their tablet is running like it’s stuck in molasses. The short answer? No. Most of these settings are just digital “traffic signs,” not heavy weights. They don’t use up your processing power or eat your bandwidth. As long as you aren’t running some massive, third-party bloatware, your devices will run just fine.

How do I make sure my kids don't just find a workaround or a "secret" way around the blocks?

Look, I’ll be the first to admit it: kids are way more tech-savvy than we are. If you lock one door, they’ll find a window. To stay ahead, don’t just rely on software; talk to them about why the rules exist. Pair your digital blocks with a “no-screens-in-bedrooms” rule and use a router with built-in controls. It’s about creating layers of defense rather than one single, hackable wall.

Is there a way to set these up once and then just walk away, or am I going to be constantly tweaking things?

I get it—the last thing you want is another chore on your to-do list. The short answer? You can definitely “set it and forget it” for the basics, like blocking certain sites or setting screen time limits. Once those guardrails are in place, they just work in the background. You’ll probably need to tweak things as your kids grow, but for now, you can set the foundation and actually get some peace.


Guide on how to make soap.

How to Make Soap at Home: a Beginner’s Guide

I used to think that learning how to make soap meant I’d need a chemistry degree and a lab coat just to avoid a kitchen fire. I’d look at those fancy artisan bars at the farmer’s market—the ones that cost twelve bucks a pop—and assume there was some secret, complicated ritual involved that I just wasn’t smart enough to grasp. But after a few messy attempts that ended with more spilled oils than actual bars, I realized the truth: most of those high-end brands are just overcomplicating a process that is actually pretty straightforward once you strip away the fluff.

In this guide, I’m going to show you exactly how to make soap without turning your kitchen into a disaster zone. I’m not going to bore you with heavy scientific jargon or tell you that you need a thousand-dollar setup to get started. Instead, I’ll walk you through the basic gear, the safety essentials, and the simple steps to get your first batch cured and ready for use. We’re going to keep this practical and hands-on, so by the time we’re done, you’ll be making your own custom bars that actually work and save you a ton of money.

Table of Contents

Guide Overview

Total Time: 24-48 hours (includes curing time)
Estimated Cost: $40-70
Difficulty: Beginner

Tools & Supplies

  • Digital scale for precise measurements
  • Immersion blender for emulsification
  • Stainless steel pot for melting oils
  • Silicone molds for shaping soap
  • Infrared thermometer for temperature monitoring
  • Coconut oil 500g
  • Olive oil 500g
  • Sodium hydroxide (Lye) 140g
  • Distilled water 330g
  • Essential oils 30ml

Step-by-Step Instructions

  • 1. First things first, you’ve got to gear up for safety. We’re working with lye here, and while it’s the magic ingredient that turns oil into soap, it can be pretty nasty if it touches your skin or eyes. Grab some safety goggles, long sleeves, and rubber gloves. I always like to set up my workspace in a well-ventilated area—maybe near a window or under the vent hood—because those lye fumes can be a real headache if you’re breathing them in directly.
  • 2. Next, let’s get our liquids and lye ready. Measure out your distilled water in one container and your lye in another. Here is the golden rule: always pour the lye into the water, never the other way around. If you do it backwards, it can cause a sudden, violent reaction that’ll make you jump. Stir the mixture gently until the lye is completely dissolved, then set it aside in a safe spot to cool down. It’s going to get hot, so don’t go rushing into the next step just yet.
  • 3. While the lye water is chilling, it’s time to prep your oils. Weigh out your fats—whether you’re using olive oil, coconut oil, or a blend—and melt them down in a large stainless steel pot. You want your oils and your lye water to be at roughly the same temperature when they meet. If one is boiling hot and the other is ice cold, the soap might “seize” up, and nobody wants a lumpy, unusable mess on their hands.
  • 4. Now comes the part that feels a bit like magic: the emulsion. Slowly pour your cooled lye water into your pot of melted oils. Grab a stick blender (also called an immersion blender) and give it a few good pulses. You aren’t trying to blend it like a smoothie; you’re looking for “trace.” This is when the mixture thickens up to the consistency of pudding. Once you can drizzle a bit of the mixture over itself and it leaves a visible trail on the surface, you’ve hit the sweet spot.
  • 5. This is where you get to be creative. If you want to add scents or colors, now is the time to mix them in. I usually go for a few drops of essential oils, but you can use skin-safe mica powders if you want some cool swirls. Stir these in by hand with a spatula to make sure everything is evenly distributed before the mixture gets too thick to move.
  • 6. Once everything is mixed, pour your liquid soap into your mold. You can buy professional silicone molds, but honestly, an old plastic Tupperware container works just fine if you clean it well. Smooth out the top with a spatula, cover the mold with a piece of cardboard and a towel to keep the heat in, and let it sit undisturbed for about 24 to 48 hours.
  • 7. Finally, it’s time for the “unmolding” and the long wait. Once the soap is firm, pop it out of the mold and slice it into bars using a sharp knife. But don’t go using it in the shower just yet! You need to let those bars cure for 4 to 6 weeks in a cool, dry place. This allows the excess water to evaporate, making your soap harder, longer-lasting, and much gentler on your skin. Patience is the hardest part, but I promise it’s worth it.

Gathering Your Soap Making Equipment List Without Breaking the Bank

Look, I’ve been to plenty of specialty craft stores where a single silicone mold costs more than my weekly grocery run, and I’m telling you right now: don’t fall for it. You don’t need a professional laboratory to get started with cold process soap making methods. Honestly, most of what you need is already sitting in your kitchen cabinets. A stainless steel pot, a sturdy spatula, and a digital scale are your best friends here. Just make sure you designate a specific set of tools for soap only—once you start working with lye, you don’t want those tools drifting back into your pasta sauce rotation.

When you start building your soap making equipment list, focus on utility over aesthetics. Instead of buying expensive custom molds, grab some lightweight silicone baking pans from a discount shop. They work like a charm and are way easier to clean. If you’re looking to level up the scent, grab a few high-quality essential oils for natural soap rather than spending a fortune on fancy packaging. As long as you have the basics and stay mindful of your safety gear, you’re ready to roll without draining your savings account.

Mastering Cold Process Soap Making Methods With Simple Steps

Mastering Cold Process Soap Making Methods With Simple Steps

Now, let’s get into the actual heavy lifting. When you’re diving into cold process soap making methods, it can feel a bit intimidating at first—kind of like looking at a car engine for the first time. The secret is not to rush. You’re essentially managing a chemical reaction between your lye solution and your oils. Before you even touch a single ingredient, I can’t stress enough how important lye safety precautions are. Wear your goggles, keep your gloves on, and always add the lye to the water, never the other way around. It’s a small detail, but it makes a world of difference in keeping the project stress-free.

Once you’ve got your safety gear on, focus on your ingredient quality. I love using a mix of natural oils for soap base, like olive or coconut oil, because they are predictable and easy to work with. If you want that killer scent without the synthetic junk, grab some high-quality essential oils for natural soap. Once your mixture reaches “trace”—that’s when it looks like thin pudding—pour it into your mold and let it do its thing. Just remember, the real work happens after the pour; the soap curing process explained is really just a lesson in patience while your bars harden up.

5 Pro-Tips to Keep Your First Batch from Turning Into a Disaster

5 Pro-Tips to Keep Your First Batch from Turning Into a Disaster
  • Safety isn’t just a suggestion here—it’s the whole game. Lye is no joke and can cause serious burns, so please, for the love of everything, wear your safety goggles and gloves. I learned that the hard way during my first attempt, and trust me, you don’t want to repeat my mistake.
  • Always add your lye to your water, never the other way around. It sounds like a small detail, but if you pour water into lye, it can cause a sudden, violent reaction that splashes everywhere. Think of it like mixing a heavy powder into a liquid; you want to be controlled and steady.
  • Keep a “safety station” ready before you even touch your ingredients. Have a bottle of vinegar nearby to neutralize spills on your counter, and make sure you have access to running water immediately. Being prepared takes the stress out of the process so you can actually enjoy the craft.
  • Don’t rush the “trace” stage. You’ll know you’re ready to pour when the mixture reaches a consistency similar to thin pudding. If you pour too early, your design will look like a muddy mess; if you wait too long, it might get too thick to work with. Just take your time and watch the texture.
  • Patience is your best friend during the curing phase. I know, I know—you want to use that soap immediately, but if you cut it too soon, it’ll be mushy and won’t last long in the shower. Give your bars at least four to six weeks to cure properly. It makes a massive difference in how hard and long-lasting the bar is.

Quick Wins to Keep You on Track

Don’t sweat the fancy gear—you can make incredible soap with basic kitchen tools and a few smart, budget-friendly substitutions.

Patience is your best friend; let the science happen in its own time rather than rushing the curing process.

Safety isn’t optional, so treat your lye with respect, wear your gear, and you’ll have a smooth, stress-free experience.

## Why I Bother With the Mess

“Look, soap making can feel like you’re trying to mix a science fair project in your kitchen, but there’s something incredibly satisfying about trading those overpriced, chemical-filled bottles for a bar you made with your own two hands. It’s not about being a chemist; it’s just about taking control of what goes on your skin and realizing you don’t need a massive budget to make something great.”

Nathan Cole

You’ve Got This: Soap Making Simplified

You’ve Got This: Soap Making Simplified guide.

Look, I know that staring at a pile of lye, oils, and safety gear can feel a little intimidating at first. But we’ve walked through it all—from gathering your gear without draining your wallet to mastering that tricky cold process method. The most important thing to remember is that soap making is really just a series of small, manageable tasks. As long as you respect the chemistry, keep your workspace clean, and follow your measurements to the letter, you are going to end up with something much better than anything you’d find on a supermarket shelf. You’ve done the hard part by learning the fundamentals, and now it’s just about trusting your process and letting those bars cure.

Honestly, there is nothing quite like the feeling of unwrapping a batch of soap you made with your own two hands. It’s a little bit of magic, a little bit of science, and a whole lot of satisfaction. Don’t get discouraged if your first batch isn’t a masterpiece; even I had a few “oops” moments when I was starting out in my kitchen. The beauty of DIY is that every mistake is just a free lesson for the next time. So, grab your goggles, get those oils measured, and start creating. You might just find that you’re more of a maker than you ever realized.

Frequently Asked Questions

Do I really need to use lye, or is there a way to make soap without those harsh chemicals?

I get it—the word “lye” sounds intimidating, like something you’d use to strip paint off a deck. But here’s the deal: lye is actually a required ingredient for traditional soap making. It reacts with oils to create the soap itself, and once that process is done, the lye is gone. If you want to skip the chemicals entirely, your best bet is “melt and pour” soap, where you buy a pre-made base and just add your own scents and colors.

How long do I actually have to wait before I can use the soap I just made?

I know, I know—you’ve done the hard work, the house smells amazing, and you want to dive right in. But here’s the kicker: patience is your most important tool right now. Even if the bars feel hard, you really need to let them cure for four to six weeks. This lets the water evaporate and makes the bar harder and much gentler on your skin. Trust me, it’s worth the wait.

What's the best way to clean up all this oily, lye-heavy mess without ruining my kitchen tools?

First things first: don’t panic, but don’t just grab a sponge and start scrubbing either. Lye is no joke. Before you touch anything, make sure all the lye is neutralized—I usually splash a little vinegar on the surfaces to kill the slipperiness. Once that’s done, soak your tools in warm, soapy water immediately. If you’ve got stainless steel, you’re golden, but keep the silicone molds away from anything that might stain.

Easy simple sheet pan dinners for cleanup.

Simple Sheet-pan Dinners for Effortless Cleanup

Look, I get it. By the time Tuesday rolls around, the last thing anyone wants to do is stand over a hot stove for an hour or face a mountain of crusty pots and pans in the sink. I’ve been there—staring into a half-empty fridge after a long day, wondering if a bowl of cereal counts as a real meal. That’s exactly why I’m such a huge advocate for simple sheet pan dinners. It’s the ultimate “work smarter, not harder” hack for your kitchen. You just toss your ingredients on a tray, slide it into the oven, and let the heat do the heavy lifting while you actually relax for a minute.

In this guide, I’m breaking down five of my absolute favorite go-to recipes that prove you don’t need a culinary degree to eat like royalty. I’m talking about meals that are high on flavor but low on effort, using basic ingredients you can probably find at your local grocery store right now. Whether you’re a total beginner or just a busy person looking to reclaim your evening, these five ideas will show you how to master the art of the one-pan wonder without any of the usual kitchen drama.

Table of Contents

Sausage, Peppers, and Onions

Sheet pan Sausage, Peppers, and Onions.

This is my absolute go-to when I realize I haven’t been to the grocery store in four days and my fridge is looking a little sad. You just grab a pack of good Italian sausages, some bell peppers, and an onion, chop them up roughly, and toss them on the tray with a heavy hand of olive oil and dried oregano. The best part is that the juices from the sausage flavor everything else on the pan, so you don’t even need a fancy sauce to make it taste professional.

Lemon Garlic Chicken and Asparagus

Lemon Garlic Chicken and Asparagus dish.

If you’re feeling like you need a “real” meal that isn’t just heavy comfort food, this one is a lifesaver. I usually grab some chicken thighs—bone-in, skin-on is the way to go if you want that extra crispy skin—and lay them out alongside a bunch of trimmed asparagus. I just smash a few cloves of garlic over the whole thing and squeeze half a lemon over the top before it hits the heat.

Honey Mustard Salmon and Broccoli

Sheet pan Honey Mustard Salmon and Broccoli.

I used to think salmon was intimidating to cook, but honestly, once you realize you can just throw it on a sheet pan, it’s a total game changer. I like to whisk together a quick glaze of honey, Dijon mustard, and a splash of soy sauce, then brush it over the fillets along with some broccoli florets. The broccoli gets these amazing charred edges that soak up all that sweet and tangy mustard goodness.

Beef and Potato Hash

This one is basically a warm hug on a plate, and it’s perfect for those nights when you just want something hearty. I take some thinly sliced steak or even just some ground beef, toss it with cubed potatoes and whatever root veggies you have lying around, and season it heavily with salt, pepper, and maybe some smoked paprika. The key is to cut the potatoes small so they cook through completely without the meat getting overdone.

Mediterranean Shrimp and Veggie Medley

When the weather gets a little warmer and I don’t want a heavy meal, I lean hard into this Mediterranean-style setup. You just grab some peeled shrimp, cherry tomatoes, zucchini slices, and some kalamata olives, then toss them in olive oil and some dried thyme. The tomatoes basically burst in the oven, creating their own little sauce that coats the shrimp perfectly.

The Bottom Line on Sheet Pan Success

Don’t overthink the ingredients; as long as you have a protein, a veggie, and a decent seasoning, you’ve got a win on your hands.

Prep is your best friend—chopping everything into similar sizes ensures it all cooks evenly so you aren’t biting into a raw carrot next to a burnt chicken wing.

Invest in a good quality parchment paper or a silicone mat to make cleanup a breeze, because the best part of a one-pan meal is not having a mountain of dishes to scrub afterward.

## My Golden Rule for the Kitchen

“At the end of a long day, the last thing I want to do is play Tetris with a mountain of pots and pans; a good sheet pan dinner is about getting real food on the table with as little cleanup drama as possible.”

Nathan Cole

Getting Started in Your Own Kitchen

Look, the beauty of these sheet pan meals isn’t just that they taste great, but that they actually work for a real life. We’ve covered everything from the classic roasted chicken and veggies to those quick, spicy sausage bakes that save me on my busiest nights. The main thing to remember is that you don’t need a culinary degree or a kitchen full of fancy gadgets to pull this off. Just pick your protein, grab whatever vegetables are looking good in the fridge, toss them in some olive oil and seasoning, and let the oven do the heavy lifting. Once you get the hang of timing your ingredients so everything finishes at the same time, you’ll realize that dinner doesn’t have to be a chore.

At the end of the day, I want you to realize that cooking shouldn’t feel like another item on a stressful to-do list. It’s just about making something decent for yourself without the mountain of dishes or the hour-long cleanup. If you burn a batch or the veggies come out a little too soft, don’t sweat it. That’s just part of the process, and honestly, it usually still tastes fine with a bit of extra salt. You’ve got this. Grab a pan, get cooking, and enjoy the win of a homemade meal that didn’t cost you your entire evening.

Frequently Asked Questions

How do I make sure the meat is cooked through without turning my veggies into mush?

That’s the million-dollar question, right? There’s nothing worse than biting into a raw chicken breast only to find your broccoli has turned into gray mush. My trick? Timing and size. I always chop my “hard” veggies (like carrots or potatoes) into smaller pieces and my “soft” ones (like zucchini or peppers) into bigger chunks. If you’re using something really dense, like cauliflower, toss it in five minutes before the rest. It’s all about the prep.

Can I prep these ingredients ahead of time, or do I need to chop everything right before cooking?

You can absolutely prep ahead of time. In fact, if you’re like me and usually running behind after work, prepping is a lifesaver. Chop your veggies and proteins a day early, toss them into a sealed container or a heavy-duty Ziploc bag, and keep them in the fridge. When you’re ready to eat, just dump them onto the pan, season, and slide them in. It turns “cooking” into just “assembling.”

What’s the best way to clean the pan afterward so I'm not scrubbing for an hour?

Look, I get it. The whole point of a sheet pan dinner is to save time, not spend your entire evening hunched over the sink scrubbing burnt bits. Here’s my trick: while the pan is still warm (not scorching hot!), pour in some hot water and a generous squirt of dish soap. Let it sit for ten minutes. Usually, the residue just lifts right off. If it’s really stubborn, grab some coarse salt to scrub away the stuck-on bits.

Tips on how to get an internship.

How to Land an Internship That Actually Helps Your Career

I remember sitting in my cramped apartment back in my early twenties, staring at a laptop screen that felt more like a brick than a tool. I was scrolling through endless, soul-crushing job boards, feeling like every “entry-level” posting required five years of experience and a blood sacrifice. The internet is full of these polished, high-society gurus telling you that you need a fancy Ivy League connection or a $2,000 “career coach” to succeed. Honestly? That’s a load of junk. Figuring out how to get an internship shouldn’t feel like trying to rebuild a car engine without a manual; it’s just a series of small, practical moves that most people overcomplicate on purpose.

I’m not here to give you a lecture on corporate etiquette or academic jargon. Instead, I’m going to break this down into a straightforward toolkit you can actually use. We’re going to look at the real-world stuff—like fixing up a resume that doesn’t sound like a robot wrote it and how to actually talk to people without feeling like an impostor. My goal is to show you that this process is much more figure-out-able than it looks once you stop listening to the hype and start taking action.

Table of Contents

Mastering the Internship Application Process Step by Step

Mastering the Internship Application Process Step by Step

Think of the internship application process like tackling a home renovation project. If you try to do everything at once—the plumbing, the electrical, and the drywall—you’re going to burn out before you even start. You’ve got to take it one room at a time. Start by getting your toolkit ready, which in this case means polishing up your paperwork. I always tell people to focus on resume tips for students that highlight transferable skills rather than just past job titles. Even if you’ve only worked at a coffee shop, you’ve managed inventory and handled high-pressure situations. That counts.

Once your documents are solid, it’s time to actually start looking. Don’t just blindly spray and pray your resume into every job board you find. Instead, spend some time scouting the best websites for internship searches specifically tailored to your industry. It’s better to send five really thoughtful, targeted applications than fifty generic ones that get lost in the digital void. It might feel like a grind, but once you have a system, it’s totally figure-out-able.

The Best Websites for Internship Searches and Finding Gems

The Best Websites for Internship Searches and Finding Gems.

Now, let’s talk about where to actually look. I used to think you just went to one big job board and prayed for the best, but that’s a recipe for burnout. If you want to find the good stuff, you need to diversify your search. LinkedIn is the heavyweight champion here, especially for networking for early career professionals, but don’t just scroll aimlessly. Use their specific filters to narrow down by industry so you aren’t wasting time on roles that don’t fit your vibe. Handshake is another absolute gem; it’s built specifically for students, meaning the companies posting there are actually looking for people who are still learning, not just seasoned pros.

Beyond the big names, I always suggest checking out niche boards or even the “Careers” page of companies you actually admire. Sometimes the best websites for internship searches aren’t the ones everyone is talking about on TikTok. If you find a small startup or a local firm that does cool work, go straight to their site. It’s a bit more manual work, but it often leads to much less competition and a higher chance of actually getting your foot in the door.

5 Pro-Tips to Get You Noticed Without Losing Your Mind

  • Treat your resume like a tool kit. Don’t just list every job you’ve ever had since high school; instead, pick out the specific “tools”—the skills and software—that actually match what the job description is asking for. If they want someone who knows Excel, make sure Excel is front and center.
  • Don’t just wait for the “Apply” button to work. If you find a company you really like, try to find someone who works there on LinkedIn and send a quick, polite note. It’s like knocking on a door instead of just leaving a flyer in the mailbox; it shows you actually care about getting in.
  • Get your “elevator pitch” ready, but keep it real. You don’t need to sound like a corporate robot. Just be able to tell someone in thirty seconds who you are, what you’re studying, and why you’re interested in their specific field. Think of it as a quick handshake in words.
  • Clean up your digital footprint. I know, it sounds cliché, but if an employer Googles you and the first thing they see is a wild party photo from three years ago, it’s going to be a tough sell. Do a quick sweep of your social media to make sure it looks like someone who’s ready to work.
  • Practice the “uncomfortable” stuff. Mock interviews might feel a little cheesy, but sitting down with a friend and practicing your answers to common questions makes the real thing way less intimidating. It’s like testing a new power tool before you start the actual build—you want to make sure everything runs smooth before the pressure is on.

The Bottom Line: Keep It Simple

Don’t let the “perfect” application stop you from sending one; a solid, honest resume sent out today is better than a flawless one sitting in your drafts.

Treat your search like a project—break it down into small, daily tasks like updating one skill or reaching out to one person so you don’t burn out.

Remember that most of these roles are just looking for someone willing to learn and show up; if you can show you’re a problem-solver, you’re already halfway there.

## My Take on the Whole Process

“Landing an internship isn’t about having some secret master key or a perfect resume from day one; it’s just about showing up, doing the prep work, and realizing that even the biggest career moves are just a series of small, manageable tasks you can figure out as you go.”

Nathan Cole

You’ve Got This

Motivational job search reminder: You’ve Got This.

Look, I know the whole process can feel like trying to assemble a piece of flat-pack furniture without the instruction manual. It’s easy to get lost in the weeds, but if you stick to the basics we talked about—polishing that resume until it shines, hunting through those niche job boards, and actually putting yourself out there—you’re already ahead of most people. Remember, it isn’t about being the most perfect candidate on paper; it’s about showing up prepared, staying organized with your applications, and being willing to tinker with your approach until something clicks.

If you hit a wall or get a string of “no’s,” don’t let it stall your engine. I’ve learned from fixing old tools and troubleshooting tech that sometimes you have to fail a few times before you find the right fit. An internship is just one project in a much bigger career, and every rejection is just a bit of valuable feedback helping you calibrate for the next attempt. Take a breath, grab a coffee, and just focus on the next small step. You’ve got the tools, you’ve got the plan, and I promise you, this is all way more figure-out-able than it feels right now.

Frequently Asked Questions

What do I even say in a cold email if I don't have any prior experience in the field?

Look, I get it. Staring at a blank email draft when your resume feels empty is intimidating. But here’s the secret: they aren’t looking for a seasoned pro; they’re looking for someone who actually gives a damn. Don’t fake expertise you don’t have. Instead, focus on your curiosity and your “why.” Tell them exactly why their specific work caught your eye and how eager you are to roll up your sleeves and learn the ropes.

How do I balance a part-time job or schoolwork while trying to land a decent internship?

Look, I get it. Trying to juggle a shift at work, a mountain of homework, and an internship hunt feels like trying to fix a sink with a butter knife—it’s messy and frustrating. My advice? Stop trying to do everything at once. Pick one “power hour” a day specifically for applications. Treat it like a scheduled appointment. If you can manage a tight budget or a messy garage, you can manage a calendar. Small wins, every day.

Is it better to aim for a big-name company or a small local startup where I might actually get more hands-on work?

Honestly, it’s a bit of a trade-off, like choosing between a massive, polished factory and a small, messy workshop. Big names look great on a resume, but you might end up just filing papers. Small startups are chaotic, but you’ll likely be elbow-deep in real projects from day one. If you want to build your skills fast, go small. If you want the brand name, go big. Personally? I’d take the hands-on grit any day.

Guide on how to choose a laptop.

How to Choose the Right Laptop for Your Needs

I remember sitting in a brightly lit electronics store last year, staring at a wall of shiny machines and feeling like I needed a PhD just to understand the sticker on the box. The salesperson kept throwing around terms like “teraflops” and “refresh rates” like he was casting a magic spell, trying to upsell me on a machine that cost more than my first truck. It’s a total racket. Most people think figuring out how to choose a laptop requires a degree in computer science, but honestly, that’s just marketing noise designed to separate you from your hard-earned cash.

I’m not here to sell you on the flashiest, most expensive gadget on the shelf. My goal is to cut through the jargon and show you how to find a machine that actually works for your life—whether that’s for crushing spreadsheets, streaming movies, or just browsing the web without that annoying lag. I’m going to break this down into a few simple, practical steps so you can walk into that store (or click ‘buy’ online) with total confidence. Let’s get to work and find you something that actually lasts.

Table of Contents

Laptop Specifications Explained Without the Headache

Laptop Specifications Explained Without the Headache.

Look, I get it. You walk into a store or open a tab online, and suddenly you’re staring at a wall of acronyms like CPU, RAM, and SSD. It feels like you need a computer science degree just to buy a computer, but let’s strip away the fluff. When you’re looking at laptop specifications explained in plain English, it really comes down to how much “brain power” you need for your daily tasks.

Think of the processor as the engine and the RAM as the workbench. If you’re just browsing the web or writing papers, you don’t need a racing engine. But if you’re jumping between twenty different tabs and a video call, you’ll notice the difference in the processor vs ram for laptops debate. A faster engine helps you finish tasks quickly, but a bigger workbench lets you keep more tools out at once without everything slowing to a crawl.

I always tell people: don’t overpay for power you won’t actually use. If you’re just looking for the best laptop for students, focus on that balance of speed and portability rather than chasing the highest numbers on the box.

Processor vs Ram for Laptops What You Actually Need

Processor vs Ram for Laptops What You Actually Need

Think of your laptop like a kitchen workstation. The processor (the CPU) is the chef—it’s the brain doing all the actual chopping, sautéing, and heavy lifting. If you have a fast chef, tasks get done quickly. The RAM, on the other hand, is your counter space. You can have the world’s fastest chef, but if you only have a tiny cutting board to work on, everything is going to slow to a crawl because there’s nowhere to put the ingredients. When you’re looking at processor vs ram for laptops, you need a balance of both to keep things moving.

If you’re hunting for the best laptop for students, you don’t need a supercomputer, but you do need enough “counter space” to handle twenty Chrome tabs and a Zoom call at the same time. I usually tell people to aim for at least 8GB of RAM; anything less and you’ll feel that frustrating lag almost immediately. A solid mid-range processor paired with decent RAM will make your daily grind feel smooth, whereas skimping on one to save a few bucks usually leads to a headache down the road.

5 Real-World Tips for Picking the Right Machine

  • Think about your “daily driver” routine before you buy. Are you going to be lugging this thing to coffee shops and classes, or is it going to live mostly on your desk? If you’re always on the move, prioritize something lightweight with a battery that actually lasts; if it’s a desktop replacement, don’t sweat the weight and go for more power.
  • Don’t get blinded by the screen resolution. It’s easy to get sucked into the marketing hype about 4K and OLED, but for most of us just browsing, writing, or watching Netflix, a solid 1080p screen is plenty. Just make sure it’s bright enough that you aren’t squinting under your living room lights.
  • Check the port situation before you check out. There is nothing more frustrating than buying a sleek, thin laptop only to realize you need to carry three different dongles just to plug in a mouse or an external hard drive. If you use a lot of peripherals, make sure it has the USB or HDMI ports you actually need.
  • Test the keyboard and trackpad (if you can). I know, it sounds picky, but you’re going to be touching these every single day. If the keys feel mushy or the trackpad is jumpy, you’re going to hate using the laptop within a week. If you’re buying online, check some hands-on reviews to see if people complain about the “feel.”
  • Budget for the “hidden” costs. It’s tempting to spend every cent on the laptop itself, but remember you might need a decent carrying case, a mouse, or maybe even a laptop stand to save your neck. I always suggest leaving a little wiggle room in your budget so you aren’t stuck with a powerful machine and zero way to protect it.

The Bottom Line: Keep It Simple

Don’t get blinded by the fancy numbers; focus on what you’re actually going to do with the machine, whether that’s browsing the web or editing video.

Prioritize a solid amount of RAM and a decent processor first, because those are the parts that’ll keep your laptop from feeling like a brick in two years.

If you’re ever stuck between two models, go with the one that feels most comfortable to use—a great screen and a good keyboard matter more than you think.

The Golden Rule of Tech Shopping

Look, you don’t need to build a supercomputer just to check your email and stream movies. Don’t let the flashy marketing fool you into buying power you’ll never use; just find the machine that handles your actual daily grind without breaking your bank or your patience.

Nathan Cole

You’ve Got This

Choosing the right laptop: You’ve Got This.

At the end of the day, picking a laptop doesn’t require a computer science degree. We’ve walked through the heavy stuff—from figuring out if you need a beefy processor for video editing to making sure you have enough RAM so your browser tabs don’t turn into a slideshow. Just remember to match the specs to your actual daily life rather than chasing every shiny new feature on the market. If you’re mostly checking emails, writing reports, or streaming movies, you don’t need to spend a fortune on a high-end gaming rig. Focus on what you’ll actually be doing, stick to a realistic budget, and don’t let the technical jargon bully you into overspending.

I know that staring at a sea of spec sheets can feel a bit daunting, but I promise you’re more prepared than you think. Technology is just another tool, much like a good hammer or a reliable chef’s knife; it’s only useful if it fits your hand and does the job you need it to do. Don’t get paralyzed by the fear of making the “wrong” choice, because even a mid-range laptop is a massive upgrade if it helps you get your work done or connect with people. Take a breath, trust your gut, and go get that machine. You’ve done the homework, and you’re ready to hit the ground running.

Frequently Asked Questions

Should I spend extra money on a touchscreen or a 2-in-1 model, or is that just a gimmick?

Honestly, it depends on how you actually use your gear. If you’re just typing up emails or browsing the web, a touchscreen is usually a gimmick that just leaves smudge marks on your screen. But, if you’re an artist, a student who loves digital note-taking, or someone who watches a lot of movies in bed, a 2-in-1 is a total game-changer. Don’t pay the “cool tax” unless it actually fits your workflow.

How much storage do I actually need—will 256GB be enough, or am I going to run out of space in a month?

Look, I’ve been there—staring at a tiny 256GB drive and wondering if I’m about to buy a digital paperweight. If you’re just browsing the web, checking emails, and using Google Docs, 256GB is plenty. But if you’re planning to store high-res photos, a huge music library, or big video files, you’re going to hit that wall fast. My advice? Aim for 512GB if you can swing it; it’s much easier than upgrading later.

Is it worth buying a more expensive laptop now to make it last longer, or should I just get something cheap and upgrade later?

Look, I get the temptation to save a few bucks now, but here’s the truth from someone who’s tinkered with plenty of gear: most modern laptops aren’t like my old desktop where I could just swap out parts. Most of the time, the RAM and processor are soldered shut. If you buy a bottom-tier machine, you’re stuck with it. I’d rather spend a bit more upfront for something solid that won’t crawl to a halt in two years.

Essential first job tips for new employees.

What Nobody Tells You About Your First Real Job

I still remember my first real gig—I was nineteen, wearing a stiff, oversized button-down, and standing in a breakroom feeling like a complete fraud. My palms were sweating, my heart was racing, and I was convinced that every veteran employee was just waiting for me to trip over my own feet. Most of the advice you find online about first job tips feels like it was written by someone who has never actually stepped foot in a real workplace; they tell you to “leverage your synergies” or “optimize your workflow,” which is just fancy talk for stuff that doesn’t actually matter when you’re just trying to figure out where the coffee machine is.

Look, I’m not here to give you a lecture on corporate ladder climbing or high-level networking. I want to give you the stuff that actually works when you’re in the thick of it. I’m going to break down the real, boots-on-the-ground tactics you need to survive your first month and actually start feeling like you belong there. We’re going to skip the fluff and focus on the simple, figure-out-able steps that will help you build confidence and get the job done right from day one.

Table of Contents

Making a Good First Impression Without the Overwhelm

Making a Good First Impression Without the Overwhelm

Look, I get it. Walking into a new office or job site can feel like you’re trying to assemble a piece of IKEA furniture without the instructions. You want to look like you know exactly what you’re doing, even if you’re secretly panicking. But here’s the secret: nobody expects you to be an expert on day one. Making a good first impression isn’t about having all the answers; it’s about showing up with the right attitude.

The easiest way to nail this is to focus on the basics of professional workplace etiquette. This doesn’t mean you have to act like a robot. It just means being punctual, being attentive when someone is explaining a task, and—this is a big one—actually listening more than you talk. If you aren’t sure about something, just ask. People actually respect someone who asks a smart question rather than someone who nods along and then breaks something later. Think of it like following a blueprint; if you don’t understand the measurements, you don’t just start cutting the wood. You check the plan first.

Navigating Office Culture One Small Win at a Time

Once you’ve settled into your desk, you’ll realize that every office has its own unwritten rulebook. It’s not just about the formal handbook they handed you during your onboarding process success; it’s about the little things, like how people actually take lunch breaks or whether the Slack channel is for serious business or just memes. Don’t feel like you need to master everything by Tuesday. Instead, treat navigating office culture like learning a new toolset—just observe first. Watch how your coworkers interact and how they handle downtime. You don’t have to be the loudest person in the room to fit in; sometimes, just being the person who actually listens during meetings is the biggest win you can snag.

As you get more comfortable, focus on sharpening your workplace communication skills. This isn’t about using big, fancy words to sound important; it’s about being clear, being reliable, and knowing when to ask for help. If you aren’t sure if an email should be a quick chat or a formal message, just ask. Getting those small interactions right early on is the best way to build a solid foundation for your long-term career growth.

5 Small Moves to Keep Your Head Above Water

  • Write everything down. I know, I know—we live in a world of smartphones and cloud syncing, but when you’re new, your brain is going to be fried by lunch. Grab a physical notebook and keep it on your desk. Jotting down names, software shortcuts, or how the coffee machine works helps you avoid asking the same question three times, which is a huge confidence booster.
  • Ask “the why” behind the “what.” It’s easy to just follow instructions like a robot, but if you want to actually get good at your job, try to understand the bigger picture. When someone asks you to pull a specific report, ask if it’s for a weekly meeting or a long-term project. Knowing the purpose helps you catch mistakes before they happen.
  • Find your “work buddy.” You don’t need to be best friends with everyone in the office, but find that one person who seems approachable and knows where the metaphorical bodies are buried. Having someone you can ping to ask, “Hey, is this how we usually format these emails?” can save you a massive amount of stress.
  • Own your mistakes immediately. Look, you’re going to mess something up. It’s a guarantee. When it happens, don’t try to hide it or make excuses—that’s how you lose trust. Just go to your manager, say “I messed this up, here’s what I think went wrong, and here’s how I’m going to fix it,” and move on. People respect honesty way more than perfection.
  • Set a “shutdown ritual” for your brain. When you’re starting a new role, it’s tempting to keep thinking about work all night, but that’s a fast track to burnout. Pick a specific time to close your laptop and do something totally unrelated—hit the gym, cook a decent meal, or just tinker in the garage. You’ll be much sharper the next morning if you actually let yourself rest.

The Quick Cheat Sheet for Your First Week

Don’t try to be a hero on day one; just focus on showing up on time, listening more than you talk, and taking notes so you don’t have to ask the same question twice.

Pay attention to the unwritten rules—like how people actually take lunch breaks or how they use Slack—because figuring out the “vibe” is just as important as doing the actual work.

Treat every small task, even the boring ones, as a chance to build trust; once your team sees you can handle the little stuff, they’ll start handing you the big stuff.

## My Golden Rule for the First Week

“Look, you don’t need to walk in on day one acting like you’ve got it all figured out. Just show up, keep your eyes open, and focus on being the person who actually listens and asks the right questions—the rest of the job is just a series of small problems waiting to be solved.”

Nathan Cole

You’ve Got This

Encouraging workplace motivation: You’ve Got This.

Look, I know it feels like you’re trying to assemble a massive piece of furniture without the instruction manual, but you’ve already done the hard part by just showing up. We’ve talked about making those first impressions count, learning the unwritten rules of the office, and finding those small, early wins to build your confidence. Just remember: you don’t need to master the entire job by Friday. Focus on showing up reliably, asking the right questions, and taking things one task at a time. If you can handle a leaky sink or a finicky laptop, you can definitely handle a new desk and a fresh set of responsibilities.

At the end of the day, nobody expects you to be an expert on day one. Even the most seasoned pros I know had that same knot in their stomach when they started out. The secret isn’t being perfect; it’s being willing to learn and staying patient with yourself while you find your groove. So, take a deep breath, grab your notebook, and just dive in. You’re going to figure this out, and before you know it, you’ll be the one helping the next new hire find their way. You’ve got this!

Frequently Asked Questions

What do I do if I realize I've made a mistake on a task I was just assigned?

Look, I’ve been there—whether it was a wrong measurement on a job site or a typo in a report. The second you realize you’ve messed up, don’t freeze or try to hide it. Take a breath, figure out exactly where things went sideways, and go straight to your boss. Say something like, “Hey, I realized I made a mistake on that task, and here’s how I’m going to fix it.” Owning it immediately builds way more trust than covering it up.

How much should I actually be asking my manager for help versus trying to figure it out myself?

Look, I get it. You don’t want to look like you don’t know what you’re doing, but you also don’t want to waste three hours staring at a problem that a two-minute chat could fix. My rule of thumb? Try to solve it yourself first. Spend about 20 or 30 minutes digging through guides or troubleshooting. If you’re still spinning your wheels, go ask. Just show them what you’ve already tried—it proves you’re actually trying.

Is it weird to try and make friends with coworkers right away, or should I just keep to myself?

Look, I get it—it’s a balancing act. You don’t want to be the person hovering by the coffee machine all day, but you also don’t want to be a ghost. My advice? Don’t force a “best friend” vibe on day one. Just aim for “friendly coworker.” Start small: a quick hello in the breakroom or asking someone how their weekend was. Build those little connections slowly. It’s way easier to grow a friendship than to fix a weird vibe.

Effective DIY cleaning products for home use.

Diy Cleaning Products That Actually Work

I used to think that if a cleaner didn’t make my eyes water or smell like a chemical factory exploded in my kitchen, it probably wasn’t actually working. I spent way too much money on those neon-colored sprays in fancy bottles, convinced that the higher the price tag, the better the grime would disappear. But after years of scrubbing my own place and realizing most of those “specialized” formulas are just overpriced water and perfume, I got tired of the hustle. Honestly, the truth is that most diy cleaning products work better than the big-brand stuff, and they won’t leave your lungs feeling like they’ve been through a sandstorm.

I’m not here to sell you some complicated, five-page recipe involving rare essential oils that cost more than my monthly grocery bill. I’m going to show you how to use the basic stuff you probably already have sitting in your pantry to get a real professional clean. We’re going to stick to simple, effective methods that actually work on grease, soap scum, and whatever else life throws at you. My goal is to help you stop overpaying for chemicals and start feeling confident that you can tackle any mess with just a few household staples.

Table of Contents

Mastering Vinegar and Baking Soda Cleaning Without the Fuss

Mastering Vinegar and Baking Soda Cleaning Without the Fuss

Look, if you walk into any big-box store, they’ll try to sell you a dozen different bottles for every single surface in your house. Honestly? You don’t need them. The absolute heavy hitters for me are vinegar and baking soda. They are the backbone of cost-effective cleaning solutions that actually work. I always keep a big jug of white distilled vinegar in my pantry because it’s a powerhouse for cutting through grease and mineral deposits. When you mix it with baking soda, you get that satisfying fizz that helps lift grime out of grout or stuck-on food without you having to scrub your fingers raw.

The best part about sticking to these basics is that you’re using safe cleaning for pets and kids. I don’t love the idea of my dog licking a floor covered in harsh, synthetic chemicals, so I stick to the stuff I can actually pronounce. If you want to level up the experience, grab a bottle of lemon or tea tree essential oils. Adding a few drops to your spray bottle makes the whole house smell like a spa instead of a salad dressing factory. It’s simple, it’s cheap, and it just works.

Cost Effective Cleaning Solutions Using Pantry Staples

Cost Effective Cleaning Solutions Using Pantry Staples

If you’re looking to slash your grocery bill while keeping your place spotless, look no further than your spice rack and pantry. I’ve found that most of the heavy lifting in cleaning can be done with stuff you probably already have sitting in a cupboard. For instance, a little bit of lemon juice works wonders on stubborn hard water stains in the sink, and a dash of cornstarch can actually help you buff out streaks on glass. Using these cost-effective cleaning solutions means you aren’t throwing money away on fancy, single-use bottles that just end up in a landfill.

Beyond the basics, you can really level up your game by adding a few drops of essential oils for cleaning. If you’re tired of your house smelling like a science experiment, a tiny bit of lemon, tea tree, or lavender oil can turn a basic spray into something that actually smells great. The best part? This approach is a total win for anyone looking for safe cleaning for pets and kids. You don’t have to worry about your toddler crawling on a floor covered in harsh residues or your dog licking up something toxic. It’s simple, it’s cheap, and it just works.

Pro Tips to Keep Your DIY Cleaning from Turning into a Mess

  • Don’t mix vinegar and baking soda in a closed bottle. I learned that the hard way—they react and create gas, which can actually pop the lid off your spray bottle or cause a massive leak. Use them one after the other instead of trying to force them into one liquid.
  • Grab some old glass spray bottles if you can. Since things like essential oils or pure lemon juice can actually eat away at cheap plastic over time, glass is a much safer bet for keeping your concoctions stable and your hands clean.
  • Always do a “spot test” first. I know, I know, it sounds tedious, but before you douse that expensive marble countertop in your homemade citrus cleaner, wipe a tiny, hidden corner to make sure it doesn’t leave a dull spot or a stain.
  • Keep your labels clear and honest. There’s nothing worse than grabbing a bottle thinking it’s water, only to realize it’s a concentrated vinegar mix that stings your nose. Write exactly what’s inside and the date you made it on a piece of masking tape.
  • Less is usually more. It’s tempting to dump half a cup of dish soap into your homemade multi-surface spray, but that just leaves a sticky residue that actually attracts more dust. A few drops do the trick, and it’ll rinse off much cleaner.

The Quick Cheat Sheet for Scrappy Cleaning

You don’t need a chemistry degree or a cabinet full of expensive, neon-colored sprays to get a clean house; most of the heavy lifting can be done with stuff you already have in your pantry.

Keep your basics—like white vinegar, baking soda, and some dish soap—on hand at all times so you can whip up a solution the second a mess hits the floor.

Don’t overcomplicate it. The best DIY cleaners are the ones that are easy to mix, cheap to make, and actually get the job done without breaking the bank.

## My Philosophy on the Scrappy Clean

“Look, you don’t need a chemistry degree or a cabinet full of neon-colored sprays to get your house looking sharp. Most of the time, the stuff that actually works is already sitting in your pantry, waiting for you to stop overthinking it and just get to work.”

Nathan Cole

Final Thoughts from the Workbench

Final Thoughts from the Workbench cleaning tips.

Look, I know it can feel a bit overwhelming when you first swap out those neon-colored bottles for a jug of white vinegar and a box of baking soda. But once you get the hang of it, you’ll realize you’ve already mastered the heavy lifting. We’ve covered how to use vinegar to cut through grime, how baking soda acts as a gentle but effective scrub, and how your pantry is basically a goldmine of cleaning power. You don’t need a chemistry degree or a massive budget to keep your place looking sharp; you just need to stop overthinking it and start using what you already have on hand.

At the end of the day, this isn’t just about saving a few bucks at the grocery store—though that definitely feels good. It’s about taking a little bit of control back over your home and your health. There is a certain kind of quiet satisfaction that comes from knowing exactly what went into the spray you just used to wipe down your kitchen counters. So, don’t feel like you have to overhaul your entire cleaning cabinet overnight. Just pick one thing, try one recipe, and see how it goes. I promise you, it’s way more figure-out-able than you think.

Frequently Asked Questions

Is it actually safe to use vinegar on everything, or am I going to end up ruining my stone countertops?

That is a killer question, and honestly, I’m glad you asked before you went grabbing the spray bottle. Short answer: No, don’t use vinegar on everything. If you’ve got granite, marble, or any natural stone countertops, keep that vinegar far away. The acid will eat right through the sealant and dull the finish, leaving you with a permanent mess. Stick to mild dish soap and warm water for those—it’s safer and works just fine.

How long can I keep these homemade sprays in a spray bottle before they start smelling weird or losing their punch?

Here’s the deal: since we aren’t using heavy-duty preservatives, you can’t just make a gallon and forget about it. If you’re using just vinegar and water, you’re usually good for about two weeks. But if you add citrus peels or essential oils, try to use them up within a week. If it starts smelling funky or looks cloudy, toss it. Better to spend two minutes mixing a fresh batch than cleaning with something gross!

If I'm switching from store-bought chemicals to DIY stuff, do I need to do anything special to make sure I'm actually killing germs?

Look, I get the worry. When you’re used to those heavy-duty sprays, switching to pantry staples can feel like you’re just moving dirt around. Here’s the deal: vinegar is great for grime, but it isn’t a heavy-duty disinfectant. For high-traffic spots like cutting boards or bathroom handles, I use a simple 70% isopropyl alcohol spray. It kills the nasties fast and evaporates clean. Just stick to the basics and use it where it counts.

Top list of best productivity books.

Productivity Books That Are Actually Worth Reading

I’ve spent a lot of my life trying to fix things—from a leaky sink to a glitchy laptop—but for a long time, I couldn’t figure out how to fix my own chaotic schedule. I used to stare at a mounting to-do list and feel completely paralyzed, like I was staring at a pile of unorganized lumber with no blueprint to follow. I realized that being “busy” isn’t the same thing as being effective, and I spent way too many years spinning my wheels without getting anything done. I started hunting for the best productivity books out there, hoping to find some actual, actionable blueprints rather than just more fluff and “hustle culture” nonsense.

In this post, I’ve narrowed it down to five specific reads that actually changed the way I approach my day. I’m not talking about theoretical stuff that sounds good in a boardroom; I’m talking about real-world tactics you can use the second you put the book down. By the time you finish this list, you’ll have a toolkit of proven methods to help you cut through the noise, stop procrastinating, and finally get your hands dirty on the projects that actually matter.

Table of Contents

Get Your Big Picture Sorted with Atomic Habits

Get Your Big Picture Sorted with Atomic Habits

I’ll be the first to admit that I used to try and change my entire life overnight. I’d decide I was going to wake up at 5:00 AM, meal prep every Sunday, and clean the whole house, only to burn out by Tuesday. James Clear’s Atomic Habits changed that for me because he doesn’t focus on the giant, scary goals. Instead, he talks about the tiny, 1% improvements that actually stick when you stop trying to be a superhero and just focus on the system.

Stop the Busywork with Deep Work

Stop the Busywork with Deep Work.

We live in a world that is constantly trying to steal our attention. Between the pings on my phone and the endless stream of emails, I used to spend my whole day feeling “busy” without actually getting anything important done. Cal Newport’s approach to “Deep Work” is like a heavy-duty power tool for your brain. It’s about carving out dedicated, distraction-free blocks of time to tackle the stuff that actually moves the needle.

Master Your Energy with The Power of Full Engagement

Master Your Energy with The Power of Full Engagement

Most productivity advice tells you to manage your time, but I’ve learned the hard way that time doesn’t matter if you’re too exhausted to use it. I used to think I could just power through a long list of tasks by drinking more coffee, but I was just spinning my wheels. The Power of Full Engagement argues that energy, not time, is the fundamental currency of high performance.

Simplify Your Focus with Essentialism

ITEM_CONTENT: If you’re the kind of person who says "yes" to every request because you don't want to let people down, Greg McKeown is going to be a bit of a reality check for you. *Essentialism* isn't about doing more things; it’s about doing the **right things**. It’s the art of discerning what is absolutely vital and ruthlessly cutting out everything else that is just "noise."

Get Moving with Eat That Frog!

This one is for the procrastinators—and trust me, I’ve been there. Brian Tracy’s concept is as blunt as it gets: if you have to eat a live frog, do it first thing in the morning. And if you have to eat two, eat the big one first. The “frog” is that one daunting, unpleasant task that you keep pushing to the bottom of your list, hoping it just disappears.

The Bottom Line

Don’t try to swallow the whole book at once; just grab one idea that clicks and try it out in your real life tomorrow.

Productivity isn’t about being a robot or working more hours, it’s about clearing the junk out of your way so you can focus on what actually matters.

There is no “perfect” system, so pick the method that feels easiest to stick with and stop worrying about the rest.

My Take on the Reading List

Look, you don’t need a library full of complex theories to get your life in order. Most of these books aren’t about working more hours; they’re about clearing out the junk so you can focus on what actually matters. Pick one, grab a coffee, and just start with the first step.

Nathan Cole

Getting Started Without the Overwhelm

Look, I know it feels like there’s a mountain of information out there, but you don’t need to read every single book on this list to see a change in your day-to-day life. Whether you’re looking to master your deep work sessions, finally get a handle on your chaotic calendar, or just build some better daily habits, the goal is the same: finding a system that actually works for you. You don’t need a complex, ten-step master plan that requires a PhD to follow. Just pick one idea from one of these books—maybe it’s time-blocking or just clearing your desk—and try it out for a week. The best tool in your kit is the one you actually use consistently.

At the end of the day, these books are just tools, much like a good screwdriver or a sharp kitchen knife. They aren’t magic wands that will instantly fix your life, but they can definitely help you clear the clutter so you can focus on what matters. Don’t get stuck in “analysis paralysis” trying to find the perfect method. Just grab a book, take one small step, and start building momentum. You’ve got this, and I promise that once you get those first few wins under your belt, everything is going to start feeling a whole lot more figure-out-able.

Frequently Asked Questions

I'm already feeling overwhelmed—should I try to read all of these at once or just pick one?

Whoa, slow down there! If you try to tackle all five at once, you’re just going to end up with a pile of books and a massive headache. That’s the opposite of what we’re trying to do here. Pick just one—ideally the one that sounds like it hits your biggest pain point right now—and give it twenty minutes a day. Treat it like a small DIY project: one step at a time, and don’t rush the process.

Are these books actually practical for someone with a messy, unpredictable schedule, or are they more for people with office jobs?

That’s a fair question. Honestly, I picked these specifically because they aren’t “sit in a cubicle for eight hours” manuals. If you’re juggling odd jobs, kids, or a schedule that changes every time you look at it, the heavy-duty corporate stuff won’t work for you. These books focus on managing your energy and your immediate tasks, not just filling out a calendar. They’re built for real life, even when real life is messy.

Do I really need to read the whole book, or can I just skim the parts that sound useful to my specific problem?

Look, I’ll be real with you: you don’t have to read every single page from cover to cover. I’ve been there, staring at a 300-page book when I just wanted to fix one specific habit. If you’re short on time, skim the table of contents, find the chapter that hits your pain point, and dive in there. Treat it like a manual for a tool—use the parts that actually help you get the job done.

Tips on how to store food properly.

How to Store Food So It Stays Fresh Longer

I’ll never forget the smell of a bag of wilted, slimy spinach hitting me from the bottom of my fridge back in my twenties. I had just spent thirty bucks on a “healthy” grocery haul, only to watch half of it turn into a science experiment within three days. It’s incredibly frustrating because most of the advice you find online about how to store food properly makes it sound like you need a chemistry degree or a dozen specialized, expensive airtight containers just to keep a head of lettuce crisp. Honestly, most of that high-end kitchen gear is just marketing fluff designed to separate you from your hard-earned cash.

I’m not here to sell you on fancy gadgets or complicated systems that take more time than they save. Instead, I want to show you how to use what you already have in your kitchen to stop throwing money in the trash. I’ve spent years tinkering with my own kitchen setup and learning through trial and error, so I’m going to give you the straight-up, no-nonsense truth. I’ll break down simple, practical habits that actually work, so you can keep your groceries fresh and your budget intact without the headache.

Table of Contents

Simple Pantry Organization Tips to Extend Grocery Shelf Life

Simple Pantry Organization Tips to Extend Grocery Shelf Life

First things first, let’s talk about your pantry. I used to just shove everything into the cupboard and hope for the best, but that’s a recipe for finding a fuzzy bag of flour six months too late. One of my favorite pantry organization tips is to group things by how you actually use them—baking supplies in one spot, canned goods in another. This makes it way easier to see what you actually have before you head to the store, which is a huge win for your wallet.

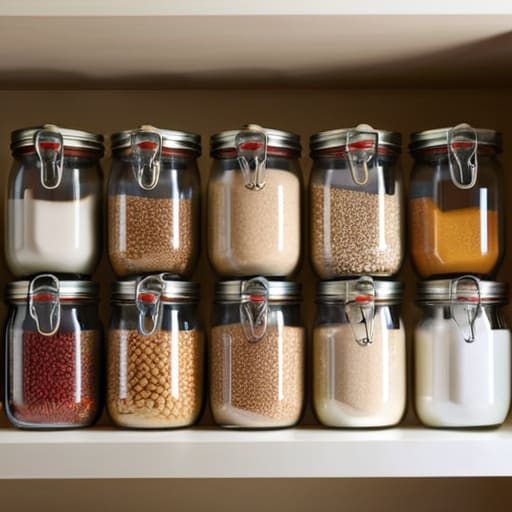
If you really want to level up, you need to ditch the flimsy, half-opened bags that come from the store. I’ve learned the hard way that investing in some decent glass or BPA-free plastic jars makes a massive difference. The airtight container benefits are huge because they keep moisture out and pests away, which is key for preventing food spoilage in dry goods like pasta, rice, or cereal. Plus, let’s be honest, seeing your ingredients neatly lined up in clear jars makes you feel like you actually have your life together. It’s a small change that goes a long way.

Mastering Refrigerator Temperature Settings for Better Freshness

Mastering Refrigerator Temperature Settings for Better Freshness

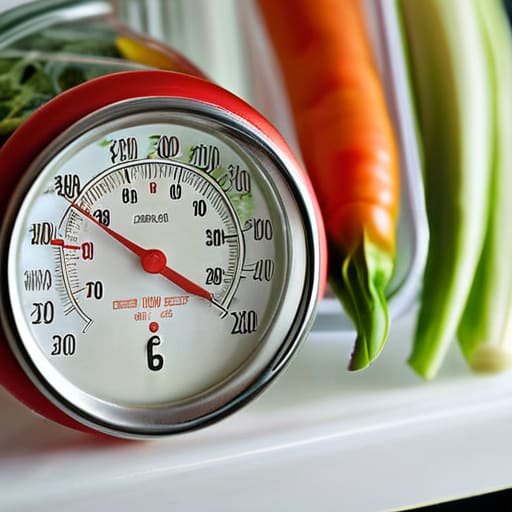
Now, let’s talk about the big chill. I used to just set my fridge to whatever number it came with and call it a day, but I realized that was a huge mistake. If your fridge is too warm, your milk turns sour before you can even finish the carton; if it’s too cold, you’re basically turning your lettuce into ice. To get the best results, you really need to dial in your refrigerator temperature settings to stay between 37°F and 40°F. I always keep a cheap analog thermometer on one of the middle shelves just to be sure, because those digital displays on the front can be notoriously unreliable.

Once you’ve got the temp dialed in, you can start focusing on preventing food spoilage by where you actually place things. Don’t just shove everything in the door—that’s the warmest spot in the whole unit! Keep your dairy and meat in the back where it’s coldest, and leave the crisper drawers for your veggies. It’s a small tweak, but it makes a massive difference in how long your groceries actually stay edible.

5 Quick Wins to Keep Your Food from Going Bad

  • Don’t just toss everything in the crisper drawer. I’ve learned the hard way that some veggies, like carrots, actually stay crunchy way longer if you store them in a jar of water in the fridge.
  • Keep your onions and potatoes far away from each other. It sounds weird, but if you store them together, the moisture from the onions will make your potatoes sprout and go soft before you can even use them.
  • Give your berries a little TLC by washing them in a vinegar-water soak. It sounds like an extra step, but it actually kills off that fuzzy mold and keeps them fresh for a few extra days.
  • Treat your bread like a VIP and keep it out of the fridge. The cold air actually dries it out faster, so unless you’re planning on not eating it for a week, keep it on the counter in a bread box or just freeze it.
  • Use your freezer as your secret weapon. If you see that spinach or those herbs starting to wilt, don’t toss them—chop them up, throw them in a bag, and freeze them for your next smoothie or soup.

Quick Wins to Keep Your Food Fresh

Treat your fridge like a tool kit—keep it organized and at the right temperature so you aren’t constantly hunting for stuff or letting things wilt.

Stop throwing money in the trash by using your pantry the right way; a little bit of organization goes a long way in keeping your dry goods from going stale.

Remember that food storage isn’t about being perfect, it’s just about making a few smart, simple tweaks that save you time and cash in the long run.

## A Quick Reality Check

“Look, I’ve definitely been the guy throwing away a bag of slimy spinach and a carton of fuzzy strawberries, and let me tell you—it feels like throwing cash straight into the trash. Storing food right isn’t about being a gourmet chef; it’s just about being smart with what you’ve already paid for.”

Nathan Cole

Making It Stick

Organizing kitchen systems for Making It Stick.

Look, I know that keeping track of every single head of lettuce or bag of flour feels like a second job, but it really does pay off. By just taking a few extra minutes to get your pantry organized and making sure your fridge is actually running at the right temperature, you’re doing more than just tidying up—you’re saving hard-earned cash. It’s about those small, repeatable habits, like checking your expiration dates once a week or grouping your dry goods so nothing gets lost in the back of a dark cupboard. Once you get these simple systems in place, you’ll stop seeing so much food end up in the trash, and your kitchen will feel a whole lot more manageable.

At the end of the day, don’t feel like you have to overhaul your entire kitchen in a single afternoon. I’ve learned through plenty of wasted groceries and messy counters that the best way to change is to just start small. Pick one shelf or one drawer this week and get it right. Before you know it, you’ll have a rhythm down that makes cooking easier and keeps your budget on track. Trust me, once you see how much less you’re throwing away, you’ll realize that most things are totally figure-out-able if you just take them one step at a time. You’ve got this!

Frequently Asked Questions

Should I keep my onions and potatoes together, or will that make them spoil faster?

Keep them apart! I learned this the hard way when I accidentally turned a whole bag of potatoes into mush. Onions release ethylene gas, which basically tells your potatoes to start sprouting and rotting way faster than they should. Think of it like this: they’re roommates that just don’t get along. Keep your potatoes in a cool, dark spot, and stash your onions somewhere else entirely to keep both of them fresh longer.

Is it actually worth it to buy those airtight containers, or can I just use what I already have in the cupboard?

Honestly, don’t go out and drop a bunch of cash on fancy matching sets just yet. If you’ve got old glass jars from pasta sauce or decent Tupperware lying around, use them! They do the job just fine. I only suggest investing in actual airtight containers for things that go stale fast—like coffee, flour, or crackers. For everything else, save your money and stick to what you’ve already got in the cupboard.

How do I know if a piece of produce has actually gone bad or if it's just a little bruised?

Look, I’ve been there—staring at a slightly soft peach, wondering if I’m about to get food poisoning or just wasting good fruit. Here’s my rule of thumb: if it’s just a soft spot or a bruise, trim that part away and use the rest. But if it smells funky, looks slimy, or has actual fuzzy mold growing on it? Toss it. When in doubt, trust your nose and your gut. Better safe than sorry.

Guide on how to cook eggs.

How to Cook Eggs Every Way (and Nail It)

I still remember standing in my first tiny apartment kitchen, staring at a greasy pan and a carton of eggs like they were some kind of high-tech puzzle I couldn’t solve. I’d tried following those fancy, over-the-top cooking shows where everything looks effortless, but I usually ended up with something that looked more like rubber than breakfast. It’s frustrating because people make learning how to cook eggs seem like this culinary art form that requires expensive copper pans and a chef’s degree, but honestly? That’s total nonsense. You don’t need a gourmet setup to get a decent meal on the table when you’re hungry and tired.

I’m not here to give you some flowery, complicated recipe that requires twenty different ingredients you don’t have in your pantry. My goal is to strip away the fluff and show you that this is one of the most figure-out-able skills you can master. I’m going to walk you through a few foolproof methods that actually work in a real-world kitchen, using the basic tools you already own. We’re going to break this down into simple, actionable steps so you can stop guessing and start actually enjoying your breakfast.

Table of Contents

Mastering Egg Cooking Temperatures for Perfect Results

Mastering Egg Cooking Temperatures for Perfect Results

Here’s the deal: heat is everything. I learned the hard way that if you treat a pan like it’s always on high, you’re going to end up with rubbery, sad-looking breakfast. Most of the magic happens in the tiny differences between “warm” and “hot.” When you’re looking for that perfect egg yolk consistency, you have to respect the thermometer (or at least your eyes). For example, if you’re going for creamy scrambled eggs, you want low and slow. If you crank the heat too fast, the proteins tighten up immediately, and you lose that velvety feel.

If you’re moving away from the pan and toward the pot, timing becomes your new best friend. I always keep a mental boiled egg timing guide handy because even sixty seconds can be the difference between a jammy, golden center and a chalky, overdone mess. It’s all about controlling the energy you’re putting into the food. Once you get a feel for how different heat levels affect the whites and yolks, you’ll stop guessing and start actually cooking with confidence.

The Secret to Achieving Your Ideal Egg Yolk Consistency

The Secret to Achieving Your Ideal Egg Yolk Consistency

This is where most people get tripped up, but honestly, it’s just a game of patience and a little bit of timing. Whether you’re craving a runny yolk to dip toast into or something jammy and rich, the trick is realizing that the yolk reacts to heat almost instantly once the whites have set. If you’re going the soft-boiled route, I always keep a boiled egg timing guide taped to my fridge. Even a thirty-second difference can be the gap between a liquid gold center and a yolk that’s gone completely chalky.

If you’re more of a breakfast-sandwich person, you’ll want to focus on your egg yolk consistency during the frying process. I like to turn the heat down low and put a lid over the pan for the last minute; that gentle steam cooks the top of the white without turning the yolk into rubber. It’s one of those small tweaks that makes a massive difference in how the final dish feels. Once you nail that balance, you’ll realize that getting it exactly how you like it is way easier than it looks.

Five little tricks to make your eggs taste like a pro made them

  • Grab yourself some fresh eggs from the fridge right before you start. If they sit out on the counter and get too warm, they’re way harder to crack cleanly without getting tiny shards of shell in your pan.
  • Don’t be afraid of a little fat. Whether it’s a knob of salted butter or a tiny splash of olive oil, you need that lubricant to keep the whites from sticking to the pan like glue.
  • Use a non-stick pan if you have one, but give it a quick wipe down first. Any leftover residue from yesterday’s dinner can mess with how the egg slides around.
  • Keep a lid handy. If you’re poaching or frying and want that beautiful, soft-set top without overcooking the bottom, just pop a lid over the pan for thirty seconds to trap the steam.
  • Season at the very end. If you salt your eggs too early while they’re still liquid, it can actually change the texture and make them a bit watery. Hit them with the salt and pepper right before they hit the plate.

The quick rundown: What you need to remember

Temperature is your best friend; keep that heat low and steady to avoid rubbery whites or burnt bottoms.

Don’t be afraid to experiment with your timing—finding that sweet spot for your yolk is all about trial and error.

It’s way more figure-out-able than it looks, so grab a pan and just start practicing; you’ll nail it in no time.

## My Golden Rule for the Kitchen

“Look, you don’t need a culinary degree or some fancy copper pan to get this right; you just need to respect the heat and realize that a little patience goes a lot further than a high flame ever will.”

Nathan Cole

You’ve Got This

Perfectly cooked eggs: You've Got This.

Look, I know it might seem like a lot to keep track of—managing your heat so you don’t end up with rubbery whites, or timing that yolk just right so it’s perfectly jammy instead of a watery mess. But once you get the hang of these basics, you’ll realize that cooking eggs isn’t some high-stakes culinary exam; it’s just about paying attention to the pan. Whether you’re scrambling them up for a quick breakfast or trying to nail a fancy poached egg for brunch, just remember to keep your temperature in check and don’t be afraid to adjust as you go.

At the end of the day, the most important thing is that you actually get in there and try it. You might burn a few, or your first fried egg might look a little more “rustic” than a restaurant version, but that is exactly how you learn. Every time you turn on that stove, you’re building a skill that stays with you for life. Don’t let a simple egg intimidate you—embrace the mess, enjoy the process, and remember that even the best chefs started exactly where you are right now. Now, go grab a pan and get cooking!

Frequently Asked Questions

Do I really need to use butter, or can I get away with just using oil from a spray can?

Look, you can definitely use the spray oil if you’re in a rush or trying to keep things light, but if you want that classic breakfast flavor, butter is king. It adds a richness that oil just can’t touch. If you do go the spray route, just make sure your pan is nice and hot first so the eggs don’t immediately bond to the surface. It’s all about what you’ve got in the pantry.

How do I know if my eggs are actually fresh before I crack them into the pan?

The easiest way to do this without making a mess is the “float test.” Grab a glass of water and drop your egg in. If it sinks to the bottom and stays flat, it’s golden. If it stands up on one end but stays submerged, it’s getting older but still fine to use. But if it floats to the top? Toss it. That means too much air has gotten in there, and it’s best to play it safe.

What’s the best way to clean up the pan if I end up with that stubborn, crusty egg residue stuck to the bottom?

Don’t go at it with a metal scrubber right away—you’ll ruin that non-stick surface I spent good money on. Instead, just pour in a little water and a drop of dish soap while the pan is still warm. Bring it to a simmer on the stove for a minute or two. That heat breaks the bond of that crusty residue, making it slide right off with a soft sponge. Easy win.