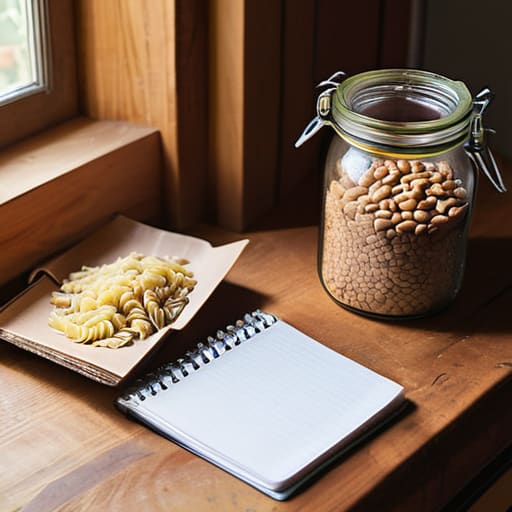
Journaling for productivity benefits.

How Journaling Can Make You More Productive

I used to think that “journaling for productivity” was just another way for people to sell you $40 linen-bound notebooks and fancy fountain pens that you don’t actually need. I’d see these influencers posting photos of their perfectly aesthetic, color-coded planners and think, there is no way a piece of paper is going to fix my chaotic life. It felt like a lot of fluff designed to make a simple concept look like some kind of high-end spiritual ritual. But honestly? I was wrong. I realized that when my brain feels like a junk drawer full of loose screws and tangled charging cables, I don’t need a masterpiece; I just need a way to get the noise out of my head.

Here’s my promise to you: I’m not going to tell you to write three pages of deep soul-searching every morning before the sun comes up. That’s not practical, and it’s not how most of us live. Instead, I’m going to show you how to use a simple notebook as a functional tool to clear the mental clutter and actually tackle your to-do list. We’re going to stick to the basics—no expensive gear required—so you can stop feeling overwhelmed and start feeling like you’re finally back in the driver’s seat.

Table of Contents

Using Morning Pages for Focus to Clear the Fog

Using Morning Pages for Focus to Clear the Fog.

I’ve always been a “jump right in” kind of guy, but I quickly learned that diving into a project without clearing my head is a recipe for mistakes. That’s where I started using morning pages for focus. The idea is pretty simple: you grab a notebook and just write whatever junk is floating around in your brain for about fifteen minutes. Don’t worry about grammar or making sense; just dump the mental clutter onto the paper.

For me, this acts like a brain de-cluttering session before the real work starts. If I’m worrying about a weird noise my car is making or a deadline hanging over my head, getting it out of my skull and onto the page stops it from looping in the background while I’m trying to work. It’s a low-effort way to find some mental clarity. Once that “fog” lifts, I find that my mindfulness and workflow efficiency shoot up because I’m actually present in the task at hand, rather than fighting my own distracted thoughts.

Mastering Goal Setting Through Writing for Real Results

Mastering Goal Setting Through Writing for Real Results

Once you’ve cleared that mental fog with your morning pages, it’s time to actually point your energy in the right direction. I used to just write vague wishes in my notebook, like “get more done” or “be more organized,” but that’s about as useful as a screwdriver with no handle. To see real progress, you need to try goal setting through writing by getting specific. Instead of a giant, scary dream, break it down into tiny, actionable wins. If you want to finish a home renovation project, don’t just write “fix the kitchen”; write “buy new cabinet pulls on Tuesday.”

When you put these concrete steps on paper, they stop being abstract ideas and start feeling like a real to-do list. I’ve found that pairing these written goals with a simple time blocking journal method works wonders. By carving out specific chunks of time in your journal for these tasks, you aren’t just hoping they happen—you’re scheduling them into reality. It turns your journal from a mere diary into a practical blueprint for your day.

5 Low-Stress Ways to Make Your Journal Work for You

  • Keep it short and sweet. Don’t feel like you have to write a novel every morning. If you’re feeling overwhelmed, just jotting down three things you want to tackle today is plenty. It’s about consistency, not word count.
  • Try the “Brain Dump” method when things get hectic. When my head feels like a browser with fifty tabs open, I grab my notebook and just scribble down every single nagging thought, task, or worry. Once it’s on paper, it stops spinning around in my brain.
  • Use your journal to track your wins, not just your to-do list. At the end of the day, write down one thing you actually finished or did well. It sounds cheesy, but it keeps you from feeling like you’re constantly running in place.
  • Plan your “Big Three” the night before. Instead of waking up and reacting to whatever fire is burning, spend five minutes before bed picking the three most important tasks for tomorrow. It makes hitting the ground running a whole lot easier.
  • Review your notes once a week. Take ten minutes on a Sunday to look back at what you wrote. You’ll start to see patterns—like certain tasks that always get pushed off—and you can finally figure out how to actually fix the problem.

The Bottom Line: Making Journaling Work for You

Don’t overthink the “right” way to write; whether it’s a messy brain dump in the morning or a quick list of goals, the best method is the one you actually stick to.

Use your journal as a tool to clear the mental clutter, not as another chore on your to-do list that makes you feel overwhelmed.

Focus on small, actionable wins by writing down specific tasks, which turns a vague “to-do” into a real plan you can actually knock out.

## The Real Secret to Getting Things Done

“Look, journaling isn’t about writing a masterpiece or keeping a fancy diary; it’s just about getting the mental clutter out of your head and onto the page so you can actually see what needs your attention.”

Nathan Cole

Putting It Into Practice

Putting It Into Practice with journaling.

Look, I know it can feel like just another thing on your to-do list, but journaling isn’t about writing a masterpiece or keeping a perfect diary. It’s really just about building a toolkit to manage your own brain. We’ve talked about how morning pages can help you clear out the mental clutter before the day even starts, and how setting concrete goals in writing turns those vague “I shoulds” into actual, actionable plans. Whether you’re using it to map out your big career moves or just to stop your brain from spinning at 2:00 AM, the goal is the same: taking control of your time so it doesn’t end up controlling you.

My best advice? Don’t overthink it. You don’t need a fancy leather-bound notebook or a high-end app to make this work; a scrap of paper or a cheap spiral pad works just fine. The magic isn’t in the tools, it’s in the consistency of showing up for yourself. Start small, maybe just five minutes a day, and see how it feels. Most things in life—from fixing a kitchen sink to organizing a chaotic work week—are much more figure-out-able once you get them down on paper. You’ve got this, so grab a pen and just start writing.

Frequently Asked Questions

I don't have a lot of time in the morning—is there a quicker way to do this than writing pages of text?

Look, I get it. Some mornings you’ve got a coffee in one hand and a deadline looming in the other—you don’t have twenty minutes to write a novel. If the long-form stuff feels like a chore, try “Bullet Journaling” instead. Just grab a notebook and jot down three quick wins for the day and one thing that’s stressing you out. It takes two minutes, clears the mental clutter, and gets you moving.

Do I really need a fancy notebook, or can I just use a cheap legal pad or a phone app?

Look, I’m the guy who still keeps a beat-up notepad in my truck, so I get it. You don’t need a $30 leather-bound journal to see results. If a cheap legal pad gets the job done, grab it. If you’re always on the move, a phone app is fine. The goal isn’t to have a pretty collection on your shelf; it’s to get those thoughts out of your head and onto paper. Just pick something that works for you and start writing.

What do I do if I sit down to journal and my mind just goes blank?

Look, we’ve all been there. You sit down, pen in hand, staring at a blank page like it’s a piece of furniture you can’t figure out how to assemble. It’s frustrating, but don’t sweat it. When the brain fog hits, stop trying to be profound. Just start with the basics: write down three things you can see, two things you can hear, and one thing you’re worried about. Once the ink starts moving, the rest usually follows.

How to fix a squeaky door quickly.

How to Fix a Squeaky Door in Two Minutes

You know that feeling when you’re trying to sneak into the kitchen for a midnight snack, only to have your bedroom door let out a piercing, high-pitched scream that sounds like a banshee? I’ve been there more times than I’d like to admit. My old apartment had a door that sounded like it was protesting every single time I moved it, and I used to think I’d need to call a professional or replace the entire hinge assembly just to get some peace. But here’s the truth: learning how to fix a squeaky door isn’t some complex engineering project. It’s usually just a matter of a little bit of lubrication and a few minutes of your time.

I’m not going to suggest any fancy, expensive industrial tools that you’ll never use again. Instead, I’m going to show you how to tackle this using stuff you probably already have in your junk drawer or kitchen pantry. We’ll walk through the quickest ways to silence that noise, from the “quick fix” method to the more thorough deep-clean approach. My goal is to get that door swinging silently so you can stop jumping every time you walk through a room.

Table of Contents

Guide Overview

Total Time: 10-20 minutes
Estimated Cost: $0-10
Difficulty: Beginner

Tools & Supplies

  • Screwdriver for tightening loose hinge screws
  • Microfiber cloth for wiping away excess lubricant
  • Lubricant (WD-40, silicone spray, or white lithium grease) 1 can
  • Cleaning rag 1 piece

Step-by-Step Instructions

  • 1. First things first, you’re going to need to grab some lubricant. If you have a can of silicone spray or white lithium grease sitting in your garage, you’re golden. If not, don’t panic—even a little bit of petroleum jelly from the medicine cabinet can do the trick in a pinch. Just avoid using plain old cooking oil; it might work for five minutes, but it eventually gets gummy and attracts dust, which creates a bigger mess later.
  • 2. Before you start spraying stuff everywhere, take a damp rag and wipe down the hinges. Over the years, those metal joints collect a nasty mix of dust, hair, and old grime. If you try to lubricate right over that junk, you’re basically just making a thick, black sludge that’ll make the squeak even worse. Get them looking relatively clean so the lubricant can actually reach the metal.
  • 3. Now, here is the part where most people get lazy, but I want you to do it right: remove the hinge pin. Take a hammer and a large nail (or a screwdriver if you’re careful), place it at the bottom of the pin, and give it a few light taps until the pin pops upward. Once it’s out, set it aside on a piece of cardboard so you don’t lose it in the carpet. Trust me, losing a pin is a headache you don’t need.
  • 4. While that pin is out, take a look at it. If it looks rusty or pitted, give it a quick scrub with some steel wool or a rough rag. This is the perfect time to apply your lubricant directly to the pin itself. Instead of just spraying the door and hoping for the best, coating the pin ensures the oil gets exactly where the friction is happening.
  • 5. Slide the pin back into the hinge carefully. As you push it down, you might need to give it a few taps with the hammer to get it seated properly. Once it’s back in, swing the door back and forth a few times. This helps work the lubricant into the internal parts of the hinge. You’ll likely hear the squeak start to fade away with every swing.
  • 6. Finally, grab that damp rag again and wipe away any excess oil. You don’t want liquid dripping down your door frame or staining your flooring. If you used a spray, there might be some overspray on the metal, so just buff it off until it looks clean. Give the door one last test swing, and if it’s silent, you’re officially done!

Finding Household Items to Stop Door Squeaks Fast

Finding Household Items to Stop Door Squeaks Fast

Now, if you don’t have a can of specialized lubricant sitting in your junk drawer, don’t panic. I’ve been in plenty of situations where I needed to quiet a hinge immediately and didn’t want to run to the hardware store. You can actually find some great household items to stop door squeaks right in your kitchen or bathroom. A little bit of cooking oil (like olive or vegetable oil) on a Q-tip works wonders in a pinch, as does a bar of soap rubbed directly onto the hinge mechanism. Just a heads-up though: these are temporary fixes. They’ll stop the noise for a few days, but they can get a bit gummy over time, so don’t make them your permanent solution.

If you do decide to head to the store for something more long-term, you’ll likely run into the classic debate of WD-40 vs silicone spray for doors. Here’s my two cents: standard WD-40 is a great cleaner and helps loosen things up, but it actually evaporates pretty quickly. For real, long-lasting door hinge maintenance tips, I always recommend grabbing a silicone-based spray or even some white lithium grease. These stay on the metal longer and won’t attract as much dust, meaning you won’t be fighting that same squeak again next week.

Wd 40 vs Silicone Spray for Doors Which Wins

Wd 40 vs Silicone Spray for Doors Which Wins

So, you’ve got your supplies ready, but you’re staring at the shelf wondering which can goes in the can. This is the classic debate of WD-40 vs silicone spray for doors, and honestly, most people get it backwards. Here’s the deal: standard WD-40 is a fantastic cleaner and a great way to break up old, gunked-up grease, but it’s not a long-term lubricant. It evaporates pretty quickly, which means that annoying squeak might come crawling back in a week. If you just want a quick fix to stop the noise right this second, it’ll do the trick, but it’s not the gold standard for fixing noisy door hinges permanently.

If you want to do the job once and forget about it, go with the silicone spray. Silicone stays put, resists dust, and creates a slick barrier that lasts way longer. When I’m doing serious door hinge maintenance tips, I always reach for the silicone because it won’t attract as much grime over time. If the squeak is really stubborn, you might even need to try removing hinge pins to coat them directly, but for most of us, a good spritz of silicone is the real winner for long-term peace and quiet.

Pro Tips to Keep That Squeak from Coming Back

  • Clean those hinges first. If you just spray lubricant over years of dust and grime, you’re basically making a greasy sludge that’ll attract even more dirt. Give them a quick wipe with a rag before you add anything new.
  • Don’t overdo it. I’ve seen guys soak a hinge in oil like they’re trying to deep-fry it. A little goes a long way. If you use too much, it’s just going to drip down your door frame and leave a nasty stain.
  • Work the hinge, don’t just spray it. Once you apply your lubricant, swing the door back and forth a few times. You want that oil to actually get inside the pin and work its way through the mechanism, not just sit on the surface.
  • Listen to the “language” of the squeak. If it’s a high-pitched chirp, it’s usually just dry metal. If it’s a low, grinding sound, you might actually have a hinge that’s slightly bent or misaligned, and no amount of spray is going to fix that.
  • Keep a small can of silicone spray in your junk drawer. It’s way cleaner than the heavy-duty stuff and won’t leave that “mechanic shop” smell hanging around your hallway for three days.

Quick Reminders Before You Get Started

If you’re in a pinch, don’t panic—things like cooking oil or even a bit of petroleum jelly from the medicine cabinet can get you through the night.

Grab a dedicated lubricant like silicone spray if you want a long-term fix, but keep the WD-40 for cleaning off old gunk rather than as a permanent solution.

Always keep a rag handy to wipe away any extra drips so you don’t end up with oily streaks on your door or floor.

## The Big Picture

“A squeaky door isn’t just a minor annoyance; it’s a tiny, constant reminder of something that needs a little attention. But here’s the thing: you don’t need a professional or a fancy toolkit to handle it. Most of the time, it’s just a matter of a little grease and a few minutes of your time to get things running smooth again.”

Nathan Cole

Wrapping It All Up

Wrapping It All Up: Fixing squeaky hinges.

So, there you have it. Whether you ended up grabbing the heavy-duty silicone spray from the garage or just grabbed some cooking oil from the pantry to get through the night, you’ve officially tackled the problem. Just remember that the secret is all in the application—make sure you get that lubricant deep into the hinge pin so it actually does its job. If you find the squeak coming back in a few weeks, don’t sweat it; it just means you might need a slightly thicker grease next time. The main thing is that you didn’t call a handyman or spend money on a professional just to deal with a little bit of friction.

At the end of the day, fixing a squeaky door is about more than just getting some peace and quiet in your hallway. It’s about that small, satisfying feeling of looking at something that was broken and realizing you were the one who fixed it. I know some of these little household annoyances can feel like a mountain when you’re tired after work, but I promise you, they are totally figure-out-able. Keep your tools handy, keep experimenting, and don’t be afraid to get your hands a little dirty. You’ve got this!

Frequently Asked Questions

What if I lubricate the hinges and the squeak doesn't actually go away?

If you’ve lubed the hinges and that annoying sound is still hanging around, don’t sweat it—it just means the squeak is hiding somewhere else. Usually, it’s a sign that the hinge pin is worn out or there’s some grit trapped deep inside the mechanism. My advice? Pull the pin out entirely, clean it with some steel wool, and check if it’s bent. If it looks beat up, it’s time for a cheap replacement.

How often do I really need to grease my door hinges to keep them quiet?

Honestly, there’s no magic number, but I usually aim for a “once a year” tune-up just to be safe. If you live near the coast where salt air can mess with metal, or if you’ve got kids constantly slamming doors, you might need to do it more often. My rule of thumb? If you hear even the tiniest hint of a groan, don’t wait. Hit it with a little lube now before it turns into a real headache.

Is it safe to use cooking oil or vegetable oil if I'm in a pinch, or will that gunk up the hinges later?

Look, I get it—you’re in the middle of something and just want that noise gone now. But honestly? Skip the olive oil or vegetable oil. It might work for ten minutes, but cooking oils eventually go rancid and turn into this sticky, gummy mess that actually traps dust and grit inside your hinges. It’ll make the problem way harder to fix later. Stick to a real lubricant if you can; your future self will thank you.

First macrame for beginners wall hanging tutorial.

Macramé for Beginners: Your First Wall Hanging

I was sitting on my living room floor last Tuesday, surrounded by a chaotic bird’s nest of tangled cotton cord and feeling completely defeated. I had watched three different “easy” tutorials, but my hands felt like they were working against me, and nothing looked like the polished photos on Pinterest. It’s a common misconception that you need some kind of natural artistry or “knack” to get started, but honestly, that’s a load of junk. Learning macrame for beginners isn’t about being a born artist; it’s just about muscle memory and getting the tension right.

I’ve spent the last few days stripping away all the fluff and the complicated jargon to figure out what actually works when you’re starting from zero. In this guide, I’m going to walk you through the only three knots you actually need to know to make something beautiful. No expensive looms, no high-end studio setups—just you, some string, and a few straightforward steps that anyone can follow. We’re going to turn that frustration into something you can actually hang on your wall by the end of the weekend.

Table of Contents

Guide Overview

Total Time: 3-5 hours
Estimated Cost: $20-40
Difficulty: Beginner

Tools & Supplies

  • Scissors for clean cord cuts
  • Measuring tape for length accuracy
  • S-hooks or clothespins to hold work
  • Cotton macrame cord (3mm or 4mm, 1 roll)
  • Wooden dowel or ring (1 piece)
  • Clipboard or stand to secure project

Step-by-Step Instructions

  • 1. First things first, you’ve gotta grab your supplies, and don’t go overboard. You really only need some cotton cord (3mm or 4mm is the sweet spot for beginners), a sturdy pair of scissors, a wooden dowel or even a pretty fallen branch from your backyard, and some masking tape. I like to use a piece of tape to secure my dowel to the edge of a table so it doesn’t slide around while I’m working.
  • 2. Once you’re set up, it’s time to load your “workspace.” Cut your cords to about eight times the length of the finished project you’re aiming for—I usually go long because you can always trim it later, but you can’t add more cord once it’s knotted. Fold your cords in half, loop them over your dowel, and pull the loose ends through the loop to create a “Lark’s Head Knot.” This is basically the anchor that holds everything in place.
  • 3. Now we get into the actual knotting, and we’re starting with the absolute king of macrame: the Square Knot. Take four strands of cord; the two in the middle are your “filler” cords that stay still, and the two on the outside are your “working” cords. Cross the left cord over the middle ones to make a shape like a “P,” then tuck the right cord under the middle cords and up through the loop on the left. Pull it tight, and you’ve got your first real knot.
  • 4. To keep your pattern looking clean, you’ll want to repeat that Square Knot a few times in a row to create a horizontal line. This is called a “Square Knot Row.” If you feel like you’re getting a bit tangled, don’t sweat it; just take a breath and untie it. Even I mess up a knot every now and then, and it’s no big deal.
  • 5. If you want to add some texture and break up those straight lines, try a Spiral Stitch. All you do is perform half of the Square Knot over and over again—just the left side, then the left side again. Instead of alternating sides, you keep going in the same direction, and the cord will naturally start to twist into a beautiful spiral. It looks way more complicated than it actually is, I promise.
  • 6. As you work your way down, keep an eye on your tension. You want your knots to be firm, but don’t go pulling them so hard that you’re struggling to get the next one in. If you find your hands getting tired, that’s a good sign you’re doing it right, but make sure you’re staying consistent so the piece doesn’t look lopsided.
  • 7. Finally, once you’ve reached the length you want, it’s time for the satisfying part: the trim. Lay your piece flat on the floor or a table to see how the fringe looks. Use your sharpest scissors to cut the bottom into a clean straight line, or if you’re feeling fancy, trim them into a V-shape. Once you’re happy with it, hang it up and take a second to realize you just made something with your own two hands.

Picking Your First Cord With a Simple Cotton Cord Weight Guide

Picking Your First Cord With a Simple Cotton Cord Weight Guide

I’ll be the first to admit that walking into a craft store and seeing a mountain of different strings can feel a bit overwhelming. You might be wondering if you need that expensive, specialty fiber or if the cheap stuff will do. Honestly? For your first few tries, you want to keep it simple. I always recommend sticking to a 3mm or 4mm single-strand cotton cord. It’s forgiving, it’s easy on your hands, and it holds those basic macrame knot patterns beautifully without fraying like crazy while you’re still learning the ropes.

If you decide to go with a twisted cord instead of single-strand, just be prepared for a little more “fuzz” as you work. A single-strand cord is much smoother, which makes it my top pick for any macrame wall hanging tutorial you might be following online. Think of it like choosing the right screwdriver for a job—you don’t need the heavy-duty industrial version for a simple shelf, you just need something that fits the task. Grab a small spool of 3mm cotton, and I promise you’ll be making progress before your coffee gets cold.

The Only Essential Macrame Tools List You Actually Need

The Only Essential Macrame Tools List You Actually Need.

Look, I’ve walked into plenty of craft stores and felt that immediate urge to buy every shiny thing on the shelf, but let me save you some money right now. You don’t need a professional studio setup to get started. For my essential macrame tools list, I keep it strictly to the basics: a sharp pair of fabric scissors, a measuring tape, and something to hold your work while your hands are busy. A simple wooden dowel or even a sturdy branch from your backyard works perfectly as a base.

If you want to get a little more organized, grab a piece of masking tape and a clipboard. I use the tape to secure my cords to a table so they don’t slide around while I’m practicing basic macrame knot patterns. It might feel a little “DIY” in the unpolished sense, but it works every single time. The goal here isn’t to have a pristine workspace; it’s to have the right gear to actually start building. Don’t let a lack of fancy equipment stop you from diving into your first project.

Five Pro-Tips to Keep Your First Project from Turning Into a Tangle

  • Don’t overthink your knots. When you’re starting out, it’s tempting to try and make every single loop look perfect, but honestly? Just focus on getting the pattern right. Your first few pieces are going to have some quirks, and that’s okay—it’s part of the charm.
  • Watch your tension like a hawk. This is the one thing that trips me up even after years of DIYing. If you pull one knot super tight and the next one a bit loose, your whole piece is going to look wonky and lopsided. Try to keep a steady, relaxed hand throughout the whole process.
  • Work on a flat, stable surface. I know it’s tempting to hang your cord from a doorway or a shower rod right away, but for your first few knots, I highly recommend taping your cords down to a table or a clipboard. It stops the constant swaying and lets you actually see what your hands are doing.
  • Keep a “scrap pile” handy. You’re going to trim a lot of cord as you go, and you’ll likely make a few mistakes that require you to start a section over. Instead of tossing those bits, throw them in a little bin. They’re great for practicing new knots without wasting your good, expensive cord.
  • Take breaks before you get frustrated. If you feel yourself starting to fight with the cord or if your fingers are getting cramped, just walk away. Go grab a coffee or tinker with something else for twenty minutes. Most “mistakes” are just caused by tired eyes, and you’ll fix them much faster with a fresh perspective.

Quick Tips to Keep You Moving

Don’t sweat the small stuff; if your first few knots look a little wonky, that’s totally normal—just keep going and you’ll find your rhythm.

Stick to the basics at first by using a decent cotton cord and the essential tools we talked about so you don’t get overwhelmed by gear you don’t need.

Remember that macrame is all about the process, so focus on getting one knot right at a time instead of worrying about the finished product right away.

My Best Advice Before You Start

“Look, your first few knots are probably going to look a little wonky, and that’s totally fine. Don’t get hung up on making it look like a professional showroom piece right out of the gate; just focus on getting the rhythm down and enjoying the process of making something with your own two hands.”

Nathan Cole

You’ve Got This

Macrame beginner practicing knots, You’ve Got This.

Look, I know it can feel a bit overwhelming when you’re staring at a pile of tangled cord and a bunch of new knots, but you’ve already done the hard part. You’ve picked out your tools, found the right cotton cord weight so your hands don’t cramp up, and you’ve got the basic steps down. Just remember that macrame isn’t about being perfect; it’s about getting your hands dirty and learning through trial and error. If a knot looks a little wonky or your tension is uneven on the first try, don’t sweat it. Just untie it, take a breath, and start again. That’s how I learned to fix everything from leaky sinks to wonky shelves, and it’s exactly how you’re going to master this craft.

At the end of the day, the best part of DIY isn’t having a perfectly curated home—it’s that feeling of pride when you look at something and say, “I made that myself.” Whether you end up making a tiny plant hanger or a massive wall tapestry, you’re building a skill that belongs entirely to you. Don’t get caught up in the fancy stuff you see on social media; just keep knotting and enjoy the process. I promise, once you finish that first piece, you’re going to feel like you can tackle just about anything. Now, get out there and start creating!

Frequently Asked Questions

How do I keep my cords from fraying or getting all fuzzy while I'm working?

There’s nothing more frustrating than getting halfway through a knot only to realize your cord looks like it went through a blender. To keep things clean, try to avoid pulling your cord too aggressively or snagging it on any rough edges on your workspace. If you’re working with a particularly fuzzy cotton, I usually keep a small pair of sharp embroidery scissors handy to snip off those stray fibers as I go. It keeps your project looking sharp!

Do I really need a wooden dowel to start, or can I just tie my project to a door handle or a branch?

Honestly? You definitely don’t need a fancy wooden dowel to get moving. I’ve used everything from a sturdy tree branch in my backyard to a heavy-duty door handle when I was first starting out. The goal is just to have something solid that won’t budge while you’re pulling those knots tight. As long as it’s steady and won’t snap or slide around, go for it. Don’t let a lack of supplies stop your momentum!

How much cord should I actually cut before I start so I don't run out halfway through a knot?

Here’s the golden rule I live by: always cut more than you think you need. I usually follow the “four-to-one” rule for beginners. If you want your finished piece to be 12 inches long, start with cords that are at least 48 inches. It feels like a waste of string at first, but trust me, nothing kills my momentum faster than running out of cord mid-knot and having to re-thread everything.

Tips on how to secure your home wifi.

How to Secure Your Home Wifi Network

I remember sitting on my floor last Tuesday, surrounded by tangled ethernet cables and three different router manuals, feeling like I was trying to assemble a piece of furniture with half the screws missing. I had just read some tech blog claiming I needed to spend five hundred bucks on a “military-grade” mesh system just to keep my data safe, and honestly, it felt like a total scam. The truth is, most of the high-priced jargon out there is just noise designed to separate you from your paycheck. Learning how to secure your home wifi shouldn’t require a degree in computer science or a massive dent in your savings account; it’s a lot more figure-out-able than the experts make it sound.

I’m not here to sell you on expensive hardware or bury you in confusing tech-speak. Instead, I’m going to walk you through the exact, no-nonsense tweaks I use to lock down my own network using stuff you probably already have. We’re going to tackle this one step at a time, focusing on the practical stuff that actually works to keep the hackers out and your connection steady. By the time we’re done, you’ll have a secure setup and the peace of mind that comes with knowing you did it yourself.

Table of Contents

Change Default Router Password to Stop Uninvited Guests

Change Default Router Password to Stop Uninvited Guests

Look, I know the drill. You get a new router, plug it in, and it just works. But here’s the thing: those factory-set passwords are basically an open invitation for anyone with a little bit of tech savvy to hop onto your connection. Most people leave the default admin credentials untouched for years, which is a huge mistake. You really need to change default router password settings immediately. Think of it like leaving your front door unlocked just because the builder gave you a generic key; it’s just not safe.

Once you’ve logged into your router’s dashboard, take a second to look around the settings menu. While you’re in there, I highly recommend you disable WPS for better security. That little button that’s supposed to make connecting devices “easy” is actually a massive loophole that hackers love to exploit. It’s one of those small, five-minute tweaks that makes a massive difference in your overall digital defense. It might feel like a chore, but once it’s done, you can actually stop worrying about who’s lurking on your bandwidth.

Always Run a Firmware Update for Routers

Always Run a Firmware Update for Routers.

Think of your router like an old truck; even if it runs fine, it needs regular maintenance to keep from breaking down on the highway. In the tech world, that maintenance is your firmware update for routers. Manufacturers are constantly finding little “cracks” in their software—security holes that hackers love to exploit—and they release updates to patch them up. If you haven’t checked for an update in a year, you’re basically leaving your front door unlocked and hoping for the best.

I used to ignore these pop-ups entirely, thinking they were just annoying interruptions while I was trying to stream a movie. But I learned the hard way that skipping them is a huge risk. To stay on top of it, log into your router’s admin panel and look for a tab labeled “System,” “Advanced,” or “Software Update.” Most modern gear has a button that says “Check for Updates,” which makes the whole process pretty painless. Once you hit that button, just give it a few minutes to finish the install—and whatever you do, don’t pull the plug while it’s working!

5 More Quick Fixes to Keep Your Network Tight

  • Switch to WPA3 Encryption. When you’re digging through your router settings, check the security type. If it says WEP or WPA, that’s old news and pretty easy to crack. Look for WPA3—or at least WPA2—to make sure your data is actually wrapped in a decent layer of protection.
  • Turn Off WPS (Wi-Fi Protected Setup). You know that little button on the back of the router that lets you connect devices without a password? It’s convenient, sure, but it’s also a massive backdoor for hackers. I usually just disable it entirely to keep things locked down.
  • Create a Separate Guest Network. If you’ve got friends over or a bunch of smart lightbulbs and cheap gadgets, put them on a guest network. That way, if a sketchy smart plug gets compromised, it won’t have a direct line to your main laptop where you do your banking.
  • Hide Your SSID (If You Want to Be Extra). This is a bit of a “pro move,” but you can set your router so it doesn’t broadcast its name to everyone passing by. It won’t make you invisible to a determined hacker, but it definitely keeps the casual window-surfers from even seeing your network exists.
  • Disable Remote Management. Most routers come with a setting that lets you change things from anywhere in the world via the internet. Unless you’re a tech wizard who actually needs that, turn it off. You should only be able to mess with your router settings when you’re physically plugged into your own home network.

Quick Wins for a Safer Network

Swap out those factory-set passwords immediately; if it’s easy for you to guess, it’s easy for a stranger to use.

Keep your router’s software up to date to patch those sneaky security holes that hackers love to exploit.

Don’t let the tech talk scare you—securing your Wi-Fi is just about taking a few small, proactive steps to stay in control.

## A Quick Reality Check

“Think of your Wi-Fi like your front door: if you leave the key under the mat with the factory settings still on it, you’re basically just inviting the whole neighborhood to come in and use your bandwidth.”

Nathan Cole

You've Got This

Securing digital privacy: You've Got This.

Look, I know it can feel like you need a computer science degree just to keep your digital life private, but it really doesn’t come down to that. By just taking a few minutes to swap out those factory-set passwords and keeping your router’s firmware up to date, you’ve already done more than most people out there. You’ve essentially bolted the front door of your digital home. It’s not about being a tech wizard; it’s just about taking these small, practical steps to make sure your personal data stays exactly where it belongs—with you.

At the end of the day, my goal is to show you that these little technical hurdles are much more figure-out-able than they first appear. Don’t let the jargon or the complex settings intimidate you into giving up. Once you get these basics dialed in, you can stop worrying about your connection and get back to actually enjoying it, whether that’s streaming a movie or working from your kitchen table. You’ve put in the work, you’ve learned a new skill, and honestly? You should feel pretty good about it.

Frequently Asked Questions

Do I really need to set up a separate guest network for my smart home gadgets and visitors?

Honestly? Yes, you really do. Think of your main network like your front door—you wouldn’t want a random person or a cheap, unsecure smart bulb wandering into your bedroom, right? Setting up a guest network keeps your private stuff, like your laptop and phone, tucked away in a separate “room.” If a visitor’s phone has a virus or a smart plug gets hacked, they can’t jump over to your personal files. It’s a total lifesaver.

How do I know if my current encryption (like WPA2 or WPA3) is actually strong enough?

Here’s the quick way to check: log into your router’s settings page (just like we did for the password change) and look for the “Wireless Security” tab. If you see WPA3, you’re golden—that’s the gold standard. WPA2 is still solid for most of us, but if it says “WEP” or “WPA,” stop what you’re doing. Those are old, flimsy, and basically an open door for anyone with a little tech know-how.

Is it worth it to hide my Wi-Fi network name, or does that actually make me more vulnerable?

Honestly? It’s mostly “security through obscurity,” and in my book, that’s not real security. Hiding your SSID (your network name) might keep your Wi-Fi from popping up on a neighbor’s phone, but a decent hacker with basic tools will find it in seconds anyway. Plus, it can actually cause more headaches with your own devices constantly searching for it. I’d rather spend that energy on a strong password and encryption.

Tips on how to cook on a budget.

How to Cook Great Meals on a Tight Budget

I remember sitting in my first studio apartment back in my early twenties, staring at a receipt that looked more like a phone number than a grocery bill. I was exhausted from working odd jobs, and the idea of figuring out how to cook on a budget felt like another massive project I didn’t have the tools for. I used to think that eating well meant buying those fancy organic pre-cut veggies or spending a fortune on “specialty” ingredients that just sat in my pantry gathering dust. Honestly, most of the advice you see online makes it sound like you need a culinary degree and a massive time commitment just to avoid eating instant noodles for the third night in a row.

But here’s the thing: most of that stuff is just noise. I’ve spent years tinkering in my kitchen and learning through trial and error, and I’ve realized that feeding yourself well is actually a lot like fixing a leaky faucet—it’s just about having the right approach. In this guide, I’m going to skip the fluff and give you the straight-up, practical steps I use to keep my meals delicious without draining my bank account. We’re going to focus on simple swaps and smart habits that actually work in the real world.

Table of Contents

Smart Meal Planning for Beginners to Stop the Stress

Smart Meal Planning for Beginners to Stop the Stress

Look, I used to be the guy who would walk into a grocery store without a plan, grab whatever looked good, and then stare blankly at the fridge on Tuesday night wondering what to make. That’s a one-way ticket to expensive takeout or, even worse, letting a bag of wilted spinach die in the crisper drawer. If you want to actually see your savings grow, you’ve got to get comfortable with meal planning for beginners. It isn’t about being a gourmet chef or spending hours in the kitchen; it’s just about making a roadmap before you ever step foot in the store.

The trick is to start small. Instead of trying to plan twenty-one different meals, just pick three or four solid dinners you know you’ll actually eat. Once you have those, you can build an affordable grocery list ideas around them, focusing on low cost pantry staples like rice, beans, and pasta. When you know exactly what you’re looking for, you stop impulse-buying those pricey snacks that blow your budget. It takes a little bit of brainpower upfront, but the peace of mind is worth every second.

Building Your Low Cost Pantry Staples Foundation

Building Your Low Cost Pantry Staples Foundation

Once you’ve got your meal plan sketched out, the next step is to stop treating your kitchen like a high-end boutique and start treating it like a workshop. You need a solid base of materials that won’t expire the moment you look away. I’m talking about low cost pantry staples like dried beans, lentils, rice, oats, and pasta. These are the “lumber” of the cooking world—they aren’t flashy, but they provide the structure for almost every meal. If you keep these on hand, you’ll never find yourself staring blankly at an empty fridge at 6:00 PM, wondering what to do.

When I’m grocery shopping on a budget, I try to avoid the “middle aisles” filled with expensive, pre-packaged snacks and instead focus on these versatile basics. Spices and oils are your finishing touches; they’re what turn a plain bowl of rice and beans into something that actually tastes like a real meal. By investing a little bit of money upfront in these shelf-stable essentials, you’re essentially building a safety net that makes every future meal much cheaper and a whole lot faster to whip up.

5 Pro-Tips to Keep Your Grocery Bill From Spiraling

  • Master the art of the “Meatless Monday” (or any day, really). Meat is usually the biggest chunk of the grocery bill, so swapping a steak for a hearty lentil stew or a black bean taco night once or twice a week can save you a ton of cash without leaving you hungry.
  • Stop buying pre-cut stuff. I know, it’s tempting to grab the pre-chopped onions or the bagged salad when you’re tired, but you’re paying a massive premium for someone else to use a knife. Buy the whole head of lettuce and the bag of onions; it takes five extra minutes of prep, but it keeps more money in your pocket.
  • Shop your own kitchen first. Before you head out to the store, take a good look in your pantry and freezer. I’ve saved so many dinners just by realizing I already had a box of pasta and a jar of marinara hiding in the back. If you know what you already have, you won’t buy duplicates.
  • Embrace the frozen aisle. People think frozen veggies are “lesser,” but they’re actually a budget lifesaver. They’re picked at peak ripeness, they won’t rot in your crisper drawer if you forget about them for a week, and they’re way cheaper than the fresh stuff out of season.
  • Learn to love “Leftover Makeovers.” Don’t just eat the same boring leftovers the next day. Turn last night’s roasted chicken into a chicken salad sandwich, or toss those leftover veggies into an omelet for breakfast. It turns “scraps” into a brand-new meal and keeps your food waste—and your spending—at zero.

The Bottom Line: Keeping Your Kitchen Budget-Friendly

Stop treating every meal like a new project; when you lean on those pantry staples you’ve already built up, you save money and a whole lot of mental energy.

Planning isn’t about being perfect or following a rigid, boring schedule—it’s just about having a rough roadmap so you aren’t making expensive, last-minute decisions when you’re hungry.

Remember that most of the “expensive” parts of cooking are the extras; if you master the basics and swap out the pricey stuff for smart alternatives, you’ll eat better for way less.

My Philosophy on the Kitchen Budget

“Eating well doesn’t require a gourmet grocery budget; it just requires a little bit of strategy and the willingness to trade fancy packaging for smart, simple ingredients you can actually work with.”

Nathan Cole

Putting It All Into Practice

Putting It All Into Practice with cooking.

At the end of the day, cooking on a budget isn’t about deprivation or eating bland, sad meals; it’s about being a little more intentional with how you shop and prep. We’ve talked about how much easier life gets when you have a solid meal plan to guide you and a pantry stocked with those versatile, low-cost staples that can turn into a dozen different dishes. When you stop making impulse buys at the grocery store and start leaning on the ingredients you already have, you’ll see those savings start to pile up. It’s really just a series of small, smart adjustments that eventually turn into a much more sustainable way of living.

I know it can feel a bit daunting when you’re staring at a receipt that’s way higher than you wanted it to be, but please don’t get discouraged if you don’t get it perfect right away. I’ve definitely had weeks where my “plan” went totally out the window, and that’s okay. The goal isn’t perfection; it’s just about making things a little more figure-out-able one meal at a time. Just grab your grocery list, keep it simple, and remember that you’ve totally got this. Once you get into the rhythm of it, you’ll realize that taking control of your kitchen is one of the best ways to take control of your life.

Frequently Asked Questions

How do I keep my food from going bad if I'm buying in bulk to save money?

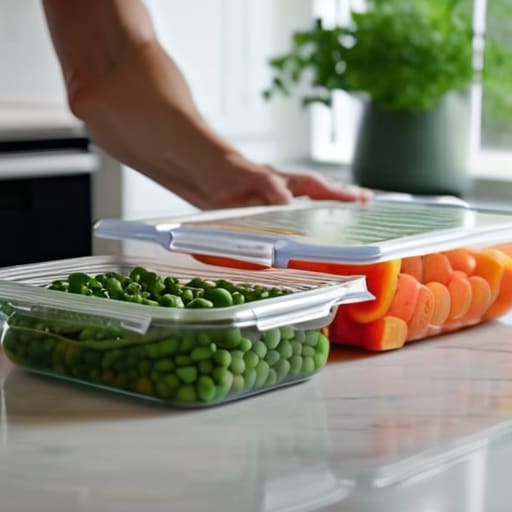
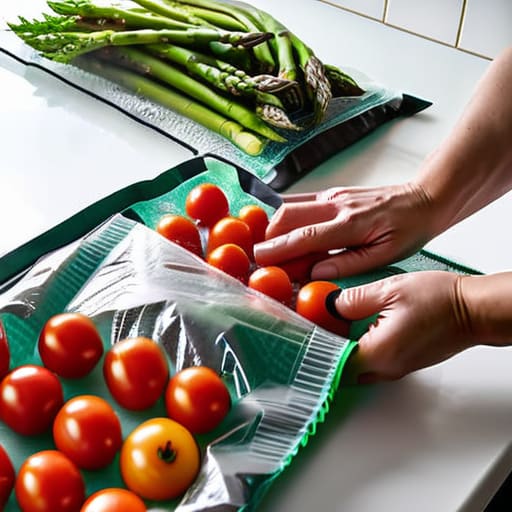
The “Bulk Buy Trap” is real—you save five bucks today only to toss twenty bucks of spoiled spinach next week. My rule of thumb? Buy for the freezer, not the fridge. If you’re grabbing a massive bag of rice or frozen veggies, make sure you have airtight containers or heavy-duty freezer bags ready. For things like meat, portion them out before they freeze so you aren’t thawing a whole slab for one taco night.

What are some cheap ways to add flavor to basic pantry staples so I don't get bored eating the same thing?

Look, I get it. Eating beans and rice every night can feel like a chore if everything tastes the same. The secret isn’t expensive gourmet ingredients; it’s all about the “flavor trifecta”: acid, heat, and aromatics. A squeeze of lime or a splash of vinegar wakes up a dull stew, while some decent chili flakes or even just toasted garlic adds that punch. Grab a few cheap spices—cumin, smoked paprika, or dried oregano—and suddenly, that basic pantry meal feels like a real dish.

Is it actually cheaper to meal prep everything on Sunday, or am I just spending more on groceries upfront?

That’s a great question, and honestly, I used to wrestle with it too. Here’s the deal: meal prepping on Sunday usually costs more that specific day because you’re buying in bulk to stock the fridge. But if you look at the weekly total, you’ll almost always come out ahead. It stops those “I’m too tired to cook” $25 takeout orders from creeping in. Think of it as an upfront investment to save your wallet later.

Profitable side hustle ideas to start now.

Side Hustle Ideas You Can Start This Weekend

Look, I get it. We’ve all had those nights where we’re staring at a stack of bills or a bank statement that just isn’t adding up, wondering where the hell the money went. It’s easy to feel stuck, like your paycheck is a fixed ceiling you just can’t break through. But here’s the thing I’ve learned from years of odd jobs and tinkering: most financial gaps are just problems waiting for a solution. You don’t need a massive business degree or a huge inheritance to change your situation; you just need a few solid side hustle ideas that actually fit into your real, messy life.

I’m not here to pitch you some “get rich quick” scheme that requires you to sell your soul or work eighty hours a week. Instead, I’ve rounded up five practical, down-to-earth ways to start earning extra cash without losing your mind in the process. We’re going to look at options that use skills you probably already have, whether that’s working with your hands or your head. By the time we’re done, you’ll have a clear, step-by-step roadmap to start building a little extra breathing room in your budget.

Table of Contents

Turn Your Tool Kit Into Cash

Turn Your Tool Kit Into Cash.

If you’re like me, you probably have a garage or a closet filled with tools that sit idle most of the week. Instead of letting that drill or pressure washer collect dust, you can offer your services for small home repairs or assembly jobs. I’ve found that neighbors are often looking for someone who can just come over and put together a bookshelf or fix a squeaky door without charging a professional contractor’s massive hourly rate.

Master the Art of Reselling

Master the Art of Reselling thrifted items.

I used to think “flipping” items was something only professional collectors did, but it’s actually a lot more accessible than that. It really just comes down to having a good eye for potential. I love hitting up local thrift stores or garage sales to find old, solid wood furniture or even vintage electronics that just need a little bit of cleaning and some elbow grease to look brand new again.

Help Others Organize Their Chaos

Help Others Organize Their Chaos efficiently.

Most people are drowning in a sea of clutter, whether it’s a messy pantry, a chaotic garage, or a digital mess of unorganized files. If you’re the kind of person who actually gets a kick out of color-coding your spice rack or tidying up a junk drawer, you have a skill that people are willing to pay for. You don’t need a degree in organizational psychology; you just need a system that works.

Share Your Hands-On Skills

There is a huge gap right now between “knowing how to do something” and “knowing how to teach it.” If you know how to bake a killer sourdough, fix a flat tire, or even navigate complex spreadsheet software, there is someone out there who wants to learn from you. You can set up simple, one-on-one tutoring sessions or even create a basic digital guide to sell online.

Tackle the Neighborhood Pet Duty

This isn’t just about walking dogs; it’s about providing reliable care for people who are too busy or too far away to look after their pets. I’ve noticed that pet owners are often looking for someone they can actually trust with their furry family members. If you’re a reliable person who doesn’t mind getting a little bit of dog hair on your clothes, this is a low-stress way to earn some extra cash.

The Bottom Line: Just Get Started

Don’t get stuck in “analysis paralysis”—pick the one idea that feels the least intimidating and just try it for a week to see if it actually sticks.

You don’t need a fancy business plan or a massive upfront investment; most of the best side hustles are built one small, practical step at a time.

Treat your side hustle like a DIY project—it’s going to have some hiccups and learning curves, but as long as you keep troubleshooting, you’ll get it running.

## The Real Secret to Getting Started

“Don’t get paralyzed trying to find that one ‘perfect’ million-dollar idea. Most of the best side hustles aren’t some grand invention; they’re just simple ways to solve a problem someone else has. Pick something you’re already decent at, keep the startup costs low, and just start building. You can always tune the engine once you’re actually moving.”

Nathan Cole

Just Get Started

Look, I know that looking at a list of ideas can sometimes feel a bit overwhelming, like staring at a pile of unsorted screws in a junk drawer. We covered everything from tapping into your digital skills with freelancing to getting your hands dirty with local service gigs or even flipping items you find at yard sales. The main thing I want you to take away is that you don’t need a massive business plan or a fancy degree to make this work. Whether you’re leaning into tech, your hands-on skills, or just your ability to stay organized, the goal is to find that one small thing that fits into your current life without causing a total meltdown.

At the end of the day, the biggest hurdle isn’t your lack of experience; it’s usually just the fear of starting something new. I’ve learned through plenty of failed DIY projects and messy kitchen experiments that you only truly learn by doing. You don’t have to build an empire by next Tuesday. Just pick one idea, try it out for a few weeks, and see how it feels. Most things in life are much more figure-out-able once you actually roll up your sleeves and dive in. You’ve got this, so go ahead and take that first small step.

Frequently Asked Questions

How much time do I actually need to set aside each week to make this worth the effort?

Look, I get it. The last thing you want is a side hustle that feels like a second full-time job. Honestly? You can start with just five or six hours a week—maybe an hour or two after dinner or a solid block on Saturday morning. The trick isn’t working massive hours; it’s being consistent. Treat it like a small DIY project. If you show up for a little bit every week, you’ll see progress without burning out.

Do I need to spend a bunch of money upfront on gear or software before I can start earning?

Look, I get it. You see those influencers with their $3,000 camera setups and fancy software, and it feels like you need a small loan just to get started. But honestly? Don’t fall for that trap. Most of the side hustles I’ve tried—and most people actually succeed at—start with what you already have in your pocket or on your desk. Use your smartphone, your existing laptop, or even just your hands. Start small, earn your first dollar, and then reinvest that profit into better gear.

How do I know if a side hustle is actually going to make money or if I'm just spinning my wheels?

Look, I’ve been there—spending three weekends building a website for a business that makes exactly zero dollars. It’s frustrating. To avoid spinning your wheels, don’t get bogged down in the “setup” phase. Instead, try to get your first dollar as fast as humanly possible. Whether it’s a quick Venmo from a neighbor or a tiny sale on Etsy, that first bit of real cash is the only true proof that your idea actually has legs.

Guide on how to set up a smart home.

How to Set Up a Smart Home on a Budget

I was standing in the middle of my living room last Tuesday, staring at a tiny, blinking light on a smart bulb that refused to connect to my Wi-Fi, feeling like I was losing a fight against a piece of plastic. It’s easy to look at all those sleek tech commercials and think you need a degree in computer science or a massive bank account to get started. But here’s the truth: most people make it way more complicated than it needs to be. Learning how to set up a smart home shouldn’t feel like you’re trying to pilot a spaceship; it should feel as straightforward as swapping out a light fixture or fixing a leaky faucet.

I’ve spent way too many late nights troubleshooting gadgets so you don’t have to. In this guide, I’m going to strip away the jargon and show you how to build a system that actually works for your life. We’ll cover the essential gear, how to avoid the common compatibility traps, and the best ways to get everything talking to each other without a headache. My goal is to help you automate the boring stuff so you can get back to the things that actually matter.

Table of Contents

Guide Overview

Total Time: 3-5 hours
Estimated Cost: $200-$500
Difficulty: Beginner

Tools & Supplies

  • Smartphone (to run control apps)
  • Wi-Fi Router (to provide network connectivity)
  • Screwdriver (for mounting some devices)
  • Smart Hub (1 unit)
  • Smart Bulbs (4-6 units)
  • Smart Plugs (2-3 units)
  • Smart Speaker (1 unit)

Step-by-Step Instructions

  • 1. First things first, you’ve got to pick your “brain.” In the smart home world, this is your ecosystem—the platform that’s going to talk to all your gadgets. I usually tell people to stick to one of the big three: Amazon Alexa, Google Home, or Apple HomeKit. If you try to mix and match everything right out of the gate, you’ll end up with a dozen different apps on your phone, and that’s a fast track to a headache. Pick the one that feels most natural to you and stick with it for your first few devices.
  • 2. Next, let’s talk about your Wi-Fi. I’ve seen so many folks buy a fancy smart lightbulb only to have it fail because their router is buried in a closet under a pile of mail. Your smart devices need a rock-solid connection to work properly. If you have a big house or a lot of “dead zones,” you might want to look into a mesh Wi-Fi system. It’s a little more upfront cost, but it’ll save you from the frustration of a lightbulb that won’t turn on because the signal can’t reach the hallway.
  • 3. Don’t try to automate your entire life in a single weekend. Start with something small and actually useful, like a smart plug or a couple of smart bulbs. I always recommend starting with smart plugs; they’re cheap, easy to install, and they can turn your “dumb” coffee maker or a floor lamp into a smart device instantly. Once you get the hang of controlling one thing with your voice or your phone, you’ll start to see where the real gaps are in your daily routine.
  • 4. Now it’s time to actually install the hardware. For smart bulbs, you just screw them in like normal. For smart plugs, you just pop them into the outlet. If you’re feeling a bit more adventurous and want to tackle smart switches, take your time here. You’ll need to turn off the power at the breaker first—I don’t care how “techy” you feel, never work on live wires. Follow the manual closely, and if something feels sketchy, stop and double-check your connections.
  • 5. Once the hardware is in place, it’s time for the digital handshake. Open up your chosen ecosystem’s app and follow the prompts to “Add Device.” This is where you’ll connect the gadget to your Wi-Fi. A pro tip from my side: name your devices something logical. Instead of “Smart Bulb 1,” name it “Living Room Floor Lamp.” It makes a huge difference when you’re walking through the door in the dark and yelling, “Hey Google, turn on the lamp!
  • 6. This is where the real magic happens: setting up “Routines” or “Automations.” This is the difference between just having a remote-controlled house and having a smart house. You can set a routine so that when your alarm goes off in the morning, the bedroom lights slowly brighten and the coffee maker starts brewing. It sounds fancy, but it’s really just a series of “If This, Then That” instructions. Start with one simple routine, like “Goodnight,” that turns off all the lights and locks the front door with one command.
  • 7. Finally, give everything a “stress test.” Walk around the house and try to trigger your new devices using the app, your voice, and any physical switches you’ve installed. You want to make sure there aren’t any weird lag times or devices that refuse to respond. If something isn’t working, don’t panic—it’s usually just a matter of updating the firmware or moving the device a few inches closer to the router. Once it’s running smooth, sit back and enjoy the handiwork.

Your Smart Home Beginner Checklist for a Smooth Start

Your Smart Home Beginner Checklist for a Smooth Start.

Before you go out and grab every shiny new gadget on the shelf, I want you to take a breath. It’s easy to get caught up in the hype, but the secret to a setup that actually works—and doesn’t drive you crazy—is planning ahead. My biggest piece of advice is to nail down your smart home ecosystem compatibility before you spend a single dime. You don’t want to buy a high-end smart lock only to realize it won’t talk to the voice assistant you already have sitting on your kitchen counter. Decide if you’re a Google, Alexa, or Apple person first, and let that be your North Star.

Once you’ve picked your camp, run through this quick smart home beginner checklist to make sure your foundation is solid. First, check your Wi-Fi signal in the rooms where you plan to install devices; nothing kills the vibe faster than a smart bulb that constantly drops offline. Second, think about your long-term goals. Are you looking at automating home lighting and security to save on energy, or do you just want your coffee maker to start when your alarm goes off? Knowing your “why” helps you buy tools that actually solve problems instead of just adding clutter to your phone.

Picking the Best Smart Home Hubs 2024 for Your Space

Picking the Best Smart Home Hubs 2024 for Your Space

Think of your smart home hub as the brain of the whole operation. If you don’t pick a good one, you’ll end up with a bunch of gadgets that refuse to talk to each other, which is a massive headache I’ve dealt with more than once. When you’re looking for the best smart home hubs 2024 has to offer, your first priority should be smart home ecosystem compatibility. You want a hub that plays nice with everything from your smart bulbs to your doorbell, so you aren’t stuck jumping between five different apps just to turn off the lights before bed.

If you’re a fan of using your voice to control things, focus on integrating voice assistants like Alexa, Google Assistant, or Apple HomeKit right from the start. For most of us, a simple plug-and-play setup is better than a complex pro-grade system that requires a degree in computer science to run. I always tell people to start small and scale up as you get comfortable. Once you have a solid hub acting as your command center, adding more devices feels less like a chore and more like a fun weekend project.

5 Pro-Tips to Keep Your Smart Home from Turning Into a Headache

  • Start with one ecosystem and stick to it. I know it’s tempting to grab whatever gadget is on sale at the hardware store, but if you mix too many different brands that don’t talk to each other, you’ll end up with ten different apps on your phone just to turn off the lights. Pick a “language”—like Alexa, Google, or Apple—and try to keep your new gear within that family.
  • Check your Wi-Fi strength before you buy anything. There is nothing more frustrating than installing a smart doorbell only to realize it can’t “see” your router through your front door. If you’ve got dead zones in your house, grab a Wi-Fi extender or a mesh system before you start adding more devices to the network.
  • Don’t forget about manual overrides. I’ve seen people get so caught up in automation that they forget they still need to be able to walk up to a wall and flip a switch. Always make sure your smart bulbs or plugs still work with a physical switch, or you’ll be standing in the dark when the internet decides to take a nap.
  • Secure your network from day one. Since you’re essentially putting more “doors” into your digital house, you’ve got to lock them. Change the default passwords on every single device you buy, and if your router allows it, set up a “Guest Network” specifically for your smart gadgets to keep them separate from your main computer and phone.
  • Think about “routines,” not just individual gadgets. A smart home shouldn’t just be a bunch of things you control with your phone; it should actually do work for you. Instead of just turning on a light, set up a “Goodnight” routine that dims the lights, locks the front door, and lowers the thermostat all at once. That’s where the real magic happens.

The Bottom Line: Keep It Simple

Don’t try to automate your whole house in one weekend; start with one room or one task—like lighting or your thermostat—and build from there once you’ve got the hang of it.

Prioritize compatibility above everything else. Before you tap “buy” on a cool new gadget, make sure it actually plays nice with the hub or voice assistant you’ve already picked out.

Focus on utility, not just the “wow” factor. The best smart home tech isn’t just flashy; it’s the stuff that actually makes your daily routine a little easier or saves you a bit of money on your energy bill.

My Golden Rule for Smart Tech

“Don’t feel like you need to turn your whole house into a sci-fi movie overnight; just pick one problem you want to solve—like a light that’s too dim or a thermostat that’s too finicky—and start there. A smart home is built one useful gadget at a time, not in one big, expensive headache.”

Nathan Cole

Wrapping It All Up

Wrapping It All Up: Smart Home Tips

Look, I know we covered a lot of ground today, from picking out a solid hub to checking off that beginner’s list. It can feel like a lot to juggle at once, but remember that you don’t have to do everything in a single weekend. Start small—maybe just a couple of smart bulbs or a plug you can control from your phone—and build from there. The most important thing is to ensure your devices are compatible with each other so you aren’t constantly fighting with different apps. Once you get that foundation laid down, the rest of the pieces will start to fall into place much more naturally.

At the end of the day, a smart home isn’t about having the flashiest, most expensive gadgets on the block; it’s about making your daily routine a little bit easier and a lot more efficient. Whether it’s the lights dimming automatically when you sit down for dinner or your thermostat adjusting while you’re out running errands, these little wins add up. Don’t let the tech side of things intimidate you. You’ve got the tools and the plan, so just take it one step at a time and embrace the process. You’ve totally got this!

Frequently Asked Questions

Will all these different gadgets actually talk to each other, or am I going to end up with five different apps on my phone?

I hear you—the “app overload” is exactly what keeps people from starting. Honestly, if you just buy random gadgets, you will end up with a phone full of clutter. But here’s the trick: look for devices that support “Matter” or work with your chosen hub. If everything speaks the same language, you can control your lights, locks, and thermostat from one single app. It’s all about picking a common tongue first.

Do I need to rewire my whole house to get this working, or can I just use what I've already got?

The short answer? Definitely not. Unless you’re living in a literal cabin from the 1800s, you don’t need to tear open your walls. Most of these gadgets are designed to play nice with your existing outlets and Wi-Fi. Think of it like adding new tools to an old toolbox—you don’t replace the whole box, you just add what works. Start with what you’ve got, plug things in, and go from there.

How much is this really going to mess with my Wi-Fi speed when I'm trying to stream a movie or work?

That’s the million-dollar question, isn’t it? Honestly, if you just plug in a couple of smart bulbs, you won’t even notice a difference. But if you start adding dozens of cheap gadgets, they can start crowding your bandwidth like people at a crowded bar. My advice? Stick to a decent router, keep your high-demand stuff (like your work laptop and Netflix) on the main frequency, and you’ll be just fine.

Guide on how to build a bookshelf.

How to Build a Simple Bookshelf From Scratch

I was standing in the middle of my living room last Saturday, staring at a pile of expensive, particle-board shelving I’d bought from a big-box store, wondering why it felt so flimsy. It’s a common trap: we think that learning how to build a bookshelf requires a massive workshop, a professional-grade table saw, and a degree in carpentry. But honestly? That’s just a myth that keeps people from actually starting. Most of the time, you don’t need a garage full of expensive gear; you just need a solid plan and a few basic tools that won’t break the bank.

In this guide, I’m going to strip away all the complicated jargon and show you exactly how I tackle these projects. I’ll walk you through selecting the right wood, making clean cuts, and getting those shelves perfectly level without losing your mind. This isn’t about building a museum piece; it’s about creating something sturdy and functional that actually fits your space. By the time we’re done, you’ll have a finished piece of furniture you can actually be proud of, all without needing a master’s degree in woodworking.

Table of Contents

Guide Overview

Total Time: 4-6 hours
Estimated Cost: $60-120
Difficulty: Beginner

Tools & Supplies

  • Circular saw or hand saw for cutting wood to size
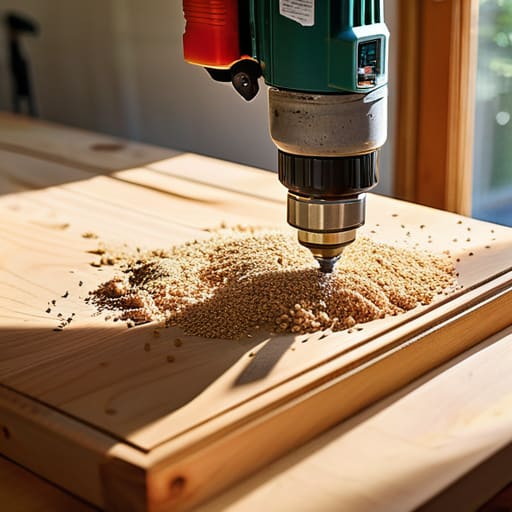
  • Power drill for driving screws and pre-drilling holes
  • Measuring tape for precise layout
  • Sandpaper for smoothing rough edges
  • Level to ensure the unit is straight
  • 1×6 lumber (approx. 4-5 boards of 8ft length)
  • Wood screws (1.5 inch, 1 box)
  • Wood glue (1 bottle)
  • Sandpaper (various grits)
  • Wood stain or paint (1 quart)

Step-by-Step Instructions

  • 1. First things first, you’ve gotta get your materials together so you aren’t running back to the hardware store halfway through the job. Grab some 3/4-inch plywood or pine boards for the main frame, a thin sheet of plywood for the back, and a box of wood screws. I always tell people to measure twice and cut once, so grab a tape measure, a pencil, and a saw before you get started.
  • 2. Once you’ve got your wood, it’s time to cut your side panels and your shelves. If you’re working with a circular saw, make sure you have a straight edge to guide you so your cuts don’t end up looking like a mountain range. You want your side pieces to be the same height and your shelves to be the exact same length, otherwise, your books are going to look a little wonky when you finally set them up.
  • 3. Now, let’s get the frame together. Lay one of your side panels flat on the ground and mark where you want your shelves to sit. I like to use a little scrap piece of wood as a spacer to make sure every shelf is at the exact same height. Once you’ve marked your spots, drill some pilot holes first; this is a pro tip that prevents your wood from splitting when you drive those screws in.
  • 4. Line up your first shelf with the marks you made and start driving those screws through the side panel and into the edge of the shelf. Don’t go too crazy with the drill right away—you want to be able to adjust things slightly if they aren’t lining up perfectly. Once everything is screwed in tight, stand the frame up to make sure it’s sturdy and not wobbling like a table with a short leg.
  • 5. This is the part most people try to skip, but don’t you dare: you need to attach the back panel. A bookshelf without a back is basically just a wobbly wooden frame waiting to collapse. Lay the unit face down, align your thin plywood sheet over the back, and nail it into place around the edges. This adds the structural integrity you need to keep the whole thing from leaning to one side.
  • 6. Finally, it’s time for the fun part—making it look good. You can leave the wood raw for a rustic vibe, or grab a can of paint or stain to match your room. I usually go with a simple matte finish, but if you’re feeling fancy, you can even add some edge banding to hide those rough plywood edges. Once the finish is dry, load up your favorite reads and take a victory lap around the room.

Gathering Essential Carpentry Supplies Without Breaking the Bank

Gathering Essential Carpentry Supplies Without Breaking the Bank.

Look, I’ve been there—standing in the middle of a big-box hardware store aisle, staring at a wall of power tools and feeling like I need a second mortgage just to get started. It’s easy to think you need a professional workshop to pull this off, but honestly? You don’t. When you’re hunting for essential carpentry supplies, my best advice is to focus on the basics. You really only need a solid saw, a drill, a level, and some decent clamps. Instead of buying a brand-new, high-end kit, check out local pawn shops or even Facebook Marketplace. You can often find high-quality, older tools that just need a little cleaning to work perfectly.

Another trick I use to keep costs down is being smart about your materials. If you’re following certain woodworking tools for beginners guides, you might see fancy hardwoods mentioned, but for your first project, don’t be afraid of pine or even high-grade plywood. It’s much more forgiving and way easier on your wallet. Just make sure you have a good tape measure and a square; getting the measuring and cutting wood part right the first time is the best way to avoid wasting money on ruined boards.

Mastering Measuring and Cutting Wood With Total Confidence

Mastering Measuring and Cutting Wood With Total Confidence

Look, I’ll be the first to admit that nothing makes my palms sweat quite like a saw blade. We’ve all been there: you stare at that expensive piece of lumber, the tape measure is in your hand, and you suddenly forget how math works. But here’s the secret I learned from my dad: measure twice, cut once isn’t just a cliché; it’s a survival tactic. When you’re measuring and cutting wood for your first project, don’t just eyeball it. Use a sharp pencil to mark your lines, and always account for the “kerf”—that’s the tiny bit of wood the saw blade actually turns into sawdust. If you don’t account for that width, your pieces are going to end up a hair too short, and trust me, that’s a headache you don’t want.

Once you’ve got your marks, take a breath. If you’re using a hand saw, let the tool do the heavy lifting instead of forcing it through the grain. If you’ve moved up to a power saw, make sure your workpiece is clamped down tight. Even if you’re following specific custom shelving unit plans, steady hands and a solid grip are what really make the difference between a professional-looking shelf and a wobbly mess.

Five little tricks to keep your project from turning into a headache

  • Measure twice, cut once—and then measure a third time if you’re feeling nervous. I’ve lost more good wood to a “measure once and hope for the best” attitude than I care to admit.
  • Don’t skip the sanding. It’s tempting to just slap the finish on once the glue dries, but a little extra time with some sandpaper now means you won’t be dealing with splinters or a rough surface later.
  • Use a square every single time you make a mark. If your corners aren’t a true 90 degrees, your bookshelf is going to lean like the Tower of Pisa, and no amount of clever styling will fix that.
  • Check your level constantly. Even if your cuts are perfect, if your base isn’t sitting flat on the floor, the whole thing will feel wobbly. A quick check with a level can save you a massive amount of frustration.
  • Pilot holes are your best friend. If you try to drive a screw straight into the wood without drilling a tiny hole first, you’re basically asking for the wood to split right down the middle. Take the extra thirty seconds to drill the hole first.

Two cents to remember before you start

Measure twice and cut once—it sounds like a cliché for a reason, and it’ll save you a lot of wasted lumber and frustration.

You don’t need a professional-grade workshop to get this done; a few solid hand tools and some patience will take you much further than an expensive power tool set ever could.

Don’t sweat the small imperfections; a little bit of sanding and some decent wood filler can turn a “DIY project” into a piece of furniture you’re actually proud to show off.

## The real secret to the build

“Look, you’re going to mess up a measurement or cut a board a hair too short at some point—I definitely have. But don’t let a crooked shelf stop you; the goal isn’t perfection, it’s building something with your own two hands that actually holds your books.”

Nathan Cole

You Did It: Time to Load Up Those Books

You Did It: Time to Load Up Those Books

Once you’ve finished sanding down those rough edges and you’ve finally tightened up that last screw, take a second to step back and look at what you’ve actually accomplished. We went from a pile of raw lumber and a messy shopping list to a solid, functional piece of furniture that didn’t exist yesterday. It wasn’t just about the precision of your cuts or finding the right budget-friendly supplies; it was about following the process, staying patient when the measurements got tricky, and seeing it through to the end. You’ve navigated the hardware store, mastered the saw, and built something with your own two hands.

I know there might be a few tiny imperfections or a slightly crooked shelf, but honestly? That’s the best part. Those little marks are proof that this wasn’t a factory-made piece of junk from a big-box store—it’s a project that has some soul. Don’t let the fear of a mistake stop you from starting your next build. Whether it’s a bigger cabinet or a simple birdhouse, just remember that everything is figure-out-able if you take it one step at a time. Now, go grab your favorite novels, get them off the floor, and start filling those shelves up. You earned it.

Frequently Asked Questions

What should I do if I mess up a cut and end up with a piece of wood that's too short?

First off, take a breath. We’ve all been there, and I promise you aren’t the first person to “short” a board. Don’t toss it in the scrap pile just yet! If it’s only off by a hair, you might be able to adjust your design slightly. If it’s a major miss, try repurposing that piece into a smaller brace, a decorative trim, or even a custom spacer. Mistakes are just unexpected design opportunities.

Is it better to use screws or nails to keep the shelves from sagging over time?

If you’re worried about those shelves bowing under the weight of your heavy hardcovers, go with screws every single time. Nails are great for quick framing, but they can pull loose over time as the wood shifts. Screws actually bite into the material and hold that tension much better. Just make sure you drill pilot holes first so you don’t split your wood—trust me, I’ve learned that the hard way!

How do I make sure the whole thing is actually level and doesn't wobble once it's standing?

There’s nothing more frustrating than spending all day building something only to have it rock back and forth like a seesaw. To fix this, grab a spirit level and check your shelf on all sides before you even think about securing it. If your floor is wonky, don’t sweat it—just use some thin wood shims under the uneven corner. It’s a quick, cheap fix that makes a world of difference in stability.

Quick and easy dinner recipes for weeknights.

Easy Dinner Recipes for Busy Weeknights

We’ve all been there: it’s 6:00 PM, you’re staring blankly into a fridge that looks more like a graveyard for half-used condiments, and the thought of a complicated recipe feels like climbing a mountain. Between work, errands, and just trying to keep your head above water, the last thing anyone needs is a kitchen disaster or a mountain of dishes. I used to think that eating well meant spending hours hovering over a stove, but I’ve learned that finding reliable, easy dinner recipes is actually the secret to surviving the week without losing your mind—or your budget.

I’m not talking about those fancy, twenty-step meals you see on TV that require ingredients you can’t even pronounce. Instead, I’ve rounded up five of my absolute favorite go-to meals that are actually doable for anyone, even if your only kitchen experience is boiling water. These are the kind of one-pan, low-effort wins that I rely on when I’m tired but still want something better than a lukewarm takeout box. Stick with me, and I’ll show you how to turn a few basic staples into a solid meal in no time at all.

Table of Contents

The One-Pan Sheet Pan Sausage and Veggies

The One-Pan Sheet Pan Sausage and Veggies.

Look, I’ve had plenty of nights where the thought of scrubbing three different pots makes me want to just order pizza. That’s why I swear by the sheet pan method. You just chop up some smoked sausage, whatever veggies are looking sad in your crisper drawer—bell peppers, onions, or broccoli work great—and toss them all on a baking sheet with some olive oil, salt, and pepper. Throw it in a hot oven and let the magic happen while you actually relax for twenty minutes.

Pantry-Staple Pesto Pasta

Quick Pantry-Staple Pesto Pasta meal.

We’ve all been there: it’s 6:30 PM, you’re exhausted, and the fridge is looking pretty empty. When I’m in that spot, I head straight for the pantry. A box of pasta and a jar of decent pesto is basically a lifesaver. It takes about ten minutes to boil the water, and once that pasta is tender, you’re basically halfway to a gourmet-feeling meal without needing a culinary degree.

Loaded Black Bean Quesadillas

Loaded Black Bean Quesadillas with melted cheese.

If you’ve got tortillas and a can of black beans, you’ve got a dinner. I used to think quesadillas were just for kids, but once you start loading them with actual substance, they become a total staple in my rotation. Just rinse those beans, smash a few of them with a fork so they don’t roll out of the tortilla, and layer them with whatever cheese you have on hand.

Skillet Ground Beef and Rice Bowls

This is one of those “workhorse” meals that I find myself making at least once a week. It’s basically a deconstructed version of a burrito bowl, but you do it all in one skillet to save on cleanup. Brown some ground beef or turkey, throw in some garlic powder and onion powder, and then mix in some pre-cooked rice or even a bag of frozen rice medley.

The "Everything" Breakfast for Dinner

Sometimes, the easiest way to handle a tough day is to lean into the comfort of breakfast. I call this my “emergency dinner” because you almost always have the ingredients sitting in the fridge. Scrambled eggs, a couple of slices of toast, and maybe some bacon or sausage if you’re feeling fancy. It’s fast, foolproof, and honestly, it’s hard to mess up an egg.

The Bottom Line on Stress-Free Cooking

Keep your pantry stocked with a few “emergency” staples so you’re never staring blankly at an empty fridge when you’re tired.

Don’t sweat the small stuff—if a recipe calls for an ingredient you don’t have, just swap it for something similar and keep moving.

The goal isn’t a five-star meal every night; it’s about getting something decent on the table without losing your mind or your budget.

## My Philosophy on the Kitchen

“Look, I’m not trying to win a Michelin star here. At the end of a long day, I just want something that tastes good, fills me up, and doesn’t leave me with a mountain of dishes that makes me want to quit cooking altogether. If it’s simple enough to pull off when you’re tired, it’s a win in my book.”

Nathan Cole

Getting It Done in the Kitchen

Look, at the end of the day, these five recipes aren’t about becoming a Michelin-star chef or spending three hours scrubbing pots and pans. They’re about cutting the chaos out of your evening. Whether you went with the one-pan roasted chicken or that quick pasta, the goal was the same: getting a decent, warm meal on the table without losing your mind. You don’t need a pantry full of exotic spices or a kitchen full of fancy gadgets to make this work; you just need a little bit of prep and the willingness to try something new. Once you realize how few moving parts these meals actually have, you’ll stop seeing dinner as a daunting chore and start seeing it as something you can actually manage.

If you messed up a step or the seasoning wasn’t quite right, don’t sweat it. I’ve burnt more toast and over-salted more soups than I care to admit, but that’s just part of the process. The real win isn’t a perfect plate; it’s the fact that you did it yourself. Cooking is a skill just like fixing a leaky sink or troubleshooting a router—it gets easier the more you roll up your sleeves and dive in. So, pick one of these for tomorrow night, keep it simple, and give yourself some credit for taking control of your kitchen. You’ve got this.

Frequently Asked Questions

Can I swap out the proteins in these recipes if I'm trying to save even more money or eat more plant-based?

Absolutely. In fact, that’s my favorite way to cook. I’m always swapping things out based on what’s on sale or what’s sitting in my pantry. If chicken is pricey, grab some canned chickpeas or black beans—they’re cheap, filling, and work great in almost any pan. If you’re going plant-based, lentils or firm tofu are your best friends here. Just keep an eye on your cooking times, and you’ll be golden.

What are some basic pantry staples I should keep on hand so I can whip these up even faster?

Look, I’ve learned the hard way that half the battle is just having the right stuff in the cupboard before you even start cooking. To move fast, keep these basics on hand: olive oil, kosher salt, black pepper, garlic powder, and a few dried herbs like oregano or crushed red pepper. Grab some rice, pasta, and canned beans too. If you’ve got those, you’re never more than ten minutes away from a solid meal.

If I'm cooking for a bigger family, how easy is it to scale these recipes up without making a massive mess?

Scaling up is actually where these kinds of recipes shine, but you’ve gotta be smart about it. My rule of thumb? Don’t just double everything in one pan or you’ll end up with a soggy mess. Grab a larger heavy-duty sheet pan or a bigger Dutch oven to keep the heat even. If you’re doing a massive batch, I usually prep everything in bowls first—it keeps the counter from looking like a disaster zone while you work.

Effective weekly planning for stress reduction.

How to Plan Your Week for Less Stress and More Done

I used to think that “weekly planning” required one of those fancy, color-coded digital planners or a subscription to some high-end productivity app that costs more than a decent cordless drill. I’d spend hours staring at a blank screen, trying to optimize every single minute of my life like I was running a Fortune 500 company, only to end up feeling more exhausted than when I started. Honestly, most of that high-level productivity hype is just noise that makes a simple task feel way more complicated than it actually needs to be.

Look, I’m not here to sell you on a lifestyle overhaul or a complicated system that takes more work to maintain than the actual tasks themselves. I just want to show you how to get your head above water. I’m going to share the no-nonsense approach I use to map out my days so I can actually get my projects done without losing my mind. We’re going to break this down into a few straightforward steps that you can start using tonight, helping you take control of your schedule instead of letting it run you ragged.

Table of Contents

Building a Simple Goal Setting Framework That Actually Works

Building a Simple Goal Setting Framework That Actually Works

Look, I used to think setting goals meant writing a massive, intimidating list of everything I wanted to achieve by December. I’d sit there with a notebook, feel overwhelmed, and then promptly do nothing. That’s not a plan; that’s just a recipe for stress. Instead, I started using a much simpler goal setting framework that focuses on what’s actually doable in a seven-day stretch. I pick three “big wins” for the week—things that actually move the needle—and everything else just becomes supporting roles.

Once those big wins are set, I focus on organizing daily tasks around them so I’m not just busy, but actually productive. I’ve found that if a task doesn’t help me hit one of those three wins, it goes on the back burner. It’s about being intentional rather than just reacting to whatever email lands in my inbox first. This keeps me from spinning my wheels and helps me actually see progress by Friday afternoon.

Organizing Daily Tasks Without Feeling Overwhelmed

Organizing daily tasks without feeling overwhelmed.

Once you’ve got your big-picture goals sorted, the real challenge is the day-to-day grind. We’ve all been there: you wake up, look at a list of twenty things, and immediately want to crawl back under the covers. The secret to organizing daily tasks without losing your mind is to stop treating every single item like an emergency. If everything is a priority, then nothing is a priority. I like to pick just three “must-win” items each morning. If I hit those three, the day is a success, regardless of what else gets left on the cutting room floor.

Another trick I’ve picked up from my tinkering days is batching tasks for efficiency. Instead of jumping from an email to a phone call, then back to a spreadsheet, try grouping similar chores together. It’s like cleaning a garage—you don’t pick up one screw, then go wash a car, then come back for the next screw. You clear one zone at a time. When you group your “admin” work or your “errand” work, you stop that constant mental switching that drains your battery before lunch.

5 Pro-Tips to Keep Your Week From Spiraling

  • Build in “buffer time” like you would when estimating a home repair. If you think a task will take thirty minutes, give it forty-five. Life always throws a wrench in the works, and having that extra breathing room means one unexpected phone call won’t wreck your entire Tuesday.
  • Pick a “Planning Anchor” day. For me, it’s Sunday afternoon while I’m sipping coffee, but it could be Friday before you clock out. The goal is to face the upcoming week before it starts hitting you, so you’re playing offense instead of just reacting to everything.
  • Use the “Rule of Three.” Don’t write a list of twenty things and wonder why you feel like a failure by noon. Pick three big wins you want to achieve by Friday. If you hit those, the week is a success—anything else is just a bonus.
  • Group your “like with like” tasks. I call this batching. If you have five quick emails to send and three quick phone calls to make, do them all in one go. It’s much easier on your brain to stay in one “mode” than to constantly switching gears between deep work and busy work.
  • Review and reset. At the end of the week, take five minutes to look at what actually happened. Did you overschedule yourself? Did you ignore a certain type of task? Don’t beat yourself up; just treat it like a diagnostic check so you can tweak your plan for next week.

The Bottom Line: Keep It Simple and Keep Moving

Don’t try to plan every single minute of your day; leave some breathing room for when life inevitably throws a wrench in your plans.

Focus on your “Big Three” tasks each day so you actually make progress on what matters instead of just spinning your wheels on busywork.

Review your plan at the end of the week, see what worked, and tweak it for the next one—it’s a process of trial and error, just like any other DIY project.

The Secret to Not Feeling Behind

“A weekly plan isn’t about turning yourself into a robot or squeezing every last drop of productivity out of your day; it’s just about clearing the mental clutter so you can actually enjoy your life without that nagging feeling that you’ve forgotten something important.”

Nathan Cole

Getting Your Hands Dirty with the Plan

Getting Your Hands Dirty with the Plan.

Look, we’ve covered a lot of ground here, from setting goals that don’t feel like climbing Everest to breaking your daily chores down into bite-sized pieces. The main thing I want you to take away is that a weekly plan isn’t some rigid, unbreakable contract you sign with yourself; it’s more like a blueprint for a house. Sometimes you realize halfway through the build that you need to move a wall or change a doorway, and that is perfectly fine. As long as you’ve got your clear goals and a way to manage the day-to-day chaos, you aren’t just spinning your wheels anymore—you’re actually moving toward something.

At the end of the day, the whole point of all this tinkering with calendars and lists isn’t to turn you into a productivity robot. It’s about carving out a little more space to actually live your life without that constant, nagging feeling that you’ve forgotten something important. Don’t worry about being perfect right out of the gate; just start small and keep adjusting as you go. I promise you, once you get the rhythm down, you’ll realize that most things are figure-out-able, and you’ll finally have the breathing room you’ve been looking for. You’ve got this.

Frequently Asked Questions

What do I do when my carefully planned week completely falls apart because of an unexpected emergency or a work crisis?

Look, I’ve been there. You’ve got your color-coded calendar set, and then—boom—the car won’t start or a work crisis hits. Don’t scrap the whole plan; just pivot. Stop what you’re doing and take five minutes to reassess. Identify the “must-dos” for today and push the rest to tomorrow or next week. Think of it like a detour on a road trip: you’re still going to the same destination, you’re just taking a different route.

How much time should I actually spend on this planning every week without it becoming a chore that eats up my whole Sunday?

Look, I’ve been there—spending three hours color-coding a calendar only to realize I’m too exhausted to actually follow it. Don’t do that to yourself. Aim for about 20 to 30 minutes. That’s it. Think of it like prepping ingredients for a meal; you want enough time to get your tools ready, but you don’t want to spend the whole night chopping onions. Keep it quick, keep it rough, and get back to living.

Do I really need fancy apps and digital calendars, or can I just stick to a basic notebook and a pen?

Look, I’ve tried the high-tech apps with all the bells and whistles, and honestly? They usually just end up being another thing I have to “manage.” If a basic notebook and a pen get the job done for you, stick with them. There’s something about physically crossing a task off a list that hits different. Don’t let “fancy” become a barrier to actually getting things done. Use whatever tool makes you move.