
I’ve walked into more than a few thrift stores and garage sales only to see someone about to toss out a piece of furniture that just needed a little love. It honestly breaks my heart a bit. We’ve all been there—staring at a scratched-up side table or a dresser with a busted drawer, thinking it’s nothing more than expensive firewood. But before you head to the landfill or drop a fortune on something brand new from a big-box store, I want you to pause. There is so much potential hiding under that peeling veneer, and finding creative upcycling furniture ideas is the best way to build a home that actually has some character without draining your bank account.
In this guide, I’m going to show you that you don’t need a professional workshop to make a massive impact. I’ve rounded up five specific projects that are totally doable even if your only tools are a screwdriver and a can of paint. We’re going to walk through five different ways to take common, tired pieces and turn them into something you’d actually be proud to show off. Let’s get to work and turn that junk into something truly awesome.
Table of Contents
- Give that old dresser a fresh coat of life
- Turn a wooden ladder into a rustic bookshelf
- Upgrade your dining chairs with new fabric
- Transform a side table with contact paper
- Reclaim old crates for organized storage
- Quick tips before you grab your tools
- My Take on Giving Old Stuff New Life
- Don't Be Afraid to Get Your Hands Dirty
- Frequently Asked Questions
Give that old dresser a fresh coat of life
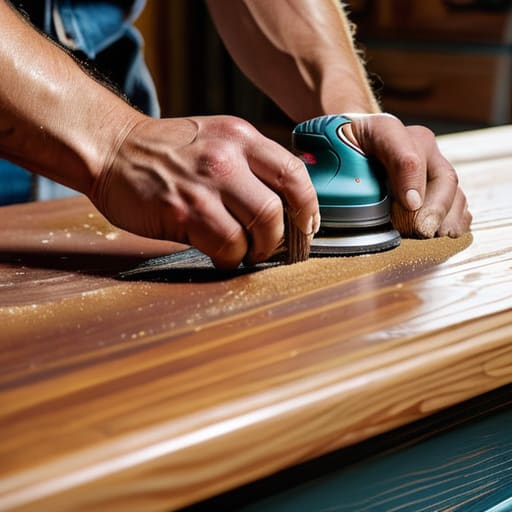
We’ve all seen them sitting on the curb or gathering dust in a garage sale—those heavy, outdated dressers with the wood grain that just doesn’t match anything modern. Instead of hauling it to the dump, grab a sander and some high-quality primer. I usually tell people to start with a good sanding session to get rid of that old, sticky varnish so the new paint actually sticks.
Turn a wooden ladder into a rustic bookshelf
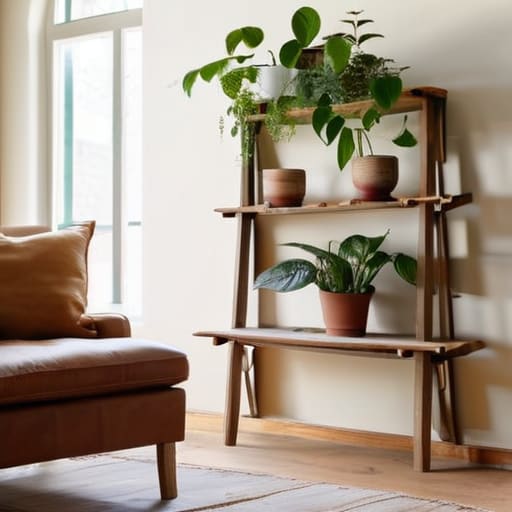
If you have an old wooden ladder leaning in the shed, don’t let it just sit there collecting cobwebs. You can turn it into a killer piece of shelving for your living room or even a plant stand for the porch. All you really need to do is find some sturdy wooden planks that are wide enough to sit on the rungs, and then secure them in place.
Upgrade your dining chairs with new fabric
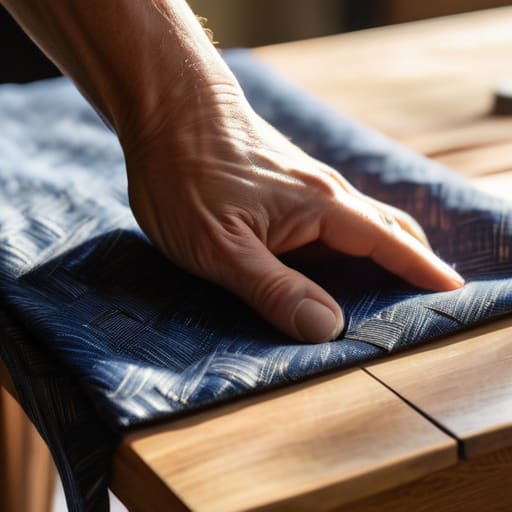
You don’t need to replace your whole dining set just because the chairs look a little tired or the fabric is stained. Most of the time, the “bones” of the chair are perfectly fine; it’s just the seat that’s seen better days. If you can find a staple gun and some durable upholstery fabric, you’re halfway there.
Transform a side table with contact paper
Sometimes you don’t want to go full-blown “construction mode” with saws and sanders, and that is totally fine. If you have a small side table or a nightstand with a surface that’s seen better days, contact paper is your best friend. I’m talking about the heavy-duty stuff, not the thin stuff you use for school projects.
Reclaim old crates for organized storage
I’ve always been a sucker for a good wooden crate, whether it’s an old wine crate or something found in an attic. Instead of letting them clutter up your workspace, you can turn them into modular storage units for your office or even your pantry. A quick sanding is a must to avoid any nasty splinters, but otherwise, they are ready to go right out of the box.
Quick tips before you grab your tools
Don’t overthink it—the goal isn’t perfection, it’s making something you actually love using.
Always clean and prep your surface thoroughly; a good sand or a quick wipe-down makes all the difference in how your finish turns out.
Start small with projects that don’t require a massive budget so you can build your confidence as you go.
My Take on Giving Old Stuff New Life
“At the end of the day, upcycling isn’t about being a master craftsman or having a fancy studio; it’s just about looking at a piece of junk and seeing the potential that’s hiding under the scratches. Most of the time, all a good chair needs is a little bit of sanding, a fresh coat of paint, and the confidence to know you can do it yourself.”
Nathan Cole
Don't Be Afraid to Get Your Hands Dirty
Look, I know that seeing a pile of old wood or a chipped-up nightstand can feel a little overwhelming at first. But whether you’re just slapping on some fresh paint to hide a scratch, swapping out those dated brass handles for something modern, or going all out with a full sanding and stain, you’ve seen that it’s really just about taking it one step at a time. We covered everything from simple cosmetic fixes to more involved structural changes, and the main takeaway is that you don’t need a professional workshop to make a massive impact. All you really need is a bit of patience and the right mindset to turn something destined for the landfill into the centerpiece of your room.
At the end of the day, upcycling isn’t about making something look “perfect” or like it just came off a showroom floor. It’s about the satisfaction of looking at a piece of furniture and knowing you were the one who gave it a second chance. Don’t let the fear of making a mistake stop you from starting; even if a coat of paint goes on a little wonky, that’s just part of the character. So, grab your sandpaper, clear off your workspace, and just start building something better. You’ve totally got this.
Frequently Asked Questions
Do I really need to sand everything down before I start painting, or can I get away with just a quick wipe?
Look, I get the temptation to skip the sanding—I’ve definitely been there when I just want to get a project finished. But here’s the truth: if you want the paint to actually stick, you can’t just wipe it down. A quick cleaning gets rid of the dust, but it won’t fix a slick, glossy finish. Give it at least a light scuff with some medium-grit sandpaper. It creates “tooth” for the paint to grab onto.
What's the best way to make sure my new paint job doesn't just peel off in six months?
Look, I’ve seen it happen a dozen times: you spend all Saturday painting, only to have the finish flake off like a bad sunburn by summer. The secret isn’t actually the paint—it’s the prep. You’ve got to clean that surface, sand down any old, loose bits, and, most importantly, use a good primer. If you skip the prep work, you’re basically just painting over a mess, and that’s where the peeling starts.
I'm on a pretty tight budget—are there cheap ways to fix up furniture that's actually a bit beat up or damaged?
Look, I’ve been there. When you’re watching every cent, a cracked tabletop or a wobbly chair feels like a reason to head to the thrift store, but don’t do it yet. Most “damage” is just a surface fix away. Grab some wood filler for those gouges, a cheap sanding block, and a small can of stain or paint. It’s way cheaper than buying new, and honestly, there’s nothing more satisfying than fixing something yourself.
