I was standing in my backyard last summer, staring at a massive, tangled mess of tomato vines that had basically turned into a green jungle on the ground. I realized I’d spent way too much money on those flimsy, plastic store-bought supports that snapped the second a heavy breeze hit them. It turns out, most people think learning how to build a garden trellis requires a master carpenter’s toolkit and a week of downtime, but that’s just not true. You don’t need a fancy workshop or expensive cedar planks to give your climbing plants something solid to hold onto; you just need a little bit of grit and some basic lumber.
In this guide, I’m going to show you how to put together a sturdy, reliable trellis using nothing more than a few standard pieces of wood and some basic fasteners. I’m skipping all the complicated architectural jargon and focusing on the real-world methods that actually work in a backyard setting. We’ll walk through everything from picking your materials to getting it anchored in the dirt, so you can stop fighting your garden and start enjoying it. By the time we’re done, you’ll have a project under your belt that looks great and lasts for seasons to come.
Table of Contents
- Step-by-Step Instructions
- Picking Your Garden Trellis Materials List Without the Stress
- Sturdy Trellis for Heavy Vines That Actually Last
- Five Pro-Tips to Keep Your Trellis from Becoming a Garden Mess
- Quick Tips to Keep Your Trellis Standing Strong
- The Secret to a Good Build
- Time to Get Growing
- Frequently Asked Questions
Guide Overview
Tools & Supplies
- Measuring tape for accurate cuts
- Hand saw or miter saw for wood processing
- Drill with bits for creating pilot holes
- Screwdriver or drill driver for fastening
- Untreated cedar or pine wood stakes (4-6)
- Wooden lattice panels or thin garden twine (1-2)
- Exterior grade wood screws (1 box)
- Garden staples or landscape wire (1 pack)
Step-by-Step Instructions
- 1. First things first, you’ve got to grab your materials. I usually head to the local hardware store (don’t worry, I’ll probably get distracted by the power tool aisle) and pick up some untreated cedar or redwood. I always recommend these because they handle moisture way better than cheap pine, which will just rot away in a season. You’ll also need some galvanized screws—the kind that won’t rust—and a few sturdy wooden stakes or 2x2s for the main frame.
- 2. Once you’ve got your wood, it’s time to do a little measuring and cutting. Grab a tape measure and a hand saw (or a miter saw if you’re feeling fancy) and cut your two main vertical posts to whatever height you want your plants to climb. For the horizontal slats, you’ll want to cut several smaller pieces that are about six inches shorter than the width of your trellis. This gives you a little wiggle room so the structure doesn’t look too cramped.
- 3. Now, let’s get to the assembly. I like to lay my pieces out on a flat surface, like a workbench or even a piece of scrap plywood on the grass, to make sure everything is square and level. Start by laying your two long vertical posts parallel to each other. This is the skeleton of your project, so if this part is wonky, the whole thing is going to look a little lopsided once it’s in the dirt.
- 4. This is where the “lattice” look comes in. Take those shorter horizontal slats you cut earlier and start screwing them across the two vertical posts. I find it easiest to pre-drill small pilot holes first; if you don’t, you’ll likely split the wood, and that’s a headache nobody needs. Space them out about 8 to 12 inches apart, depending on how heavy your plants are going to get.
- 5. Before you even think about putting this in the ground, give the whole thing a quick “stress test.” Grab the sides and give it a firm shake to make sure none of the screws are wiggling loose. If it feels solid, you’re ready for the heavy lifting. If it feels a bit flimsy, just add an extra screw at the joints to stiffen things up.
- 6. Now, it’s time for the actual installation. Dig two holes about 8 to 12 inches deep where you want the trellis to sit. If you’re building something small, you can just use garden stakes to pin it into the soil, but for a larger structure, I prefer to set the main posts directly into the holes. I usually toss a handful of gravel into the bottom of the hole first to help with drainage, which keeps the wood from sitting in a puddle and rotting.
- 7. Finally, once the trellis is upright and steady, it’s time to get your plants in. If you’re working with something like sweet peas or cucumbers, they’ll need a little help getting started. You can use some soft garden twine to gently tie the vines to your new wooden slats. After a few weeks, the plants will take over on their own, and you can just sit back with a cold drink and admire your handiwork.
Picking Your Garden Trellis Materials List Without the Stress
Before you head out to the hardware store, let’s talk about what you actually need. I’ve learned the hard way that picking the wrong stuff can turn a fun afternoon into a frustrating trip back to the lumber aisle. When you’re putting together your garden trellis materials list, my best advice is to think about what you’re actually growing. If you’re just looking to support some light annuals, some thin bamboo stakes or lightweight cedar slats will do the trick. But, if you’re planning on growing something beefy like wisteria or heavy squash, you’re going to need a sturdy trellis for heavy vines that won’t buckle under the weight once summer hits.
I usually lean toward pressure-treated lumber or naturally rot-resistant wood like cedar because, let’s be honest, nobody wants to rebuild their garden setup every single season. While you’re browsing, keep an eye out for various wooden trellis design ideas that might fit your space—maybe a classic A-frame or a simple wall-mounted lattice. Just make sure whatever you grab is thick enough to handle the wind and the moisture. Don’t overthink it; just grab something solid, and you’ll be golden.
Sturdy Trellis for Heavy Vines That Actually Last
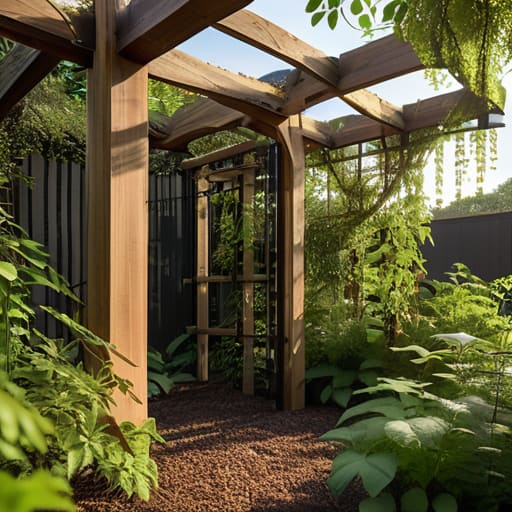
If you’re planning on growing something beefy like heavy-duty wisteria, old-school grapevines, or even some massive climbing roses, you can’t just wing it with some flimsy twine and thin bamboo sticks. I learned that the hard way a few years back when my summer squash basically took my lightweight trellis down with it during a thunderstorm. For those bigger plants, you really need to focus on building a sturdy trellis for heavy vines that can handle the weight of wet leaves and thick stems. I always recommend using thicker pressure-treated posts or even 4x4s sunk deep into the ground to create a rock-solid foundation.
When you’re looking at different climbing plant support structures, remember that the more weight the plant adds as it matures, the more reinforcement you’ll need. Don’t be afraid to use heavy-duty galvanized wire or thicker wooden slats to create a grid that won’t sag over time. It’s much better to overbuild it slightly now than to spend your entire summer trying to prop up a collapsing mess of greenery. Take the extra time to secure your joints with exterior-grade screws, and your garden will be set for years to come.
Five Pro-Tips to Keep Your Trellis from Becoming a Garden Mess
- Don’t forget the ground prep. If you’re driving stakes directly into the dirt, give them a good stomp or use a mallet to get them deep. A trellis that wobbles in the first breeze is going to be a headache you don’t need later.
- Think about your plant’s “personality.” If you’re growing something with tiny tendrils like sweet peas, you’ll need a fine mesh or thin wire. If it’s a heavy hitter like a squash, go with thick lattice or sturdy wooden slats so it doesn’t snap under the weight.
- Give your plants some breathing room. I’ve seen too many folks crowd their trellises, which just leads to mold and bad airflow. Leave a little gap between the trellis and your garden bed or fence to let the air circulate.
- Treat your wood before it goes in the ground. Even if the lumber says it’s “outdoor rated,” I always recommend a quick coat of non-toxic sealant. It’s a small extra step that keeps your project from rotting away after one rainy season.
- Plan for the “growth spurt.” Plants grow way faster than you think they will. Build your trellis a little taller than you think you’ll need, or make sure it’s designed so you can easily add an extra tier of support once the vines start taking over.
Quick Tips to Keep Your Trellis Standing Strong
Don’t overthink the materials; just match the weight of your plants to the strength of your wood or metal so you aren’t rebuilding next season.
Always prioritize a deep, solid anchor in the ground because a heavy vine can turn a flimsy trellis into a fallen mess during a summer storm.
Build for growth, not just for today—leave enough room for those vines to climb and spread without feeling cramped or suffocated.
The Secret to a Good Build
“At the end of the day, a trellis doesn’t need to be a masterpiece of fine carpentry to do its job; it just needs to be sturdy enough to hold the weight and simple enough that you didn’t lose your mind building it.”
Nathan Cole
Time to Get Growing
At the end of the day, building a trellis isn’t about having a professional contractor’s degree; it’s just about getting the right materials and making sure your structure is solid enough to handle the weight of those climbing plants. We’ve covered how to pick the right wood, how to keep things sturdy for heavy vines, and how to keep the whole process from becoming a massive headache. Just remember to double-check your measurements and ensure everything is anchored properly before you start adding the heavy greenery. If you’ve followed these steps, you haven’t just built a garden accessory—you’ve built a reliable foundation for your garden to thrive.
I know that staring at a pile of lumber and a handful of screws can feel a little daunting at first, but I promise you, the feeling of seeing those first green tendrils wrap around something you built with your own hands is unbeatable. There is something incredibly satisfying about looking out your window and knowing you didn’t just buy a plastic piece from a big-box store, but actually made something real. So, grab your drill, head out to the yard, and don’t be afraid to make a few mistakes along the way. You’ve got this, and your garden is going to thank you for it.
Frequently Asked Questions
Do I need to treat the wood to prevent it from rotting in the ground?
Short answer? Yes, absolutely. If you just shove raw wood into the dirt, it’s going to start rotting faster than a bag of peaches in July. Since your trellis is sitting in damp soil, you really want to use pressure-treated lumber or at least hit it with a good quality, eco-friendly wood sealer. If you’re using cedar or redwood, you’re in better shape naturally, but a little extra protection goes a long way.
How do I make sure my trellis doesn't tip over once the plants actually start growing on it?
Look, I’ve seen plenty of beautiful trellises go down like a house of cards once the heavy vines take over. To keep yours upright, you’ve got to think about the anchor. Don’t just stick the posts in the dirt; drive them deep—at least 12 to 18 inches—or better yet, use some heavy-duty garden stakes or even small concrete footings if you’re building something big. A little extra ground support now saves a lot of heartache later.
Can I use a trellis for heavy vegetables like squash, or is that too much for a DIY build?
You absolutely can, but you can’t use a flimsy little bamboo stick for that. Squash and melons are heavy hitters—they get bulky fast. If you’re growing something like butternut or pumpkin, you need to build for weight. I’m talking thick wooden posts or even a heavy-duty cattle panel anchored into the ground. Just think of it like building a porch: if the foundation is solid, the weight won’t be an issue.
