How to organize your desktop effectively.

How to Organize Your Computer Desktop for Good

Ever feel like you’re staring at a digital junk drawer instead of a computer? I’ve been there—sitting at my desk at 11:00 PM, desperately hunting for that one spreadsheet while a dozen random screenshots and “final_v2_REAL_final” files bury everything else. Most people think you need some expensive, high-end productivity software or a complete lifestyle overhaul to fix it, but honestly, that’s just unnecessary hype. Learning how to organize your desktop shouldn’t feel like a second job or a massive technical project; it should be as straightforward as cleaning out a messy toolbox so you can actually find your hammer when you need it.

I’m not going to give you any of those “optimize your workflow” lectures that sound like they were written by a robot. Instead, I’m going to show you the no-nonsense methods I use to keep my own digital workspace from turning into a disaster zone. We’re going to break this down into a few simple, actionable steps that actually stick, so you can stop fighting your screen and get back to the work that actually matters.

Table of Contents

Mastering Digital Decluttering Techniques for a Clear Mind
Mastering Digital Decluttering Techniques for a Clear Mind

When I first started working from home, my computer screen looked like a junk drawer in a workshop—just a pile of random files, screenshots, and half-finished projects. It’s hard to focus when your eyes are constantly jumping from one icon to the next. The first thing I learned about digital decluttering techniques is that you have to be ruthless. I started by minimizing desktop icons until only the absolute essentials remained. If you haven’t opened a file in a month, it doesn’t belong on your main screen; move it to a drive or a deep folder where it can live quietly in the background.

Once the surface is clear, you need a system that actually sticks. I’m a big believer in setting up some basic folder structure best practices so you aren’t playing hide-and-seek every time you need a document. Instead of naming everything “Final_v2_REALLY_FINAL,” I started using consistent file naming conventions like “YYYY-MM-DD_ProjectName.” It feels a little nerdy at first, but trust me, once you have a predictable way to find your stuff, the mental fog starts to lift.

Minimizing Desktop Icons to Find Your Focus Again
Minimizing Desktop Icons to Find Your Focus Again

Look, I get it. You start with a few important shortcuts, and before you know it, your screen looks like a junk drawer in a workshop—just a chaotic pile of random files and half-finished projects. It’s hard to focus when your eyes are constantly jumping from one icon to the next. One of my favorite minimizing desktop icons tricks is the “One-Folder Rule.” Instead of letting files scatter everywhere, create one single folder named “Inbox” or “To Sort.” Drag everything currently sitting on your desktop into that one folder. Suddenly, your wallpaper is visible again, and that immediate sense of visual relief is huge for your brain.

Once you’ve cleared the surface, don’t just dump everything back later. This is where you start implementing some basic folder structure best practices. Think of it like organizing a toolbox; you wouldn’t throw your screwdrivers, wrenches, and drill bits into one giant bin, right? Group your files by project or type, and keep them tucked away in your Documents folder rather than on the desktop itself. It takes a little more effort upfront, but once you find your rhythm, you’ll stop wasting time hunting for that one specific PDF.

5 quick wins to keep your desktop from turning into a digital junk drawer

  • Use a “Landing Zone” folder. Instead of letting every new download scatter across your screen, create one folder named ‘Inbox’ or ‘To Sort.’ Dump everything there, then clear it out once a week. It keeps the desktop clean while you decide what’s actually important.
  • Color-code your folders. I do this with my physical toolboxes, and it works just as well digitally. Assign bright colors to your most frequent projects—maybe blue for work, green for personal, and red for urgent stuff. It makes finding things a lot faster than squinting at text labels.
  • Embrace the “One-Screen Rule.” If you have to scroll or move windows around just to see your wallpaper, you’ve got too much going on. Aim to keep your most-used shortcuts visible, but everything else should be tucked away in organized folders or the taskbar.
  • Set up an automated cleanup routine. Most computers have built-in tools to help, but you can also just set a recurring calendar invite for yourself every Friday afternoon. Spend ten minutes deleting those random screenshots and temporary files so you start Monday with a fresh slate.
  • Leverage your taskbar or dock for the heavy hitters. Don’t clutter your desktop with icons for apps you use every single day. Pin your browser, your email, and your main workspace tools to the taskbar instead. It keeps them one click away without taking up any precious screen real estate.

Quick wins for a cleaner workspace

Treat your desktop like a physical workbench—if you aren’t using a file right this second, move it into a folder so it isn’t cluttering up your view.

Use a consistent naming system for your files so you can actually find what you need with a quick search instead of hunting through a digital junk drawer.

Set a weekly “digital reset” timer for five minutes every Friday to clear out those random screenshots and downloads before they pile up again.

## A quick reality check

“A cluttered desktop isn’t just an eyesore; it’s a mental weight that tells your brain you’ve still got work to do before you can even start. Clearing that space is like sweeping the sawdust off your workbench—it doesn’t just look better, it actually lets you get the job done.”

Nathan Cole

Getting It Done
Organizing digital files for Getting It Done.

Look, I know that staring at a screen filled with a hundred random files and messy folders can feel just as draining as looking at a pile of junk in your garage. But we’ve covered a lot of ground today. We talked about the heavy lifting of digital decluttering, finding ways to minimize those distracting icons, and setting up a system that actually works for your brain instead of against it. The goal isn’t to achieve some perfect, sterile aesthetic that looks like a tech commercial; it’s about creating a space where you can actually find what you need without that split-second of panic every time you click something.

If you’re feeling a bit overwhelmed, don’t sweat it. You don’t have to reorganize your entire digital life in one afternoon. Just pick one folder, clear out five old files, or move those stray screenshots into a “To Sort” bin. Most things in life—whether it’s a broken sink or a cluttered hard drive—are much more figure-out-able when you take them one small piece at a time. Once you get that first bit of breathing room on your screen, you’ll be surprised at how much better your focus feels. Now, go grab a coffee, clear that first folder, and get to work.

Frequently Asked Questions

What should I do with all those old files I’m afraid to delete but never actually use?

I call this “digital hoarding,” and trust me, I’ve been there. It’s that paralyzing fear that you’ll need that random tax doc from 2014 someday. Here’s my fix: create one folder named “The Archive” and dump everything in there by year. If you don’t touch it for six months, move it to an external hard drive or a cheap cloud service. Get it off your workspace so you can breathe again.

Is it better to use actual folders or should I try one of those desktop organizer apps?

Honestly? Stick to folders. I’ve tried those fancy organizer apps, and they usually just end up being another thing to manage. It’s like buying a high-tech tool organizer when a simple wooden crate does the job better. Folders are reliable, they don’t crash, and they work on every computer. Set up a few solid categories, drag your files in, and you’re done. Keep it simple so you can actually stay organized.

How often do I actually need to do this so my computer doesn't get cluttered again in a week?

Look, I get it—life gets busy and the files start piling up again before you know it. I like to treat it like washing the dishes: you don’t wait for the sink to overflow, you just do a quick sweep. Aim for a “Friday Reset.” Spend ten minutes every Friday afternoon clearing your downloads and tossing what you don’t need. It keeps the mess from snowballing so you start Monday with a clean slate.

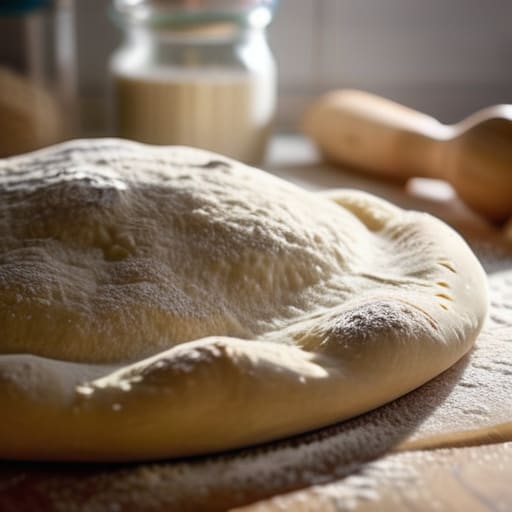
Learn how to make homemade pizza.

How to Make Homemade Pizza Better Than Delivery

You don’t need a wood-fired oven or a degree in culinary arts to master the art of the perfect slice. I used to think that if I wanted to learn how to make homemade pizza that didn’t taste like a soggy cracker, I’d need to spend hundreds on fancy Italian flour and specialized gear. I spent way too many Friday nights staring at expensive recipe blogs that made it seem like a science experiment gone wrong. But after a few messy attempts—and a lot of burnt crusts in my tiny apartment kitchen—I realized the truth: it’s mostly about technique and patience, not how much money you drop at the specialty grocer.

I’m not here to give you any of that high-brow, intimidating nonsense. My goal is to show you that you can whip up something incredible using stuff you probably already have in your pantry. I’m going to walk you through my tried-and-true, no-stress method, breaking it down into simple, manageable steps that actually work in a standard home oven. By the time we’re done, you’ll have the confidence to skip the delivery driver and feel proud of what you built with your own two hands.

Table of Contents

Recipe Details

Total Time: 35 minutes
Difficulty: Easy

Ingredients

  • 2 cups all-purpose flour
  • 1 packet active dry yeast
  • 1 cup warm water
  • 1 teaspoon sugar
  • 1/2 teaspoon salt
  • 1/2 cup tomato sauce
  • 2 cups shredded mozzarella cheese
  • 1/4 cup sliced pepperoni

Recipe Instructions

Step 1

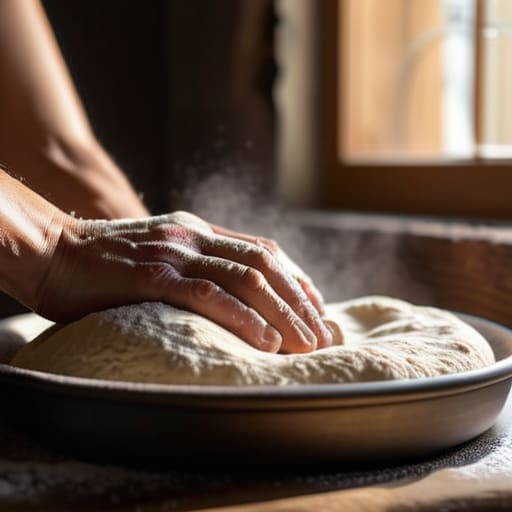
First things first, let’s get that dough moving. Grab a large bowl and mix your warm water, yeast, and a pinch of sugar. Let it sit for about five to ten minutes until it gets nice and foamy on top. Once that’s happening, stir in your flour, olive oil, and a bit of salt. Knead the dough on a floured surface for about ten minutes—it’s a great way to work out some frustration after a long day, and you’ll know it’s ready when it feels smooth and elastic under your hands.

Step 2

Now, we need to let that dough do its thing. Lightly oil a clean bowl, tuck your dough ball inside, and cover it with a damp kitchen towel. Find a warm, draft-free spot in your kitchen and let it rise for about an hour. You’re looking for the dough to roughly double in size. If your house is chilly, don’t sweat it; you might just need to give it a little extra time to get that perfect, airy texture.

Step 3

While the dough is rising, let’s prep the oven and the toppings. Crank your oven up as high as it will go—usually around 475°F or 500°F. If you have a pizza stone, get it in there now so it can soak up the heat. While that’s heating, chop up your toppings. I’m a big fan of keeping it simple with fresh mozzarella and basil, but don’t be afraid to raid the fridge for whatever leftover meats or veggies you’ve got lying around.

Step 4

It’s showtime. Punch the risen dough down to let the air out and divide it into two balls if you want medium pizzas. On a piece of parchment paper or a floured surface, stretch the dough out into a circle. Avoid using a rolling pin if you can; using your hands helps preserve those little air bubbles that make the crust so good. Once it’s stretched, spread a thin layer of your sauce, add your cheese, and pile on those toppings.

Step 5

Slide your pizza into the oven (using the stone or a preheated baking sheet) and watch it closely. Since every oven runs a little different, it’s not about the timer; it’s about the look and smell. You’re waiting for the crust to turn a beautiful golden brown and the cheese to be bubbling and slightly charred in spots. Once it looks right, pull it out, let it sit for just a minute so the cheese sets, and slice it up and dig in.

The Best Pizza Dough Recipe Without the Kitchen Chaos

The Best Pizza Dough Recipe Without the Kitchen Chaos

Look, I’ve spent way too many Saturday nights staring at a sticky mess on my counter, wondering why my dough felt more like industrial glue than something edible. The secret to the best pizza dough recipe isn’t some fancy Italian flour you can only find in a boutique shop; it’s all about patience and temperature. I used to rush the process, but I learned the hard way that yeast dough fermentation tips are actually the most important part of the whole job. If you give that dough time to rest and bubble up, it does all the heavy lifting for you.

Once you’ve got your dough behaving, don’t overthink the toppings. I usually keep a few easy pizza toppings ideas on hand—think spicy salami, fresh basil, or even just a heavy hand of garlic—to keep things interesting without breaking the bank. If you’re worried about getting that restaurant-style crunch, remember that baking pizza in a home oven is all about heat management. Crank that thing as high as it goes and use a preheated stone if you have one; it makes all the difference for a solid crust.

Simple Yeast Dough Fermentation Tips for Better Flavor

Simple Yeast Dough Fermentation Tips for Better Flavor

Now, if you want to take your crust from “pretty good” to “better than the local shop,” you’ve got to talk about time. I used to rush this part, thinking I could get a pie in the oven five minutes after mixing the flour, but that’s how you end up with bread rather than pizza. The real secret lies in yeast dough fermentation tips that focus on patience. If you have the extra time, let your dough rise in the fridge overnight. This “cold ferment” slows down the yeast and lets those complex, slightly tangy flavors really develop. It’s a total game-changer for the flavor profile.

Don’t feel like you have to be a scientist, though. Even if you’re in a hurry, just make sure your water isn’t too hot; if it’s scalding, you’ll kill the yeast and end up with a flat, lifeless disk. Once you’ve nailed the rise, you can focus on crispy pizza crust techniques like preheating your stone or steel to its absolute limit. Whether you’re keeping it classic or experimenting with easy pizza toppings ideas, a well-fermented dough is the foundation that makes everything else pop.

5 Pro Moves to Level Up Your Pizza Game

  • Get your oven as hot as it’ll go. Most home ovens tap out around 500°F or 550°F, and that’s exactly where you want to be. If you have a pizza stone or a steel, let it soak up that heat for at least 45 minutes before you even think about sliding a pie in.
  • Less is more when it comes to toppings. I know it’s tempting to pile on the pepperoni and veggies, but a heavy load of toppings will weigh down your dough and turn your crust into a soggy mess. Keep it light so the heat can actually crisp up the bottom.
  • Room temperature dough is your best friend. If you try to stretch dough straight out of the fridge, it’s going to fight you every step of the way and snap back like a rubber band. Let it sit out for an hour or two until it feels soft and pliable.
  • Use a little bit of flour (or semolina) on your work surface. If your dough is sticking to the counter or your pizza peel, you’re going to have a bad time when you try to launch it into the oven. A light dusting makes the transfer seamless.
  • Don’t skimp on the sauce or the cheese. You want high-quality stuff here since it’s the star of the show. A simple crushed tomato with a pinch of salt goes a long way, and using low-moisture mozzarella prevents that watery puddle in the middle of your pie.

Quick Wins for Your Next Pizza Night

Don’t sweat the small stuff; as long as you keep your workspace clean and your ingredients at room temperature, your dough is going to turn out great.

Patience is your best friend when it comes to flavor—letting that dough sit and ferment a little longer is the easiest way to level up from “okay” to “restaurant quality.”

Keep your toppings simple so you don’t weigh down the crust; a little goes a long way when you’re aiming for that perfect, crispy bite.

## The Secret to Getting Started

“Look, you don’t need a fancy Italian stone or a degree in culinary arts to make a killer pizza; you just need a little patience, some decent flour, and the confidence to get your hands messy.”

Nathan Cole

You've Got This: The Final Slice

You've Got This: The Final Slice pizza.

At the end of the day, making pizza from scratch isn’t about having a professional-grade stone oven or a degree in culinary arts. It’s really just about mastering a few basics: getting your dough hydrated, letting that yeast do its magic work during fermentation, and not being afraid to get a little flour on your hands. We covered how to avoid the kitchen chaos and how to let the dough develop that deep, delicious flavor that makes a crust truly stand out. If you remember nothing else, just remember that patience is your best ingredient when it comes to that rise.

I know that first time you pull a bubbling, slightly charred pie out of your oven, your heart might race a little. You might even think you messed up a topping or the shape is a bit wonky. Honestly? That’s part of the fun. The best part of DIY cooking isn’t perfection; it’s the fact that you actually built something with your own two hands. So, grab a cold drink, slice up that masterpiece, and take a second to enjoy the win. You didn’t just make dinner; you mastered a new skill, and I promise, it tastes a whole lot better when you do it yourself.

Frequently Asked Questions

My dough isn't rising at all—did I kill the yeast or is my kitchen just too cold?

Don’t panic—this happens to the best of us. It’s usually one of two things: either your water was a bit too hot and accidentally “cooked” the yeast, or your kitchen is just acting like a refrigerator. If you used lukewarm water (think baby bath temperature), you’re likely fine; your dough just needs a warmer, draft-free spot to wake up. Try tucking it into the oven with just the light turned on.

Can I use a regular baking sheet if I don't own a pizza stone?

You absolutely can. Honestly, I used to stress about not owning a fancy pizza stone until I realized a standard baking sheet works just fine. If you want to mimic that stone-like heat, try flipping the sheet upside down and preheating it in the oven. That way, you’re sliding your dough onto a flat, hot surface, which helps get that crispy bottom we’re all after. No expensive gear required!

How do I stop the dough from sticking to my hands while I'm stretching it out?

Trust me, I’ve spent more than a few Friday nights with dough stuck to my knuckles, so I get the frustration. The trick is to keep things light. First, grab a little extra flour—not a mountain, just enough to dust your palms and the work surface. If it’s still acting up, a tiny drizzle of olive oil on your hands works wonders. It keeps the dough moving without making it a sticky mess.