Tips on how to ask for a raise.

How to Ask for a Raise (and Actually Get It)

I remember sitting in my first real office job, staring at a spreadsheet and feeling that familiar, heavy knot in my stomach. I knew I was working harder than anyone else in the room, but every time I thought about how to ask for a raise, I felt like I was about to walk into a trap. I kept seeing these polished “career gurus” online telling you to use “synergistic negotiation tactics” or some other corporate nonsense that sounded more like a foreign language than actual human speech. Honestly, that high-level fluff is exactly why most people never bring up money—it makes a straightforward conversation feel like a high-stakes performance instead of a simple business transaction.

Look, I’m not here to give you a script that sounds like a textbook. I believe most things are more figure-out-able than they look, and your salary is no different. In this guide, I’m going to break down the process into small, manageable steps—from gathering your “proof of work” to actually sitting across from your boss. We’re going to strip away the intimidation and focus on a practical, no-nonsense plan so you can walk into that meeting feeling ready to claim what you’ve earned.

Table of Contents

Doing Market Value Research for Employees to Find Your Number

Doing Market Value Research for Employees to Find Your Number

Before you even think about opening your mouth to talk numbers, you need to know what the market is actually paying for what you do. I’ve learned the hard way that walking into a meeting with just a “feeling” that you deserve more is a recipe for getting shut down. You need real data to back you up. Start by digging into sites like Glassdoor, Payscale, or even LinkedIn Salary to see what people in your specific city and role are making. This kind of market value research for employees isn’t about finding the highest number possible; it’s about finding the fair number that aligns with your experience and the current economy.

Once you have a range, don’t just stop at a single figure. I like to build a “bracket” for myself—a low end that I’d be happy with and a high end that represents my true goal. This gives you some breathing room when you start negotiating compensation packages. If you can show your boss, “Hey, the industry standard for my skill set is between $X and $Y,” it stops being a personal request and turns into a professional conversation about market realities. It takes the emotion out of it and makes your case much harder to argue against.

Quantifying Achievements for Promotion to Prove Your Worth

Quantifying Achievements for Promotion to Prove Your Worth

Now, here’s where most people trip up. They walk into the office and say, “I’ve been working really hard lately,” or “I’ve taken on a lot more responsibility.” While that might be true, “hard work” is subjective—it’s hard to put a price tag on effort alone. To get the money you actually want, you need to stop talking about how you feel and start talking about what you’ve done. I like to think of this like showing a client a finished deck instead of just telling them you bought good lumber; you need to show the finished, sturdy product.

This is the heart of quantifying achievements for promotion. I want you to grab a notebook or open a spreadsheet and start hunting for numbers. Did you cut department costs by 10%? Did you manage a project that finished two weeks ahead of schedule? Did you train three new hires who are now top performers? When you’re preparing for a performance review, these specific wins are your leverage. It turns a vague request into a logical business case. You aren’t just asking for more money; you’re showing them the return on investment they get by keeping you happy.

Five Ways to Keep Your Cool and Close the Deal

  • Pick your timing like you’re planning a renovation—don’t just spring it on your boss during a crisis. Wait for a post-project high or a scheduled performance review when they actually have the mental bandwidth to listen to you.
  • Script your opening lines so you don’t stumble. You don’t need a formal speech, but having a clear, “I’d like to discuss my compensation based on my recent contributions,” keeps you from rambling or sounding unsure of yourself.
  • Practice your “poker face” at home. It’s totally normal to feel your heart racing, but try to keep your tone steady and conversational. If you treat it like a business negotiation rather than a personal favor, you’ll feel a lot more in control.
  • Prepare for the “not right now” answer. If the budget is frozen, don’t let the momentum die. Ask specifically, “What milestones do I need to hit to make this happen in six months?” and get those goals in writing.
  • Think beyond just the hourly rate or the base salary. If they can’t budge on the cash, see if they’ll throw in some extra PTO, a professional development budget, or a flexible schedule. Sometimes those “perks” end up being worth more in the long run.

The Bottom Line: Getting Ready to Ask

Don’t walk into that meeting empty-handed; you need a solid number backed by real market data and a list of your actual wins to prove you’ve earned it.

Treat the conversation like a professional project—stay calm, stay focused on the facts, and remember that you’re just presenting a business case for your own value.

Even if the answer isn’t an immediate “yes,” use the moment to map out exactly what you need to do to get that raise next time.

## The Mindset Shift

“Asking for more money isn’t about begging for a favor; it’s just a business transaction where you’re presenting the receipts to show you’ve earned a better deal.”

Nathan Cole

The Finish Line is Just the Start

The Finish Line is Just the Start.

Look, I know this whole process feels like trying to rewire a house without a schematic, but you’ve actually done the heavy lifting already. You’ve crunched the numbers, looked up what your peers are actually making, and—most importantly—you’ve built a solid list of your wins that proves you aren’t just showing up, you’re delivering value. By gathering your market data and pinning down those specific achievements, you aren’t just walking into a room to ask for a favor; you are walking in with a solid, evidence-based case for why your paycheck needs to catch up to your performance.

At the end of the day, remember that even if the answer isn’t an immediate “yes,” you haven’t failed. Sometimes a negotiation is like fixing an old engine—you might find a part is stuck, but now you know exactly where the friction is, and you can start working on a plan to fix it. Don’t let the fear of a “no” keep you from advocating for yourself. You’ve done the prep work, you’ve got the facts, and you are more than capable of handling this conversation. Now, take a deep breath, trust your preparation, and go get what you’ve earned.

Frequently Asked Questions

What if my boss says "not right now" or tells me there's no budget for raises?

Look, I’ve been there, and it stings. It feels like you just spent all that prep work only to hit a brick wall. But “not right now” isn’t necessarily a “no forever.” Instead of walking away defeated, ask for a roadmap. Say something like, “I understand. What specific milestones do I need to hit to make this happen in six months?” Turn that rejection into a concrete checklist so you aren’t guessing next time.

Is it better to ask for more money or more benefits, like extra vacation days or a flexible schedule?

Look, it’s not a one-size-fits-all situation. If your bills are piling up, go for the cash—it’s the most direct way to ease that stress. But if you’re feeling burnt out or need more time for side projects, negotiating for extra PTO or a flexible schedule can be a massive win. I like to think of it like choosing tools: pick the one that actually fixes the specific problem you’re facing right now.

How do I know if I should bring a coworker or a friend into the conversation, or if I should keep it strictly between me and my manager?

Look, I get the urge to bring backup, but here’s my take: keep this one strictly between you and your manager. Bringing a coworker or a friend into the actual meeting can make things feel weirdly high-stakes or even confrontational, which is the last thing you want. Think of it like fixing a plumbing issue—you want a clear line of communication. Use your friends for a practice run, but handle the real talk solo.

Effective note taking methods for better memory.

Note-taking Methods That Help You Actually Remember

I remember sitting at my kitchen table three years ago, surrounded by three different open notebooks, a half-finished coffee, and a growing sense of pure frustration. I had spent more time trying to “perfect” my system than actually learning anything, convinced that if I just found the right fancy app or the most complex color-coding scheme, everything would finally click. It turns out, most of the advice you see online about note taking methods is just a bunch of over-engineered nonsense designed to sell you a subscription or a $30 planner you’ll never use. We don’t need more gear; we just need a way to actually remember what we read.

Look, I’m not here to sell you on a lifestyle overhaul or a digital ecosystem that requires a PhD to navigate. My goal is to strip away all the fluff and show you a few practical, battle-tested ways to capture information that actually stick. I’ve spent years tinkering with everything from old-school legal pads to basic digital tools, and I’ve learned that the best system is the one that doesn’t get in your way. I’m going to break down the most effective note taking methods into simple, actionable steps so you can stop scribbling aimlessly and start actually using your notes.

Table of Contents

Choosing Your Tools the Real Truth About Digital vs Handwritten Notes

Choosing Your Tools the Real Truth About Digital vs Handwritten Notes

Look, I’ve spent a lot of time staring at both blank notebooks and glowing laptop screens, trying to figure out which one actually helps me get stuff done. It’s the classic digital vs handwritten notes debate, and honestly, there’s no “perfect” answer—only what works for your brain. When I’m sitting in a meeting or a lecture, my instinct is to grab a pen. There’s something about the physical act of writing that forces you to slow down and actually process what’s being said. It’s a huge part of practicing active listening techniques because you can’t just transcribe every word like a robot; you have to summarize it.

On the flip side, if you’re a person who loves searching through old files or needs to attach screenshots to your thoughts, digital is king. Apps make organizing lecture notes or project details a breeze since you can just hit `Cmd+F` and find what you need in seconds. My advice? Don’t get caught up in the gear. Whether you’re using a $30 Moleskine or a high-end tablet, the tool only matters if it actually helps you retain the information.

Making Sense of the Chaos by Organizing Lecture Notes

Making Sense of the Chaos by Organizing Lecture Notes

Once you’ve picked your tools, the real challenge starts when the professor starts talking. It’s easy to fall into the trap of trying to transcribe every single word like you’re a court reporter, but that’s a one-way ticket to burnout. Instead of trying to capture everything, focus on active listening techniques to catch the big ideas. If you try to write it all down, you’ll miss the nuance of what’s actually being said. I’ve found that if you listen for the “why” behind a concept rather than just the “what,” your notes actually start to make sense later.

A great way to keep things from turning into a wall of text is to use a structured approach like the Cornell note taking system. It’s a lifesaver because it forces you to divide your page into sections for raw notes, cues, and a summary. This little bit of extra structure makes organizing lecture notes way less of a headache when finals week rolls around. It turns a messy pile of scribbles into a functional study guide that you can actually use to teach yourself the material.

5 ways to stop writing everything down and start actually learning

  • Stop acting like a stenographer. If you try to write down every single word your boss or professor says, you’re going to miss the big picture. Instead, listen for the “meat”—the main ideas and the “why” behind them—and just jot down the essentials.
  • Use a shorthand that actually works for you. I don’t mean fancy Latin abbreviations; I mean using arrows for “leads to,” plus signs for “and,” or even just little symbols that make sense to your brain. It saves your wrists from cramping and keeps you in the flow.
  • Build in a “five-minute polish” rule. I’ve learned the hard way that notes taken in a rush are useless if you don’t look at them again. Spend five minutes right after a meeting or class just cleaning up your scribbles and highlighting the stuff that actually matters.
  • Leave some breathing room on the page. Don’t cram your notes from edge to edge like you’re trying to win a contest. Leave some white space in the margins so you can go back later and add a thought, a question, or a connection you didn’t see in the moment.
  • Color-code like a pro, not a toddler. You don’t need a box of sixty markers, but having one specific color for “action items” or “deadlines” is a game changer. When you’re scanning your notes later, your eyes will jump straight to what you actually need to do.

The bottom line: Keeping it simple

Don’t get hung up on finding the “perfect” app or the fanciest notebook; just pick one tool that doesn’t get in your way and start writing.

The goal isn’t to capture every single word someone says, but to grab the ideas that actually matter so you aren’t drowning in a sea of useless scribbles later.

A system only works if you actually use it, so build a habit that feels easy enough to stick with even on your busiest, most chaotic days.

The Golden Rule of Note-Taking

Look, I’ve learned from fixing engines and fixing code that the fanciest tool in the box doesn’t matter if you don’t know how to use it. Note-taking is the same way: stop worrying about the perfect app or the most expensive notebook, and just focus on making sure your notes are actually useful to you when you’re staring at them three weeks from now.

Nathan Cole

Getting It Done

Student productivity and Getting It Done.

Look, I know it feels like a lot to juggle. We’ve talked about everything from picking between a trusty old notebook and a slick tablet to actually structuring those lecture notes so they don’t just turn into a pile of useless scribbles. The main thing I want you to walk away with is this: there is no “perfect” system that works for everyone. Whether you end up using the Cornell method or just a messy digital folder, the goal is to stop just transcribing and start actually processing what you’re hearing. If your system helps you find what you need ten minutes from now, then you’ve already won the battle.

At the end of the day, don’t let the fear of a messy notebook or a disorganized app keep you from starting. I’ve spent plenty of afternoons staring at a half-finished project, wondering if I even had the right tools to finish it, but the truth is that you learn by doing. Grab a pen, open a blank doc, and just start writing. You can always tweak the system later, but you can’t fix a blank page. You’ve got this—just take it one note at a time and trust that you’re more than capable of figuring it out as you go.

Frequently Asked Questions

I've tried a bunch of apps before, but how do I know if I'm actually learning or just mindlessly typing everything the speaker says?

Look, I’ve been there. I used to sit in meetings or classes just typing like a madman, only to realize later I hadn’t actually processed a single word. If you’re just a human stenographer, you aren’t learning; you’re just transcribing. To fix this, stop trying to catch every syllable. Instead, listen for the “why” and the “how,” then write it down in your own words. If you can’t summarize a point simply, you didn’t catch it.

Is it worth spending money on fancy planners and notebooks, or can I really just use whatever random scrap paper I have lying around?

Look, I’ve spent way too much money on high-end leather journals only to let them collect dust on a shelf. Here’s the truth: the gear doesn’t do the work; you do. If a $30 notebook makes you feel more motivated to actually sit down and write, go for it. But if you’re just buying it for the aesthetic, save your cash. A scrap of paper and a decent pen work just fine.

How do I keep my notes from becoming a giant, unorganized mess after a few weeks of heavy use?

Look, we’ve all been there—you start the week with a clean notebook or a fresh app, and by Friday, it looks like a crime scene. The trick is to stop treating note-taking like a storage unit and start treating it like a workshop. Spend ten minutes every Sunday “resetting.” File the old stuff, toss the junk, and prep your workspace for Monday. If you don’t clear the clutter weekly, it’ll bury you.

Explaining what is a vpn guide.

What Is a Vpn and Do You Actually Need One?

I remember sitting at a coffee shop last summer, trying to finish some freelance work on their public Wi-Fi, when I realized I had no idea if my passwords or bank details were actually safe. I started Googling, only to get hit with a wall of tech jargon and flashy ads promising “unbreakable encryption” that sounded more like science fiction than actual advice. It’s incredibly frustrating how companies make something as straightforward as what is a vpn feel like you need a PhD just to understand the basics. Honestly, most of the explanations out there are just overcomplicating things to sell you a subscription you might not even need.

Look, I’m not here to sell you on some magic digital shield, and I’m definitely not going to bore you with textbook definitions. My goal is to strip away the hype and give you the plain-English version of how this tech actually works in your daily life. I’ll show you how to set one up, what to actually look for in a provider, and how to tell if a service is actually worth your hard-earned money. Let’s get into the nuts and bolts so you can secure your connection and get back to your day.

Table of Contents

How Vpn Encryption Works to Protect Your Data

How Vpn Encryption Works to Protect Your Data

Think of VPN encryption like sending a letter inside a heavy-duty, locked steel box instead of just writing your details on a postcard for anyone to read. When you use a virtual private network technology, the software takes all your data—your passwords, credit card numbers, or even just your search history—and scrambles it into a chaotic mess of code. Even if a hacker managed to intercept your signal while you were browsing, all they’d see is a bunch of gibberish that makes absolutely no sense.

This process is what creates a secure internet connection between your device and the VPN server. It’s especially vital for public wifi safety; when you’re sitting in a coffee shop using their open network, you’re essentially broadcasting your activity to everyone else on that same signal. By encrypting that data right at the source, the VPN ensures your personal business stays personal. It’s a simple, automated layer of defense that works in the background so you can focus on your work (or your latte) without worrying about who might be lurking on the network.

Ip Address Masking Made Simple for Everyone

Ip Address Masking Made Simple for Everyone

Think of your IP address like your home’s street address. It’s how the internet knows exactly where to send the data you requested, but it also acts as a digital footprint that tells websites and advertisers exactly where you’re located. Without protection, anyone with a little bit of tech savvy can see your general location and track your activity across different sites. This is where ip address masking comes into play. When you use a VPN, you aren’t sending your data directly from your device to the website; instead, you’re routing it through a remote server first.

By doing this, the website you’re visiting sees the IP address of that server instead of your actual one. It’s like sending a letter through a P.O. Box instead of using your front door—the recipient gets the message, but they have no idea where you actually live. This layer of virtual private network technology is a huge win for your online privacy and security, especially if you’re frequently hopping on coffee shop networks. It keeps your digital identity tucked away, making it much harder for trackers to build a profile on your habits.

5 things I wish I knew before picking a VPN

  • Don’t go for the “free” stuff. Look, I love a good bargain as much as the next guy, but if you aren’t paying for the service, you’re usually the product. Free VPNs often sell your browsing data to advertisers just to keep the lights on, which defeats the whole purpose of getting one in the first place.
  • Check for a “no-logs” policy that actually holds up. You want a provider that promises they aren’t keeping a digital paper trail of what you do online. It sounds simple, but do a little digging to make sure they’ve actually been audited by a third party to prove they aren’t secretly hoarding your info.
  • Watch out for speed bumps. A VPN adds an extra stop for your data to make, which can slow down your connection. If you’re planning on streaming movies or hopping on video calls, look for a provider known for high-speed servers so you aren’t stuck staring at a loading circle.
  • Make sure it has a “Kill Switch.” This is a lifesaver. If your VPN connection drops for even a second, a kill switch instantly cuts your internet access so your real IP address doesn’t accidentally leak out into the wild. It’s like an emergency shut-off valve for your privacy.
  • Pick one that works on all your gear. You shouldn’t be limited to just your laptop. A good VPN should have easy-to-use apps for your phone, your tablet, and even your smart TV. If it’s a headache to set up on your mobile device, you probably won’t bother using it when you’re actually out at a coffee shop.

The bottom line: Why a VPN actually matters

A VPN acts like a digital bodyguard for your internet connection, wrapping your data in a layer of encryption so hackers and snoops can’t see what you’re doing.

It hides your real IP address, which is basically your digital home address, making it much harder for websites and advertisers to track your every move.

Think of it as a tool for peace of mind—whether you’re using sketchy coffee shop Wi-Fi or just want a bit more privacy, it makes the web a whole lot more figure-out-able and secure.

## The bottom line on VPNs

“Look, you don’t need a computer science degree to get this. Think of a VPN as that extra layer of privacy you’d want when walking through a crowd—it’s just a way to make sure you’re moving through the digital world on your own terms, without everyone else seeing exactly where you’re going or what you’re carrying.”

Nathan Cole

Wrapping It All Up

Wrapping It All Up: VPN security summary.

At the end of the day, a VPN isn’t some mysterious piece of high-level spy tech; it’s just a practical tool for your digital toolbox. We’ve looked at how it builds that secure encryption tunnel to keep your private info safe and how it masks your IP address so you can browse without a digital paper trail following you around. Whether you’re trying to protect your bank details on a coffee shop’s public Wi-Fi or you just want a bit more privacy from advertisers, getting a VPN set up is one of the easiest wins you can grab for your online security.

I know that staring down new tech can feel a bit overwhelming sometimes, but I promise you, it’s much more figure-out-able than it looks. You don’t need a computer science degree to take control of your own data; you just need to take that first small step. Once you get your service installed and that little icon turns green, you’ll feel a lot more confident navigating the web. So, go ahead and give it a shot. You’ve got this, and honestly, your future, more secure self will definitely thank you for it.

Frequently Asked Questions

Will using a VPN actually slow down my internet speed?

Look, I’ll give it to you straight: yes, a VPN will likely slow your connection down a bit. Think of it like taking a detour on a road trip to avoid a toll booth—you’re still getting to the same destination, but the extra mileage takes a little more time. Since your data has to travel to a remote server before hitting the web, there’s a tiny bit of lag. But if you pick a solid provider, you’ll barely notice it.

Do I really need a VPN if I'm just browsing at home?

Honestly? If you’re just sitting on your couch using your private home Wi-Fi, you’re probably fine. Most home networks are pretty secure. But here’s the thing: I always recommend one if you frequently work from coffee shops, use airport Wi-Fi, or if you’re just a bit of a privacy nerd who doesn’t want your ISP tracking every single site you visit. Think of it like locking your front door—you might not need it every second, but it’s better to have it.

Are there any free VPNs that are actually safe to use?

Look, I get the temptation. When you’re trying to tighten the belt, “free” sounds like a win. But here’s the thing: running a VPN costs money. If you aren’t paying for the service with your wallet, you’re likely paying for it with your data. Most free ones sell your browsing habits to advertisers just to keep the lights on. If you absolutely must go free, stick to reputable names with limited data caps like Proton. Otherwise, just pay the few bucks for a real one. It’s worth the peace of mind.

Quick breakfast for busy mornings ideas.

Quick Breakfasts for People Who Are Always Rushing

We’ve all been there: the alarm goes off way too late, you’re frantically hunting for your keys, and suddenly you realize you’re about to head out on an empty stomach. I used to think that a real meal required a spatula and twenty minutes of standing over a stove, but that’s a one-way ticket to mid-morning burnout. Finding a reliable quick breakfast for busy mornings isn’t just about filling your belly; it’s about setting yourself up to actually tackle the day instead of just surviving it.

I’ve spent years tinkering in my kitchen, trying to find that sweet spot between “fast enough to grab on the way out” and “actually tastes good.” I don’t want to give you a bunch of complicated recipes that require a grocery haul and a degree in culinary arts. Instead, I’ve narrowed it down to five simple, no-nonsense options that I swear by when my schedule gets hectic. These are the exact go-to moves that will help you reclaim your morning routine without breaking the bank or your sanity.

Table of Contents

Overnight Oats That Actually Taste Good

Overnight Oats That Actually Taste Good.

I used to think overnight oats were just soggy cardboard, but once I figured out the right ratio, they became my absolute lifesaver on Monday mornings. You just grab a mason jar, toss in some rolled oats, milk (or whatever dairy alternative you like), and a spoonful of chia seeds if you want that extra boost. The trick is to let them sit in the fridge overnight so the oats can actually absorb the liquid properly instead of just floating around.

The One-Pan Egg Scramble

The One-Pan Egg Scramble in skillet.

If you have about five minutes and a decent non-stick skillet, you can whip up a hot breakfast without feeling like you’ve skipped a meal. I usually crack two or three eggs directly into a preheated pan with a little butter, toss in whatever leftover veggies are lingering in my crisper drawer, and stir it all together. It’s a no-brainer way to use up scraps and get some protein in your system before the workday starts.

Loaded Greek Yogurt Bowls

Healthy Loaded Greek Yogurt Bowls with toppings.

Sometimes, I don’t even want to turn on the stove, and that’s when I lean on the Greek yogurt method. It’s basically a “build-your-own” situation that requires zero actual cooking skills. I grab a container of plain Greek yogurt—which is way better for you than the sugary pre-flavored stuff—and dump it into a bowl. From there, it’s just about adding whatever toppings you have on hand to keep things interesting.

Breakfast Burritos in Bulk

This is my go-to “pro move” for when I actually have an hour of free time on a Sunday afternoon. I make a massive batch of scrambled eggs, black beans, and maybe some sausage, then roll them all into large flour tortillas with a bit of cheese. Once they’re rolled, I wrap them individually in foil and toss them in the freezer. It’s basically like having your own personal frozen food aisle, but way healthier and much cheaper.

The High-Speed Nut Butter Toast

Look, we’ve all been there—you woke up late, you’re already behind schedule, and you’re starving. In those moments, a thick slice of whole-grain toast with nut butter is my reliable old friend. It’s simple, it’s sturdy, and it actually provides the kind of slow-burning energy you need to get through a morning meeting. I always try to use a bread that has a bit of texture to it so it doesn’t just turn into mush.

The Bottom Line: Making Mornings Easier

Don’t aim for perfection; even a quick grab-and-go option is better than skipping fuel and running on empty.

The real secret to a smooth morning is doing the heavy lifting—like chopping or prepping—the night before.

Keep your pantry stocked with a few reliable staples so you’re never left staring blankly at an empty fridge when the alarm goes off.

The Real Secret to a Better Morning

Look, I’m not trying to turn your kitchen into a five-star restaurant at 6:00 AM. I just want you to stop skipping meals and feeling like a zombie by noon. A quick, solid breakfast isn’t about perfection; it’s about giving yourself a win before the chaos of the day even starts.

Nathan Cole

Don't Let the Morning Win

At the end of the day, getting a decent breakfast on the table isn’t about being a gourmet chef or having a perfectly organized pantry. It’s really just about removing the friction that keeps you from eating something better than a sugary granola bar on your way out the door. Whether you’re prepping overnight oats the night before, grabbing a quick protein shake, or mastering the art of the five-minute egg sandwich, the goal is the same: fuel your body without the stress. Once you have a couple of these simple routines down, you’ll stop viewing the morning as a race you’re losing and start seeing it as a manageable part of your day.

I know how it feels when the alarm goes off and your brain immediately starts calculating how many minutes of sleep you can squeeze out if you skip breakfast. It’s easy to fall into that trap, but I promise you, once you start winning these small battles, the rest of your day feels a lot more under control. You don’t need a complete kitchen overhaul or a massive grocery budget to make this work; you just need a plan that actually fits your life. So, pick one of these ideas, try it out tomorrow, and remember that you’ve got this handled.

Frequently Asked Questions

I'm always on the move—can I prep these even faster the night before?

You bet you can. Honestly, if you’re running on fumes in the morning, doing even five minutes of work the night before is a total game-changer. For the oats or chia puddings, just toss everything in a jar before you hit the hay—they actually taste better after sitting overnight anyway. For the egg muffins or breakfast burritos, prep those on a Sunday and just grab them from the fridge. Work smarter, not harder, right?

What are some cheap, grocery-store staples I can use to swap out ingredients so I don't get bored?

Look, I’ve been there—staring at the same carton of eggs wondering if I can actually survive another week of them. To keep things interesting without breaking the bank, I always keep a few “pivot” ingredients on hand. Swap your oats for cornmeal to make a quick savory porridge, or trade spinach for frozen peas; they’re cheaper and last way longer. Even switching from peanut butter to sunflower butter can totally change the vibe of your toast.

I'm trying to eat a bit healthier, so how can I tweak these recipes to pack in more protein or fiber?

I love that you’re looking to level up these meals. Most of these are super easy to tweak. For a protein punch, toss some hemp seeds or Greek yogurt into your oats, or swap regular bread for sprouted grain toast. If you’re craving more fiber, that’s an easy win—just throw in some chia seeds, berries, or extra veggies. It’s all about those small, smart swaps that keep you full longer.

Guide on how to quit your job.

How to Quit Your Job the Right Way

I still remember sitting in my old beat-up truck in the company parking lot, staring at the dashboard and feeling that heavy, sinking knot in my stomach. I had spent three years grinding away at a job that drained my battery every single day, but the thought of actually walking into my boss’s office felt like trying to fix a busted electrical panel without any tools. Most of the career gurus online make it sound like you need a massive severance package or a five-year master plan just to figure out how to quit your job without burning every bridge you’ve ever built. They make it sound so complicated and intimidating, like you’re performing open-heart surgery instead of just making a necessary life change.

Look, I’m not here to give you any of that corporate fluff or tell you to “follow your passion” while your bank account is hitting zero. I’m going to give you the same kind of straight-talk I use when I’m teaching someone how to rewire a socket or fix a leaky sink. We’re going to break this down into simple, manageable steps so you can exit your current role with your dignity intact and your finances steady. We’ll tackle the paperwork, the conversation, and the aftermath, so you can walk away feeling completely in control of your next move.

Table of Contents

Mastering Financial Preparation for Unemployment

Mastering Financial Preparation for Unemployment guide.

Before you hand in that notice, we need to talk about the numbers. I’ve learned the hard way that walking away from a steady paycheck without a safety net is a recipe for a massive headache. Think of this like prepping a workspace before a big project—you don’t want to start building until you know you have all the right tools and materials. Start by looking at your bank statements from the last three months to figure out your absolute baseline for monthly spending. You need to know exactly how much it costs to keep the lights on and the fridge full.

Once you have that number, start building your financial preparation for unemployment buffer. If you can, try to tuck away a few extra months of living expenses before you officially announce your departure. This isn’t just about being cautious; it’s about giving yourself the breathing room to focus on your next move without panicking every time a bill hits your inbox. Having that cash cushion turns a potentially stressful period into a manageable part of your career transition planning, letting you choose your next step rather than just taking whatever comes first.

The Simple Art of Career Transition Planning

The Simple Art of Career Transition Planning

Once you’ve got your finances in a decent spot, it’s time to look at the bigger picture. I like to think of career transition planning like prepping a job site before you start building; if you don’t have a blueprint, things get messy fast. You aren’t just walking away from a paycheck; you’re moving toward something else. Take a second to map out your “next.” Are you jumping straight into a new role, or are you taking a breather to upskill? Knowing your direction helps take the panic out of the exit.

Next, let’s talk about the actual exit strategy. You want to leave with your head held high, which means mastering a bit of professional resignation etiquette. Check your contract to see what your specific notice period requirements are so you don’t accidentally burn a bridge by leaving them high and dry. When the day comes, keep your resignation letter short, sweet, and professional. You don’t need to write a manifesto about why you’re leaving; just state the facts and express gratitude for the opportunity. Doing it this way ensures you’re leaving a job on good terms, which is huge for your reputation later on.

5 Ways to Leave Without Burning the Bridge Behind You

  • Don’t just ghost your boss. I know it’s tempting to just stop showing up when a place gets toxic, but the professional world is smaller than you think. Give your official notice in writing and, if you can, have a quick face-to-face chat. It feels awkward for ten minutes, but it saves you a lifetime of “did you hear what happened with…” gossip.
  • Nail your handover notes. Before you pack up your desk, spend an afternoon putting together a “cheat sheet” for whoever is taking over your tasks. List where the files are, what the recurring deadlines look like, and any weird quirks about your projects. It’s the ultimate way to show you actually cared about the work, even as you’re heading out the door.
  • Keep the “exit interview” classy. HR might ask you why you’re leaving, and while you might want to vent about that one manager who drives you nuts, try to keep it constructive. Instead of saying “my boss is a nightmare,” try “I’m looking for a different leadership style.” It keeps you looking like the professional and them looking like the problem.
  • Clean out your digital footprint. Seriously, don’t leave your personal passwords, private browser history, or those “venting” Slack messages sitting on your work laptop. Spend thirty minutes clearing out your personal stuff so you aren’t leaving a mess for the next person—and more importantly, so you aren’t leaving anything private behind.
  • Say your goodbyes properly. You don’t need to throw a party, but send a quick, friendly note to the coworkers you actually liked. Connect with them on LinkedIn or grab a coffee one last time. Your job might be ending, but your professional network is something you want to keep building for the long haul.

The Bottom Line

Don’t rush the exit; use your time while you’re still employed to build your “escape fund” and polish your resume so you’re not scrambling later.

Treat your job hunt like a part-time job itself, but keep it organized so you don’t burn out before you even land the new gig.

Always leave on good terms by giving proper notice and finishing your tasks, because the professional world is smaller than you think and you’ll want those bridges intact.

## The Right Way to Walk Away

“Quitting a job isn’t about burning a bridge or running away from a mess; it’s about clearing the workspace so you can build something better in the next room.”

Nathan Cole

Taking the Final Step

Taking the Final Step toward career change.

Look, I know this whole process feels like trying to rewire a house while the power is still on, but you’ve done the heavy lifting. You’ve looked at your bank account to make sure you won’t be stranded, you’ve mapped out your next career move, and you’ve prepared yourself for the actual conversation with your boss. By tackling the financial side and the professional planning separately, you’ve turned a massive, overwhelming life change into a series of manageable tasks. You aren’t just walking away from something old; you are building a bridge to something better, and you’re doing it with a solid plan in your pocket.

At the end of the day, leaving a job is a lot like restoring an old tool I found in a junk drawer. It takes some grit, a bit of sweat, and the willingness to get your hands dirty, but the result is something much more valuable. Don’t let the fear of “what if” keep you stuck in a situation that no longer fits who you are. Trust the steps you’ve taken and trust your gut. You’ve got the tools, you’ve got the plan, and now, it’s time to just go for it. You’ve totally got this.

Frequently Asked Questions

How much notice should I actually give my boss without burning any bridges?

Look, the “standard” two weeks is the golden rule for a reason. It’s enough time to hand over your projects without leaving your team in the lurch, but not so long that it gets awkward. If you’re in a high-level role or managing huge projects, maybe aim for three. Just don’t go rogue and quit on the spot unless the place is truly toxic. Leave on a high note so you can actually use them as a reference later.

What should I say in my resignation letter so it stays professional but doesn't feel fake?

Look, I get it. Writing a resignation letter feels like you’re trying to act like a robot in a suit. But here’s the trick: keep it short and stick to the facts. You don’t need to write a novel or fake some deep emotional connection. Just state your last day, offer a hand with the handoff, and say thanks for the opportunity. It’s about being polite, not being a phony.

Is it okay to quit my job before I have another one lined up, or is that too risky?

Look, I’ll give it to you straight: it’s a massive gamble. In my book, the safest move is always having that next paycheck lined up before you hand in your notice. But, I also know that sometimes a job is so toxic or draining that staying is costing you more than leaving. If you’re going to leap without a net, make sure your “emergency fund” is beefy enough to catch you.

Sturdy floating shelves diy project guide.

How to Build Floating Shelves That Hold Real Weight

I was standing in my hallway last summer, staring at a pile of expensive, heavy timber and a set of mounting brackets that looked way more complicated than any YouTube video had let on. I had this vision of sleek, modern storage, but looking at those instructions, I was this close to just giving up and calling a professional. But here’s the thing I learned the hard way: you don’t need a master carpenter’s toolkit to master a floating shelves diy project. Most people think you need specialized heavy-duty anchors or a built-in stud system to keep things from sagging, but it’s really just about knowing exactly where to bite into that wall.

I’m not going to feed you any of that high-end designer fluff that requires a workshop full of power tools. Instead, I’m going to show you how to get these up using the stuff you likely already have in your garage. We’re going to walk through the essential gear, how to find your studs without losing your mind, and the trick to making sure they actually stay level. By the time we’re done, you’ll have some solid, beautiful shelving that looks like it cost a fortune, but was actually just a Saturday afternoon well spent.

Table of Contents

Guide Overview

Total Time: 3-5 hours
Estimated Cost: $40-80
Difficulty: Beginner

Tools & Supplies

  • Drill/Driver for mounting brackets
  • Level to ensure evenness
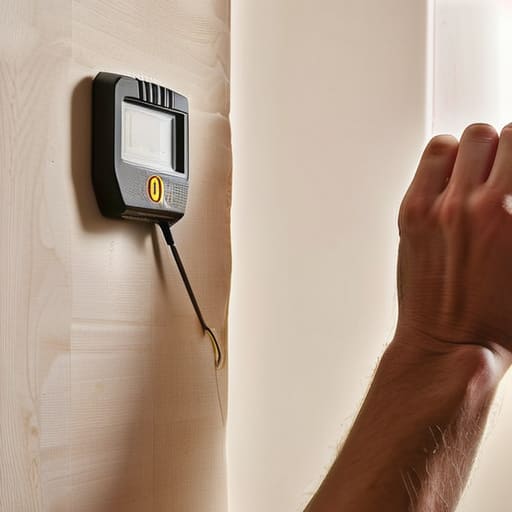
  • Stud Finder to locate wall supports
  • Saw for trimming wood to size
  • Sandpaper for smoothing edges
  • Wood planks (2-3 pieces)
  • Floating shelf brackets/hardware (1 set)
  • Wood screws (1 pack)
  • Wall anchors (if no studs are available)
  • Wood stain or paint (1 can)

Step-by-Step Instructions

  • 1. First things first, you’ve got to grab your gear. You’ll need a drill, a level (this is non-negotiable if you want to avoid a crooked mess), a stud finder, some wall anchors, and your shelf materials. I always tell people to double-check their measurements before they even touch a tool; there is nothing more frustrating than realizing your “perfect” shelf is two inches too wide for the nook you picked out.
  • 2. Now, let’s find those studs. Take your stud finder and run it along the wall where you want the shelves to live. If you can hit at least two studs, you’re in serious business because that’s where your real strength is going to come from. If your layout doesn’t line up with the studs, don’t sweat it—we’ll just use heavy-duty toggle bolts instead of standard plastic anchors to keep things secure.
  • 3. It’s time to mark your spots. Once you know where the studs are, use a pencil to mark the exact height and position. This is where that level becomes your best friend. Hold it up against the wall and draw a light line; if that line isn’t perfectly straight, your shelves will look like they’re sliding off the wall, and we definitely don’t want that.
  • 4. Time to get the drill moving. If you’re mounting directly into studs, drill your pilot holes first to prevent the wood from splitting. If you’re using anchors, follow the instructions on the package to drill a hole that fits the anchor’s diameter. Just remember to take your time here—you don’t need to rush or force the drill, just steady, even pressure.
  • 5. Let’s get the brackets or the internal support system into the wall. Screw your brackets into the pilot holes or anchors until they are tight and won’t budge when you give them a little tug. I like to give them a quick “test pull” because peace of mind is worth the extra ten seconds it takes to make sure they aren’t going anywhere.
  • 6. Slide your shelves onto the supports. Most DIY floating shelves use a bracket that hides inside the wood, so you’ll just guide the shelf onto the pegs or bracket arms. Once it’s seated, check it one last time with your level. If it’s sitting true, you can use a couple of tiny finishing nails or specialized shelf screws to lock it into place from underneath so it doesn’t slide forward.
  • 7. Finally, the fun part: decorating! Start by placing your heavier items—like thick cookbooks or ceramic planters—closer to the wall or directly over the studs. This keeps the weight distributed properly. I usually like to leave a little “breathing room” between items so the shelf doesn’t look cluttered. Now, step back and admire your work; you just leveled up your entire room.

Finding Your Grip Using a Stud Finder for Shelf Installation

Finding Your Grip Using a Stud Finder for Shelf Installation

Now, before you go driving any screws into that drywall, we need to talk about the most important tool in your kit: the stud finder. I’ve seen way too many people try to wing it, only to have their hard work come crashing down an hour later. When you’re working on hidden bracket installation, you aren’t just looking for any random spot; you’re hunting for that solid wood backing that’s going to do the heavy lifting. If you don’t hit a stud, you’re relying entirely on drywall anchors, and let’s be honest, that’s a gamble I’m not willing to take with my favorite books.

Once you find those studs, grab a pencil and mark them clearly. I like to use a little bit of painter’s tape on the wall first so I don’t make a mess with my marks. This is where you really determine your floating shelf weight capacity. If your brackets are spaced perfectly between two studs, you can load those shelves up with heavy stoneware or thick novels without a second thought. Just remember: measure twice, drill once. It’s a cliché for a reason, and in this case, it’ll save you a massive headache.

Mastering Hidden Bracket Installation Without the Stress

Mastering Hidden Bracket Installation Without the Stress

Now, here’s where things can get a little nerve-wracking: the actual hidden bracket installation. Since you won’t see any supports once the wood is up, you really want to get that bracket seated perfectly flush against the wall. If it’s even slightly crooked, your shelf is going to look tilted, and trust me, that’ll drive you crazy every time you walk past it. I always recommend double-checking your level after the bracket is screwed in, but before you slide the shelf on. It’s much easier to fix a loose screw now than to try and shim a heavy piece of timber later.

You also need to keep a close eye on your floating shelf weight capacity. It’s tempting to go all out with a library of heavy hardcovers, but even the sturdiest custom wood shelving projects have their limits. If you aren’t hitting a stud, make sure you’re using high-quality toggle bolts rather than those cheap plastic anchors. I’ve seen plenty of DIYers end up with a pile of books on the floor because they underestimated the load. Take it slow, measure twice, and you’ll have a setup that looks professional and stays put.

Five Pro-Tips to Keep Your Shelves from Becoming Floor Decor

  • Don’t skip the level check. I know, I know, you think you’ve got a steady hand, but even a tiny tilt looks massive once you actually put books or plants on the shelf. Use a real bubble level, not just a phone app, to make sure everything is dead-on.
  • Account for your “stuff” weight. Before you get too attached to a heavy oak slab, think about what’s actually going up there. If you’re planning on a massive collection of heavy hardcovers, you’re going to need more than just a couple of drywall anchors to keep them from sagging.
  • Mind the gap. When you’re mounting those brackets, leave just a hair of breathing room. If you try to force a shelf onto a bracket that’s too tight, you risk cracking the wood or, worse, stripping the screws you just worked so hard to set.
  • Test your layout with painters tape. Before you go drilling holes that you’ll regret for the next five years, use some blue painter’s tape to outline where the shelves will sit. It helps you see if the spacing looks weird or if you’ve accidentally blocked a light switch.
  • Keep your hardware organized. There is nothing more frustrating than being halfway through a project and realizing you’ve mixed up your 2-inch screws with your 2.5-inch ones. Grab a cheap little plastic organizer or even an old muffin tin to keep your bits and pieces separated while you work.

Quick Wins for Your Shelf Project

Don’t skip the stud finder—hitting a solid stud is the difference between a shelf that holds your favorite books and one that ends up on the floor.

Take your time with the leveling; a shelf that’s even by just a tiny fraction looks professional, while a crooked one will drive you crazy every time you walk past it.

Remember that it’s okay to make a mistake, so keep a little extra wall patch or touch-up paint handy just in case a screw goes in a little wonky.

## A Little Confidence Goes a Long Way

“At the end of the day, those floating shelves aren’t just about extra storage or making a room look a bit more ‘Pinterest-ready’—it’s about that feeling you get when you step back, see something sturdy holding up your favorite books, and realize you’re the one who made it happen.”

Nathan Cole

You’ve Got This: Final Thoughts on Your New Shelves

You’ve Got This: Final Thoughts on Your New Shelves

Once you’ve finished leveling those brackets and sliding the wood into place, take a second to step back and look at what you’ve actually accomplished. We covered a lot of ground today—from the crucial step of locating those studs to the slightly nerve-wracking process of mounting hidden hardware. It’s easy to get overwhelmed by the math or the fear of putting a hole in the wrong spot, but by following these steps, you’ve ensured your shelves are actually going to hold your books and plants without a hitch. Just remember: if things feel a little wonky at first, it’s usually just a matter of double-checking your level and giving it one more tweak.

At the end of the day, DIY isn’t about being a master carpenter or having a workshop full of expensive power tools. It’s about that feeling of satisfaction when you look at a blank wall and realize you didn’t need to call a professional to fix it. You took a project that looked complicated, broke it down into manageable chunks, and built something real with your own two hands. So, go ahead and decorate those shelves, grab a coffee, and enjoy the view. You earned it, and honestly? I bet they look incredible.

Frequently Asked Questions

Can I actually put heavy books on these, or are they strictly for light decor?

That’s the million-dollar question, isn’t it? Here’s the straight truth: it all comes down to what you’re mounting into. If you’ve followed my advice and secured those brackets directly into the wall studs, you’re golden—you can definitely load them up with those heavy hardcovers. But if you’re just using drywall anchors? Stick to light decor like small plants or photos. I’ve seen too many “book lover” shelves end up on the floor because of it!

What should I do if my stud finder isn't finding anything in the wall?

Don’t panic—this happens to the best of us. If your stud finder is coming up blank, it might be a low battery or you’re just moving it too fast. If it’s definitely working, try the “knock test”: tap the wall until the sound changes from hollow to a solid thud. You can also use a strong magnet to find the screws holding your drywall to the studs. It’s a bit old-school, but it works every time.

How do I make sure the shelves don't end up looking crooked or uneven?

Trust me, I’ve been there—nothing kills the vibe of a finished project faster than a shelf that looks like it’s sliding off the wall. To keep things straight, don’t just eyeball it. Grab a bubble level (or a leveling app on your phone if you’re in a pinch) and check your marks twice. I always double-check the level once the bracket is up but before I drill the holes. Better to fix a pencil mark than a hole in the drywall!

Guide on how to spot fake news.

How to Spot Fake News and Misinformation Online

I remember sitting at my kitchen table last Tuesday, scrolling through my phone while waiting for a pot of chili to simmer, when I saw a headline that made my blood boil. It looked totally legit—even had a professional-looking logo—but something about the way it was written just felt off. It’s frustrating because everyone acts like you need a PhD in journalism or some high-tech software to figure out what’s real and what’s garbage. The truth is, learning how to spot fake news isn’t about being a genius; it’s more like learning how to tell if a piece of lumber is warped before you start building a deck. You just need to know which signs to look for.

I’m not here to give you a lecture or drown you in academic jargon that makes your head spin. Instead, I’m going to break this down into a few simple, practical checks that you can use right from your phone. Think of this as a basic toolkit for your brain. I’ll show you how to sniff out the nonsense so you can stop feeling overwhelmed and start trusting your own gut again.

Table of Contents

Mastering Simple Fact Checking Techniques

Mastering Simple Fact Checking Techniques guide.

Look, you don’t need a PhD in journalism to figure out if a story is legit. Think of it like inspecting a used truck before you buy it; you wouldn’t just take the seller’s word for it, right? You’d check the oil, look under the chassis, and maybe run the VIN. The same goes for your newsfeed. One of the best lateral reading strategies I’ve picked up is simply opening a new tab to see what other people are saying about the same topic. If only one obscure blog is reporting a “massive scandal,” that’s a huge red flag that something smells fishy.

I also like to treat every headline like a suspicious contractor quote—I always look for the fine print. This means practicing a bit of source credibility assessment before you hit that share button. Check the “About Us” section and see if the author actually knows their stuff. It’s also worth keeping an eye out for detecting biased reporting by noticing if the language is trying to make you angry rather than just informing you. If a post feels like it’s shouting at you, it’s probably not trying to tell the truth.

Using Lateral Reading Strategies to Verify

Using Lateral Reading Strategies to Verify information.

Now, if you want to get really good at this, you’ve got to stop reading a single article from top to bottom like it’s a novel. That’s a trap. When I’m trying to figure out if a tool I found at a garage sale is actually high-quality or just junk, I don’t just look at the tool; I look at what other people say about that brand. Verifying information works the exact same way. Instead of staying stuck on one webpage, you need to use lateral reading strategies. This just means opening a bunch of new tabs to see what the rest of the world says about that specific source while you’re reading it.

Think of it like a quick background check. If a site makes a wild claim, don’t just look for a “Contact Us” page to see if they look legit—that’s easy to fake. Instead, search for the organization’s name on a search engine to see if they have a reputation for detecting biased reporting or if they’re known for pushing an agenda. By jumping sideways across the web, you’re building much stronger digital media literacy skills without needing a degree to do it.

5 Quick Ways to Sniff Out a Fake Story

  • Check the source’s “About Us” page. If a site claims to be a major news outlet but the “About” section is vague, full of typos, or sounds more like a personal rant than a newsroom, that’s a massive red flag.
  • Look past the headline. I’ve learned the hard way that “clickbait” is designed to make you angry or shocked so you’ll share it without thinking. If the headline sounds too crazy to be true, read the actual article—the facts often don’t match the hype.
  • Do a quick reverse image search. A lot of fake news uses old photos from completely different events to stir up drama. If a photo looks suspicious, plug it into Google Images; you might find it was actually taken five years ago in a different country.
  • See who else is reporting it. If a “massive breaking story” is only appearing on one random blog and isn’t being mentioned by any of the big, reputable news agencies, there’s a good chance it’s just made up.
  • Watch out for “emotional loading.” Fake stories use heavy, loaded language to trigger your gut reaction. If an article is trying way too hard to make you feel outraged or terrified, take a breath and step back—it’s likely trying to manipulate you rather than inform you.

The Quick Cheat Sheet: What to Remember

Don’t take things at face value—always pause and do a quick “lateral” search to see what other trusted sources are saying about a claim before you hit share.

Check the source’s credentials and the date of the article; a lot of “breaking news” is actually old info being recirculated to stir up trouble.

Trust your gut, but verify with your brain; if a headline is designed to make you feel super angry or shocked, that’s usually a sign it’s leaning more on emotion than actual facts.

## The Bottom Line

“At the end of the day, spotting fake news isn’t about being some kind of genius or a professional investigator; it’s just about slowing down long enough to check the plumbing before you let the whole house flood.”

Nathan Cole

Don't Let the Noise Win

Don't Let the Noise Win: Fact-checking.

Look, I know it feels like every time you open your phone, you’re being hit with a new wave of nonsense designed to get a reaction out of you. But if you remember what we talked about today, you’ve already got the right tools in your belt. Just take a second to pause before you click, run a quick lateral search to see what other sources are saying, and always double-check those wild claims against a reliable fact-checker. It’s a lot like fixing a leaky sink; if you try to rush it, you’re going to make a mess, but if you follow the steps and take your time, you’ll get the job done right.

At the end of the day, spotting fake news isn’t about being a genius or having a degree in journalism; it’s just about being a little bit skeptical and a lot more intentional. We live in a world that wants us to react instantly, but I’m telling you, there is so much power in simply slowing down. You don’t have to be an expert to protect your own headspace and the truth. Once you start applying these little checks to your daily scroll, you’ll realize that most of the chaos is way more figure-out-able than it seems. You’ve got this.

Frequently Asked Questions

What do I do if I realize a friend or family member is the one sharing the fake news?

This is where things get tricky. It’s one thing to debunk a random stranger online, but it’s another entirely when it’s your Uncle Bob or your best friend. My advice? Don’t go in guns blazing with “you’re wrong.” That just makes people defensive. Instead, try being curious. Say something like, “Hey, I saw that post too, but I couldn’t find a reliable source for it. What do you think?” Keep it low-pressure and focused on the facts, not their intelligence.

Are there any reliable apps or browser extensions that can help me check facts on the fly?

Look, I’m not a fan of cluttering up my phone or browser with a dozen different tools, but a few good ones can really save your skin. I personally like using the Ground News app—it’s great for seeing how different sides are covering the same story. For your browser, the NewsGuard extension is a lifesaver; it acts like a little warning light for sketchy sites. Just keep it simple and don’t overcomplicate your setup.

How can I tell the difference between a genuine mistake by a news outlet and actual intentional misinformation?

Look, even the pros mess up sometimes. The best way to tell the difference is to look at how they handle the blunder. If a site realizes they screwed up, they’ll issue a clear correction or an update right at the top. That’s just a mistake. But if they double down, delete the evidence without a word, or keep pushing the same lie after being called out? That’s not a slip-up; that’s intentional.

Colleagues giving and receiving feedback at work.

How to Give and Take Feedback at Work

I still remember sitting in my first real office job, staring at a blank screen while my stomach did actual somersaults because my manager wanted to “chat” about my performance. To me, it felt less like a professional development tool and more like being called into the principal’s office to get chewed out. Most corporate training manuals make giving and receiving feedback sound like this high-stakes, delicate dance involving “synergy” and “constructive frameworks,” but let’s be real: it usually just feels awkward and stressful. We’ve been taught to treat these conversations like they’re made of glass, when in reality, they’re just tools—kind of like a wrench or a screwdriver—that are supposed to help us fix things that aren’t working.

I’m not here to give you any of that polished, HR-approved fluff that sounds good in a seminar but fails in the real world. Instead, I want to show you how to strip away the drama and treat these conversations like a simple troubleshooting guide. I’ll break down how to deliver the truth without being a jerk and how to take a hit to your ego without letting it ruin your week. My goal is to help you master giving and receiving feedback so you can stop overthinking it and just get back to work.

Table of Contents

Mastering Effective Communication Skills Without the Stress

Mastering Effective Communication Skills Without the Stress

Look, I’ve learned from fixing old engines that if you force a part that isn’t turning, you’re just going to strip the threads. Communication is exactly the same. You can’t just barge in and start pointing out flaws without a bit of finesse. To keep things from getting heated, you really need to lean into emotional intelligence in management. That’s just a fancy way of saying: take a breath, read the room, and remember there’s a human being on the other side of the conversation. If you approach the talk with a bit of empathy, you’ll find people are way more willing to listen instead of immediately going on the defensive.

On the flip side, when you’re the one on the receiving end, try to look at it through the lens of a growth mindset in feedback. Instead of seeing a critique as a personal attack on your character, try to view it as a diagnostic tool—kind of like a check engine light. It’s not there to ruin your day; it’s there to tell you exactly what needs a little grease or a quick adjustment so you can keep running smoothly.

Using Performance Review Techniques to Build Confidence

Using Performance Review Techniques to Build Confidence

Now, I know the phrase “performance review” usually makes people want to hide under their desks, but try looking at it differently. Instead of seeing it as a scary judgment day, think of it like a regular tune-up on an old truck. You aren’t looking for what’s “broken” to punish it; you’re just checking the oil and the tire pressure so you don’t break down on the highway later. By using certain performance review techniques—like setting small, specific goals rather than vague “do better” targets—you turn a high-pressure meeting into a simple roadmap for what’s next.

The real secret here is developing a growth mindset in feedback. When you stop viewing every critique as a personal attack and start seeing it as a data point, everything changes. It’s just information you can use to sharpen your skills. If you approach these sessions with the goal of learning rather than defending, you’ll find that you actually walk out of the room feeling more capable and ready to tackle the next project. It’s all about building momentum, one small adjustment at a time.

5 Ways to Handle Feedback Without Losing Your Cool

  • Focus on the work, not the person. When you’re giving feedback, try to talk about the specific task or the result rather than attacking someone’s character. It’s a lot easier to fix a broken process than it is to fix a personality.
  • Keep it timely, but skip the heat of the moment. If a project goes sideways, don’t wait three months to bring it up, but don’t do it while everyone is still frustrated either. Wait until the dust settles so you can actually talk sense.
  • Be specific, not vague. Telling someone they “need to do better” is about as helpful as telling a guy to “fix the sink” without saying where the leak is. Tell them exactly what happened and what a “win” looks like next time.
  • Listen more than you talk when you’re on the receiving end. It’s tempting to jump in with excuses the second you feel criticized, but just take a breath and listen to the whole thing first. You might actually find some useful info in there.
  • Turn the feedback into a “to-do” list. Once the conversation is over, don’t just let it sit there. Pick one or two small things you can actually change and start working on them immediately. It turns a scary conversation into a practical project.

The Bottom Line: Making Feedback Work for You

Stop looking at feedback like a personal attack and start seeing it as a free set of blueprints to help you level up your skills.

Whether you’re giving it or getting it, keep things simple and focused on the actual task at hand so you don’t get bogged down in the drama.

Don’t just listen to the words—make a quick plan of action so you can actually use what you learned to get better results next time.

The Real Way to Look at Feedback

“Think of feedback like fixing a leaky faucet: it’s not about pointing out what’s broken just to be a jerk, it’s about finding the source of the drip so you can actually get things running smooth again.”

Nathan Cole

Wrapping It All Up

Wrapping It All Up: fine-tuning processes.

Look, I know that sitting down to talk about what’s working and what isn’t can feel a lot like trying to fix a plumbing leak in the dark—it’s messy, a little intimidating, and you’re worried about making a bigger disaster. But if you take what we’ve talked about today—keeping your communication clear, using structured techniques to stay calm, and treating reviews as a tool for growth rather than a trip to the principal’s office—you’ll realize it’s actually pretty manageable. Once you stop seeing feedback as a personal attack and start seeing it as just another way to fine-tune your process, the stress starts to fade away.

At the end of the day, none of us have it all figured out on the first try. Whether you’re learning a new trade, navigating a promotion, or just trying to get through a busy week, you’re going to need a little course correction every now and then. Don’t let the fear of a “tough conversation” keep you from getting better at what you do. Just take it one step at a time, keep an open mind, and remember that every mistake is just a chance to recalibrate. You’ve got this, and honestly, you’re more capable than you think.

Frequently Asked Questions

What do I do if the person giving me feedback is being totally unfair or just plain rude?

Look, we’ve all been there—someone comes at you sideways, and suddenly it’s not even about the work anymore. It’s personal. When that happens, the best move is to hit the pause button. Don’t fire back; that just fuels the fire. Take a breath, ask a clarifying question like, “Can you help me understand how I reached that conclusion?”, and if they’re still being a jerk, walk away. You can deal with the details once the temperature drops.

How can I give feedback to a boss or someone in charge without it feeling awkward or risky?

Look, I get it. Telling your boss something is off feels like walking a tightrope without a net. The trick is to stop treating it like a confrontation and start treating it like a “fix-it” project. Instead of saying, “You’re doing this wrong,” try, “I think we could hit our goals faster if we adjusted this one thing.” Focus on the work, not the person, and keep it solution-oriented. It turns a scary talk into a simple upgrade.

I always get defensive when someone critiques my work; are there any quick tricks to help me stay calm in the moment?

Look, I get it. When someone starts poking holes in something you worked hard on, your brain goes straight into “fight or flight” mode. It’s a natural reflex. My best trick? Take a beat and just listen—literally, just listen. Before you jump in to defend yourself, ask one clarifying question like, “Can you help me understand that part better?” It buys you a few seconds to breathe and shifts you from defending to problem-solving.

Delicious and budget friendly meals.

Budget-friendly Meals That Don’t Taste Cheap

I remember sitting in my first tiny studio apartment after trade school, staring at a receipt from the grocery store that looked more like a car payment than a food bill. I was convinced that eating well meant buying fancy organic produce or those pre-packaged “superfood” kits that cost a fortune. But honestly? Most of those “cheap eating” gurus make it sound way harder than it actually is, pushing complicated recipes that require ingredients you’ll only use once. I’m tired of the idea that budget friendly meals have to be boring, bland, or involve nothing but canned beans and sadness.

I’m not here to sell you on some lifestyle overhaul or a pantry full of expensive spices you don’t need. My goal is to show you how to use common-sense cooking to turn basic, affordable staples into something you actually look forward to eating. I’ve spent years tinkering in my kitchen, figuring out how to stretch a few dollars without sacrificing flavor, and I’m going to break it all down into simple, manageable steps. We’re going to focus on real food, real prices, and recipes that won’t leave you feeling broke or hungry.

Table of Contents

Low Cost Grocery Shopping Tips You Can Use Today

Low Cost Grocery Shopping Tips You Can Use Today

Before you even step foot in the store, you’ve got to have a game plan. I used to wander the aisles aimlessly, grabbing whatever looked good in the moment, only to realize I’d spent fifty bucks on stuff I wouldn’t even eat by Thursday. Now, I treat my shopping trip like a construction project: you need a blueprint. Start by auditing what you already have in your cupboards. If you’ve got a half-box of pasta and a jar of marinara hiding in the back, that’s a head start. I always try to focus on cheap protein sources like dried beans, lentils, or even canned tuna to keep the bill down without sacrificing the heavy lifting your body needs.

Another thing that saved my sanity (and my wallet) was learning how to shop the perimeter. The middle aisles are where the fancy, overpriced processed stuff lives. Instead, stick to the produce and bulk sections. If you can master a few pantry staple recipes, you’ll find that you aren’t just saving money; you’re actually eating better because you’re relying on real, whole ingredients rather than expensive, pre-packaged junk.

Finding Cheap Protein Sources Without Breaking the Bank

Finding Cheap Protein Sources Without Breaking the Bank.

When I first started living on my own, I thought “protein” meant expensive cuts of steak or fancy salmon fillets. I was wrong. If you want to master eating well on a tight budget, you have to stop looking at the meat aisle as your only option and start looking at your pantry. Beans, lentils, and chickpeas are absolute game-changers. They’re incredibly shelf-stable, and a single bag of dried lentils costs next to nothing compared to a pound of ground beef. I usually keep a few different kinds on hand for quick soups or taco fillings; they bulk up a meal without draining your wallet.

Don’t sleep on eggs or canned tuna, either. Eggs are probably the most versatile tool in my kitchen—you can scramble them, poach them, or hard-boil them for a quick snack. If you’re into meal prepping for beginners, these are your best friends because they don’t require a ton of prep time. Even frozen chicken thighs can be a much more affordable way to get your fix than buying boneless, skinless breasts. It’s all about making smart swaps that keep you full without the “sticker shock” at the register.

5 Ways to Build a Solid Meal Without the Sticker Shock

  • Master the art of the “pantry staple” base. I’m talking about big bags of rice, dried lentils, and oats. They cost pennies per serving and act as the perfect blank canvas for whatever random veggies or seasonings you have left in the cupboard.
  • Don’t sleep on frozen veggies. Honestly, half the time they’re fresher than the stuff sitting in the produce bin for a week, and they’re way cheaper. Plus, you won’t end up throwing a bag of slimy spinach in the trash at the end of the month.
  • Get comfortable with “Cook Once, Eat Twice.” I never cook just one meal anymore. If I’m roasting chicken or boiling a big pot of chili, I make enough to turn it into something completely different the next night. It saves time and keeps you from ordering takeout when you’re tired.
  • Shop your own kitchen before you hit the store. It sounds simple, but I’ve lost count of how many times I went to the grocery store only to realize I already had three cans of black beans hiding in the back of my pantry. Check your shelves first to avoid buying duplicates.
  • Embrace the “Everything” Soup or Stir-fry. This is my favorite trick for when the fridge looks a little sad. Take whatever wilting carrots, half an onion, or leftover bits of meat you have, toss them in a pan with some soy sauce or a bouillon cube, and you’ve got a decent dinner.

The Bottom Line on Eating Well for Less

Stop viewing a budget as a restriction and start seeing it as a puzzle; once you know how to shop the sales and swap expensive proteins for smarter ones, the “puzzle” actually becomes pretty fun to solve.

Focus on the basics—staples like grains, beans, and seasonal produce are your best friends because they fill you up without draining your bank account.

Don’t try to overhaul your entire kitchen overnight; just pick one or two of these simple shifts, master them, and you’ll see your grocery bill drop before you know it.

## The Real Secret to Eating Well on a Budget

“At the end of the day, cooking on a budget isn’t about deprivation or eating bland stuff; it’s just about being a little smarter with your tools and your grocery list so you can actually enjoy your dinner without checking your bank balance first.”

Nathan Cole

Putting It All Into Practice

Putting It All Into Practice with groceries.

Look, I know that staring at a grocery receipt can feel a bit like looking at a broken engine—it’s overwhelming and you’re not quite sure where the leak is. But if you take what we talked about today and apply it, you’ll see the math start to work in your favor. By hitting the grocery store with a solid plan, focusing on those versatile, low-cost proteins, and shopping smarter rather than harder, you’re doing more than just saving a few bucks. You’re actually taking control of your kitchen and your wallet at the same time. It’s not about being perfect or following a rigid, expensive diet; it’s about making those small, smart adjustments that add up over a month.

At the end of the day, cooking for yourself shouldn’t feel like a chore or a financial burden. It’s a skill, just like fixing a leaky sink or troubleshooting a glitchy router, and like any skill, you’re going to get better with practice. Don’t get discouraged if your first few budget-friendly meals aren’t five-star restaurant quality. The goal is to feed yourself well without the stress. Just grab your list, head to the store, and remember that you’ve totally got this. I’ll see you in the next one!

Frequently Asked Questions

How do I make sure I'm actually getting enough nutrition if I'm mostly eating cheaper staples like beans and rice?

That’s a fair concern. I used to worry I was just running on carbs, too. The trick is to stop thinking of beans and rice as “filler” and start seeing them as a foundation. To round things out, I always try to toss in some frozen veggies—they’re cheap, won’t spoil, and pack a punch—and maybe a handful of seeds or some leafy greens. It’s all about adding those small, colorful layers to keep your body fueled.

What are some ways to prep these meals ahead of time so I don't end up ordering takeout when I'm tired after work?

Look, I’ve been there—staring at the fridge at 6:00 PM, too exhausted to move, and halfway through clicking “order” on a pizza app. To beat that, you’ve gotta do the heavy lifting early. I like to spend Sunday afternoon “component prepping.” Instead of full meals, just cook a big batch of grains, roast a tray of veggies, and prep your protein. When you’re wiped out on Tuesday, you just grab a bowl, toss it together, and you’re done.

Is it really worth buying in bulk, or am I just going to end up with a pantry full of stuff that goes bad before I use it?

Look, I’ve been there—staring at a massive bag of flour I used once and then forgot about for six months. The honest answer? It depends on what you’re buying. Stick to the “dry and durable” rule. Bulk up on stuff like rice, beans, pasta, or oats; those things aren’t going anywhere. But skip the bulk deals on fresh produce or fancy sauces. If it’s going to rot before you finish it, it’s not a deal—it’s a waste.

Comparing systems vs goals for productivity.

Why Systems Beat Goals for Getting Things Done

I remember standing in my garage three years ago, surrounded by half-finished projects and a mountain of expensive, high-tech tools I’d bought because a “productivity guru” told me they’d change my life. I had these massive, shiny visions of what I wanted to build, but I was stuck staring at a pile of sawdust because I hadn’t actually figured out how to start. I was obsessed with the finish line, totally ignoring the messy reality of systems vs goals. I thought if I just dreamed big enough, the work would somehow become easier, but all I ended up with was a garage full of clutter and a whole lot of frustration.

Look, I’m not here to sell you some $500 planner or a complicated life-coaching seminar. I want to show you how to stop chasing those disappearing finish lines and start building the small, repeatable habits that actually get things done. I’m going to break down the real-world difference between having a dream and having a process, using the same plain-English approach I use when I’m fixing a leaky sink. We’re going to get practical, get our hands dirty, and figure out how to make your progress feel actually doable.

Table of Contents

Moving From Outcome Orientation to Simple Daily Wins

Moving From Outcome Orientation to Simple Daily Wins

When I used to set big goals—like finally restoring that old workbench or hitting a specific savings number—I’d spend all my energy staring at the finish line. The problem is, staring at the finish line doesn’t actually move your feet; it just makes you feel like you’re failing every day you aren’t “there” yet. I had to learn the hard way that process vs outcome orientation is the difference between burning out by February and actually making progress. Instead of obsessing over the massive end result, I started focusing on the tiny, repeatable actions that happen in between.

Think of it like this: you don’t build a deck by dreaming about the finished backyard; you build it by driving one screw at a time. This is the heart of the James Clear atomic habits philosophy—focusing so much on the small, daily wins that the big result becomes an inevitable byproduct. When you shift your focus toward daily routine optimization, you stop riding that emotional rollercoaster of “I succeeded today” versus “I failed today.” You just show up, do the work, and let the momentum do the heavy lifting for you.

Why Chasing the Finish Line Makes Growth Feel Impossible

Why Chasing the Finish Line Makes Growth Feel Impossible

Look, I’ve been there. I remember trying to renovate my first fixer-upper, staring at a gutted kitchen and feeling like I’d never actually eat a meal in there again. When you focus solely on the “after” photo, the gap between where you are and where you want to be feels massive. That’s the trap of goal setting vs system building; if you only care about the finish line, every single day you aren’t there feels like a failure. It’s exhausting, and honestly, it’s the fastest way to burn out before you even get the good stuff done.

When you’re stuck in that mindset, you’re essentially living in a constant state of “not enough.” You’re chasing a destination that keeps moving, which makes sustainable personal growth strategies nearly impossible to stick to. Instead of enjoying the craft, you’re just white-knuckling your way through the struggle. It turns what should be a rewarding journey into a grueling marathon where the only prize is a moment of relief before the next big mountain appears.

5 ways to stop chasing the dragon and start building the machine

  • Audit your “daily minimums.” Instead of saying you’ll write a book, decide that you’ll sit in your chair for fifteen minutes every morning. It’s a small, non-negotiable win that builds the muscle without the burnout.
  • Focus on the inputs, not the scoreboard. You can’t control if a client hires you or if you lose five pounds this week, but you can control how many outreach emails you send or how many miles you walk. Manage the effort, and the results usually follow.
  • Build “frictionless” environments. If your goal is to cook better, don’t just wish for it—prep your spice rack and keep a clean pan ready on the stove. If the setup is easy, the system actually sticks.
  • Use a “low-bar” checklist. I love a simple paper list. Don’t write “Master Python programming”; write “Open code editor and run one script.” Checking that box gives you a hit of dopamine that keeps you coming back tomorrow.
  • Review the process, not just the progress. Once a week, don’t ask “Did I hit my goal?” Ask “Did my system work this week, or did I find excuses to skip it?” If the system is broken, tweak the steps, don’t just yell at yourself for failing.

The bottom line: Stop chasing, start building

Goals are just the destination on the map, but systems are the actual engine that gets you there—focus on the engine if you actually want to move.

If your plan feels so heavy that you’re procrastinating, your system is too big; shrink it down until it’s so easy it feels almost silly not to do it.

Stop judging your progress by how far you are from the finish line and start measuring it by how many days in a row you showed up for the process.

## The real secret to getting things done

“A goal is just a destination on a map, but a system is the actual engine under the hood. Don’t get so caught up staring at the horizon that you forget to make sure your car is actually running.”

Nathan Cole

Getting Your Hands Dirty

Getting Your Hands Dirty building daily systems.

Look, I get it. It’s easy to get caught up in that big, shiny vision of where you want to be—the perfect kitchen, the dream job, or that massive savings account. But as I’ve learned from both fixing old engines and trying to get my own life in order, chasing that finish line is a one-way ticket to burnout. Goals are great for pointing the compass, but they don’t actually move the boat. It’s the small, repeatable systems you build every single day that do the heavy lifting. Instead of staring at the mountain peak, just focus on the next right step and the tools you need to take it.

At the end of the day, I want you to stop waiting for some future version of yourself to finally show up and be successful. That person doesn’t exist yet; you build them through the mundane, unglamorous stuff you do on a Tuesday afternoon. Whether you’re tightening a bolt or finally setting a schedule that actually sticks, remember that progress is a process, not a destination. You’ve got the tools, and I promise you, this is way more figure-out-able than it looks. Now, quit overthinking it and just start building.

Frequently Asked Questions

If I stop focusing on the big goal entirely, how do I know if I'm actually making progress or just spinning my wheels?

That’s the million-dollar question, isn’t it? I used to worry about that all the time. Here’s how I handle it: I look at my “input metrics.” If your goal is a renovated kitchen, don’t just stare at the empty room. Look at whether you actually sanded one cabinet or bought the right screws this week. If you’re checking off your daily tasks, you’re moving. The progress is in the doing, not just the dreaming.

How do I figure out what a "good" daily system actually looks like for my specific project?

Look, there’s no magic blueprint, but here’s my rule of thumb: a good system is one you can actually stick to on your worst, most tired Tuesday. If your plan requires two hours of focus and a perfect environment, it’s a fantasy, not a system. Test it by asking, “Can I do this even when I don’t feel like it?” If the answer is yes, you’ve found your sweet spot. Keep it small, keep it repeatable.

What do I do when I hit a massive setback that makes my daily routine feel totally useless?

Look, I’ve been there. You’re mid-project, something breaks, and suddenly your whole routine feels like a joke. When that happens, stop trying to fix the big picture. It’s too heavy right now. Instead, shrink your world. Pick one tiny, mindless task—even if it’s just clearing your workbench or organizing one drawer—and do it. You aren’t “fixing your life”; you’re just proving to yourself that you can still move the needle.