Tips on how to take better breaks.

How to Take Breaks That Actually Recharge You

I remember sitting at my kitchen table last Tuesday, staring at a spreadsheet until the cells started blurring into a gray smudge. I had been “working” for four hours straight, but my brain felt like a rusted-out engine trying to turn over in mid-winter. I thought I was being productive by powering through, but the truth was I was just spinning my wheels and making mistakes I’d have to fix later. We’ve been sold this lie that grinding until your eyes burn is the only way to get things done, but I’ve learned the hard way that knowing how to take better breaks is actually the most important tool in your kit.

I’m not here to sell you on some expensive mindfulness retreat or a complicated ten-step meditation ritual that takes an hour you don’t have. I want to show you how to do this the practical way. I’ve spent years testing out different methods while juggling DIY projects and full-time work, and I’ve boiled it down to a few simple, no-nonsense resets. I’m going to give you a straightforward, step-by-step guide to reclaiming your focus so you can work smarter, not just longer.

Table of Contents

The Simple Math Behind Mental Fatigue Recovery

The Simple Math Behind Mental Fatigue Recovery

Look, I’m not a mathematician, but I do know how to budget my time and my energy. Think of your brain like a smartphone battery. If you keep running heavy apps in the background without ever plugging it in, you’re going to hit 1% before lunch. Mental fatigue recovery isn’t just about being lazy; it’s about managing your “internal battery” so you don’t crash hard by 3:00 PM.

The secret lies in understanding the difference between active vs passive breaks. If you spend your ten-minute breather scrolling through social media, you aren’t actually recharging; you’re just swapping one type of screen fatigue for another. To truly reset, you need to step away from the digital noise. I’ve found that even tiny micro-breaks for focus—like stepping onto the porch for fresh air or doing a quick stretch—work way better than staring blankly at a wall. It’s about giving your cognitive gears a chance to cool down so they don’t seize up when you need them most.

Using Micro Breaks for Focus to Reclaim Your Day

Using Micro Breaks for Focus to Reclaim Your Day

Think of micro-breaks like a quick reset on a router when the internet starts acting up. You don’t need to go for a forty-minute hike every time you feel a slump coming on; sometimes, just ninety seconds of stepping away from the screen is enough to trigger some cognitive recharge strategies. I’ve found that these tiny windows of time are perfect for stretching my hamstrings or grabbing a glass of water. The goal isn’t to escape your work entirely, but to use these micro-breaks for focus to keep your brain from hitting that dreaded wall halfway through the afternoon.

The real secret, though, is understanding the difference between active vs passive breaks. If your “break” is just scrolling through social media on your phone, you aren’t actually resting your eyes or your mind—you’re just swapping one screen for another. To really see the pomodoro technique benefits, try doing something physical or tactile. Stand up, do a quick lap around the room, or even just stare out the window at something far away. It’s about giving your mental processor a chance to cool down so you can actually get back into the flow without feeling fried.

5 ways to actually reset without feeling guilty

  • Get away from your screens. If you spend your break scrolling through your phone, your brain isn’t actually resting; it’s just processing a different kind of digital noise. Put the phone in a drawer and look at something that isn’t backlit.
  • Move your body, even just a little. I’m not talking about a full-blown gym session, but a quick lap around the house or some basic stretching helps clear that “stagnant air” feeling that comes from sitting in one spot for three hours straight.
  • Change your scenery. If you work at a desk, don’t take your break at that same desk. Even moving to a different chair or stepping out onto a porch for five minutes tells your brain, “Okay, the work session is officially paused.”
  • Hydrate or caffeinate (wisely). Sometimes that mid-afternoon slump is just plain old dehydration. Grab a big glass of water or a quick tea. Just try not to make your “break” a marathon of sugary energy drinks that will leave you crashing an hour later.
  • Practice the “nothing” technique. It sounds weird, but just sitting quietly for three minutes without a podcast, a book, or a task can be incredibly powerful. It’s like letting the dust settle in a glass of water so you can finally see clearly again.

The quick cheat sheet for better breaks

Stop waiting until you’re totally fried; use micro-breaks every hour to keep your brain from hitting that “frozen laptop” stage.

Treat your mental energy like a battery—short, regular charges are way more effective than waiting until you’re at 1% to plug in.

Get away from the screen entirely during your downtime; your eyes and your focus need a real change of scenery to actually reset.

## The truth about the "grind"

“Look, I’ve spent plenty of days trying to power through a project by sheer willpower, only to realize I was just spinning my wheels. Taking a break isn’t ‘quitting’ or being lazy; it’s just hitting the reset button so you don’t burn out the engine before you actually cross the finish line.”

Nathan Cole

Taking Control of Your Downtime

Taking Control of Your Downtime with breaks.

Look, we’ve covered a lot of ground here, from the actual science of why your brain hits a wall to the tactical way you can use those tiny micro-breaks to keep your momentum going. The main takeaway I want you to hang onto is that rest isn’t a reward you earn after you’re exhausted; it’s the fuel that prevents the burnout in the first place. Whether you’re calculating your mental recovery math or just stepping away for a quick stretch, remember that small, intentional pauses are way more effective than one giant, frantic nap at the end of a wasted week.

At the end of the day, I know how it feels to stare at a screen, feeling like you’re making zero progress while the clock just keeps ticking. It’s frustrating, but I promise you, most of these productivity hurdles are way more figure-out-able than they seem. Don’t feel like you need to overhaul your entire life by Monday morning. Just pick one thing—maybe it’s a five-minute walk or a quick screen break—and start right where you are. You’ve got this, and honestly, once you start treating your energy like a resource instead of an infinite well, you’re going to feel like a whole new person.

Frequently Asked Questions

How do I actually stop myself from just scrolling through my phone during these breaks?

Look, I get it. I’ve been there—staring at a screen for eight hours only to “relax” by staring at a smaller screen. It’s a trap. To break the cycle, you’ve got to create physical distance. Put your phone in a drawer or another room before you step away. If you need a distraction, grab something tactile: a quick stretch, a quick walk, or even just washing a few dishes. Move your body, not your thumb.

Is there a specific time of day when I should be taking my longest break to avoid that mid-afternoon crash?

Honestly, if you’re looking to dodge that 3:00 PM slump, aim to take your longest break right around 1:30 or 2:00 PM. Think of it like letting a tool cool down before it overheats. Instead of powering through that post-lunch fog, step away for 20 or 30 minutes. Grab some fresh air or just sit without a screen. It resets your system so you aren’t just running on fumes by dinner time.

What do I do if my boss or my coworkers think I'm slacking off when I'm actually just stepping away for a reset?

Look, I get it. It feels awkward stepping away when everyone else is glued to their desks. My best advice? Over-communicate your rhythm. You don’t need to ask permission, but a quick “Stepping away for ten to reset my focus, back in a flash” on Slack goes a long way. If you make your output high-quality and your availability predictable, most people won’t care about the ten-minute reset. Work smarter, not longer.

Remote job interview tips for success.

How to Nail a Remote Job Interview

I still remember the absolute panic of my first big virtual meeting—sitting there in a wrinkled t-shirt, staring at a frozen screen while my Wi-Fi decided to take a nap right as the hiring manager asked me a question. It felt less like a professional milestone and more like a total disaster waiting to happen. Most of the advice you find online about remote job interview tips is way too high-maintenance, telling you that you need a studio-grade lighting kit or a dedicated office space that looks like a Pinterest board. Honestly, that’s just noise. You don’t need a Hollywood production to land a great gig; you just need to make sure your tech doesn’t betray you when it matters most.

I’m not here to sell you on some expensive gear or complicated corporate jargon. Instead, I’m going to break this down into simple, actionable steps that you can actually pull off with whatever you’ve got lying around the house. We’re going to tackle the basics—from testing your connection to setting up a decent background—so you can stop stressing about the small stuff and actually focus on the conversation. Let’s get you ready to nail this thing.

Table of Contents

Fix Your Remote Interview Technical Setup Step by Step

Fix Your Remote Interview Technical Setup Step by Step

First things first, let’s talk gear. You don’t need a studio-grade camera, but you do need to make sure your tech isn’t going to flake out mid-sentence. I always tell people to treat their remote interview technical setup like prepping a workspace before a big project: check it twice. Test your mic and webcam at least twenty minutes before the call starts. If you’re using a laptop, plug it into a power source; there is nothing more stressful than seeing that “10% battery” warning pop up right when you’re explaining your best career win.

Next, let’s look at your surroundings. You don’t need a fancy office, but you should aim for a clean, clutter-free space that won’t distract the person on the other side. If your room is a mess, find a plain wall or use a subtle blur filter. Most importantly, pay attention to your lighting for virtual meetings. Avoid sitting with a bright window directly behind you, or you’ll end up looking like a shadowy silhouette. Instead, face a window or put a lamp in front of you so they can actually see your face.

Perfect Your Lighting for Virtual Meetings Easily

Perfect Your Lighting for Virtual Meetings Easily

Look, you don’t need a Hollywood studio setup to look decent on camera, but you definitely don’t want to look like you’re filming a horror movie in a dark basement. The biggest mistake I see people make is sitting with a bright window directly behind them. That just turns you into a dark, mysterious silhouette, which isn’t exactly the “hire me” vibe we’re going for. Instead, try to face your light source. If you’ve got a window, sit facing it. If it’s nighttime, grab a desk lamp and position it slightly behind your monitor so the light hits your face evenly.

Getting your lighting for virtual meetings right is one of those small tweaks that makes a massive difference in how much you connect with the interviewer. When your face is clear and well-lit, it’s much easier to maintain natural eye contact in video interviews, even if you’re actually just staring at a little green light on your webcam. It builds trust and keeps the focus on what you’re saying rather than the shadows under your eyes. Keep it simple: even light, no backlighting, and you’re golden.

5 Ways to Nail the "Human" Side of a Virtual Interview

  • Dress for the job, not the couch. I know it’s tempting to keep those sweatpants on since they’re under the desk, but putting on a real shirt and actual shoes changes your mindset. It’s like putting on work boots instead of flip-flops; it just makes you feel ready to get to work.
  • Master your background without a renovation. You don’t need a fancy home office to look professional. Just clear away the pile of laundry or the stack of old magazines. A clean, simple corner of a room shows you’ve got your act together without looking like you’re trying too hard.
  • Eye contact is all about the lens. This one is tricky, but try to look at the little camera hole on your laptop rather than the person’s face on the screen. It feels weird at first, I know, but to them, it looks like you’re looking them right in the eye, which builds way more trust.
  • Prep a “cheat sheet” for your desk. One of the best perks of a remote setup is that you can have notes right in front of you. Tape a few bullet points of your biggest wins or questions you want to ask to the side of your monitor. Just don’t read them like a script—use them as a quick nudge if your brain freezes up.
  • Run a “dry run” five minutes early. Don’t just hope the link works. Click it, check your mic, and make sure your audio isn’t crackling. Treating it like a pre-flight checklist takes the “what if” anxiety out of the equation so you can focus on the actual conversation.

Quick Wins for Your Interview Day

Treat your tech like a pre-flight checklist—test your mic, camera, and internet connection at least twenty minutes before you go live so you aren’t scrambling at the last second.

Don’t overthink your lighting; just find a window or a simple lamp to make sure they can actually see your face instead of staring at a silhouette.

Keep your workspace clean and simple, because a clutter-free background helps you stay focused on the conversation rather than the mess behind you.

## The Bottom Line

“At the end of the day, an interview is just a conversation. Don’t let a fuzzy webcam or a messy background make you feel like you aren’t ready; just get your gear sorted, clear your space, and focus on showing them who you are.”

Nathan Cole

You’ve Got This

Organized workspace setup: You've Got This.

Look, I know all this prep work—checking your Wi-Fi, fiddling with the webcam, and hunting for the perfect lamp—can feel like a lot of extra chores before the actual job even starts. But just like when I’m prepping a kitchen for a big meal or organizing a toolbox, getting your environment dialed in ahead of time means you won’t be scrambling when the pressure is on. By smoothing out the tech glitches and setting up a clean, well-lit space, you’ve essentially removed the distractions that pull focus away from what really matters. You’ve done the heavy lifting, and now you can finally stop worrying about the gear and start focusing on showing them who you are.

At the end of the day, remember that the person on the other side of that screen is just another human being looking for a teammate. They aren’t expecting a Hollywood production; they just want to see that you’re prepared, capable, and ready to dive in. Don’t let a little bit of digital nerves get in your way. You’ve put in the work, you’ve checked your settings, and you’ve built a solid foundation. Now, take a deep breath, trust your preparation, and go get that job. You’ve totally got this.

Frequently Asked Questions

What should I do if my internet starts acting up right in the middle of the interview?

First, don’t panic. If your screen freezes, take a breath. If you’re on a laptop, immediately try switching to your phone’s hotspot—it’s often more reliable than a glitchy Wi-Fi signal in a pinch. If that fails, send a quick email or text to your recruiter right away. Let them know you’re having tech issues and offer to jump on a regular phone call. It shows you can troubleshoot under pressure.

Is it okay to have a messy background, or do I need to go buy a professional backdrop?

Look, I’m all for a “real life” vibe, but you don’t need to drop a hundred bucks on a professional studio backdrop. If your background looks like a laundry pile exploded, it’s going to be a distraction. You don’t need perfection, just order. Clear a small patch of wall, tidy up the bookshelf behind you, or even use a simple blur filter. Keep it clean, keep it simple, and keep the focus on you.

How do I make sure I'm looking at the camera instead of my own face on the screen?

This is a classic one, and honestly, it’s the hardest part of looking “natural” on camera. We all do it—we stare at our own little video box to make sure our hair looks okay, but then it looks like we’re looking down to the interviewer.

Tips on how to reduce screen time.

Practical Ways to Reduce Your Screen Time

I was sitting on my porch last Tuesday, trying to enjoy a quiet cup of coffee, when I realized I’d spent the last twenty minutes mindlessly scrolling through a feed of strangers’ vacation photos. My neck was stiff, my eyes felt like they had sand in them, and I hadn’t even taken a single sip of my drink. It’s that weird, hollow feeling we all get when we realize our devices are actually using us. I’ve looked into all the high-tech apps and expensive “digital detox” retreats, but honestly, most of that stuff is just more noise. If you’re looking for how to reduce screen time without throwing your smartphone into a lake, you’re in the right place.

I’m not here to give you some lofty, impossible lecture about living in a cave. I’m a guy who likes tools and fixing things, and I view your attention like any other resource—it’s something you can reclaim with the right approach. I’m going to break this down into a few practical, no-nonsense steps that actually work in the real world. We’ll focus on small, manageable tweaks to your environment and your habits so you can get back to living instead of just scrolling.

Table of Contents

Recognizing the Signs of Uncontrolled Digital Habits

Recognizing the Signs of Uncontrolled Digital Habits

Before we can start fixing the problem, we have to figure out if it’s actually a problem. I used to think I was just “staying connected,” but then I realized I was scrolling through social media at 1:00 AM, feeling like a zombie the next morning. If you find yourself reaching for your phone the second you wake up, or if you feel a weird sense of phantom anxiety when your battery hits 5%, you might be noticing some common smartphone addiction symptoms. It’s not about being dramatic; it’s about noticing when the tool starts using you instead of the other way around.

Another big red flag is how you feel physically. I noticed that my eyes were constantly feeling gritty and my head would throb by mid-afternoon. That’s often the blue light effects on sleep and general eye strain catching up to you. If you’re losing sleep because you can’t put the device down, or if you feel like your brain is constantly “buzzing” with notifications, it’s time to take a hard look at your habits. Recognizing these patterns is the first step toward building more healthy technology habits that actually work for your life.

Understanding How Blue Light Effects Your Sleep

Understanding How Blue Light Effects Your Sleep

I remember staying up way too late scrolling through news feeds, thinking I was just “winding down,” only to wake up feeling like I’d gone ten rounds in a boxing ring. It turns out, my phone was actually sabotaging my brain. That bright, harsh glow from our screens emits a specific kind of light that tricks our bodies into thinking it’s still high noon. This is one of the most common blue light effects on sleep that people overlook. When that light hits your eyes, it suppresses melatonin—the hormone your body needs to signal that it’s time to pass out.

Instead of feeling drowsy, your brain stays stuck in “on” mode, making it nearly impossible to drift off naturally. It’s not just about being tired the next morning; it’s about the quality of your rest. If you’re constantly fighting to fall asleep, you might need to incorporate some healthy technology habits into your nightly routine. I started setting a “digital sunset” an hour before bed, and honestly, it changed everything. It’s a small tweak, but it makes a massive difference in how you feel when that alarm goes off.

5 Simple Ways to Claw Back Your Time from the Screen

  • Set some hard boundaries with your phone. I started by using the “Do Not Disturb” feature during dinner and for an hour before bed. If it’s not an emergency, it can wait until tomorrow.
  • Turn off those annoying non-human notifications. You don’t need a buzz in your pocket every time someone likes a photo or a random app has a sale. Keep the pings for texts and calls only.
  • Create “Tech-Free Zones” in your house. For me, the kitchen table is a strictly no-phone area. It makes a huge difference when you’re actually eating your food instead of scrolling through a feed.
  • Try the “Out of Sight, Out of Mind” trick. When I’m working on a project or trying to relax, I put my phone in a different room or even a drawer. If I can’t see it, I stop reaching for it reflexively.
  • Swap the scroll for a real-world habit. Whenever I feel that itch to check my phone, I try to do something tactile instead—like watering my plants, grabbing a book, or even just cleaning a tool. It breaks the loop.

The Quick Fix: What to Remember

Awareness is your best tool; once you realize your phone is actually hijacking your focus, you’ve already won half the battle.

Protect your sleep by treating blue light like a bad habit—cut it out an hour before bed to give your brain a real chance to wind down.

Don’t try to overhaul your whole life overnight; just pick one small, manageable change and stick to it until it feels natural.

A Shift in Perspective

“Reducing your screen time isn’t about throwing your phone in a lake or living like a monk; it’s just about reclaiming the tools you need to actually live your life instead of just scrolling through someone else’s.”

Nathan Cole

Taking Back Your Time

Intentional habits for Taking Back Your Time.

Look, I know this stuff feels like a lot to tackle at once. We’ve talked about spotting those mindless scrolling habits, understanding why that blue light is wrecking your sleep, and how to set some actual boundaries with your devices. It’s not about tossing your smartphone into a lake or living like a hermit; it’s about intentionality. By recognizing the signs and making those small, tactical adjustments we discussed, you’re basically just doing a bit of “preventative maintenance” on your brain. Just like I wouldn’t ignore a weird rattling sound in a car engine, you shouldn’t ignore the mental fog that comes from being glued to a screen all day.

At the end of the day, I want you to remember that you are the one in control, not your notifications. It’s going to be a bit of a struggle at first—I still catch myself reaching for my phone the second I feel bored—but that’s part of the process. Every time you choose a book, a walk, or even just a quiet moment over a mindless scroll, you’re winning a little bit of your life back. Don’t aim for perfection; just aim to be a little more present than you were yesterday. You’ve got this, and I promise it feels a whole lot better once you start.

Frequently Asked Questions

Is it actually possible to stay productive at work without constantly checking my phone or email?

Look, I’ll be the first to admit: I used to be that guy. I’d be mid-task and suddenly find myself scrolling through some random thread or refreshing my inbox like it was a slot machine. But yeah, it’s absolutely possible. It’s not about willpower; it’s about setting up your “workspace” to work for you. Once you build a few simple boundaries, you’ll realize you actually get more done with way less stress.

What are some easy ways to replace scrolling through social media when I'm feeling bored or stressed?

When that itch to scroll hits, your brain is usually just hunting for a quick hit of dopamine. Instead of feeding the beast, try a “micro-project.” Pick up a physical book, tinker with a gadget that needs cleaning, or even just head to the kitchen to prep something simple. If you’re stressed, try a five-minute stretch or some quick sketching. The goal isn’t to be “productive”—it’s just to do something that uses your hands instead of your thumbs.

Should I be using blue light filters on my devices, or is it better to just put the screens away entirely before bed?

Honestly? If you can swing it, put the screens away entirely. Blue light filters are a great tool—think of them like a dimmer switch on a light—but they don’t fix the real issue: your brain is still getting “wired” by the scrolling and the dopamine hits. Use the filters if you absolutely have to work late, but for actual rest, nothing beats closing the laptop and picking up a book instead.

DIY ideas on how to make wall art.

Diy Wall Art Ideas That Look Store-bought

I used to think that if I wanted my place to look decent, I had to drop a couple hundred bucks at a high-end home decor store just to find something that didn’t look like it came out of a factory. But honestly? That’s a total myth. You don’t need a massive budget or a degree in fine arts to fix those empty, depressing spaces in your living room. I learned the hard way that learning how to make wall art is less about being “talented” and more about having the right plan and a few basic tools. Once I stopped overthinking it and started experimenting with what I already had in my garage, I realized that some of my favorite pieces are the ones I built myself for next to nothing.

In this guide, I’m going to strip away all the fluff and show you exactly how to get started. We aren’t doing anything overly complicated or pretentious here; I’m talking about real-world projects that actually look good. I’ll walk you through picking the right materials, avoiding the common mistakes that turn a project into a mess, and executing your vision step-by-step. By the end of this, you’ll have the confidence to stop staring at blank walls and finally start creating something you’re proud to hang up.

Table of Contents

Guide Overview

Total Time: 3-5 hours
Estimated Cost: $30-60
Difficulty: Beginner

Tools & Supplies

  • Paintbrushes various sizes for application
  • Painter's tape for creating clean lines
  • Pencil for sketching designs
  • Canvas or wood panel 1 unit
  • Acrylic paint set 1 set
  • Palette 1 unit
  • Water cup 1 unit

Step-by-Step Instructions

  • 1. First things first, you need to decide what kind of vibe you’re going for. Don’t get stuck in “analysis paralysis” here—just pick a style that doesn’t make you cringe. Are we talking about minimalist line drawings, some rugged reclaimed wood pieces, or maybe some colorful abstract canvas work? Once you’ve got a general direction, grab a notebook and jot down a few colors or textures that match your room. This keeps you from wandering aimlessly into the craft aisle later.
  • 2. Next, let’s talk supplies. I’m a big believer in not overspending on stuff you’ll only use once, so check your junk drawer or the back of your closet before hitting the store. You’ll likely need your base material (like a canvas, a wooden board, or even a thick piece of heavy cardstock), some kind of adhesive or paint, and a few basic tools like brushes or even a sponge. If you’re doing something wood-based, make sure you have some sandpaper handy because smooth edges make all the difference between a professional look and a DIY disaster.
  • 3. Now, prep your workspace. I can’t tell you how many times I’ve ended up with dried acrylic paint on my dining room table because I was too lazy to lay down some protection. Grab some old newspapers, a cheap plastic tablecloth, or even just some cardboard boxes from your last delivery. Clear off a flat surface and get organized by laying out all your tools in the order you’ll use them. It sounds tedious, but it saves you from that frantic “where’s the tape?” scramble halfway through.
  • 4. Time to get your hands dirty and start the actual creation. If you’re painting, start with your background colors first—don’t try to do the fine details until the base is completely dry. If you’re working with textures or collage elements, layer them from the bottom up. The trick here is to embrace the imperfections. If a line isn’t perfectly straight, don’t sweat it; sometimes that slight bit of character is exactly what makes handmade art look so much better than something mass-produced from a big-box store.
  • 5. Once your piece is looking the way you want, you have to let it cure. This is the hardest part for me because I want to hang it up immediately, but patience is a virtue when it comes to glue and paint. If you try to hang a piece that’s still tacky, you’re going to end up with a mess on your wall and a ruined project. Give it at least a few hours—or even overnight if you’re using heavy-duty materials—to make sure everything is set solid.
  • 6. Finally, let’s get that beauty off the workbench and onto the wall. Don’t just slap a nail in and hope for the best. Use a level (or a leveling app on your phone if you don’t have a physical one) to make sure it’s not sitting crooked. I usually like to test the placement by leaning the art against the wall first to see how the light hits it. Once you’re happy, secure it firmly, step back, and take a second to actually admire your work. You built this, and that’s a pretty great feeling.

Budget Friendly Wall Decor Without the Designer Price Tag

Budget Friendly Wall Decor Without the Designer Price Tag

Look, I get it. You walk into a high-end home goods store, see a piece of art that actually looks decent, and then you see the price tag. It’s enough to make you want to walk right back out. But here’s a secret from someone who’s spent way too much time browsing aisles: you don’t need a massive bank account to pull off modern home decor DIY projects that look intentional rather than “cheap.” Most of the time, you’re just paying for a brand name, not the actual soul of the piece.

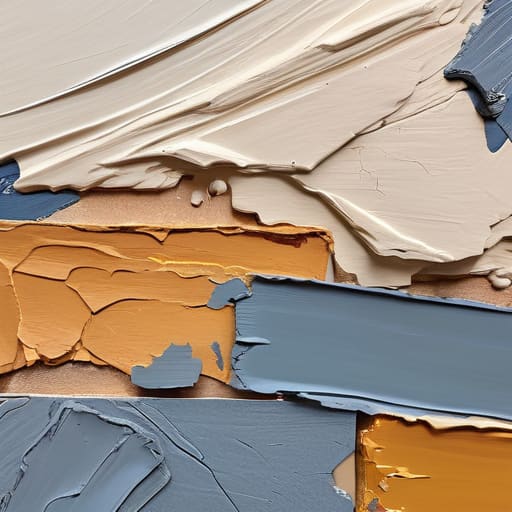
If you’re working with a tight budget, my best advice is to raid your local thrift store or even your own junk drawer. You can find incredible mixed media art supplies—like old frames, interesting scraps of fabric, or even interesting hardware—that add character you just can’t buy new. I love using heavy-duty textured paste or even just some joint compound from the hardware store to create a textured art tutorial vibe on a basic canvas. It adds that high-end, tactile feel without the designer markup. Just keep it simple, keep it tactile, and don’t be afraid to get a little messy.

Mastering Abstract Canvas Painting Techniques in Simple Steps

Mastering Abstract Canvas Painting Techniques in Simple Steps

If you’re feeling a little intimidated by a blank canvas, don’t sweat it. Abstract art is honestly one of the best ways to practice because there is no “wrong” way to do it. One of my favorite abstract canvas painting techniques is the layering method. Instead of trying to paint a perfect picture, just start by applying a base color, let it dry, and then layer different shades or even some texture paste on top. It’s all about building depth rather than precision.

To really level up your piece, I highly recommend experimenting with some mixed media art supplies. I’ve found that grabbing a cheap palette knife or even an old credit card from your junk drawer can create amazing ridges and grooves that a standard brush just can’t mimic. This is a great way to nail that high-end, textured look without spending a fortune on professional studio tools. Just remember: if you make a stroke you don’t like, just let it dry and paint right over it. That’s the beauty of abstract work—you can always pivot.

5 Pro Tips to Keep Your Projects from Looking Like a Mess

  • Don’t skip the layout test. Before you hammer a single nail into the drywall, grab some painter’s tape or even just some old newspaper and mock up your art on the wall. It’s way easier to move a piece of paper than it is to patch a hole because you hung something too high.
  • Mix up your textures. If every single piece of art you hang is a flat canvas, your room is going to feel a little “one-note.” Try throwing in some wood elements, a woven basket, or even a framed piece of vintage fabric to give the wall some actual depth.
  • Think about your lighting. You can make a ten-dollar thrift store find look like a gallery piece if you hit it with the right light. A simple, inexpensive battery-operated picture light can completely change the vibe of your DIY project.
  • Mind the “eye level” rule. I see this all the time—people hang art way too high. A good rule of thumb is to aim for the center of the piece to be about 57 to 60 inches from the floor. It feels weird at first, but it makes the whole room feel more professional.
  • Embrace the imperfection. If you’re doing something handmade, like a wood print or a painted canvas, don’t sweat the tiny wobbles. That’s what makes it yours. If it looks too perfect, it starts looking like something you just bought from a big-box store, and we’re here to make something real.

Quick Wins to Remember

Don’t sweat the perfection—the best part about DIY wall art is that there are no real rules, so just start creating and adjust as you go.

You don’t need a massive budget to make a statement; some thrift store finds and a bit of elbow grease can look better than anything from a big-box retailer.

Always prep your space before you dive in, because nothing kills a good creative groove like realizing you’re missing a crucial tool or making a mess you can’t clean up.

## The Real Secret to Decorating

“Look, you don’t need a massive budget or a degree from an art school to make a space feel like home. You just need to stop staring at that empty wall and start playing with what you’ve already got. Most of the best stuff I’ve ever hung up wasn’t ‘perfect’—it was just something I made with my own two hands.”

Nathan Cole

Don't Stop at the First Project

Don't Stop at the First Project.

Look, we’ve covered a lot of ground here, from keeping things cheap and budget-friendly to getting your hands messy with some abstract canvas work. Whether you ended up repurposing old finds or diving headfirst into a fresh painting, the most important thing is that you actually made something with your own two hands. You don’t need a professional studio or a massive bank account to transform a room; you just need a little bit of patience and the right approach to breaking the project down into manageable chunks. Once you’ve got the basics of texture, color, and framing under your belt, you’ll realize that customizing your space is way more rewarding than just clicking “add to cart” on a generic piece of decor.

My biggest piece of advice as you wrap this up is to embrace the imperfections. If a line isn’t perfectly straight or the paint drips a little more than you planned, don’t sweat it—that’s just character. That’s what makes it yours. Every DIYer I know started with something that looked a little wonky, but that’s exactly how you learn the ropes. So, hang that piece up with pride, take a look at what you’ve accomplished, and start thinking about what’s next on your list. You’ve got the tools, you’ve got the steps, and most importantly, you’ve proven to yourself that you can figure it out.

Frequently Asked Questions

What’s the best way to hang my new art without putting massive holes in the drywall?

Look, I’ve definitely made the mistake of over-drilling holes in a wall I actually liked, so I get it. If your art isn’t heavy-duty, skip the hammer and nails entirely. Command Strips are your best friend here—just make sure you clean the wall with rubbing alcohol first so they actually stick. If it’s a bit heavier, grab some slim picture hangers; they use tiny pins that leave almost zero trace once you pull them out.

I’m worried about the colors clashing—how do I know if my DIY piece actually fits my room's vibe?

Look, I’ve definitely stared at a half-finished project and thought, “Is this actually going to look good or am I just making a mess?” Here’s my trick: grab some painter’s tape and a few scraps of your art, then stick them on the wall. Better yet, take a photo of the wall with your phone and use a basic editing app to “overlay” the colors. If it feels jarring, tweak the palette before you commit.

Are there any specific tools I absolutely need, or can I just wing it with stuff I already have around the house?

Look, I’m a big believer in using what you’ve got, but there’s a line between “winging it” and “making a mess.” You don’t need a professional studio, but grab a decent set of brushes and some painters’ tape so you aren’t fighting your tools. If you’re painting, definitely have some old rags and drop cloths handy—trust me, your carpet will thank you. Use what you have, but don’t skip the basics!