Quick and easy healthy breakfast ideas.

Healthy Breakfast Ideas You Can Make in Minutes

Look, I get it. Most mornings feel like a race against the clock, and by the time you’ve actually found your keys, you’re already running on fumes. I used to think that eating well meant spending an hour hovering over a stove or buying those overpriced, pre-packaged wellness bars that taste like flavored cardboard. But honestly? Most of those fancy routines are just too much work for a Tuesday morning. If you’re tired of hitting that snooze button only to settle for a sugary doughnut or, even worse, nothing at all, you need some reliable healthy breakfast ideas that actually fit into a real, busy life.

I’ve spent plenty of time tinkering in my kitchen, testing out what actually sticks and what just creates more dishes to wash. In this guide, I’m breaking down five of my go-to options that are quick, budget-friendly, and—most importantly—actually taste good. I promise these aren’t some complicated gourmet recipes; they are simple, foolproof ways to fuel your body so you aren’t crashing by 10:00 AM. Let’s get into it and get you fueled up.

Table of Contents

Overnight Oats That Actually Taste Good

Overnight Oats That Actually Taste Good.

If you’re like me and usually rushing out the door with nothing but a lukewarm coffee, this is your new best friend. You just grab a jar, toss in some rolled oats, milk (or a dairy-free version), and a spoonful of chia seeds, then let it sit in the fridge overnight. By morning, the oats have soaked up all that liquid and turned into a creamy, pudding-like texture that doesn’t feel like you’re eating cardboard.

The One-Pan Egg Scramble

The One-Pan Egg Scramble with vegetables.

There’s nothing quite like the smell of eggs hitting a hot pan to make you feel like you actually have your life together. I like to keep it simple: crack two or three eggs into a skillet with whatever veggies are looking a little sad in your crisper drawer—spinach, peppers, or even some leftover onions. It’s the ultimate low-effort, high-reward way to get some protein in your system without a mountain of dishes to wash later.

Avocado Toast with a Protein Kick
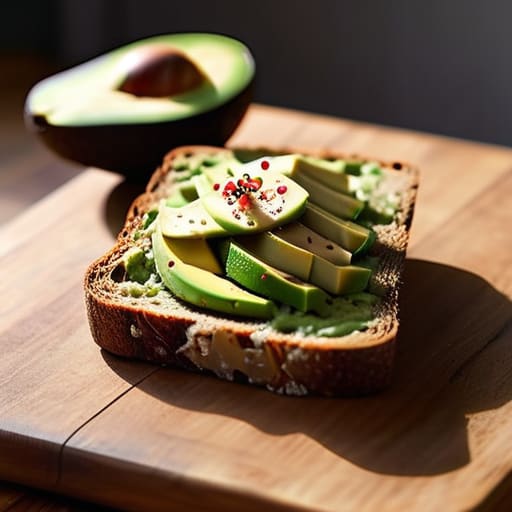
Avocado Toast with a Protein Kick.

Now, I know avocado toast can sometimes feel like a fancy brunch cliché, but when you make it at home, it’s just a smart, practical meal. Smashing half an avocado onto a thick slice of toasted whole-grain bread gives you those healthy fats that keep you feeling full. I always make sure to use a decent quality bread—the kind that has a bit of a sturdy crunch to it—so it doesn’t get soggy under the weight of the toppings.

Greek Yogurt Power Bowls

Sometimes you don’t want to turn on the stove at all, and that’s where a Greek yogurt bowl comes in handy. I keep a big tub of plain, unsweetened Greek yogurt in the fridge because it’s packed with protein and it’s incredibly versatile. Avoid the pre-flavored cups that are basically just liquid sugar in disguise; instead, add your own sweetness with a little bit of honey or some fresh fruit.

Nut Butter and Banana Toast

When I’m running even shorter on time than usual, I go for the old reliable: nut butter and banana. It’s a classic for a reason. Spreading some almond or peanut butter on toasted rye or sourdough provides a great base, and the banana adds just enough natural sweetness to satisfy a craving. It’s a balanced combo of fats, carbs, and a little bit of fiber that hits the spot every time.

The Bottom Line on Easy Mornings

Don’t aim for perfection on day one; just pick one recipe that fits your schedule and stick to it until it becomes a habit.

Prep work is your best friend—if you spend ten minutes the night before, you’ll save twenty minutes of chaos in the morning.

Keeping the basics like oats, eggs, and frozen fruit on hand means you’ll never be forced to grab expensive, sugary junk when you’re in a rush.

## My Take on Morning Fuel

“Look, you don’t need a gourmet chef or a massive grocery budget to win the morning; you just need a plan that’s easier to follow than the snooze button.”

Nathan Cole

Getting Started Without the Stress

Look, I know that trying to overhaul your entire morning routine feels like a massive project, but you don’t need to be a gourmet chef to eat well. Whether you’re leaning into the speed of overnight oats, grabbing something protein-packed like Greek yogurt, or just tossing some eggs in a pan, the goal is the same: fueling your body so you aren’t crashing by 10:00 AM. You don’t need a pantry full of expensive superfoods or a kitchen that looks like a magazine spread. Just pick one of these options that fits your schedule and keep it simple. If you can make a sandwich or boil an egg, you can definitely master these breakfast hacks.

At the end of the day, the most important thing isn’t perfection—it’s just showing up for yourself. I used to think that if I didn’t have a perfectly balanced, organic meal prepared, I had already failed the day. But I’ve learned that even a small, smart choice is a huge win for your energy and your mood. Don’t let the fear of a messy kitchen or a tight morning stop you from trying something new. You’ve got this, and I promise that once you start seeing how much better you feel, it becomes second nature. Now, go grab some oats or crack an egg and get after it!

Frequently Asked Questions

I'm always on the move—can I prep these ahead of time on a Sunday to save time during the week?

You bet you can. In fact, if you’re anything like me, Sunday prep is the only way you’re actually going to eat well when Tuesday morning hits and you’re running late. I usually spend about forty minutes on a Sunday chopping fruit, boiling a batch of eggs, or portioning out my oats into jars. It’s a little extra work upfront, but it saves you from the “grab a sugary granola bar” panic later.

Do I really need to spend extra money on "superfoods," or can I make these work with whatever is already in my pantry?

Look, I’ll give it to you straight: you can absolutely skip the expensive “superfood” labels. I’ve learned that a lot of those fancy powders are just marketing in a shiny bag. If you’ve got oats, peanut butter, or frozen berries in your pantry, you’re already winning. It’s not about the price tag on the box; it’s about the fuel you’re actually putting in your body. Keep it simple, keep it cheap, and just get it done.

What are some good ways to add more protein to these ideas if I'm feeling hungry again by mid-morning?

Look, I get it. I’ve been there—stomach growling by 10:00 AM because my breakfast didn’t quite hit the mark. If you’re feeling the mid-morning slump, you just need more staying power. Try stirring a scoop of Greek yogurt into your oats, tossing a handful of hemp seeds or chia seeds onto your fruit, or even adding a hard-boiled egg on the side of your toast. It’s a quick fix that keeps you full longer.


Guide on how to use cloud storage.

How to Use Cloud Storage to Keep Your Files Safe

I still remember the sinking feeling in my gut when my old laptop finally gave up the ghost three years ago. I sat there staring at a black screen, realizing every single one of my irreplaceable photos and important tax docs were trapped on that dead hard drive. It was a total disaster, and it’s exactly why I spent way too much time reading tech blogs that made everything sound like rocket science. Most of those sites make learning how to use cloud storage feel like you need a computer science degree just to save a picture of your dog. Honestly, the tech industry loves to wrap simple concepts in layers of unnecessary jargon just to make themselves sound indispensable, but they’re mostly just blowing smoke.

I’m not here to sell you on some expensive, high-end enterprise suite you’ll never use. My goal is to strip away the fluff and show you how to set up a digital safety net that actually works for your real, messy life. I’ll walk you through the most reliable tools and give you a straightforward, step-by-step game plan so you can stop worrying about lost files and get back to the things that actually matter.

Table of Contents

Mastering How to Upload Files to the Cloud

Mastering How to Upload Files to the Cloud

Alright, let’s get into the actual heavy lifting. Once you’ve picked your service—whether it’s Google Drive, Dropbox, or iCloud—the real magic happens when you start moving your stuff up there. Most people think you have to manually drag every single photo or document into a web browser, but that’s the slow way. The real pro move is setting up a dedicated folder on your computer that handles everything for you. This is the secret to syncing files across devices without even thinking about it. You just drop a file into that folder on your desktop, and boom—it’s sitting there waiting for you on your phone or tablet.

If you’re still a bit nervous about the transition, just remember that thinking about cloud storage vs local storage shouldn’t be a source of stress. Think of your local drive as your physical workbench and the cloud as a high-tech, off-site organized tool chest. To get started, just right-click your file, select “upload,” and pick your destination. It’s as simple as that. Just keep an eye on your storage limits so you don’t hit a wall mid-project!

Syncing Files Across Devices Without the Headache

Syncing Files Across Devices Without the Headache

Now, here is where the real magic happens. If you’ve already figured out how to upload files to the cloud, the next level is getting those files to follow you around like a shadow. I used to be the guy with three different USB sticks scattered across my desk just to move a single spreadsheet from my desktop to my laptop. It was a total mess. But once you set up syncing files across devices, that headache disappears. Most services let you install a small app that makes your cloud folder look just like a regular folder on your computer. You save a file in one spot, and boom—it’s waiting for you on your phone or tablet before you’ve even finished your coffee.

The real beauty here is the benefits of remote file access. Whether you’re working from the kitchen table or sitting in a coffee shop, your stuff is just there. Just a quick word of advice from someone who has learned the hard way: always double-check that your sync is actually finished before you shut your laptop lid. There’s nothing worse than thinking you saved a project only to realize it’s still stuck in the digital waiting room.

5 Pro Tips to Keep Your Digital Life from Turning Into a Junk Drawer

  • Organize your folders before you upload. I know, it sounds like a chore, but if you just dump everything into one giant “Cloud” folder, you’ll spend more time searching for that one tax document than you’ll ever spend actually using the service. Think of it like a well-organized toolbox—everything has a specific spot.
  • Double-check your “Sync” settings. One thing I learned the hard way is that if you tell your computer to sync everything, it’ll try to upload every single heavy file you own, which can crawl your internet to a halt. Set it to sync only your most important folders so you don’t kill your bandwidth.
  • Use the “Search” bar like a pro. Most people spend way too much time clicking through folders. Every major cloud service has a search bar at the top—get used to typing in keywords instead of hunting through subfolders. It’s a massive time-saver.
  • Set up Two-Factor Authentication (2FA) immediately. Your cloud storage holds your digital life, so don’t leave the front door unlocked. Turn on 2FA so that even if someone guesses your password, they can’t get into your files without that extra code on your phone. It’s a small step that saves a massive headache later.
  • Periodically purge the clutter. Just like a garage that slowly fills up with old scrap metal, your cloud storage will fill up with duplicate photos and old versions of documents. Once every few months, take ten minutes to delete the stuff you don’t need anymore so you aren’t paying for extra storage space you aren’t actually using.

The Quick Cheat Sheet

Think of the cloud as your digital backup plan—it’s not just for techies, it’s for anyone who wants to stop worrying about a crashing hard drive or a lost phone.

Don’t try to move everything at once; start by uploading your most important “must-have” files to get the hang of how it works.

Set up your syncing early so your files follow you from your laptop to your phone, saving you from that “where did I save that?” panic.

## The Big Picture

“Think of cloud storage less like some high-tech mystery and more like a digital safety net; it’s just a way to make sure your hard work doesn’t vanish into thin air the next time your laptop decides to take an unexpected nap.”

Nathan Cole

Wrapping It All Up

Wrapping It All Up with cloud storage.

Look, I know it can feel like a lot to juggle when you’re first getting started. Between figuring out which service to trust and making sure your files are actually uploading where they’re supposed to go, it’s easy to feel a bit overwhelmed. But just remember: we’ve covered the basics of uploading your important stuff, and we’ve looked at how to keep everything in sync so your phone, laptop, and tablet are all playing nice together. Once you get those first few folders organized and the syncing process running in the background, you’ll realize that cloud storage isn’t some high-tech mystery—it’s just a digital safety net that works while you sleep.

My biggest piece of advice? Don’t try to move your entire digital life over in one afternoon. Start small. Move your most important photos or that one work project you’re always worried about losing. Once you see how much easier it is to grab a file from your phone while you’re out grabbing coffee, you’ll be hooked. Technology is supposed to work for us, not the other way around. You’ve got the tools and the steps now, so go ahead and take that first step. You’ve totally got this!

Frequently Asked Questions

Is my stuff actually safe, or is someone going to hack into my private photos and documents?

Look, I get it. The idea of your private photos just floating around on some server somewhere is a little unnerving. But think of cloud security like a high-end deadbolt for your digital life. As long as you aren’t using “password123” and you turn on two-factor authentication (that’s the thing that texts your phone a code), you’re doing better than most. It’s not foolproof, but with a few smart habits, your stuff stays yours.

How much is this going to cost me once I run out of the free storage space?

Here’s the deal: once you hit that free limit, you’re looking at a monthly subscription. It’s not a huge dent in the wallet, but it adds up. Usually, you’re looking at anywhere from $2 to $10 a month to get a decent bump in space. Think of it like a utility bill—you pay for what you use. Just check the pricing page for whichever service you pick so there are no surprises.

If I delete a file on my phone, am I going to accidentally wipe it off my computer too?

That’s the million-dollar question, and honestly, it’s what keeps me up at night sometimes. The short answer? If you have “syncing” turned on, then yes—deleting it on your phone will likely wipe it from your computer too. Think of it like a mirror: whatever you do to one side shows up on the other. If you just want to clear space on your phone without losing the file, don’t hit delete; use the “Free up space” option instead.

Beating procrastination with the two minute rule.

The Two-minute Rule: a Tiny Trick for Beating Procrastination

I remember standing in my kitchen last Tuesday, staring at a mountain of mail, a sink full of crusty pans, and an inbox that looked like a digital crime scene. I felt that familiar, heavy weight in my chest—the kind where you know you should be doing something, but everything feels so massive that you just end up scrolling on your phone instead. I used to think I needed some high-priced, complex productivity system or a fancy leather-bound planner to get my life together. But honestly? Most of that stuff is just expensive noise. I realized that the real problem wasn’t my lack of a system; it was that I was letting tiny, insignificant tasks pile up until they felt like boulders. That’s when I finally sat down and actually put the two minute rule to work.

I’m not here to sell you on some life-changing miracle or a complicated ritual that requires a subscription. I just want to show you how a dead-simple habit can stop that mental clutter from taking over your day. I’ve spent years figuring out how to tackle everything from messy workshops to chaotic schedules, and I’ve learned that small wins are the only way to build real momentum. In this guide, I’m going to break down exactly how you can use this rule to clear the deck and finally feel like you’re back in the driver’s seat.

Table of Contents

Building Micro Habits That Actually Stick

Building Micro Habits That Actually Stick.

The trick to making this work isn’t about a massive lifestyle overhaul; it’s about building micro habits that feel almost too easy to fail. When I first started trying to get my life together, I’d set these huge, ambitious goals that I’d abandon by Tuesday. Now, I realize that the real magic happens in the tiny, repetitive wins. If you can commit to something that takes less than 120 seconds—like hanging up your coat or clearing your inbox of one single junk email—you’re training your brain to actually follow through instead of just dreaming about being productive.

Think of it like prepping for a big DIY project. You wouldn’t just dive into framing a wall without laying out your tools first, right? Applying this to your day is one of the best time management strategies I’ve ever used for reducing mental clutter. By knocking out those tiny tasks immediately, you stop them from piling up into a mountain of stress. It keeps your momentum high and ensures that the small stuff doesn’t turn into a massive headache later in the week.

Reducing Mental Clutter One Small Task at a Time

Reducing Mental Clutter One Small Task at a Time

You know that feeling when you walk into a garage that’s so cluttered you can’t even find your screwdriver? That’s exactly what a messy to-do list does to your brain. When you have a dozen tiny, unfinished chores floating around—like answering that one email or hanging up your coat—they act like mental static. They’re constantly humming in the background, draining your energy even when you aren’t working. By using this quick approach, you’re essentially clearing the workbench of your mind.

I’ve found that reducing mental clutter isn’t about a massive, weekend-long overhaul; it’s about those tiny wins. Instead of letting small tasks pile up until they feel like a mountain, you just knock them out immediately. This is a core part of improving daily workflow because it prevents that “decision fatigue” that hits you by 3:00 PM. When you stop the small stuff from accumulating, you suddenly have the headspace to actually focus on the big, important projects that really matter.

5 Ways to Put the Two-Minute Rule to Work Right Now

  • Stop the “I’ll do it later” loop with immediate wins. If you see a piece of mail that just needs a quick shred or a dish that needs a rinse, don’t add it to a list. Just do it. That tiny burst of momentum is better than any fancy planner you’ve ever bought.
  • Use it to prime your brain for bigger projects. If you’re staring at a massive DIY project or a mountain of paperwork, tell yourself you’ll just do two minutes of prep. Clean your workspace or lay out your tools. Once you start, the hardest part is already over.
  • Clean up your digital workspace in tiny bites. Instead of waiting for a “deep clean” day that never comes, use the rule for small digital chores. Delete those five junk emails, clear your desktop of random screenshots, or empty the trash bin. It keeps the clutter from piling up.
  • Tackle the “micro-maintenance” of your home. I’ve learned that a quick two-minute wipe-down of the kitchen counter or a fast sweep of the entryway keeps the house feeling way more manageable. It’s much easier to maintain a space than it is to fix a total disaster.
  • Set up “trigger” habits. Pair a two-minute task with something you already do every day. For example, while your coffee is brewing, empty the dishwasher or wipe down the counter. It turns dead time into productive time without even feeling like work.

The Bottom Line: How to Make It Work for You

Don’t overthink the small stuff—if a task takes less than two minutes, like hanging up your coat or replying to a quick text, just do it immediately instead of letting it pile up.

Use the rule to build momentum; once you knock out a few tiny tasks, you’ll find it a whole lot easier to tackle the big, intimidating projects on your list.

Be kind to yourself if you slip up, but try to treat the two-minute rule as a way to clear the mental cobwebs so you can focus on what actually matters.

## The Secret to Beating Procrastination

“Look, we all have those tiny chores that hang over our heads like a cloud—hanging up a jacket, answering a quick text, or clearing a spot on the counter. The Two Minute Rule isn’t about being a productivity robot; it’s just about realizing that the mental weight of thinking about doing those little things is way heavier than actually just getting them done.”

Nathan Cole

Getting Started (Right Now)

Building momentum by Getting Started (Right Now).

Look, I know it sounds almost too simple to be true, but that’s the whole point of the two-minute rule. We’ve talked about how it helps you build those tiny, unbreakable habits and how it clears out the mental junk that makes you feel overwhelmed before you even start your day. Whether you’re tackling a pile of mail, responding to a quick email, or finally putting that wrench back in its proper place, the goal isn’t perfection—it’s just momentum. By knocking out those tiny chores immediately, you stop the “snowball effect” of clutter and stress that usually turns a small mess into a massive headache.

At the end of the day, I’ve learned that the hardest part of any project—whether it’s fixing a sink or cleaning a kitchen—is just showing up. You don’t need a massive burst of willpower to change your life; you just need to be willing to do the small stuff without overthinking it. Stop staring at the mountain of things you need to do and just pick one thing that takes less than a hundred and twenty seconds. Just start moving, and I promise you’ll be surprised at how much easier the big stuff feels once you’ve found your rhythm. You’ve got this.

Frequently Asked Questions

What do I do if a task looks small but actually ends up taking way longer than two minutes?

Look, I’ve been there. I once thought wiping down a “dusty” workbench would take two minutes, only to realize I needed a degreaser, a scrub brush, and forty minutes of elbow grease. If a task turns out to be a monster, don’t sweat it. Just stop, reassess, and move it to your actual to-do list. The rule isn’t about being perfect; it’s about momentum. If it’s a big job, treat it like one.

Is it okay to use this for big, scary projects, or should I only stick to the tiny stuff?

Look, I’ll be straight with you: don’t try to tackle a whole kitchen remodel with a two-minute rule. You’ll burn out before you even pick up a hammer. But you can use it to stop the paralysis. If a massive project feels scary, find a two-minute version of it—like just clearing off your workbench or opening a blank document. Use the tiny wins to build the momentum you need to face the big stuff.

How do I stop myself from getting distracted by a million tiny tasks and actually getting my real work done?

Look, I get it. I’ve spent way too many afternoons “cleaning” my workbench instead of actually fixing the engine I promised myself I’d tackle. It’s called productive procrastination. To stop the cycle, you’ve got to draw a line in the sand. Use the two-minute rule to clear the small junk first, but once that’s done, set a timer for your “big” project. Don’t touch a single tiny task until that timer hits zero.

Best jobs without a degree career guide.

Great Careers You Can Start Without a Degree

I’ll be the first to admit it: for a long time, I thought that if you didn’t have a piece of paper from a four-year university, you were basically stuck in a dead-end loop. We’ve all seen those job postings that ask for a bachelor’s degree just to file paperwork, and it can feel incredibly discouraging when you’re just trying to build a life. But after years of working odd jobs and realizing that most people actually care about what you can do rather than where you sat in a lecture hall, I’ve learned the truth. There are plenty of high-paying, rewarding, and stable paths out there, and finding the best jobs without a degree is a lot more doable than the gatekeepers want you to believe.

In this guide, I’m cutting through the noise to show you exactly where to focus your energy. I’ve rounded up five specific career paths that you can actually jump into, master through hands-on experience, and turn into a real career without spending four years in a classroom. Whether you want to work with your hands, dive into tech, or manage projects, these options are all about building skills that actually matter in the real world. Let’s get to work.

Table of Contents

Get Your Hands Dirty in the Trades

Get Your Hands Dirty in the Trades.

If you’re the kind of person who likes seeing a physical result at the end of the day, look no further than the skilled trades. I’m talking about electrical work, plumbing, or HVAC. These aren’t just “blue-collar jobs”; they are specialized careers that require a sharp mind and a lot of problem-solving skills. You don’t need a four-year degree to start; most of these paths begin with an apprenticeship where you actually get paid to learn on the job.

Master the Digital Craft

Master the Digital Craft with real projects.

You might think you need a Computer Science degree to work in tech, but the reality is a lot more flexible. If you can teach yourself how to code, manage a website, or navigate digital marketing tools, companies will care way more about your actual portfolio than a piece of paper from a university. I’ve seen plenty of people jump into web development or UX design just by grinding through online courses and building real-world projects to show for it.

Drive Your Career Forward

Drive Your Career Forward with CDL training.

It sounds simple, but being a commercial driver or a logistics specialist is a massive, essential industry. We live in a world that runs on shipping, and without people behind the wheel, everything grinds to a halt. Getting your CDL (Commercial Driver’s License) is a relatively quick process compared to a college degree, and it puts you straight into a role where you can start earning a solid paycheck almost immediately.

Become a Sales Pro

If you’ve got the gift of gab and can connect with people, sales is probably the fastest way to see a massive return on your effort. Sales isn’t about being a “smooth talker” like they show in the movies; it’s about listening, understanding what a customer needs, and providing a solution. It’s a skill you can practice in almost any industry, from software to medical supplies to real estate.

Step Into Real Estate and Property Management

Since I spend half my time thinking about houses and how they work, I have a soft spot for the property world. You don’t need a degree to get your foot in the door as a real estate agent or a property manager. You’ll need to pass a state exam and get licensed, but that’s a manageable hurdle compared to years of lectures and exams. It’s all about knowing your local market and being someone people can trust with their biggest investments.

The Bottom Line: Getting Started

Don’t let the lack of a diploma slow you down; most of these roles care way more about what you can actually do than what’s printed on a piece of paper.

Focus on picking up specific, hands-on skills or certifications that actually matter in the field to get your foot in the door faster.

Start where you can, build your confidence, and remember that every pro you see started exactly where you are right now.

The Real Secret to Career Growth

Look, a piece of paper from a university is nice, but it isn’t a magic wand. In the real world, showing up, knowing how to solve a problem, and being someone people can actually rely on will get you further than any diploma ever could. Most of the best jobs aren’t about what you studied; they’re about what you can actually do with your hands and your head.

Nathan Cole

Getting Started on Your Own Terms

Look, we just covered a lot of ground, from the hands-on grit of the trades to the digital possibilities of tech support and sales. Whether you’re looking to pick up a wrench in HVAC or dive into the world of digital marketing, the common thread here is that these roles value what you can actually do over what a piece of paper says you know. You don’t need to spend four years and a mountain of debt sitting in a lecture hall to find a career that pays the bills and actually feels rewarding. The key is to pick a path that fits your personality, grab some entry-level experience, and start building your toolkit one skill at a time.

If I’ve learned anything from years of tinkering with broken engines and glitchy software, it’s that the most important tool you own isn’t in a toolbox—it’s your own curiosity. Don’t let the lack of a diploma make you feel like you’re stuck behind a glass wall. Most of the world is just waiting for someone who is willing to show up, work hard, and figure things out. So, take that first step, whether it’s signing up for a certification or asking a local pro for advice. You’ve got this, and I promise you, it’s much more figure-out-able than it looks.

Frequently Asked Questions

I don't have any experience in these fields; do I need to take a short course or get a certification first?

Look, I get it. Staring at a job description when you’ve never done the work feels intimidating. Honestly? You don’t always need a massive, expensive degree, but a little “proof of skill” goes a long way. I usually recommend starting with a cheap online certification or a local community college workshop. It’s like buying the right drill bit before you start a project—it just makes the whole job smoother and shows employers you’re serious.

How do I actually land these jobs if my resume doesn't show a college degree?

Look, I get it. Staring at a blank “Education” section feels like staring at a stripped screw—frustrating and stuck. But here’s the secret: employers in these fields care way more about what you can do than where you sat for four years. Focus your resume on “Skills” and “Projects.” If you’ve fixed your own car or built a PC, list it. Show them the proof, grab a certification if you can, and let your hands do the talking.

Which of these paths is the fastest way to start making decent money?

If you’re looking to get paid as quickly as possible, I’d put my money on the trades—specifically something like HVAC or electrical work. You can often jump into an apprenticeship or a helper role almost immediately. While you’re still learning the ropes, you’re already earning a paycheck. It’s not just about the quick start, though; once you get those specialized skills under your belt, the earning potential really starts to climb.

Creative diy home decor ideas on budget.

Diy Home Decor Ideas on a Budget

We’ve all been there: you’re sitting on your couch, looking around your living room, and realizing it just feels… off. Maybe it’s a bit too sterile, or perhaps it’s just staring back at you with that same beige emptiness you’ve had since move-in day. You want a space that actually feels like home, but the thought of dropping a massive paycheck at a high-end furniture boutique makes your stomach churn. I used to think that having a stylish house was reserved for people with bottomless bank accounts, but I’ve learned that the best diy home decor ideas aren’t about how much you spend; they’re about how you use your hands to breathe life into a room.

In this post, I’m breaking down five specific projects that will take your space from “rental basic” to “actually awesome” without breaking your budget. I’m talking about real, hands-on tasks that you can tackle this weekend with just a few basic tools and a bit of grit. By the time we’re done, you’ll have a roadmap to transform your space using simple, figure-out-able steps that make decorating feel less like a chore and more like a win.

Table of Contents

Give Old Shelves a Second Life

Give Old Shelves a Second Life.

I’ve spent way too many weekends staring at those cheap, particle-board shelves that look like they belong in a dorm room rather than a home. Instead of tossing them, grab a sander and some decent sandpaper to smooth out those rough edges. Once you’ve got a clean surface, a fresh coat of dark walnut stain or even just a matte black paint can make a massive difference in how they feel in your living room.

The Magic of Floating Mantels

The Magic of Floating Mantels on walls.

If you’ve got a blank wall that’s just staring at you, a floating wood mantel is one of the easiest ways to add some warmth to a room. You don’t need to be a master carpenter to pull this off; you just need a solid piece of reclaimed wood and a few heavy-duty brackets. I personally love using reclaimed timber because the natural knots and imperfections give the room an instant sense of history and soul.

Upcycled Mason Jar Lighting

Rustic Upcycled Mason Jar Lighting with copper.

We all have that cabinet full of empty glass jars, so let’s stop letting them collect dust and start using them. You can turn a simple mason jar into a pretty pendant light or even a rustic candle holder with just a bit of effort. I like to take a few jars, clean them up thoroughly, and use a bit of copper spray paint on the lids to give them a more sophisticated, industrial vibe.

Custom Framed Textile Art

Sometimes you find a cool patterned fabric or even a vintage bandana that just doesn’t fit into your wardrobe, but it’s too nice to throw away. Instead of letting it sit in a drawer, turn it into textile art. All you really need is a sturdy wooden frame and some heavy-duty staples. I usually stretch the fabric tight over a piece of foam board before securing it, which keeps everything looking crisp and professional.

The Painted Accent Corner

You don’t have to commit to painting an entire room just to change the vibe. If you’re feeling a bit hesitant about a big color change, try painting just one corner or a single architectural feature, like a window frame or a built-in nook. I’ve found that a deep forest green or navy can create a stunning focal point that makes the rest of your furniture really pop.

The Bottom Line: Keep It Simple and Start Small

You don’t need a massive budget or a professional contractor to make a space feel new; most of the best changes come from small, intentional tweaks you can do yourself.

Don’t get paralyzed by perfectionism—the goal isn’t to make it look like a showroom, it’s to make it look like your home.

Always measure twice and buy your supplies only when you’re ready to go; it keeps the project from turning into a pile of expensive, half-finished clutter.

## The Real Secret to a Great Home

“At the end of the day, your home shouldn’t look like a page from a showroom catalog; it should look like a collection of things you actually built, fixed, or finished yourself. That’s where the real character comes from.”

Nathan Cole

Final Thoughts Before You Grab Your Tools

Look, I know it can feel a little overwhelming when you stare at a blank wall or a dated corner of your living room, but we just covered how much you can actually achieve with a bit of elbow grease. Whether you decided to tackle that custom shelving project, refresh your old furniture with a new coat of paint, or just hang some framed art to break up the monotony, the goal was never about perfection. It was about taking those small, manageable steps—from prepping your surfaces to picking the right hardware—to create something that actually feels like home. You don’t need a massive renovation budget or a professional contractor on speed dial to see a real difference in your space.

At the end of the day, the best part of these projects isn’t even the finished product sitting in your living room; it’s that feeling of looking at something and knowing, “I did that myself.” There is a specific kind of confidence that comes from picking up a screwdriver or a paintbrush and actually seeing a result. So, don’t let the fear of making a mistake keep you from starting. If you mess up a measurement or get a little too much paint on the floor, just wipe it up and try again. Most things are way more figure-out-able than they seem, so go ahead and get started. You’ve got this.

Frequently Asked Questions

I don't have a ton of fancy tools in my garage; can I still pull these projects off with just a basic screwdriver and some glue?

Honestly? Absolutely. I’ve pulled off more projects with a screwdriver and a bottle of wood glue than I care to admit. You don’t need a workshop full of power tools to make something look good; you just need a little patience and the right approach. If a project calls for something more heavy-duty, I’ll tell you upfront. But for most of these, if you can turn a screw and wait for glue to dry, you’re golden.

What’s the best way to make sure my DIY decor actually looks "intentional" and not just like a bunch of random junk I found in the attic?

That is the million-dollar question. I’ve definitely been there—standing in a room surrounded by “cool” stuff that just looks like a yard sale exploded. The secret is a cohesive color palette or a repeating material. If you’re using reclaimed wood for a shelf, maybe throw a wooden bowl on the table. Pick two or three main tones and stick to them. It ties the random pieces together so they look like a choice, not an accident.

How do I know which paints or finishes are actually durable enough to handle everyday wear and tear in a busy house?

Look, don’t just grab the cheapest can on the shelf because the color looks pretty. In a busy house, you need to check the sheen. For walls that get touched constantly—like hallways or kids’ rooms—aim for satin or eggshell; they hide imperfections but can actually take a sponge to them. For trim and doors, go with semi-gloss or even high-gloss. They’re tougher and way easier to wipe down when life happens.

Explaining what is two step verification.

Two-step Verification: What It Is and How to Turn It on

I remember sitting at my kitchen table last Tuesday, staring at my phone in total disbelief after getting a notification that someone was trying to log into my email from halfway across the world. It was a massive wake-up call. Most people think they’re safe just because they have a decent password, but honestly, relying on a single password is like leaving your house key under the doormat and hoping for the best. You’ve probably heard the tech jargon flying around, but when you strip away the noise, what is two step verification really just boils down to a second, digital deadbolt for your most important accounts.

I’m not here to bore you with a lecture on cybersecurity protocols or complex encryption theories. My goal is to show you that securing your digital life is just as manageable as fixing a leaky faucet or organizing a messy garage. I’m going to break this down into simple, plain-English steps so you can get it set up once and stop worrying about it for good. We’ll skip the fluff and get straight to the practical stuff you actually need to know to keep the hackers at bay.

Table of Contents

Preventing Unauthorized Account Access With One Simple Layer

Preventing Unauthorized Account Access With One Simple Layer

Think of it like this: if you only have a single key to your front door, anyone who swipes it can walk right in. But if you add a deadbolt or a keypad, you’ve just made life a whole lot harder for any unwanted guests. That’s exactly what we’re doing here with preventing unauthorized account access. Even if a hacker manages to guess your password or snags it in some big data breach, they’re still stuck at the second gate. They might have your password, but they don’t have that extra piece of the puzzle, which keeps your personal info tucked away safely.

When you start looking into the different ways to do this, you’ll notice there are a few paths you can take. Some people prefer getting security codes for account protection sent straight to their phones via text, while others swear by using specialized software. Personally, I’m a big fan of improving digital identity security by using one of those dedicated authenticator apps. They’re faster, they don’t rely on a shaky cell signal, and they feel a lot more secure than just waiting for a text message to pop up.

Improving Digital Identity Security by Breaking It Down

Improving Digital Identity Security by Breaking It Down

Think of your digital identity like your house. You wouldn’t just leave your front door unlocked and hope for the best, right? Even if you have a sturdy lock, you’d probably want a deadbolt or maybe a security camera too. That’s essentially what we’re doing here when improving digital identity security. By adding that second layer, you aren’t just relying on one single password—which, let’s be honest, most of us struggle to keep unique and complex—but you’re creating a multi-layered defense that makes it much harder for a stranger to walk right in.

When you dive into the actual setup, you’ll notice there are a few different ways to handle those extra security codes for account protection. You might get a text message with a number, or you can use something a bit more robust like an app on your phone. Personally, I’ve found that learning how to use authenticator apps is a total game-changer. While SMS is better than nothing, app-based codes are generally more secure because they don’t rely on your cellular network. It’s a small tweak to your daily routine that provides some massive peace of mind.

5 quick ways to get your 2FA setup right

  • Pick an authenticator app over SMS whenever you can. Getting a text message is fine, but hackers can sometimes “swap” your SIM card to intercept those codes. An app like Google Authenticator or Authy stays right on your phone and is much harder to mess with.
  • Don’t lose those backup codes! When you first turn on two-step verification, most sites will give you a list of emergency recovery codes. Print them out or write them down and tuck them in your physical safe or a junk drawer. If you lose your phone, these codes are your only way back into your accounts.
  • Use a physical security key if you’re a high-value target. If you’re worried about serious digital snooping, grab a little USB key like a YubiKey. It’s like having a physical key to your house; you literally have to plug it in to prove it’s you.
  • Watch out for “MFA fatigue.” This is when a hacker tries to spam your phone with login requests, hoping you’ll get annoyed and just hit “approve” to make it stop. If your phone starts blowing up with requests you didn’t trigger, hit “deny” and change your password immediately.
  • Keep your recovery info updated. It sounds tedious, but every few months, double-check that your recovery email and phone number are still current. There’s nothing worse than being locked out of your own life because you’re still using an old email address from college.

The bottom line on staying secure

Think of 2FA as that extra deadbolt on your front door; it’s a tiny bit of extra effort that makes a massive difference in keeping the wrong people out.

You don’t need to be a tech genius to do this—most apps make it a quick, one-time setup that works in the background while you go about your day.

Even if a hacker manages to guess your password, they’re still stuck outside without that second piece of the puzzle, giving you the peace of mind you deserve.

## Think of it like a deadbolt

Look, I’m the guy who tells you to double-check the stove before you leave the house. Two-step verification is just that same instinct, but for your digital life; it’s that extra deadbolt on the door that makes sure even if someone steals your key, they’re still stuck on the porch.

Nathan Cole

Getting It Done

Getting It Done with two-step verification.

Look, I know adding an extra step to your login process feels like a bit of a hassle when you’re just trying to check your email or pay a bill. But when you step back and look at the big picture, it’s really just about adding that extra layer of defense between your private data and someone trying to sneak in. We’ve covered how two-step verification works, why it’s better than relying on a password alone, and how it effectively breaks down the wall that hackers try to climb. It’s the digital equivalent of putting a deadbolt on your door after you’ve already locked the handle; it takes an extra second, but it’s way more secure.

At the end of the day, my goal is to help you realize that technology doesn’t have to be intimidating. You don’t need to be a cybersecurity expert to keep your digital life in good shape; you just need to take these small, practical steps. Once you get your 2FA set up on your main accounts, you’ll probably find that you actually feel a lot more relaxed knowing you’ve done the heavy lifting. So, grab your phone, jump into your settings, and get it sorted. You’ve got this, and I promise, it’s worth the effort.

Frequently Asked Questions

What happens if I lose my phone or can't access my authentication app?

Look, I get it—the thought of being locked out of your own life because you misplaced your phone is enough to make anyone sweat. It’s like losing your house keys right when you’re standing on the porch. The good news? You aren’t stuck. Most sites give you “backup codes” when you first set things up—print those out and tuck them in a drawer! If not, you’ll usually have to use a secondary email or a recovery phone number to get back in.

Is using an SMS text code actually secure, or should I be using an app instead?

Look, I get it—texting a code feels easy, and easy is usually better. But if we’re being real, SMS is a bit like using a cheap padlock; it works, but it’s not bulletproof. Hackers can actually hijack your phone number through something called “SIM swapping.” If you want to level up, grab an authenticator app like Google or Authy. It’s just as quick, but much harder for anyone to intercept.

Won't this make logging into my accounts a huge, annoying hassle every single time?

I get it—the last thing anyone wants is a digital speed bump every time they try to check their email. It feels like an extra chore. But honestly? Once you set it up, it’s usually just a quick tap on your phone or a thumbprint scan. It takes maybe five seconds. I look at it like wearing a seatbelt: it’s a tiny bit of extra effort, but it’s a total lifesaver when things go sideways.

Tips for dealing with a difficult boss.

How to Deal With a Difficult Boss Without Losing Your Mind

I remember sitting in my truck outside a job site three years ago, staring at my steering wheel and feeling that heavy, sinking knot in my stomach because I just couldn’t face walking into the trailer. My foreman was the kind of guy who didn’t just give orders; he made sure everyone knew they were failing, even when we were hitting every mark. It’s that gut-wrenching feeling of dread that makes dealing with a difficult boss feel less like a career hurdle and more like a personal weight you’re forced to carry every single day.

Look, I’m not going to give you some corporate-speak lecture about “leveraging emotional intelligence” or “navigating synergistic hierarchies.” That stuff doesn’t work when you’re in the thick of it. Instead, I want to show you how to approach this like a DIY project: we’re going to identify the problem, grab the right tools, and fix what we can control. I’m going to break this down into straightforward, actionable steps so you can stop feeling like a victim of your workplace and start reclaiming your peace of mind.

Table of Contents

Spotting the Signs of Workplace Bullying Early

Spotting the Signs of Workplace Bullying Early.

Before you can fix a problem, you’ve got to know exactly what you’re looking at. I’ve learned from fixing old engines that if you ignore a tiny rattle, it eventually turns into a blown gasket. The same goes for your job. You need to look for the signs of workplace bullying before they start eating away at your confidence. It’s rarely a big, dramatic explosion; usually, it’s the small stuff—constant undermining in meetings, moving the goalposts on your projects, or that subtle way they dismiss your input whenever you speak up.

If you start feeling a knot in your stomach every Sunday night, pay attention. That physical reaction is often the first indicator of a serious workplace mental health impact. It’s easy to tell yourself you’re just being “too sensitive,” but if the pattern is consistent, it’s not in your head. Watch out for shifts in how information is shared or if you find yourself being excluded from the very conversations needed to do your job. Once you recognize these patterns, you can stop questioning your own competence and start looking at the actual situation for what it is.

Using Managing Up Techniques to Simplify Things

Using Managing Up Techniques to Simplify Things.

Now, I know what you’re thinking: “How am I supposed to ‘manage’ someone who’s literally my superior?” It sounds backwards, right? But think of it like working with a finicky piece of old machinery. You don’t win by fighting the gears; you win by learning exactly how they turn so you can work with them instead of against them. Using managing up techniques isn’t about being a suck-up; it’s about proactively providing the information or structure your boss lacks so they stay out of your hair. If they’re a micromanager, try sending a bulleted status update every Friday morning before they even have a chance to ask. If you beat them to the punch, you’re actually taking control of the narrative.

This approach is also a massive win for your own sanity. When you start setting professional boundaries at work—like clarifying project priorities in writing—you reduce the chaotic back-and-forth that leads to burnout. It’s all about creating a predictable rhythm that keeps the friction low. By smoothing out these bumps, you aren’t just making your job easier; you’re protecting your headspace so you don’t go home feeling completely drained every single night.

5 ways to keep your sanity when things get messy

  • Start a “paper trail” for everything. I know, it sounds a bit like you’re building a legal case, but when a boss is inconsistent or moves the goalposts, you need proof. After a confusing meeting, shoot them a quick, friendly email: “Hey, just to make sure I’m on the right track, I’m going to focus on X and Y as we discussed.” It’s not being petty; it’s being prepared.
  • Build a fortress of professional boundaries. If your boss is the type to text you at 9 PM about a spreadsheet, you’ve got to draw a line. You don’t need to be rude about it, but start responding to those off-hours pings during your actual working hours. If you train them to expect an immediate answer at dinner time, they’ll never stop asking.
  • Find your “sanity squad” outside the immediate chaos. Having a couple of trusted colleagues to vent to can help, but be careful not to turn your lunch break into a gossip session that gets back to the boss. I prefer finding a mentor or a friend in a completely different department—someone who can give you a reality check without the office politics.
  • Focus on what you can actually control. You can’t fix a person’s personality, and you certainly can’t force them to be a better leader. Instead, pour that energy into your own work quality and your own reaction. When I’m working on a frustrating project, I try to tell myself: “I can’t control their mood, but I can control how well I execute this task.”
  • Keep your “escape hatch” ready. This is the hard part, but it’s crucial. Don’t wait until you’re completely burnt out to look at what else is out there. Keep your resume updated and keep an eye on job boards. Just knowing that you could leave if you had to makes the daily grind feel a lot less like a trap.

The bottom line on handling a tough boss

Keep a paper trail of everything; when things get messy, having your own set of facts is your best defense.

Focus on what you can actually control—your work quality and your reaction—rather than trying to change their personality.

Know your exit strategy; sometimes the best way to “fix” a bad situation is to realize it’s time to move on to a better shop.

## A little perspective goes a long way

“Look, I’ve learned that you can’t rewrite someone else’s personality, but you can definitely change how much power they have over your headspace. It’s not about winning a fight; it’s about building a toolkit so their bad moods don’t wreck your entire week.”

Nathan Cole

Taking Back Your Control

Taking Back Your Control at work.

Look, dealing with a tough manager isn’t something you just “get over,” but it is something you can actively manage. We’ve talked about how to spot the red flags before they turn into a full-blown crisis and how using those “managing up” tricks can actually clear the fog and make your daily grind a lot smoother. Whether it’s setting clearer boundaries or just being one step ahead of their demands, the goal is to stop reacting and start acting. By applying these small, practical shifts, you move from being a passenger in your own career to being the one with their hands on the wheel.

At the end of the day, remember that your job is just one part of your life, not the whole thing. You might not be able to change your boss’s personality overnight, but you can absolutely change how much power they have over your peace of mind. Don’t let a difficult person make you doubt your own skills or worth. Keep chipping away at these problems one step at a time, just like fixing up an old house or troubleshooting a glitchy computer. You’ve got the tools, you’ve got the plan, and I promise you are more than capable of navigating this.

Frequently Asked Questions

How do I know if my boss is just having a bad week or if they're actually toxic?

Look, I get it. We’ve all had those weeks where everything goes sideways and we snap at the people around us. To figure out if it’s just a rough patch or a real problem, look for the pattern. A bad week is a spike—it’s intense but it passes. Toxicity is a baseline. If the disrespect or the chaos is “just how they are” every single day, you aren’t dealing with a bad week; you’re dealing with a toxic boss.

Should I start documenting everything in writing, or will that just make things worse?

Look, I get the hesitation. You don’t want to look like you’re building a legal case against them, but here’s the truth: documentation isn’t about being aggressive; it’s about having a receipt. If things go sideways, “he said, she said” won’t help you. Start a private log—dates, times, and exactly what was said. Keep it factual and out of company servers. It’s not making things worse; it’s giving you a solid foundation.

At what point do I stop trying to "manage up" and just start looking for a new job?

Look, I’ve spent plenty of time trying to patch up old engines that just wouldn’t turn over, and I know when a tool is beyond saving. If you’ve tried adjusting your communication, setting boundaries, and managing up, but you’re still waking up with a pit in your stomach every morning, that’s your signal. If the effort is costing you your mental health, stop trying to fix the unfixable. It’s time to start looking for a new shop.

Using the pomodoro technique for productivity.

The Pomodoro Technique: a Simple Way to Get More Done

I remember sitting at my kitchen table last Tuesday, staring at a mountain of half-finished projects and a laptop screen that felt like it was mocking me. I had three different “productivity apps” open, all of them flashing bright colors and sending me notifications, but I still hadn’t actually done anything useful. It’s funny how we try to solve a simple lack of focus by buying more expensive digital junk, when the truth is, most of those high-tech solutions are just distractions in disguise. I realized I didn’t need a fancy subscription; I just needed to try the pomodoro technique to see if breaking my work into small, timed bites could actually stop the mental spinning.

Look, I’m not here to sell you on some magical productivity miracle that’s going to turn you into a robot. I just want to show you how I use the pomodoro technique to stop procrastinating and actually get through my to-do list without feeling like my brain is melting. I’m going to break down exactly how it works, how I tweak it to fit my own messy schedule, and how you can start doing it today without any complicated setup.

Table of Contents

Optimizing Your Productivity Workflow With Simple Timer Intervals

Optimizing Your Productivity Workflow With Simple Timer Intervals

Once you’ve got the concept down, the real magic happens when you start fine-tuning your pomodoro timer intervals to match how your brain actually works. I used to think I could power through a four-hour stretch of work without stopping, but I’d usually end up staring blankly at my screen by hour two. Instead of fighting that mental fog, I started leaning into deep work principles by setting a timer for 25 minutes of focused effort followed by a quick five-minute breather. It sounds almost too simple, but it keeps your brain from hitting that wall where you’re working hard but accomplishing absolutely nothing.

The trick is to treat those short breaks like a mandatory pit stop. When the timer dings, you have to actually step away—stretch your legs, grab some water, or just look out the window. This isn’t just about laziness; it’s a core part of avoiding burnout with breaks throughout the day. By managing your energy instead of just your time, you stop feeling like a machine and start feeling like a person who actually has the headspace to finish the job right.

Using Deep Work Principles to Conquer Your Biggest Projects

Using Deep Work Principles to Conquer Your Biggest Projects

Now, here’s where things get interesting. While the standard intervals are great for clearing out your inbox or tackling small chores, they aren’t always enough when you’re staring down a massive, intimidating project. This is where I like to bring in some deep work principles to keep me from spinning my wheels. Instead of just blindly following a timer, I try to align my intervals with the actual weight of the task. If I’m trying to write a complex report or learn a new piece of software, I’ll stretch those sessions out a bit longer to really get into the zone.

The trick is learning how to balance that intense focus with smart cognitive load management. You can’t just redline your brain for eight hours straight without hitting a wall. I’ve found that by treating my focus sessions like heavy lifting at the gym, I can push harder during the “on” periods because I know a real, restorative break is coming. It’s all about avoiding burnout with breaks that actually work—meaning I step away from the screen entirely rather than just scrolling through my phone.

Five Ways to Make the Pomodoro Method Actually Work for You

  • Pick a timer that isn’t your phone. I know, it sounds counterintuitive, but if your phone is right there, you’re one notification away from falling down a YouTube rabbit hole. Grab a cheap kitchen timer or a dedicated desk timer so you aren’t tempted to check your texts every time the screen lights up.
  • Treat your breaks like a real reset, not just a scroll through social media. If you spend your five-minute break reading news comments, your brain isn’t actually resting. Stand up, stretch, grab some water, or just stare out the window for a minute. You need to give your eyes and your mind a genuine break from the screen.
  • Keep a “distraction log” next to you. When you’re mid-sprint and suddenly remember you need to buy more lightbulbs, don’t stop what you’re doing. Write it down on a notepad and get back to work. You can deal with the lightbulbs during your long break once the timer goes off.
  • Don’t be a slave to the clock if you’re in the zone. If the timer dings but you’re finally making real headway on a tough task, finish that thought or that paragraph. The Pomodoro technique is a tool to help you, not a drill sergeant meant to interrupt your flow. Just make sure you take a longer break once you finally do step away.
  • Adjust your intervals to fit your actual energy levels. If 25 minutes feels too short because you take forever to get settled, try 50 minutes of work followed by a 10-minute break. There’s no “one size fits all” here—it’s all about finding the rhythm that keeps you moving without making you feel like you’re hitting a wall.

The Quick Version: How to Make This Work for You

Don’t get hung up on the “perfect” timer; the goal is just to stop multitasking and give your brain a clear finish line for every task.

Use those short breaks to actually step away from your screen—stretch, grab some water, or pace around—so you don’t end up just scrolling on your phone.

Be ready to tweak the intervals to fit your own rhythm, because if a 25-minute sprint feels too short for your flow, it’s okay to adjust the settings.

My Take on the Timer

“Look, I’m not a productivity guru, but I’ve learned that staring at a mountain of work is how you get paralyzed. The Pomodoro technique isn’t about being a robot; it’s just about telling yourself, ‘I can do anything for twenty-five minutes,’ and realizing that once you start, the hardest part is already over.”

Nathan Cole

Making It Work for You

Using a kitchen timer, Making It Work for You.

At the end of the day, the Pomodoro Technique isn’t some magic spell that’s going to turn you into a productivity robot overnight. It’s really just about finding a rhythm that works for your specific brain. We’ve talked about how those small timer intervals keep you from feeling overwhelmed and how leaning into deep work can help you actually move the needle on those massive projects that have been sitting on your list for weeks. Whether you’re using a fancy app or just a rusty old kitchen timer from your junk drawer, the goal is the same: stop staring at the mountain and just start climbing one small step at a time.

Look, I know how it feels when your to-do list starts looking like a mountain you just can’t climb. I’ve been there, staring at a messy desk or a broken project, feeling like I’m spinning my wheels. But I promise you, most things are way more figure-out-able than they look when you’re staring at them all at once. Don’t worry about being perfect or following the intervals to the exact second. Just pick one task, set a timer, and get moving. You’ve got this, and honestly, the feeling of crossing that first thing off your list is better than any caffeine kick.

Frequently Asked Questions

What do I do if I'm right in the middle of a flow state when the timer goes off?

Look, I get it. There is nothing worse than being “in the zone” and having a loud timer snap you out of it like a bucket of cold water. If you’re in a true flow state, don’t kill the momentum just because the clock says so. Give yourself a five-minute grace period to wrap up that thought or finish that paragraph. Just make sure you actually take that break afterward, or you’ll burn out by noon.

Do I really need a physical kitchen timer, or can I just use my phone?

Look, you can definitely use your phone, but here’s my two cents: if you can avoid it, do. I’ve learned the hard way that once that timer goes off and you pick up your phone to stop it, you’re suddenly three minutes deep into a social media rabbit hole. A cheap, physical kitchen timer keeps the distractions at bay. It’s tactile, it’s focused, and it keeps your phone in the other room where it belongs.

Is it better to stick to the standard 25-minute chunks, or should I tweak the times to fit my own focus levels?

Look, the 25-minute rule is a great starting point, but don’t feel like you’re breaking some sacred law if it doesn’t work for you. I’ve found that if I’m deep in a project—like fixing a piece of furniture or coding—25 minutes feels like I’m just getting started when the timer dings. If you’re in the zone, try 50 minutes. If you’re struggling to focus, stick to shorter bursts. Tweak it until it clicks.

Elegant upcycling furniture ideas for expensive looks.

Upcycling Furniture Ideas That Look Expensive

I’ve walked into more than a few thrift stores and garage sales only to see someone about to toss out a piece of furniture that just needed a little love. It honestly breaks my heart a bit. We’ve all been there—staring at a scratched-up side table or a dresser with a busted drawer, thinking it’s nothing more than expensive firewood. But before you head to the landfill or drop a fortune on something brand new from a big-box store, I want you to pause. There is so much potential hiding under that peeling veneer, and finding creative upcycling furniture ideas is the best way to build a home that actually has some character without draining your bank account.

In this guide, I’m going to show you that you don’t need a professional workshop to make a massive impact. I’ve rounded up five specific projects that are totally doable even if your only tools are a screwdriver and a can of paint. We’re going to walk through five different ways to take common, tired pieces and turn them into something you’d actually be proud to show off. Let’s get to work and turn that junk into something truly awesome.

Table of Contents

Give that old dresser a fresh coat of life

Give that old dresser a fresh coat of life.

We’ve all seen them sitting on the curb or gathering dust in a garage sale—those heavy, outdated dressers with the wood grain that just doesn’t match anything modern. Instead of hauling it to the dump, grab a sander and some high-quality primer. I usually tell people to start with a good sanding session to get rid of that old, sticky varnish so the new paint actually sticks.

Turn a wooden ladder into a rustic bookshelf

Turn a wooden ladder into a rustic bookshelf.

If you have an old wooden ladder leaning in the shed, don’t let it just sit there collecting cobwebs. You can turn it into a killer piece of shelving for your living room or even a plant stand for the porch. All you really need to do is find some sturdy wooden planks that are wide enough to sit on the rungs, and then secure them in place.

Upgrade your dining chairs with new fabric

Upgrade your dining chairs with new fabric.

You don’t need to replace your whole dining set just because the chairs look a little tired or the fabric is stained. Most of the time, the “bones” of the chair are perfectly fine; it’s just the seat that’s seen better days. If you can find a staple gun and some durable upholstery fabric, you’re halfway there.

Transform a side table with contact paper

Sometimes you don’t want to go full-blown “construction mode” with saws and sanders, and that is totally fine. If you have a small side table or a nightstand with a surface that’s seen better days, contact paper is your best friend. I’m talking about the heavy-duty stuff, not the thin stuff you use for school projects.

Reclaim old crates for organized storage

I’ve always been a sucker for a good wooden crate, whether it’s an old wine crate or something found in an attic. Instead of letting them clutter up your workspace, you can turn them into modular storage units for your office or even your pantry. A quick sanding is a must to avoid any nasty splinters, but otherwise, they are ready to go right out of the box.

Quick tips before you grab your tools

Don’t overthink it—the goal isn’t perfection, it’s making something you actually love using.

Always clean and prep your surface thoroughly; a good sand or a quick wipe-down makes all the difference in how your finish turns out.

Start small with projects that don’t require a massive budget so you can build your confidence as you go.

My Take on Giving Old Stuff New Life

“At the end of the day, upcycling isn’t about being a master craftsman or having a fancy studio; it’s just about looking at a piece of junk and seeing the potential that’s hiding under the scratches. Most of the time, all a good chair needs is a little bit of sanding, a fresh coat of paint, and the confidence to know you can do it yourself.”

Nathan Cole

Don't Be Afraid to Get Your Hands Dirty

Look, I know that seeing a pile of old wood or a chipped-up nightstand can feel a little overwhelming at first. But whether you’re just slapping on some fresh paint to hide a scratch, swapping out those dated brass handles for something modern, or going all out with a full sanding and stain, you’ve seen that it’s really just about taking it one step at a time. We covered everything from simple cosmetic fixes to more involved structural changes, and the main takeaway is that you don’t need a professional workshop to make a massive impact. All you really need is a bit of patience and the right mindset to turn something destined for the landfill into the centerpiece of your room.

At the end of the day, upcycling isn’t about making something look “perfect” or like it just came off a showroom floor. It’s about the satisfaction of looking at a piece of furniture and knowing you were the one who gave it a second chance. Don’t let the fear of making a mistake stop you from starting; even if a coat of paint goes on a little wonky, that’s just part of the character. So, grab your sandpaper, clear off your workspace, and just start building something better. You’ve totally got this.

Frequently Asked Questions

Do I really need to sand everything down before I start painting, or can I get away with just a quick wipe?

Look, I get the temptation to skip the sanding—I’ve definitely been there when I just want to get a project finished. But here’s the truth: if you want the paint to actually stick, you can’t just wipe it down. A quick cleaning gets rid of the dust, but it won’t fix a slick, glossy finish. Give it at least a light scuff with some medium-grit sandpaper. It creates “tooth” for the paint to grab onto.

What's the best way to make sure my new paint job doesn't just peel off in six months?

Look, I’ve seen it happen a dozen times: you spend all Saturday painting, only to have the finish flake off like a bad sunburn by summer. The secret isn’t actually the paint—it’s the prep. You’ve got to clean that surface, sand down any old, loose bits, and, most importantly, use a good primer. If you skip the prep work, you’re basically just painting over a mess, and that’s where the peeling starts.

I'm on a pretty tight budget—are there cheap ways to fix up furniture that's actually a bit beat up or damaged?

Look, I’ve been there. When you’re watching every cent, a cracked tabletop or a wobbly chair feels like a reason to head to the thrift store, but don’t do it yet. Most “damage” is just a surface fix away. Grab some wood filler for those gouges, a cheap sanding block, and a small can of stain or paint. It’s way cheaper than buying new, and honestly, there’s nothing more satisfying than fixing something yourself.

Guide on how to bake bread at home.

How to Bake Bread at Home (no Fancy Equipment)

I still remember the first time I tried to tackle a sourdough starter. I spent three weeks hovering over a jar of flour and water like it was a science experiment, only to end up with a sticky, sour mess that looked more like drywall compound than food. Most of the fancy tutorials online make it seem like you need a degree in chemistry and a hundred-dollar proofing basket just to get a decent crust. Honestly, it’s a total myth that you need all that gear to learn how to bake bread at home. You don’t need a specialized kitchen or a decade of training; you just need to stop overthinking the process and start trusting the basics.

I’m not here to sell you on some complicated, twelve-step artisan ritual that takes up your entire weekend. My goal is to strip away the fluff and show you that bread making is actually pretty figure-out-able with just a few pantry staples and a little patience. I’m going to walk you through a straightforward, no-nonsense method that works, even if your kitchen is small and your equipment is basic. By the time we’re done, you’ll be pulling warm, crusty loaves out of your own oven without all the stress.

Table of Contents

Choosing the Right Flour Types for Bread Success

Choosing the Right Flour Types for Bread Success

Before you even touch a bowl, you’ve got to talk about the foundation: your flour. I know, it sounds boring, but picking the wrong bag is the fastest way to end up with a dense, brick-like loaf that’ll break a tooth. If you’re just starting out with bread making for beginners, my best advice is to stick to the basics. You’re looking for flour with high protein content, because that protein is what creates the gluten structure needed to trap those lovely gases during the yeast fermentation process.

Most folks head straight for All-Purpose, which works fine in a pinch, but if you want that professional, chewy texture, you really want to grab some Bread Flour. It’s got a higher protein punch that gives your dough more “strength” to rise. If you’re feeling adventurous and want to try a rustic sourdough, you might experiment with Whole Wheat, but just a heads-up: it’s heavier and absorbs more water, so it can be a bit trickier to handle. Just pick one reliable type to start with, and don’t overthink it.

Essential Baking Equipment That Wont Break the Bank

Look, I get it. You walk into a kitchen supply store and suddenly you’re staring at a $500 professional mixer and a dozen different specialized bowls, wondering if you even need any of it. Here’s the truth: you don’t. When it comes to bread making for beginners, the goal is to get some flour and water into an oven, not to build a laboratory. You really just need a decent mixing bowl, a sturdy spoon, and a kitchen scale. Seriously, skip the measuring cups if you can; weighing your ingredients is the single best way to ensure your dough turns out consistent every single time.

Beyond the basics, you’ll want a simple baking sheet or a Dutch oven if you have one tucked away in a cupboard. A heavy pot helps trap steam, which is one of those pro proofing bread tips that makes your crust crackle just right. You don’t need fancy gadgets to master essential baking equipment; you just need the right tools to support the process. If you’ve got a bowl, a scale, and a way to bake it, you’re already halfway there.

Five Pro Tips to Keep Your Kitchen From Turning Into a Flour War Zone

Five Pro Tips to Keep Your Kitchen From Turning Into a Flour War Zone
  • Don’t rush the rise. I know it’s tempting to turn the oven on the second you finish kneading, but dough works on its own schedule. If your kitchen is chilly, your bread will take longer to puff up—just be patient and let the yeast do its thing.
  • Get a digital scale if you can. I used to eyeball everything with measuring cups, but flour is sneaky; you can pack way too much into a cup and end up with a loaf that’s basically a brick. Weighing your ingredients in grams is the easiest way to get consistent results every single time.
  • Watch the dough, not the clock. Every house has different humidity and temperature, so a recipe might say “let rise for one hour,” but your dough might need ninety minutes. Look for it to roughly double in size rather than staring at your watch.
  • Master the “Windowpane Test.” Before you stop kneading, grab a small piece of dough and stretch it thin. If it stretches until it’s translucent without tearing, you’ve built enough gluten to hold all those lovely air bubbles. If it snaps immediately, keep working that dough.
  • Give it room to breathe after baking. This is the hardest part for me, but resist the urge to slice into that loaf the second it comes out of the oven. The bread is actually still cooking inside while it cools; cutting it too early lets the steam escape and can leave you with a gummy texture.

Quick Wins for Your First Loaf

Don’t sweat the expensive gear; you really only need a few basic tools to get a great crust and crumb.

Get your flour right from the start, because using the wrong type is the easiest way to end up with a brick instead of a loaf.

Remember that baking is a process of trial and error, so keep things simple and don’t be afraid to make a mess.

## My Take on the Whole Process

“Look, you don’t need a professional kitchen or a fancy degree to make a killer loaf. At the end of the day, bread is just flour, water, salt, and a little bit of patience—and once you nail that first batch, there’s nothing quite like the feeling of knowing you built something real with your own two hands.”

Nathan Cole

You've Got This

Baking bread basics: You've Got This.

So, let’s look at the big picture before you get your hands messy. We’ve covered how to pick out the right flour so your loaf actually has some structure, and we talked about grabbing the basic gear without spending a fortune at a specialty kitchen shop. Remember, you don’t need a professional-grade stone oven or a fancy French mill to get started; you just need the right ingredients and a little bit of patience. Once you’ve got your flour and basic tools sorted, the rest is really just about getting comfortable with the rhythm of the dough. It might feel a bit clunky the first few times, but that’s just part of the process of learning the craft.

At the end of the day, don’t sweat the small stuff. If your first loaf comes out a little dense or looks more like a brick than a baguette, don’t throw in the towel. I’ve definitely had my fair share of “bread bricks” in my own kitchen, and honestly, they still taste great with enough butter. The real magic isn’t in a perfect crust; it’s in the fact that you made something from scratch using nothing but flour, water, and salt. So, preheat that oven, get stuck in, and embrace the mess. I promise you, that first warm slice is going to feel incredibly rewarding.

Frequently Asked Questions

I tried making a loaf and it came out like a brick—what am I doing wrong with my kneading?

Man, I’ve been there. There is nothing quite as soul-crushing as pulling a literal brick out of your oven after all that work. Usually, when a loaf is that dense, it means you didn’t develop enough gluten through kneading. You’ve gotta work that dough until it’s smooth and elastic, not just “mixed.” Try the “windowpane test”—stretch a small piece of dough; if it pulls thin enough to see light through without tearing, you’re golden.

Do I really need to buy a kitchen scale, or can I just use measuring cups like everyone else?

Look, I get it. Measuring cups are right there in the drawer, and they’re easy. But if you want to stop guessing and start actually baking, get a scale. Measuring flour by volume is a trap; one person scoops a light handful, while another packs it down like they’re tamping concrete. That’s the difference between a fluffy loaf and a brick. It’s a cheap upgrade that’ll save you a ton of frustration.

How do I know if my yeast is actually alive or if I'm just wasting flour?

There is nothing more frustrating than getting all your ingredients ready only to realize your yeast is dead. Don’t guess—test it! Grab a small glass, add a half-cup of warm water (not hot, or you’ll kill it!), and stir in a teaspoon of sugar. Drop in your yeast and wait about ten minutes. If it gets foamy and smells like beer, you’re golden. If it just sits there looking sad, toss it and grab a new packet.